• Hello there guest and Welcome to The #1 Classic Mustang forum!
    To gain full access you must Register. Registration is free and it takes only a few moments to complete.
    Already a member? Login here then!

1932 Studebaker, 4 Door Sedan

Walter

Member
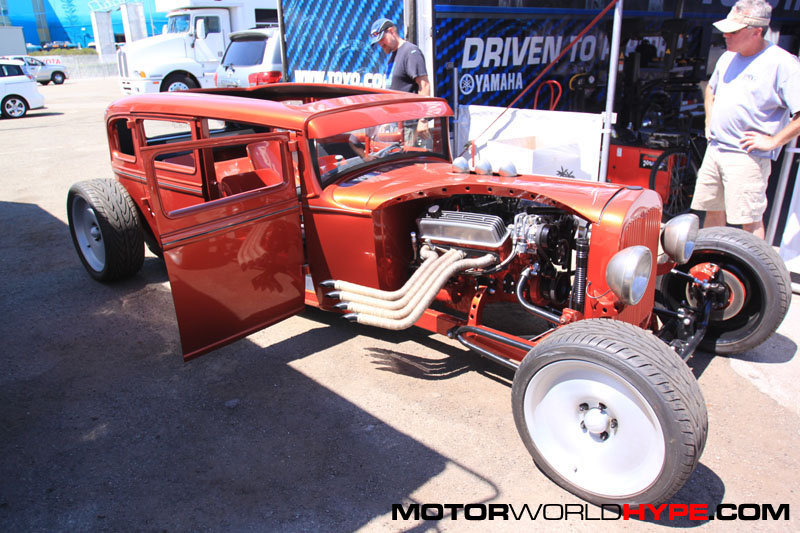
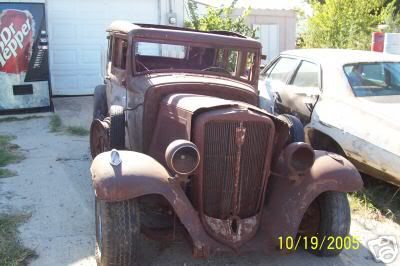
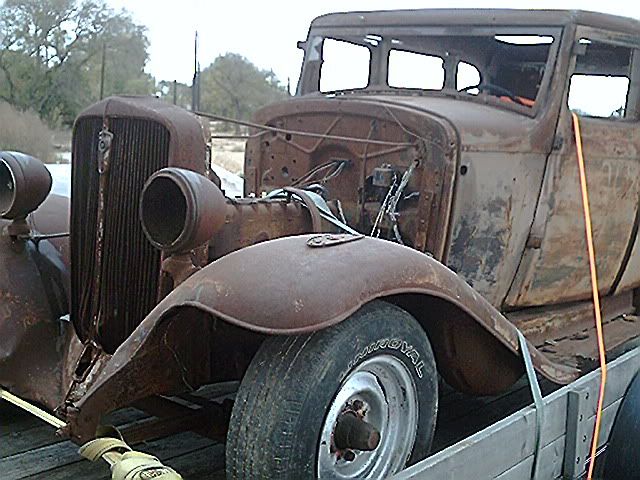
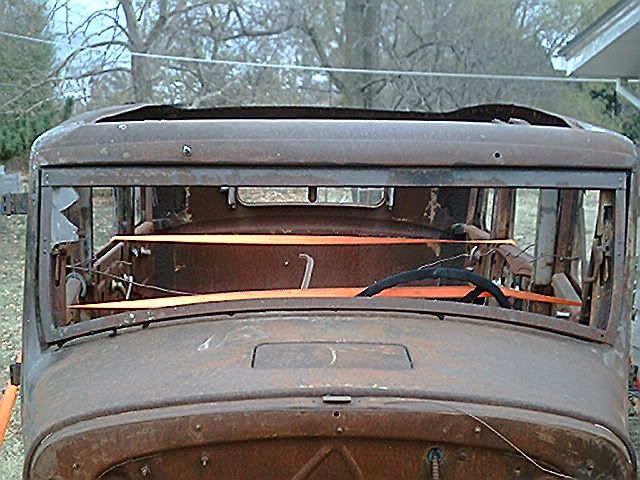
Well, here it is. The fabled 1932 Studebaker Sedan that some of you have heard so much about. It is rough as it spent a LONG time in the Seattle area, but it was cheap and it is pretty unique (how many 7 window hot rods do you see at cruise-ins?).

This car belonged to my late father whom I lost about one year ago. It will be a tribute car for him, and as such I have been thinking of some things that he wanted the car to have, and things I think would be appropriate. Since I will not be getting back home for several more weeks to begin work on the car, I thought I would continue the planning process on here and I welcome your input/ideas.

What I currently have:

1) A basket-case hot rod shell
2) Moderately pitted original chassis
3) 1994 TBird Super Coupe Drivetrain (Independent rear and 3.8L Supercharged V6 with what I believe is an 4R70W automatic tranny)
4) Time and dedication
5) All the tools I should need for the job

What I want to do:

1) 3 inch chop. The old man wanted it left alone, I wanted it chopped. I'll let him win the next couple.
2) Pearl white paint. His biggest concern for the car was this color.
3) Tan interior. His second biggest concern was the interior color.
4) Keep it full-fendered. This will probably require me finding all new fenders.
5) Give it a vintage aircraft theme. My dad learned to fly before he could drive (or so he said). I think filling the cluster with some aviation instruments would be cool (altimeters and attitude indicators come to mind).
6) Fill the cowl
7) Fill the roof. Although that big sun roof may be nice on some hot summer days. Perhaps I can find a donor wagon that had a factory sun/moon roof in it?
8) Build a tubular metal frame for the body
9) TBD


What I have no idea about:

1) The chassis I have is moderately pitted. I need to reevaluate whether it can be boxed and used as is, or if I should try to find one ($$$) or build one myself with boxed tubing.
2) Do I keep the auxillary wheel openings in the front fenders or fill them?
3) Front suspension
4) TBD


CarPictures187.jpg

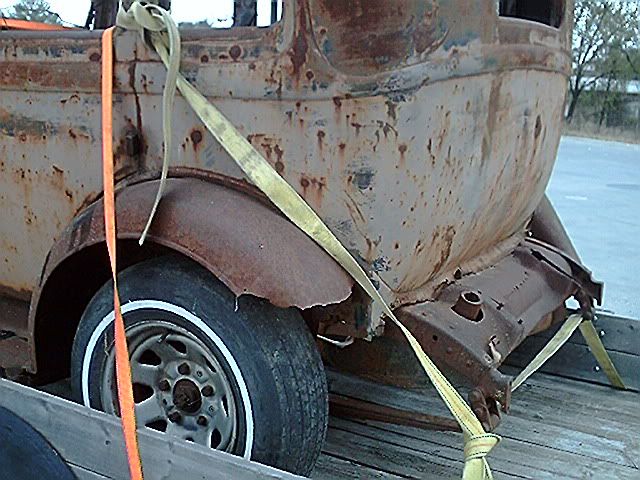
That lean is from a flat rear tire. The car is rough, but this picture makes it look like it was wrecked.
CarPictures024.jpg

CarPictures019.jpg

CarPictures018.jpg
 
Awesome project! As far as your desire to use aircraft instruments, I seem to recall a company that makes automotive gauges that look like aircraft. You could possibly kill two birds with one stone (frame & suspension), by measuring the wheelbase and track width. Compare it to some more modern truck frames. Due to early cars having a relatively narrow frame width, I'd suggest starting with smaller, long wheel base trucks (earlier Rangers, S10's, imports, etc). You may find something really close, if not dead on. Just a thought!

p.s. If I come across the instrument company, I'd be happy to let you know who it is.


UPDATE: I found the gauges. They're called the Moal Bomber series. There are several dealers on the internet that list them. Here's a link to one:
http://www.egauges.com/vdo_grou.asp?Series=Moal_BL
 
Very cool project . And being your dads car makes it even better.

Sent from my HTC Liberty using Tapatalk
 
Wow X2.

Second; don't chop it. The proportions will look all wrong with full fenders and that much length.

And you have a LOt of work ahead of ya...! Good luck!
 
I agree about it being a lot of work, but I think it'll be enjoyable. The metal work on the mustang was my favorite part of the whole project, especially when I was making my own patch panels for parts where a repop wasn't available.

Jeremy, I hadn't thought much about the proportions, but you are definitely right about it maybe looking too long when chopped. I'll plan to do all the other metal work first and concentrate on getting the right stance before making any decisions about cutting the roof (I will admit I was hesitant of all the windows that would need to be reworked with a chop on such a big car).
 
+1 on no chop! It's a pretty common mod on most hot rods (and I've worked on a BUNCH!). With that said, I thought the same thing the very first time I viewed the pics. Most cars from that era have a much higher roof/window profile. Bringing the roof down some really helps the looks on most. You Stud already has a low profile. Besides, have you ever driven a chop top car? They look cool, but they're a pain to see out of!
 
Pete, that photo of the full bodied '32 reminded me that I had once briefly thought about sectioning the car. That thing is gorgeous. Do you by chance any more photos of it? Sectioning a car would be a lot more work than a chop, but man is that thing SWEET! I'm still going to stick to getting the fenders straight and the roof filled before considering any major changes like that, but the look is tempting.
 
Could not find any more shots. The one there is from an Autorama show in '06 in Ca. Owners info printed...Bill and Sally Killion of Alpine, CA, had their steel '32 Ford Tudor sedan painted in a PPG two-tone Garnet red. Did we mention that the sedan is chopped, channeled, sectioned, and more?
 
I ended up picking up a job last summer a few hours away from home so no work got done on the Studebaker. However, this summer I decided to take a few months off between graduating from KSU and going to graduate school (UT-Austin).

Lately, I've been trying to figure out a more refined idea of what I want to do, and could use some input from more experienced rodders.

Since the car already needs the floor replaced, I was considering a channel job. The tricky part here is that all the channels I have seen are on cars without fenders. I would like to keep the fenders on this car, but I think that may require some extra work to bring the fenders and body lines up into the body. Is this correct? If so, I'll either need to reconsider the channel job or the decision to keep fenders.

As for filling the roof, I know it is most typical to cut the roof off of an old wagon, but I think it'd be nice to get a sun/moon roof. If anyone has a lead on a suitable donor for this within a few hours of Wichita, I'd be interested.

Since it is a 4 door with suicides, there is currently a center pillar for the doors to latch to. I'd like to remove this and add some tubing around the frame so that the doors can latch into the top/bottom. I think this would look very cool when both doors are open and should not affect the strength of the body if done correctly (my degree is in Structural engineering, so I should be able to handle it), though it would require some new latch designs and maybe adding material to one door so there is no gap when it closes. My thought is to mimic something found on an extended cab pickup.

I'll be back home next week, and am going to see about blasting it and priming it by the 19th. I'll be blasting it myself, so I'll need to load up on the aluminum oxide. One benefit to all the rust is that the media won't have any crevices to hide in.
 
Cool project Walter.

You walking across the stage Saturday? That was a fast few years!!
 
Thanks, Mark.

Yes, I'll be walking on Saturday at 6:15 PM. I made it Summa Cum Laude, even. I'm pretty excited about that. :yah Just one more final and a day of work before then.

Jeremy, thanks for clearing that up. Would it be best to mock up the suspension and chassis first so the final frame height (more or less) can be established before channeling?
 
I was finally able to get the frame loaded up from home and moved to the shop on Friday so I could start work. I've spent today working on removing the current rear-end and getting the frame in a condition so that it can be moved easily around the shop. As such I've welded up a temporary rear-end with casters so I can still move the frame around without the old or final rear in place.

Now for some story time:

One of the first things I did once I got the car into the shop was start removing the tires that don't hold air and replacing them with ones that did. No problem (or so you'd think). I started with the driver side rear wheel, the lug nuts needed some help from a break-over bar, but they came off OK in the end. Moving on the passenger side rear wheel I find that they are also pretty tight. Thinking they are tight just from being over-tightened initially and then rusting in place for who knows how long I pull out the break-over again. After struggling for a few minutes I end up stripping the threads on a stud. Then a light goes off in my head and decide that maybe these are reverse thread lugs (I remember hearing somewhere that some older cars are that way). Sure enough, I start working righty-loosy and off come all the rest. Next I go for the driver side front tire. Thinking it is a regular thread (as the driver rear was) I start working the lugs again. This time I end up breaking a stud off. OK, well lets try righty-loosy again just for sh*ts. Sure enough, this works! I get the rest off no problem and proceed to the passenger front. These are, of course, regular thread and come off no problem.

My question to anyone is, have you ever heard of right and left hand threads being used in separate corners of a car and not just separate sides?

Pictures to come once I get home and can download them off my phone.
 
Finished removing the leaf springs yesterday, so I was able to lift the IRS more-or-less into place to get an idea of what brackets would need to be made. I took measurements of everything a couple weeks ago, but this was just as useful.

The casters are set to hold the frame at the same height as when I removed the original rear. When I make up the new brackets I'll design them to keep the frame height the same as well, and then set the body over the frame and start adjusting.

The next step for setting up the IRS will be to remove that rear pan so I can start working on brackets.
 

Attachments

  • Doree's iPhone 303.JPG
    900.1 KB · Views: 15
  • Doree's iPhone 306.JPG
    2.8 MB · Views: 16
  • Doree's iPhone 305.JPG
    872.6 KB · Views: 16
Back
Top