Navigation
Install the app
How to install the app on iOS
Follow along with the video below to see how to install our site as a web app on your home screen.

Note: This feature currently requires accessing the site using the built-in Safari browser.
More options
-
Hello there guest and Welcome to The #1 Classic Mustang forum!
To gain full access you must Register. Registration is free and it takes only a few moments to complete.
Already a member? Login here then!
You are using an out of date browser. It may not display this or other websites correctly.
You should upgrade or use an alternative browser.
You should upgrade or use an alternative browser.
1971 Airstream Sovereign 31ft
- Thread starter phlegm
- Start date
")
tarafied1
Well-Known Member
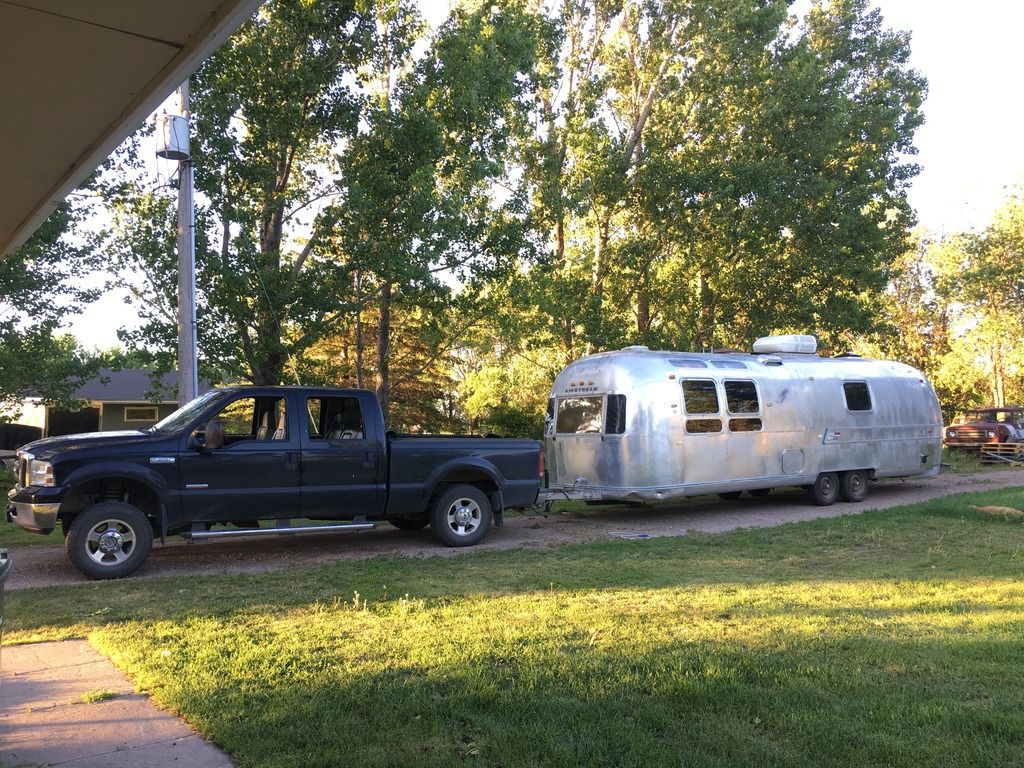
yes I did need a drop hitch. Although it wasn't actually on the hitch in that pic. It was raised up to go on the hitch but it rode pretty high in the front. Those rims were cool. I had 33" super swampers on them in that picLooks like you needed a drop hitch.
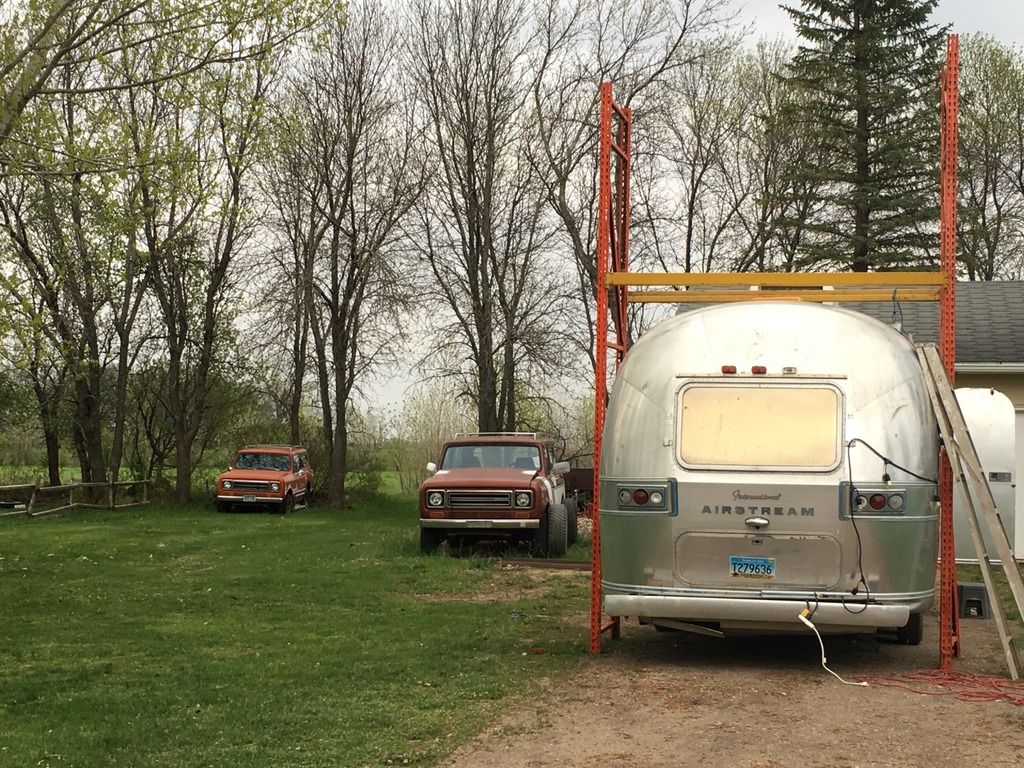
I want a set of steel rims like those on the truck.
Time to play catch up..
Last weekend the kids were with their grandparents so my wife and I got the windows taped and resealed.
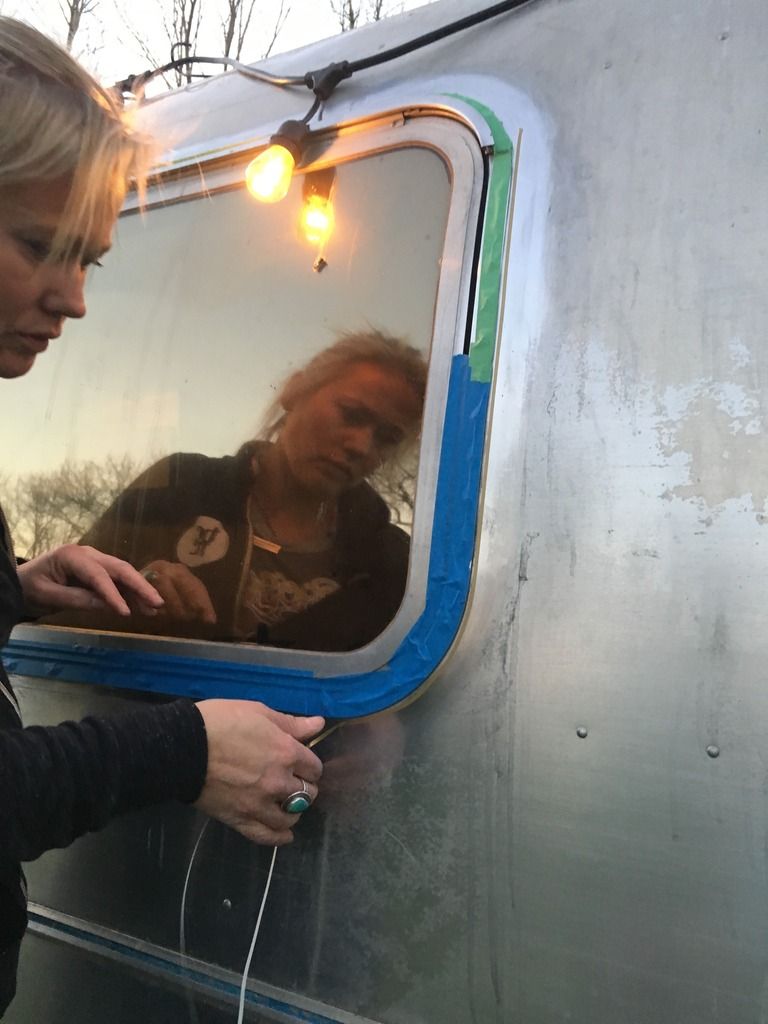
While I cleaned the last side window (galley/curbside)
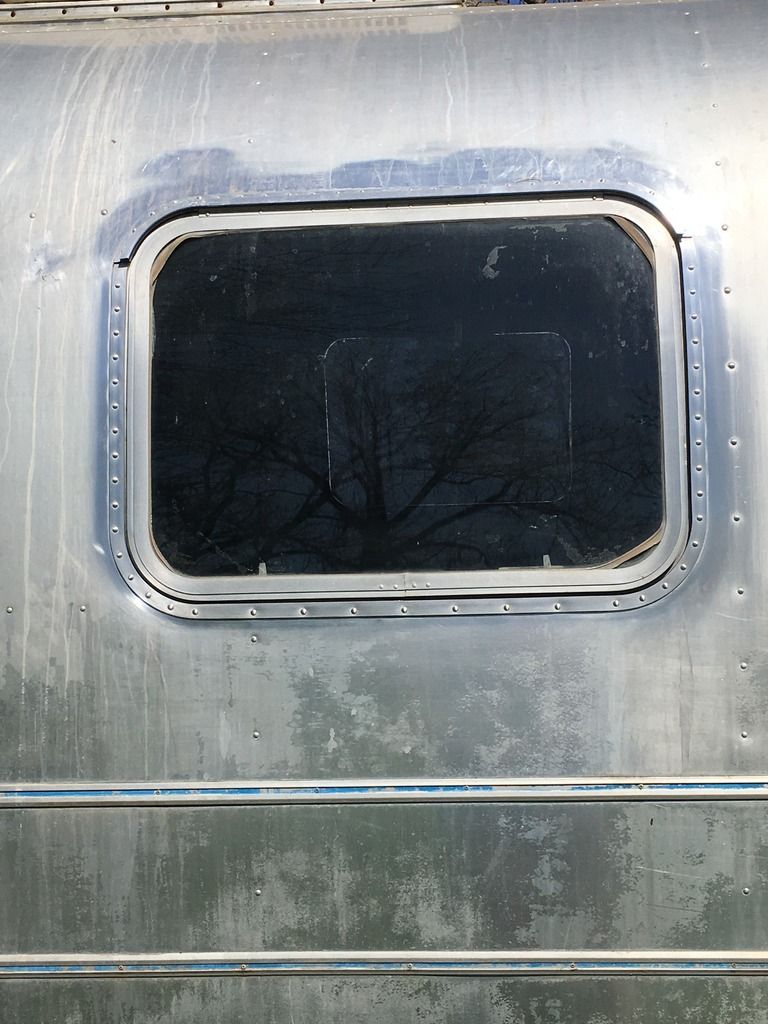
My wife started masking off the window frames.
Masking is optional, but I wanted to reduce the amount of 'oopsies', and the tape helped make things go faster when applying the sealant.
The pinstripe is about 1/4" (ish) away from the window frame.
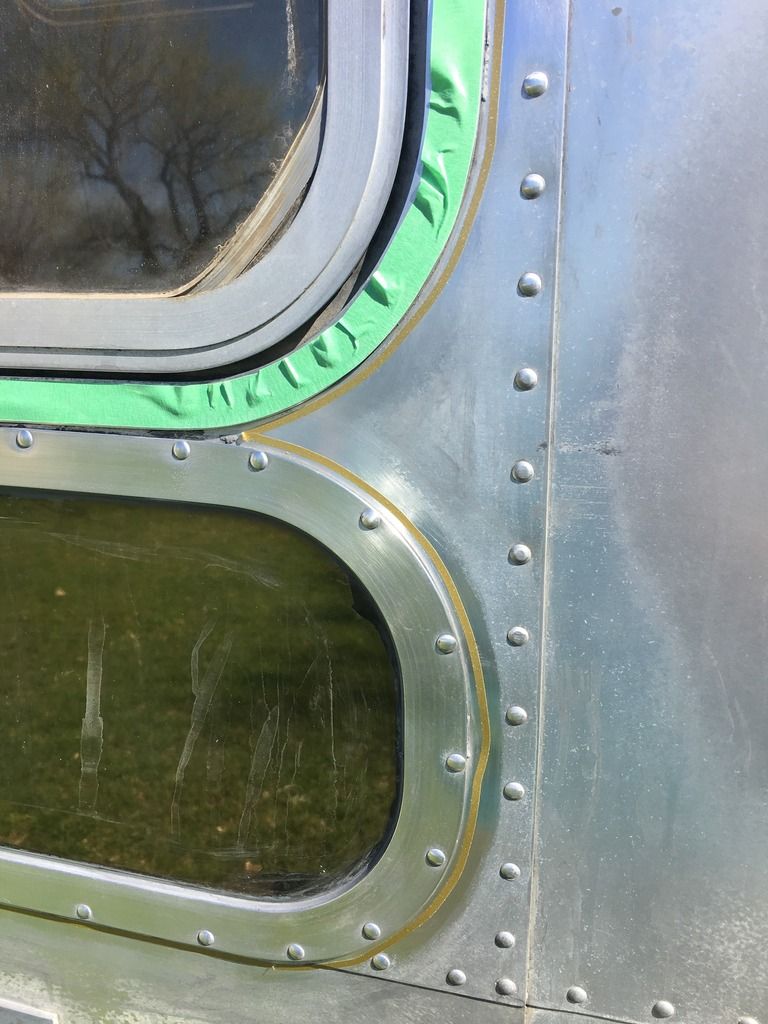
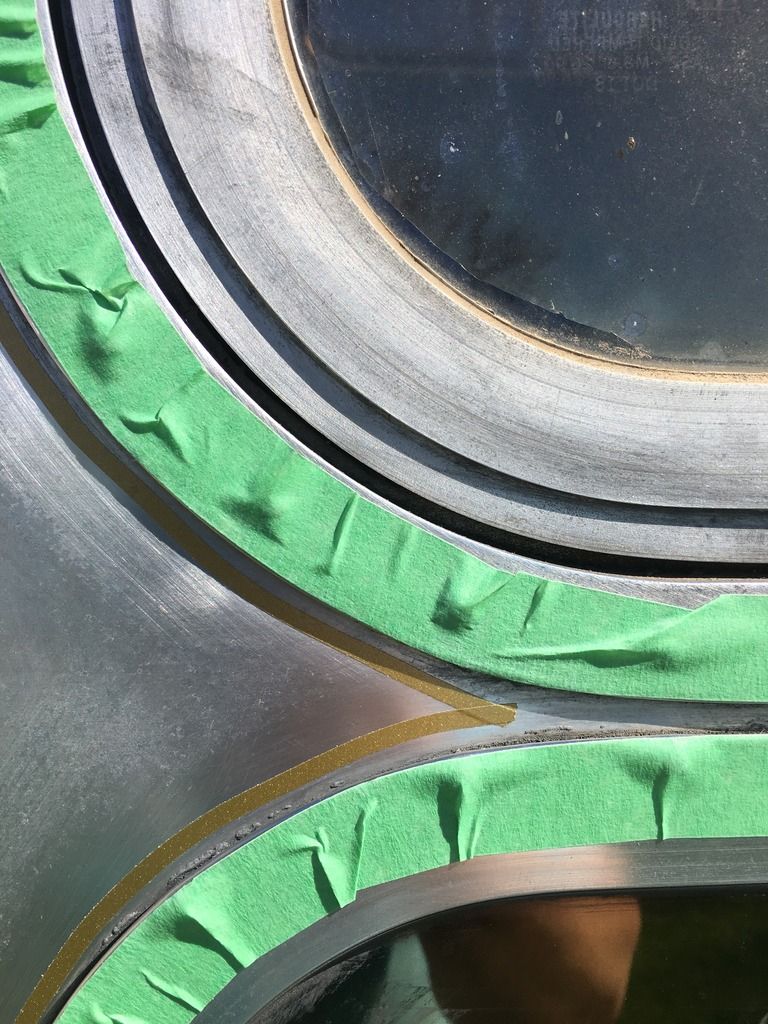
And after applying the sealant via syringes and smoothing with fingers (in gloves) we pulled the tape and
it really isn't a whole lot of sealant required.
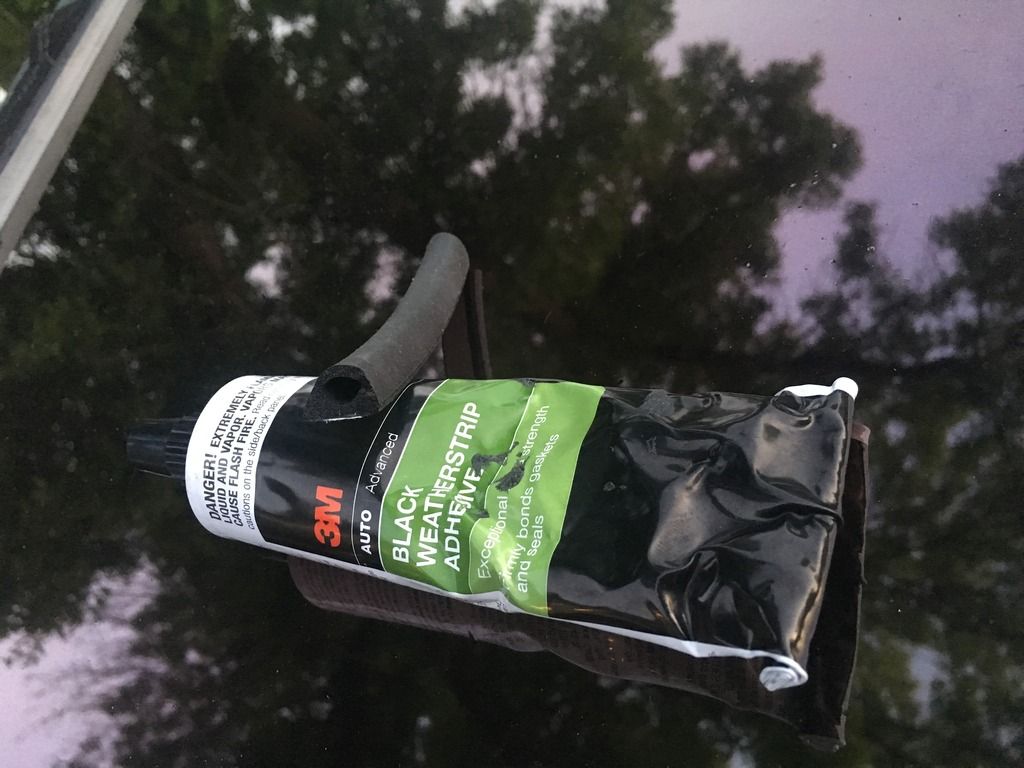
I started the process of removing the weatherstripping from the access doors and window frames, I haven't gotten to far with it.
This isn't even the right gasket material.
Putty knife removed 98% of it.
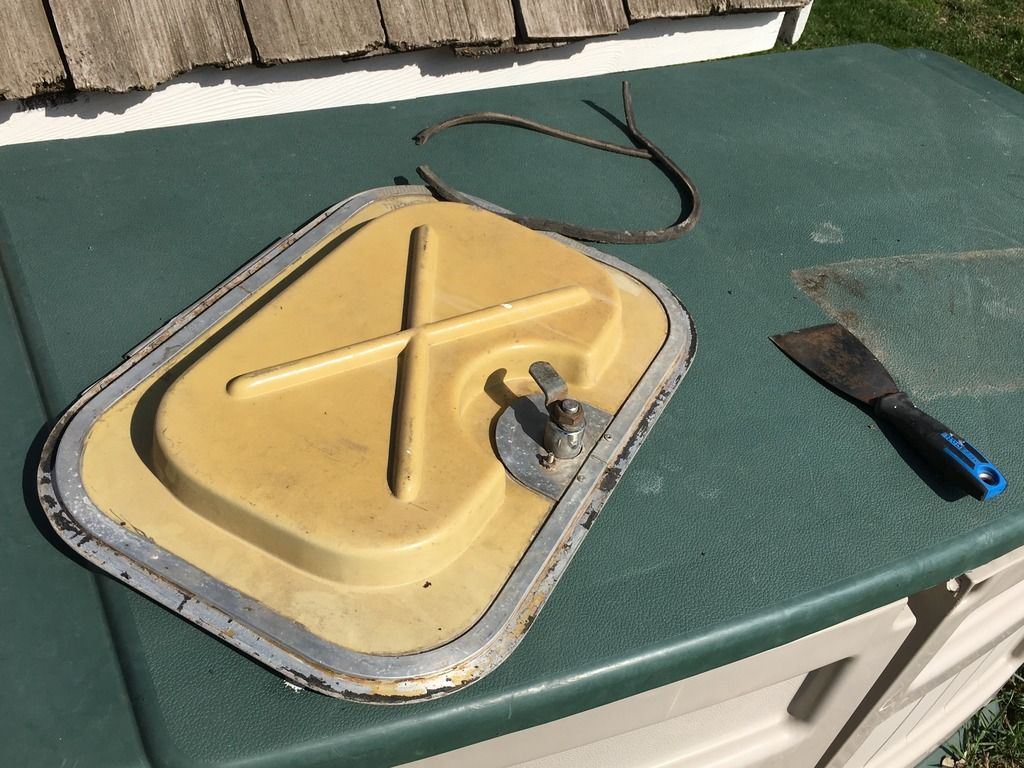
A putty knife barely budged this OEM/Stock gasket.
I need a better removal solution.
And I found more silicone to remove, I've ordered replacement gaskets for this and a couple more tubes of sealant.
Last weekend the kids were with their grandparents so my wife and I got the windows taped and resealed.
While I cleaned the last side window (galley/curbside)
My wife started masking off the window frames.
Masking is optional, but I wanted to reduce the amount of 'oopsies', and the tape helped make things go faster when applying the sealant.
The pinstripe is about 1/4" (ish) away from the window frame.
And after applying the sealant via syringes and smoothing with fingers (in gloves) we pulled the tape and
it really isn't a whole lot of sealant required.
I started the process of removing the weatherstripping from the access doors and window frames, I haven't gotten to far with it.
This isn't even the right gasket material.
Putty knife removed 98% of it.
A putty knife barely budged this OEM/Stock gasket.
I need a better removal solution.
And I found more silicone to remove, I've ordered replacement gaskets for this and a couple more tubes of sealant.
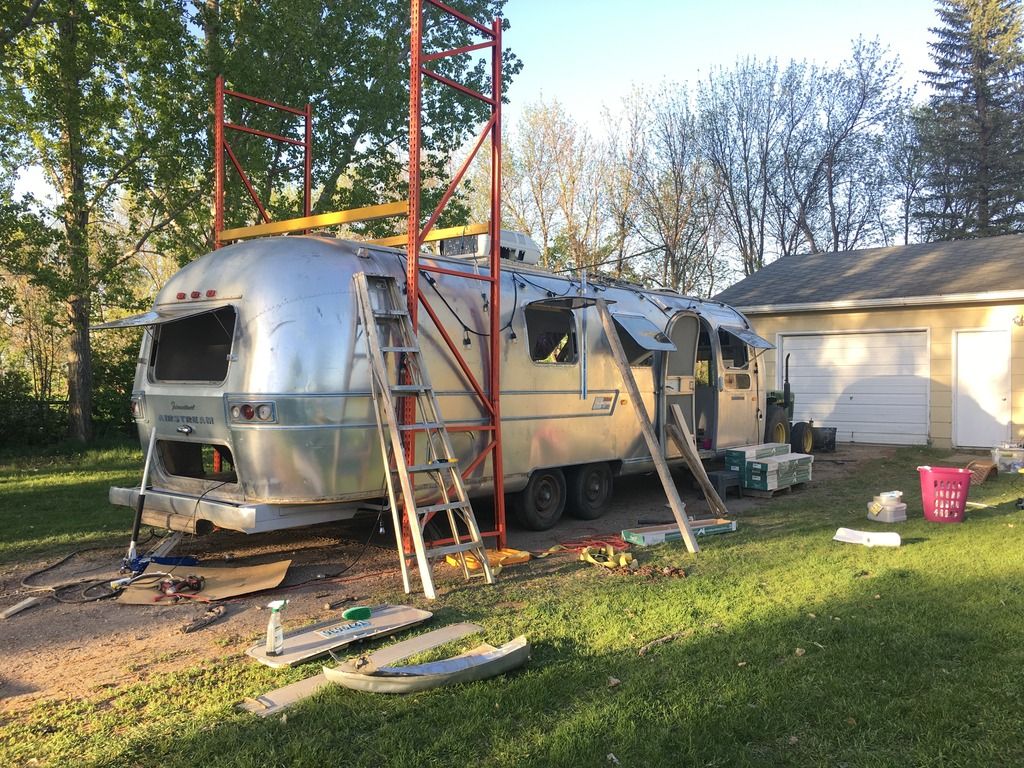
I setup a redneck gantry so I could get up on the roof.
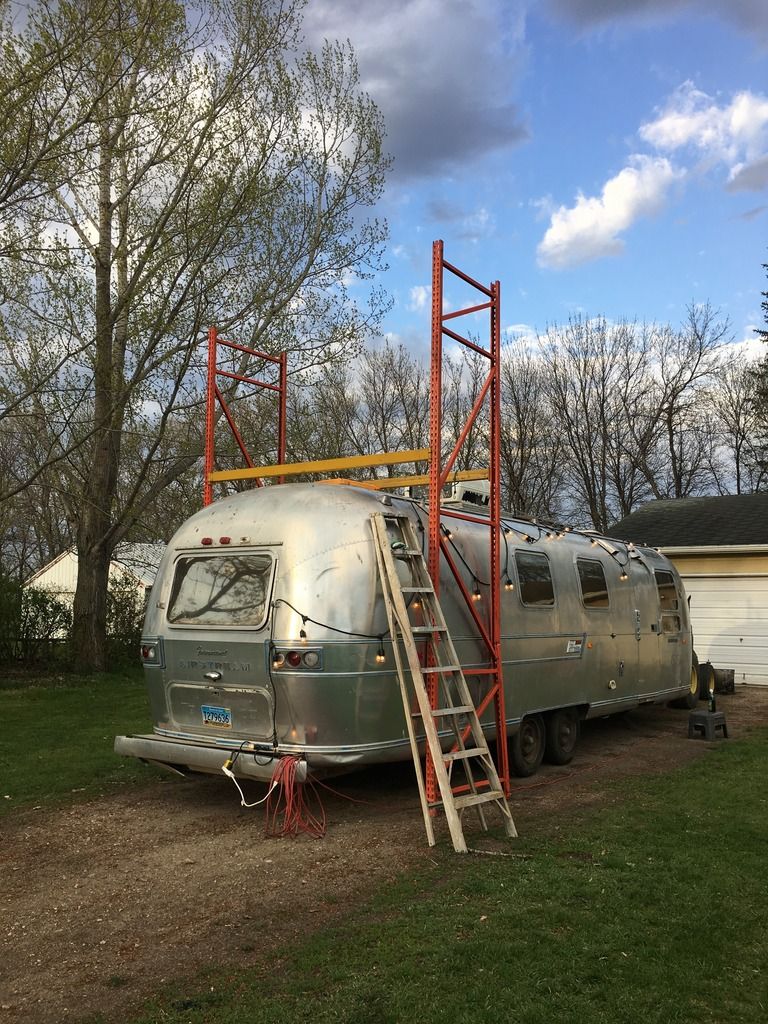
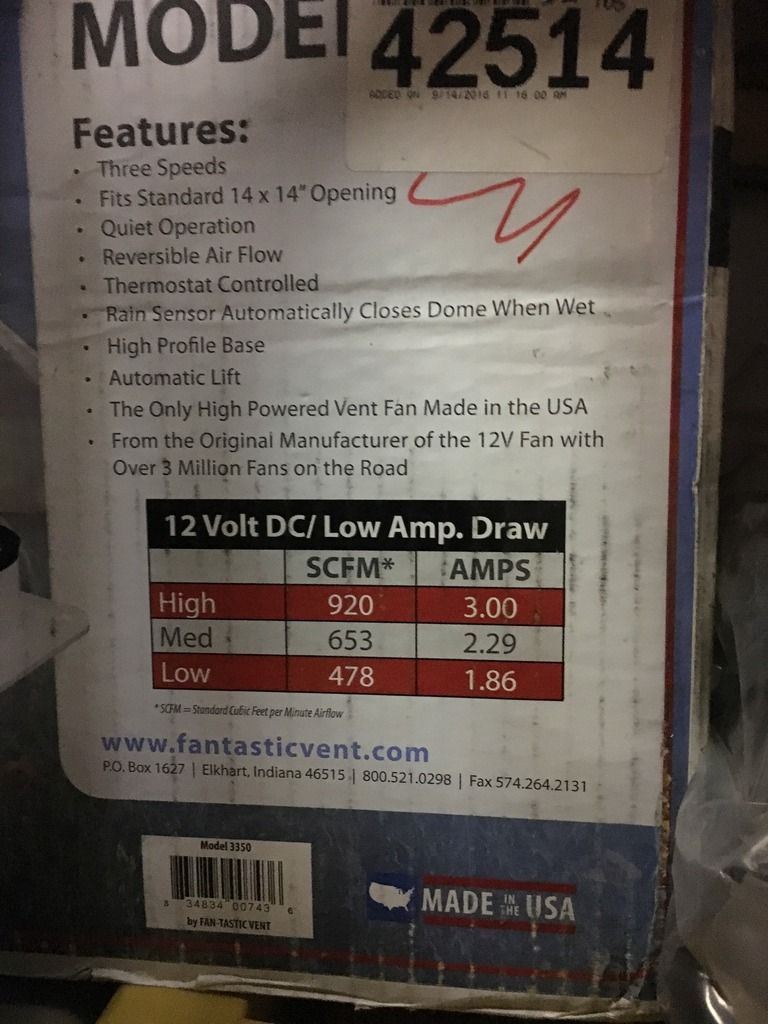
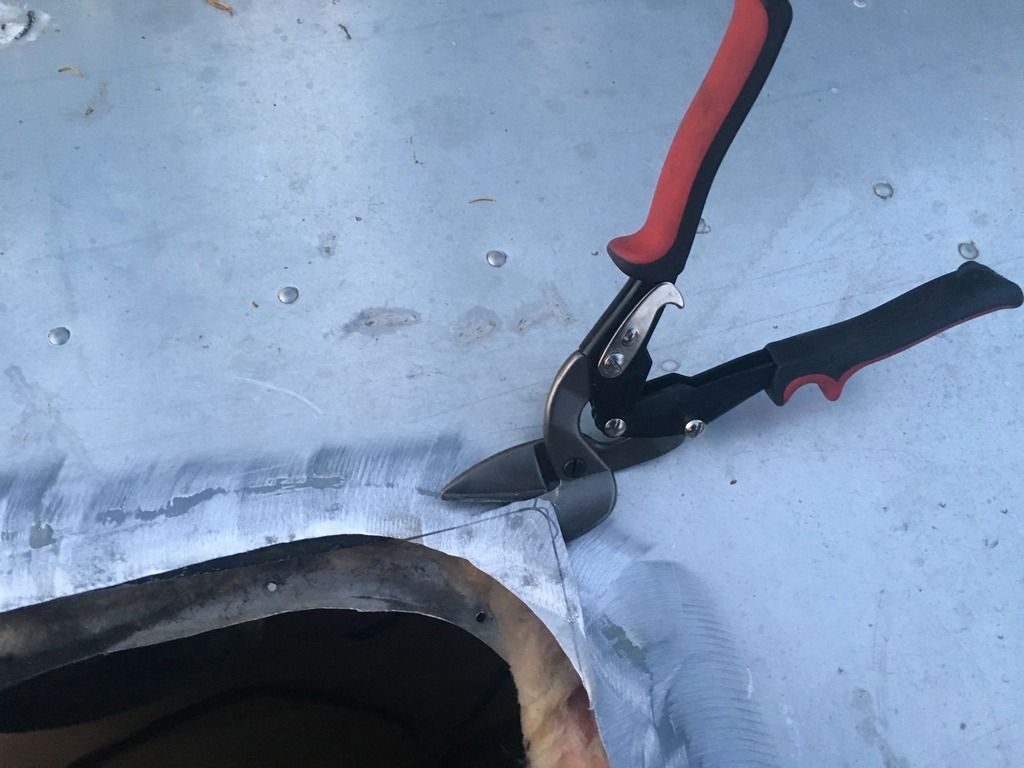
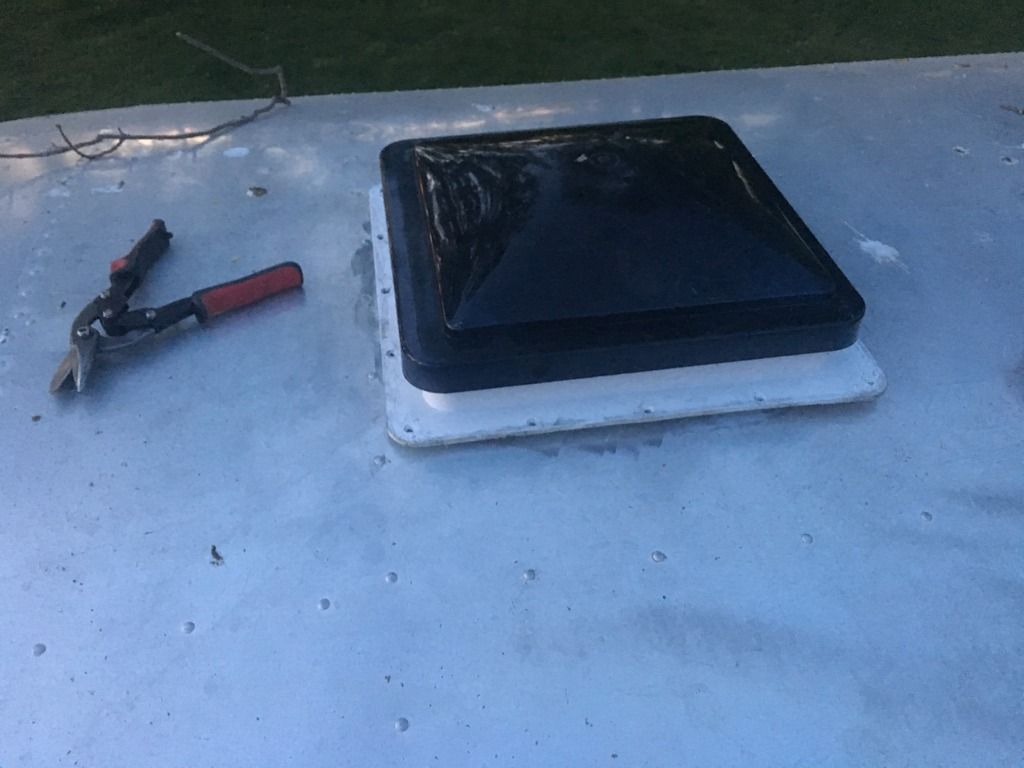
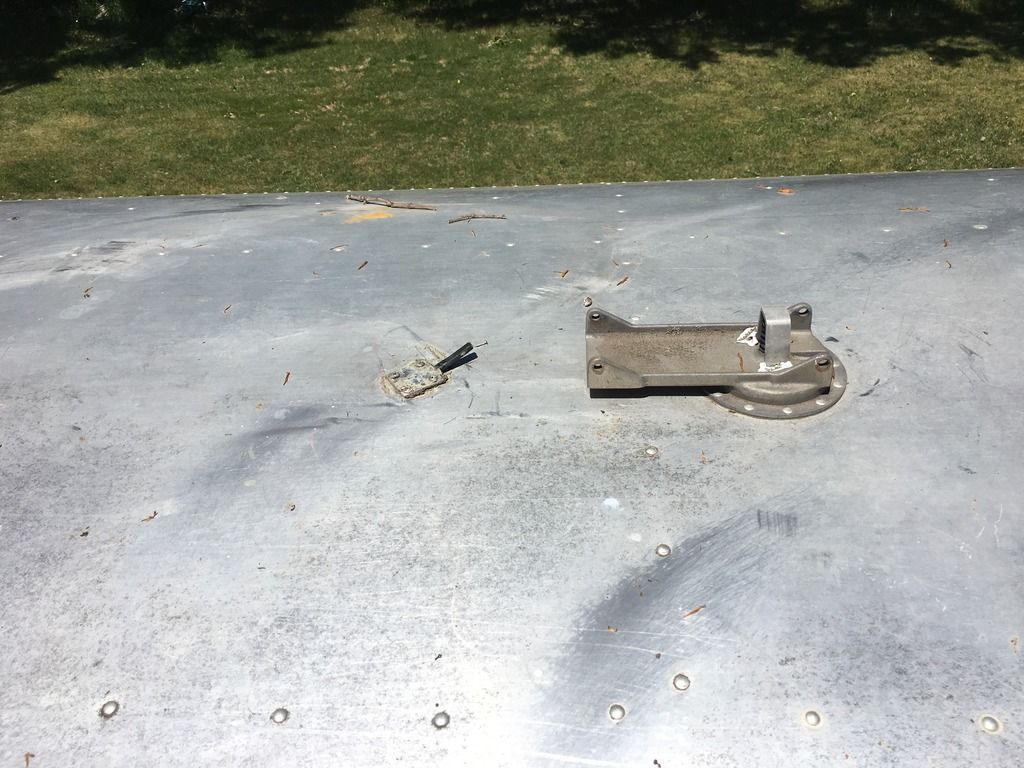
I need to change out this original fanless vent with a new powered vent.
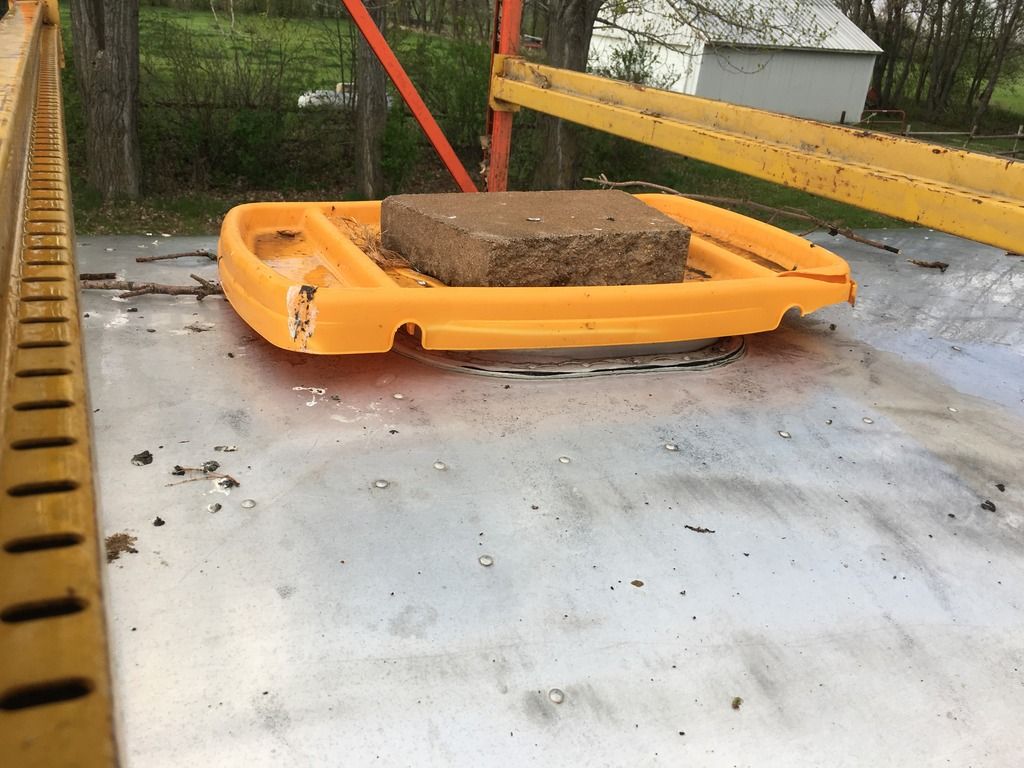
First I cleaned the roof with simple green.
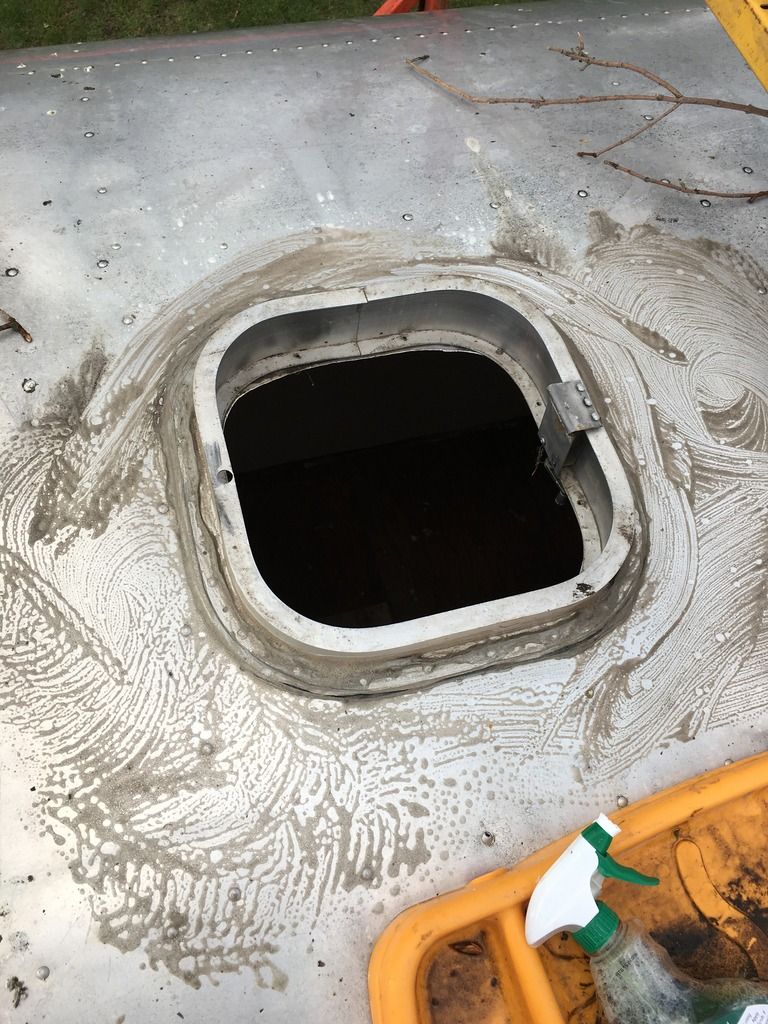
Then center punched and drill off the rivet heads.
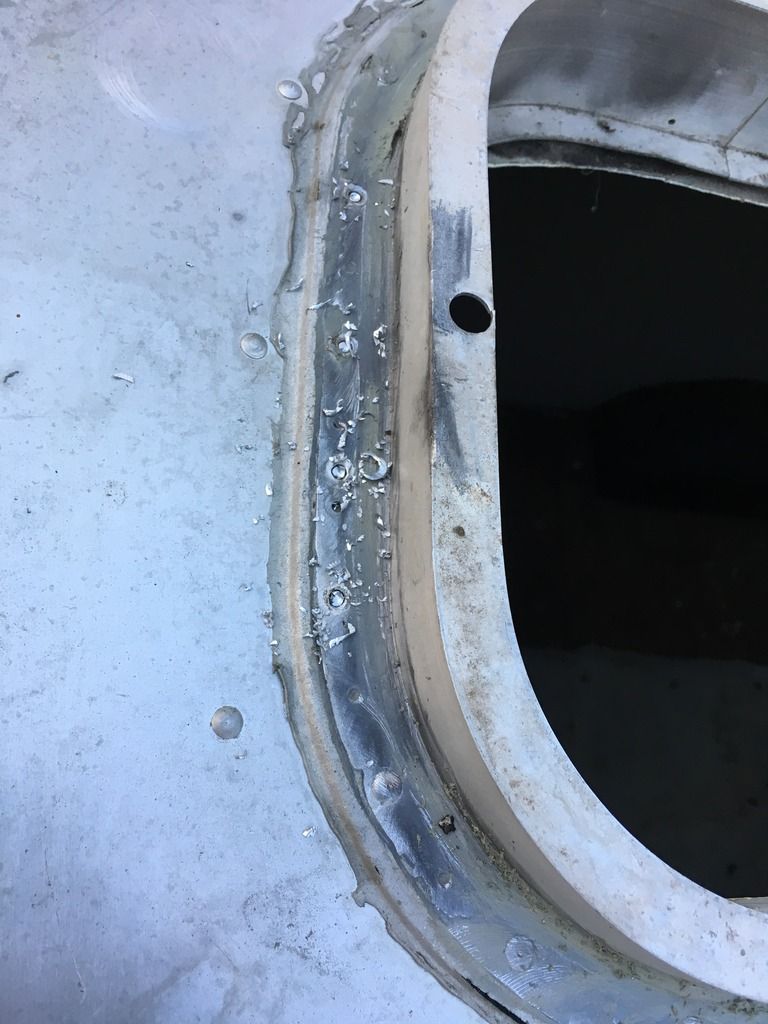
And pulled the vent assembly off by hand.
I've got to grind off the remainder of the rivets and the original sealant, but that's got to wait for later. I need the hole.
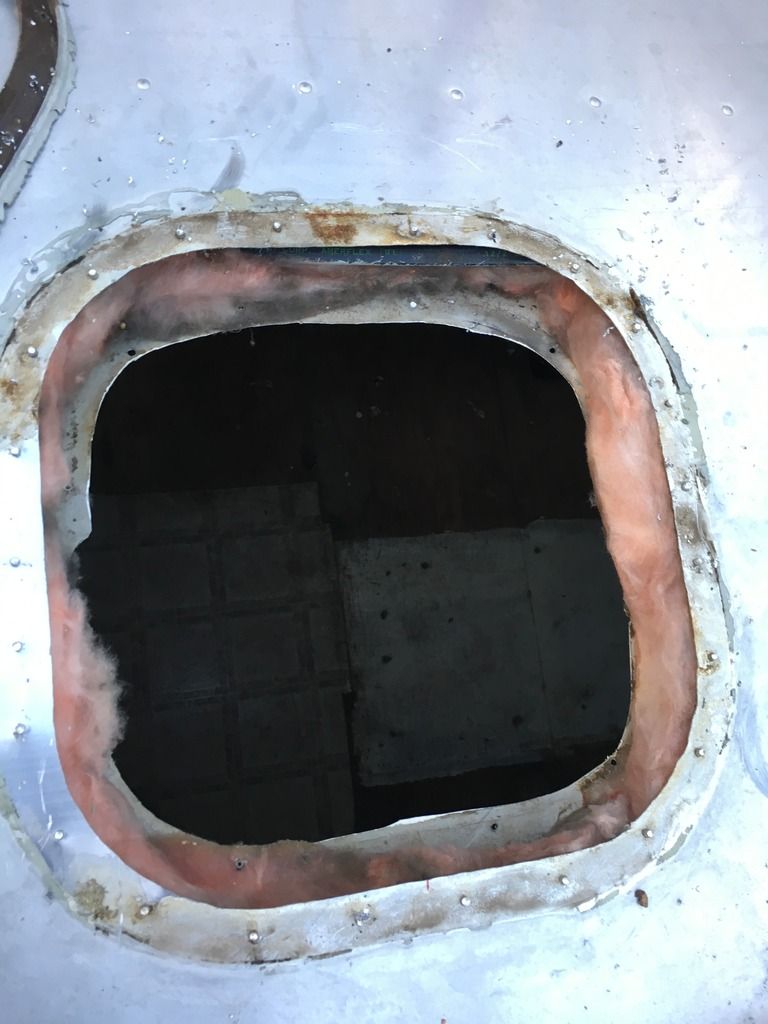
Eventually this fan will go in that hole.
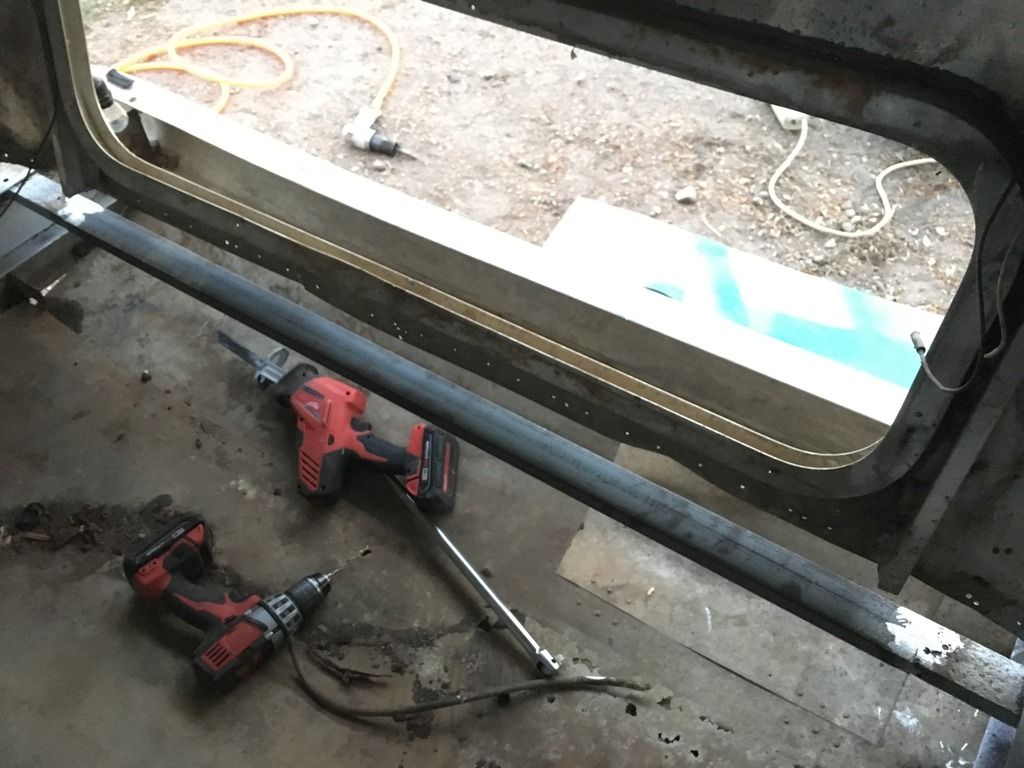
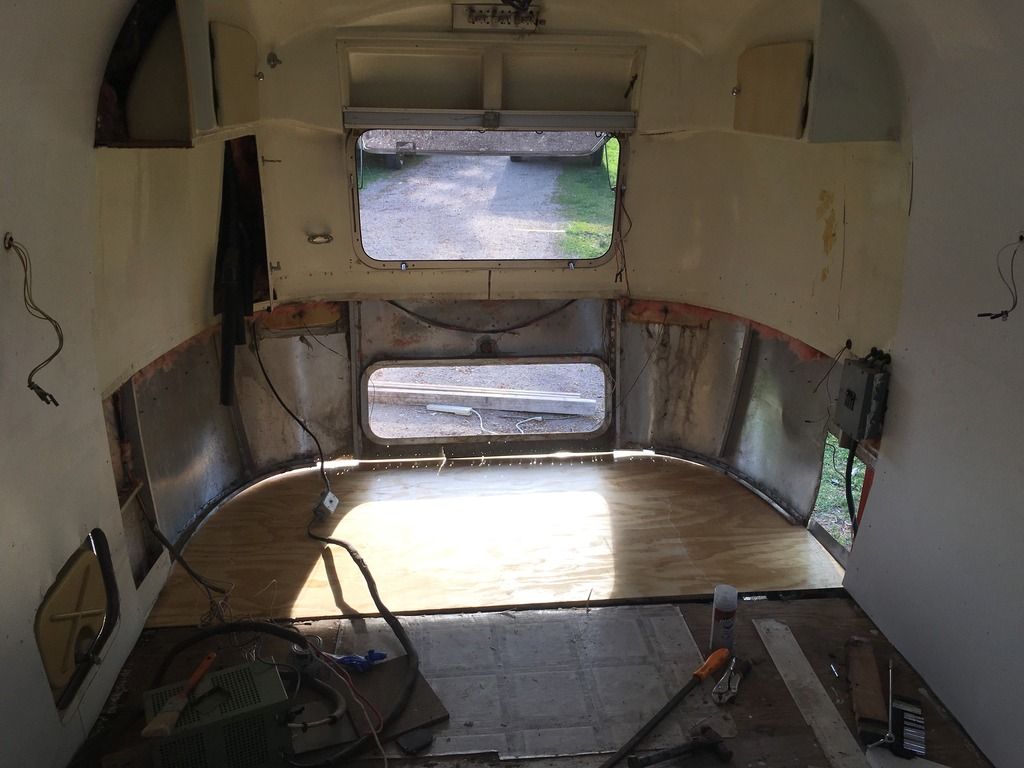
I need the hole so I can put a board on the inside and then I used a load lock/ratchet strap to gently lift the rear of the Airstream shell to separate it enough to get the old floor out and new floor in.
Also to get the floor out I had to disassemble some of the other components..
The side trim.
And then the rear section of the belly pan "banana wraps"
Inside I used my grinder to cut these bolts in half.
For the floor to frame bolts, I bought a drill bit set that is designed to cut wood plugs, the 5/8" one worked perfect for getting around the elevator bolt heads.
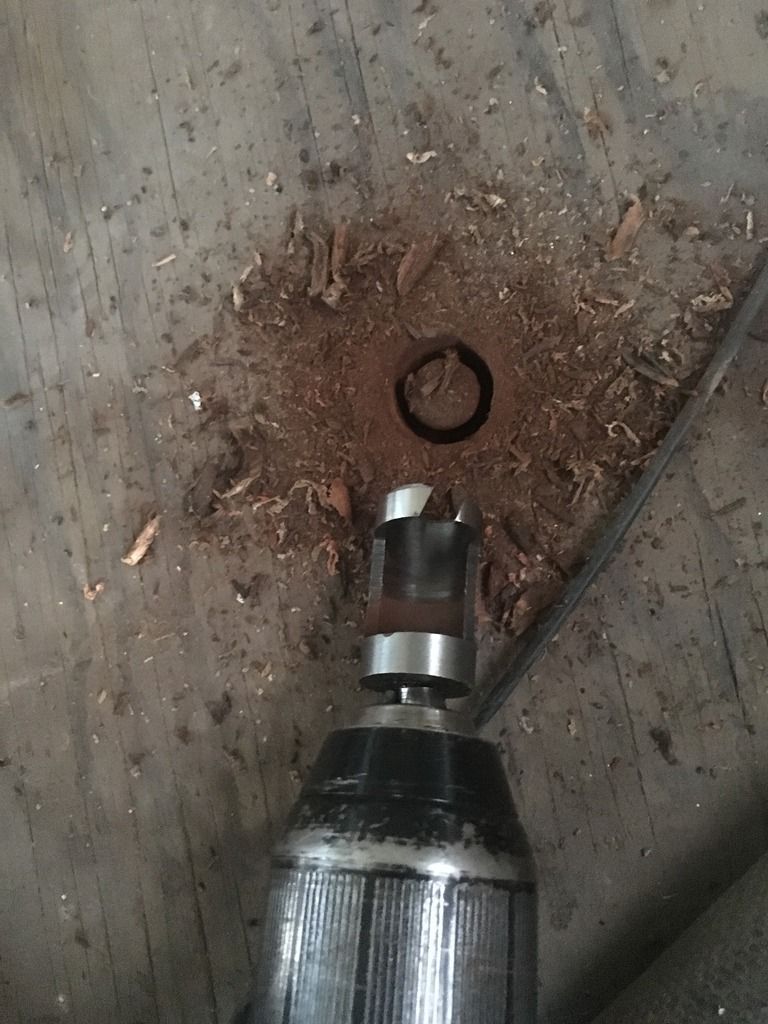
I cut some notches out of the leading edge of the rear floor section and pried it free from the trailer frame.
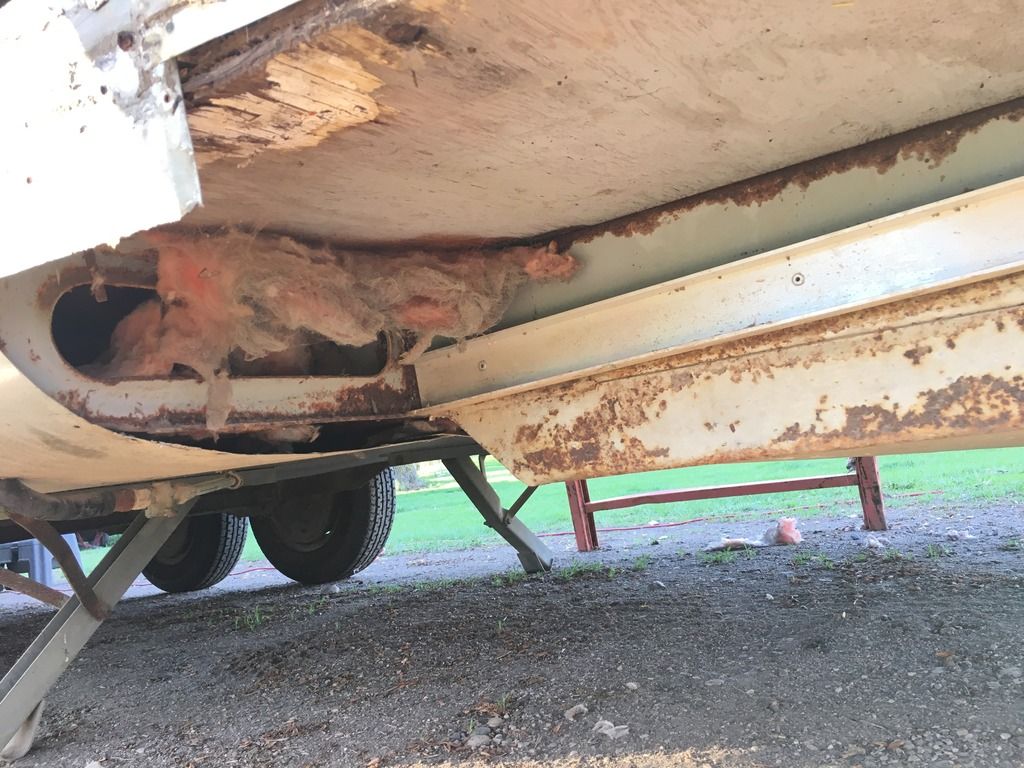
I still couldn't get the sum'bish out so I cut it in half.
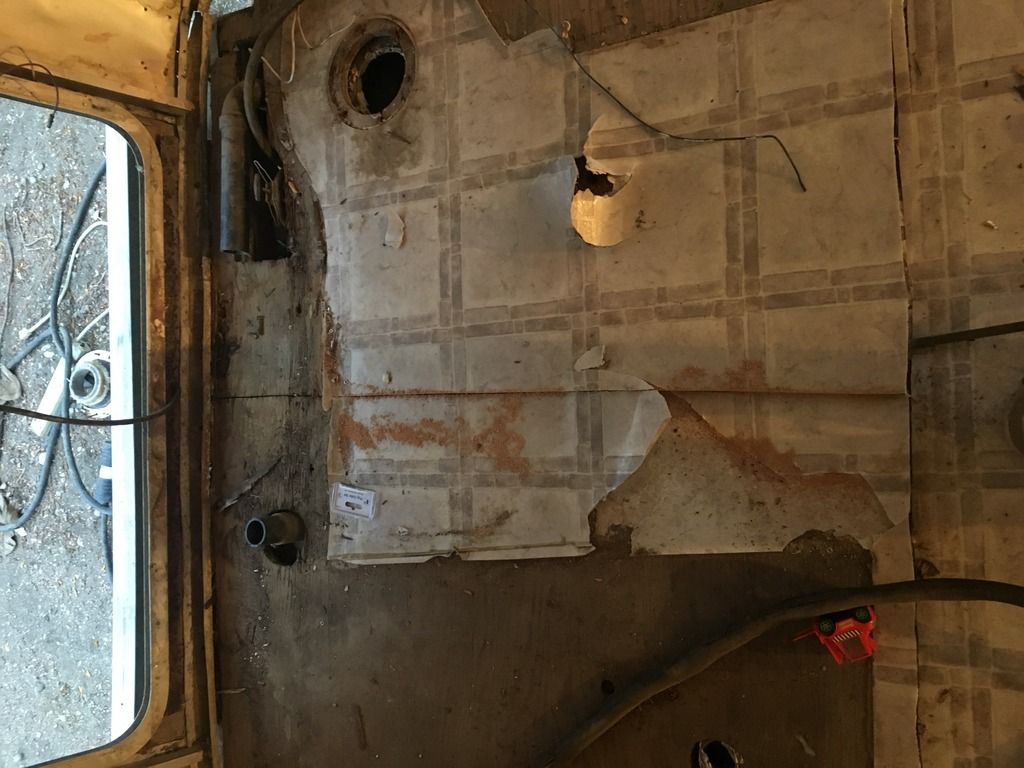
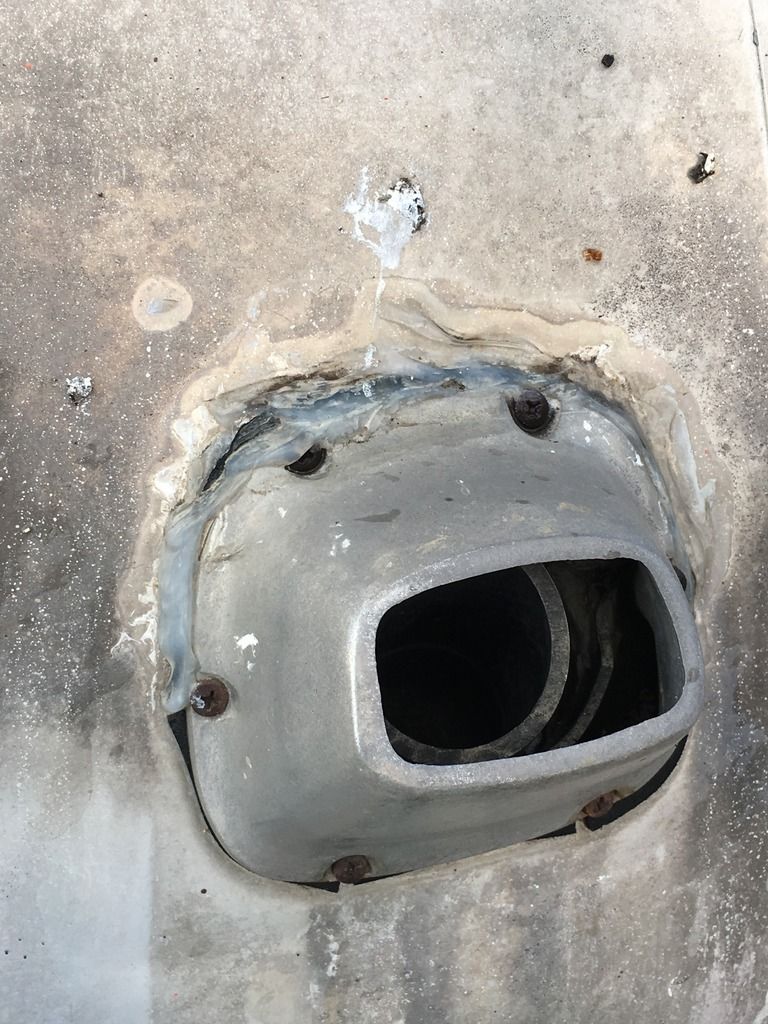
Tada!! the rear of the trailer frame and the black water (effluent) tank.
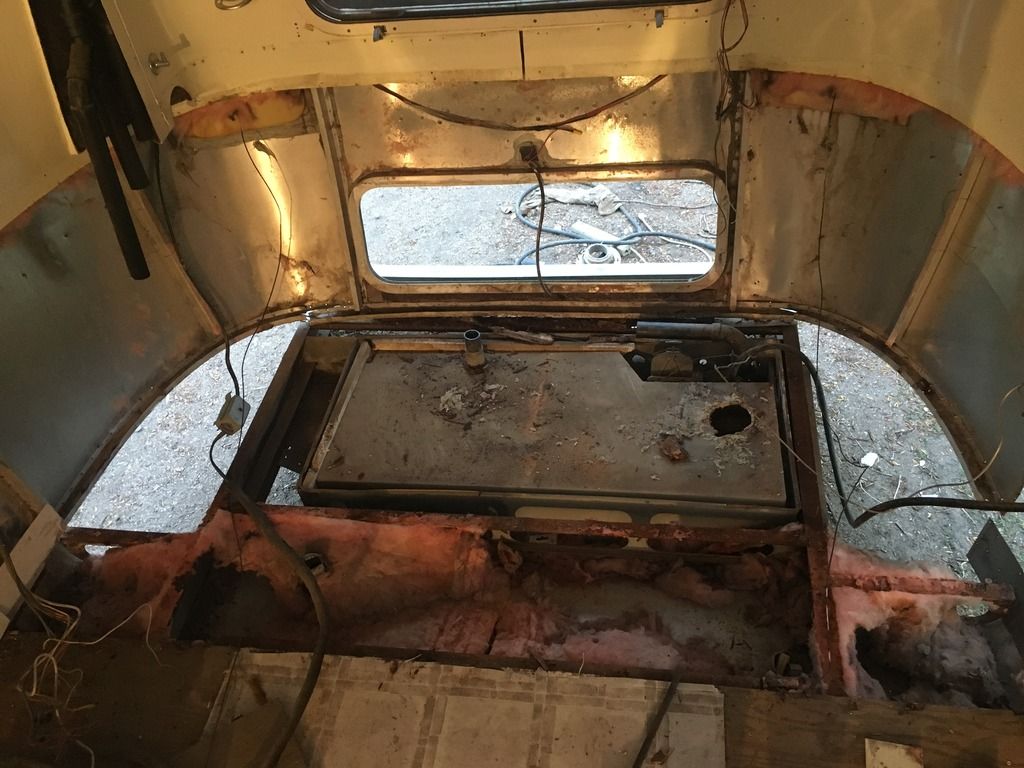
The tank was trashed already.
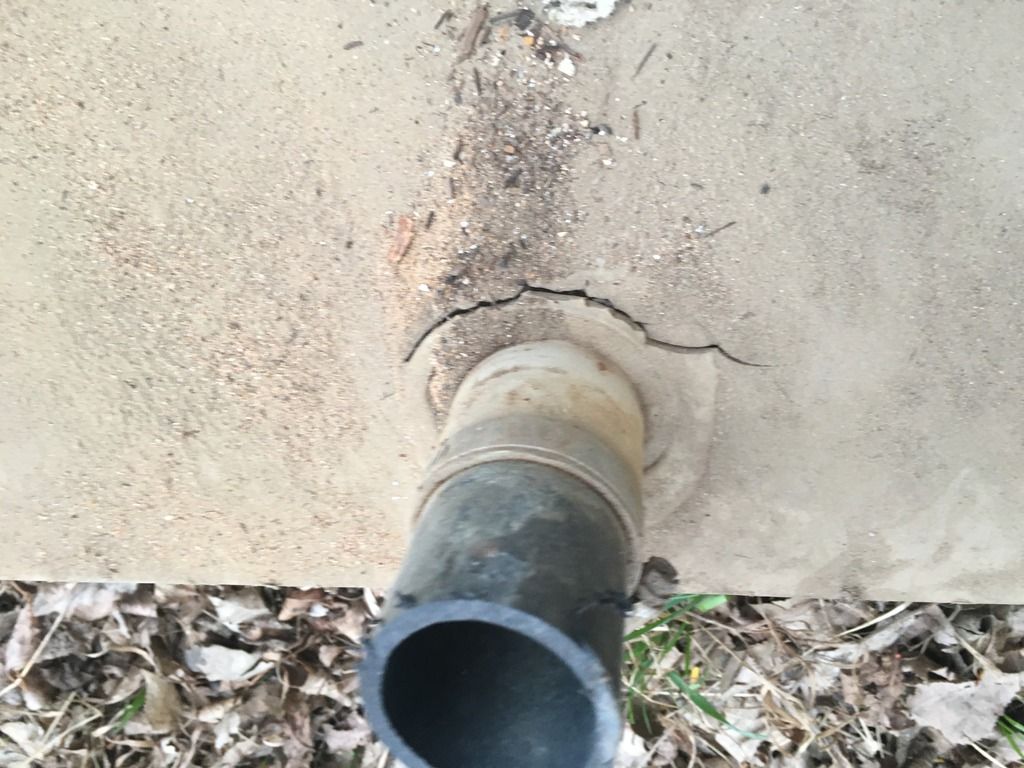
Cracked fitting for the exhaust pipe connection.
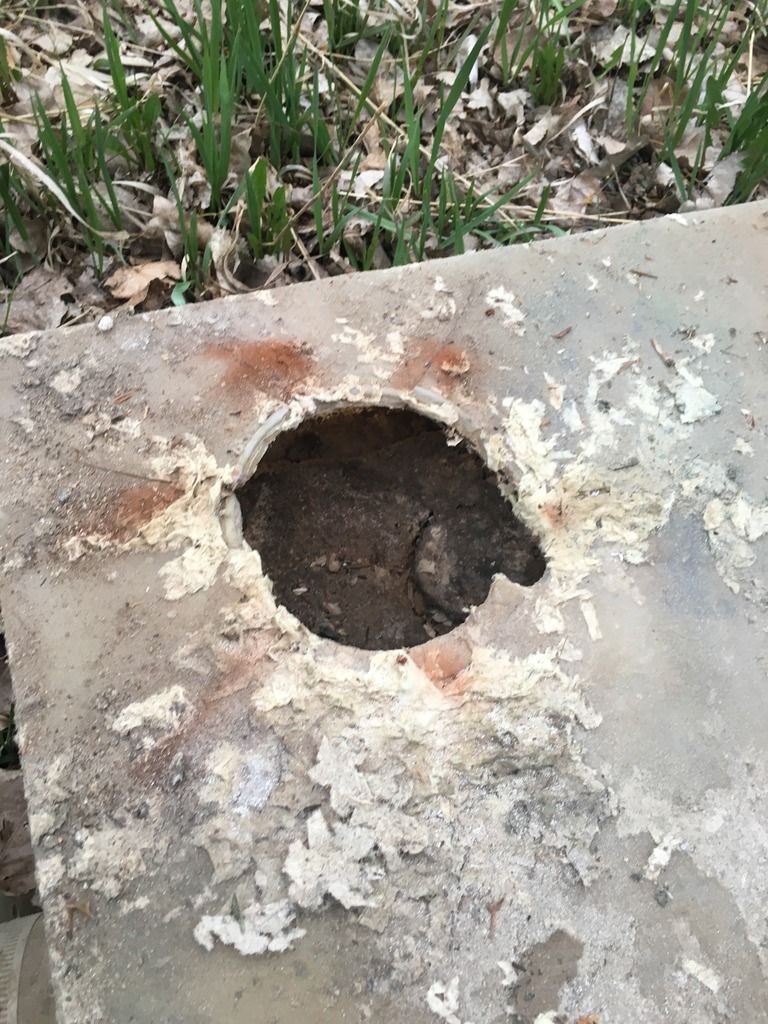
There is supposed to be a permanently affixed 'neck' on this hole to mate with the bottom of the toilet.
Onward and upward, out comes the black tankholding box (I don't know its real name)
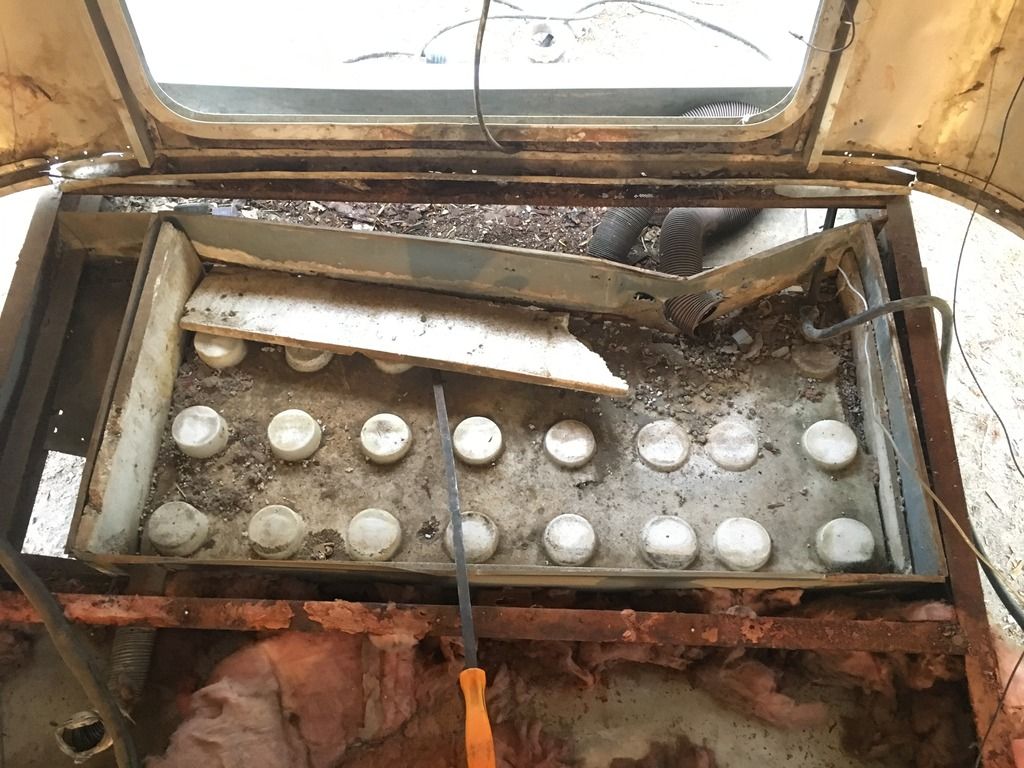
There's a lot of detritus in there, I cleaned it all out.
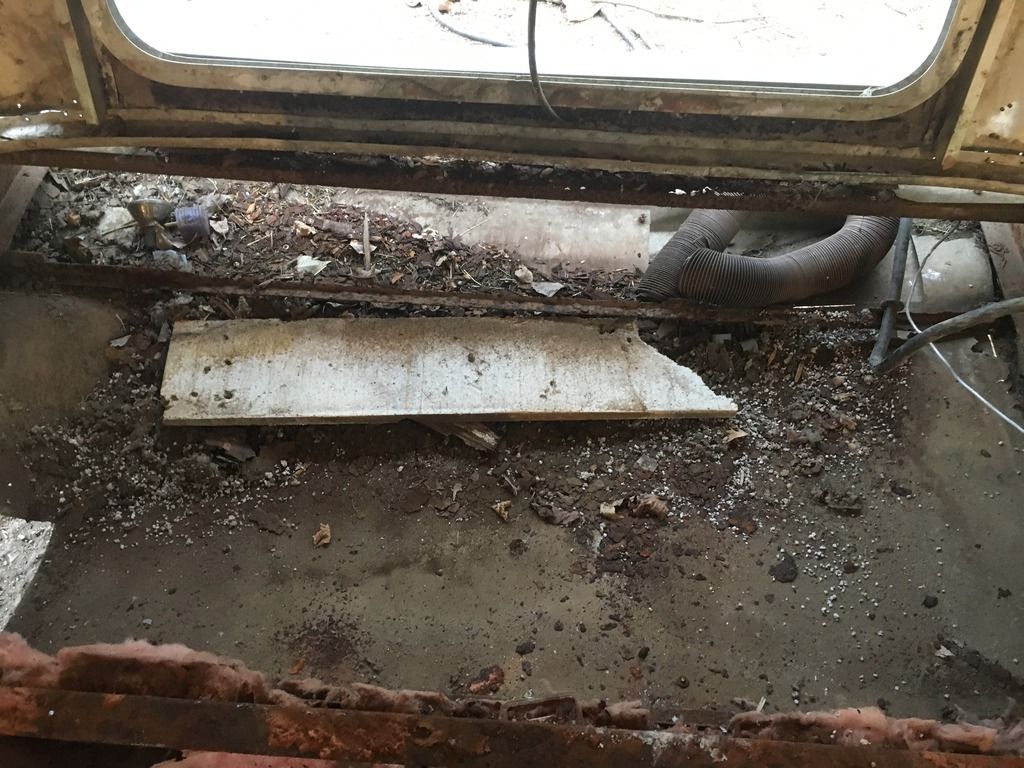
Looks like a chunk of old barn wood.
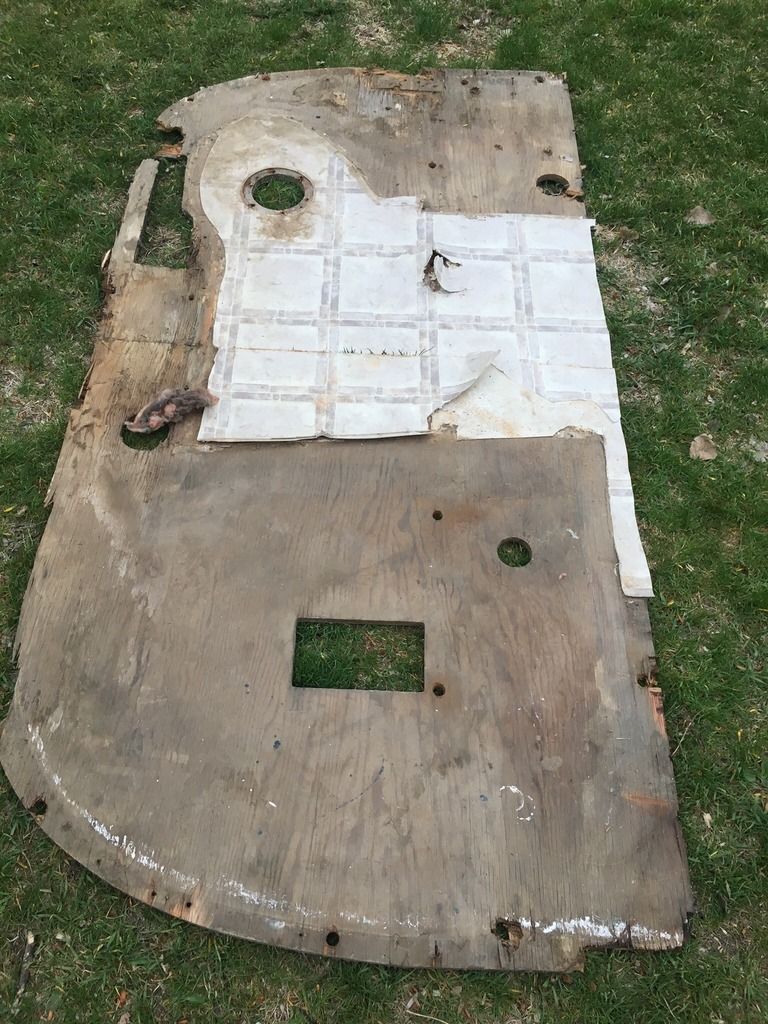
I grabbed some large cardboard from work and taped it together.
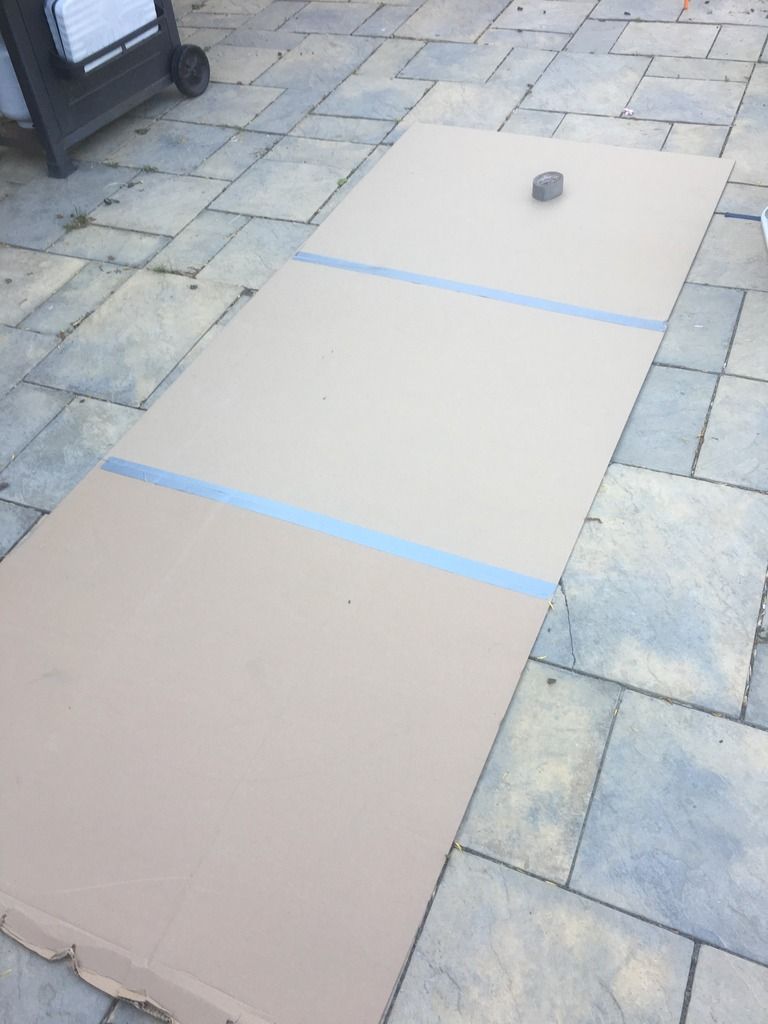
Used the old floor section to make trace the shape onto it.
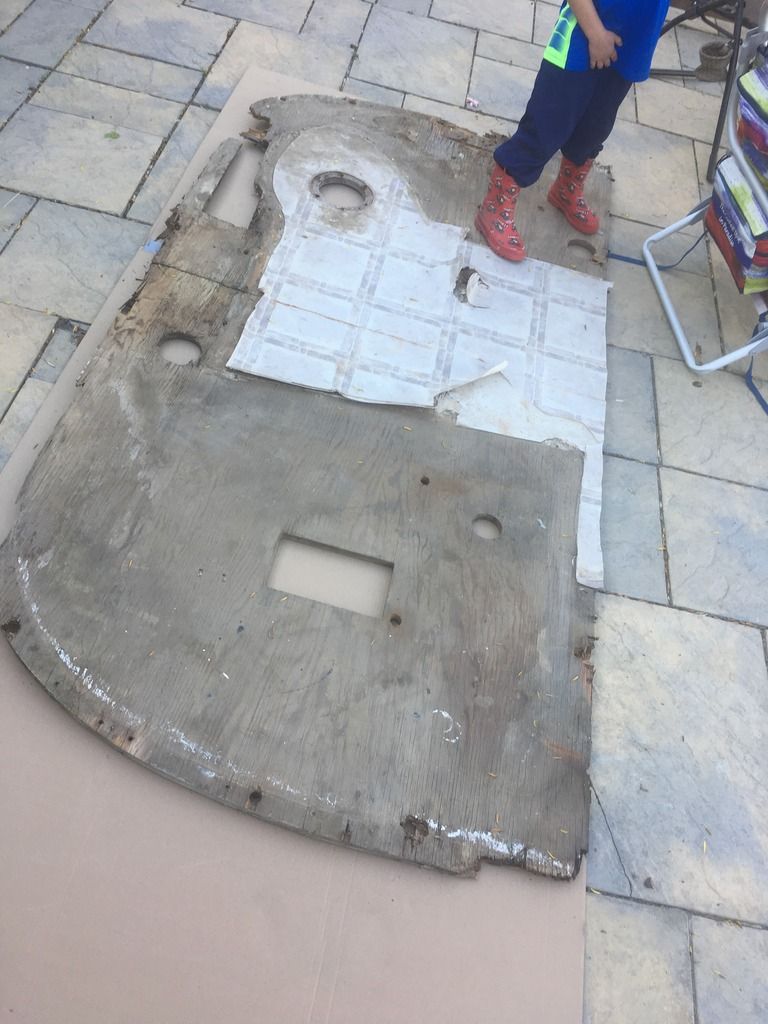
Cut out the template.
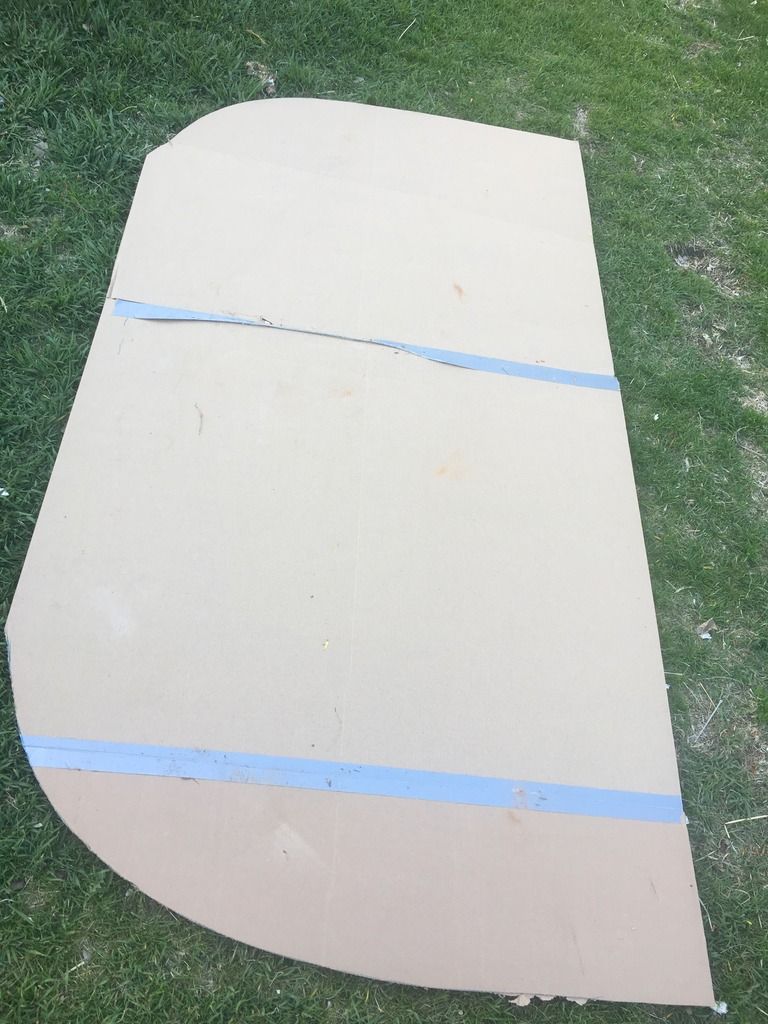
Test fit it
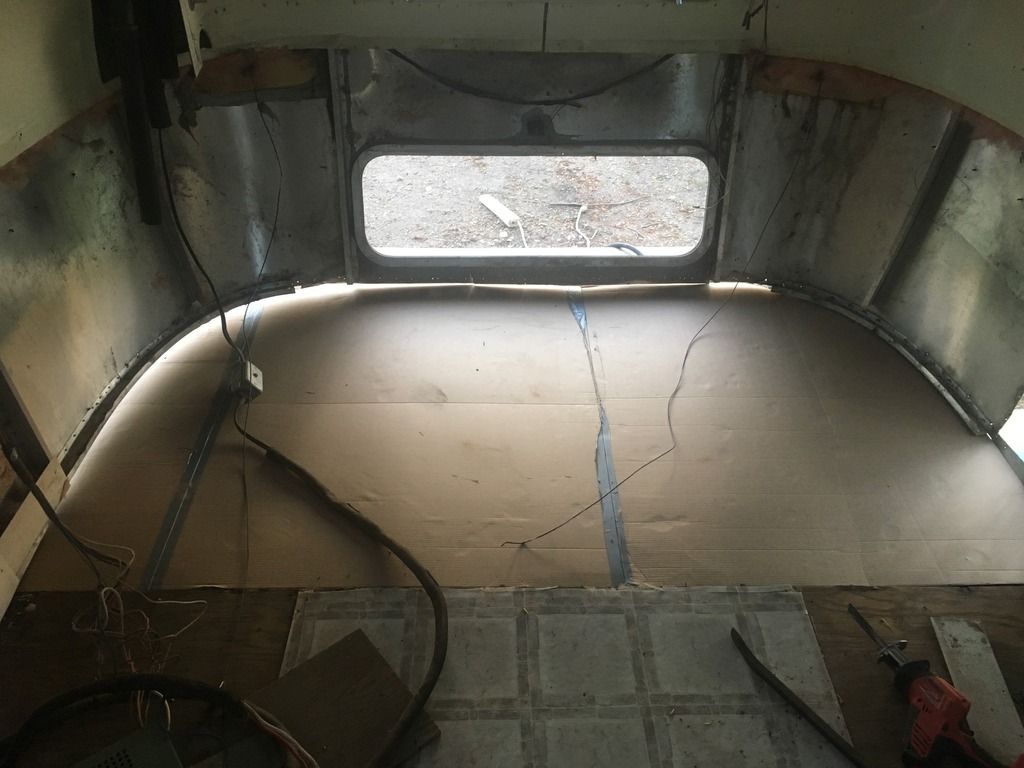
Trace the template back onto real wood 3/4" exterior rated subflooring.
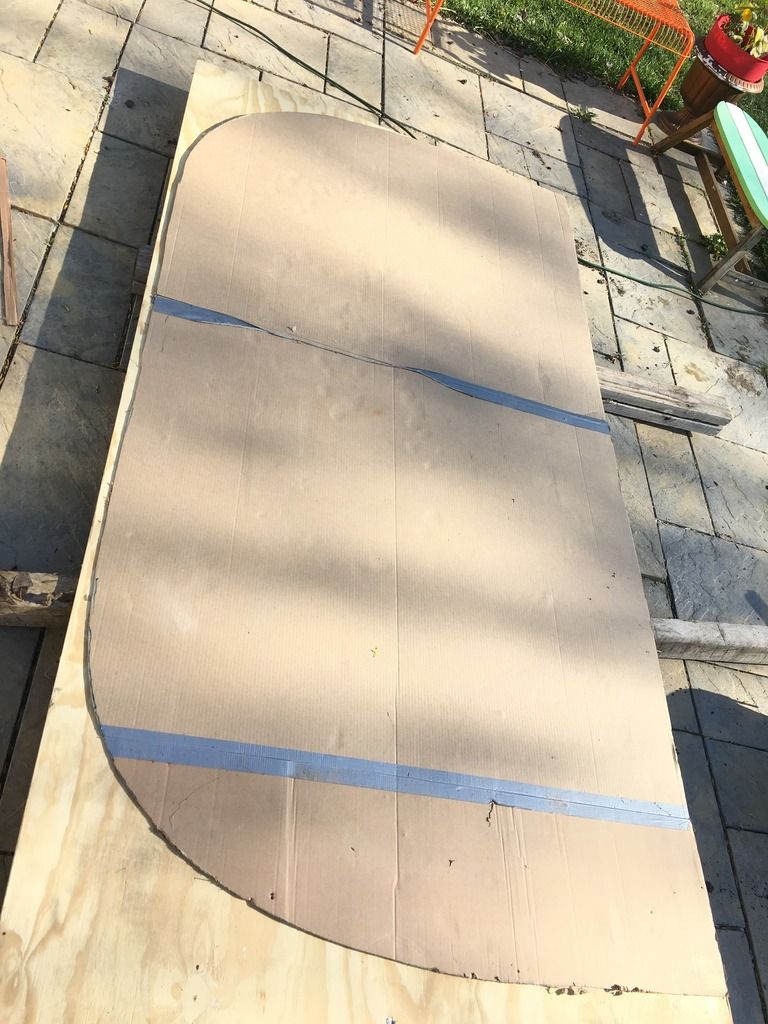
Cut it out with a jigsaw.
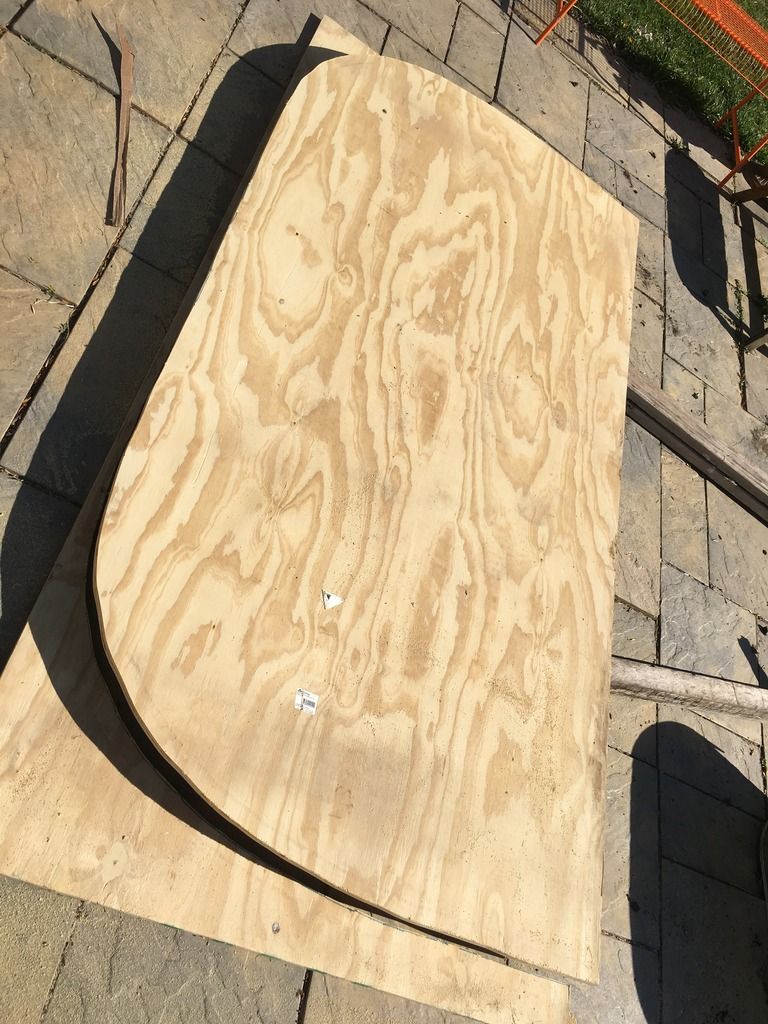
And seal it with some poly.
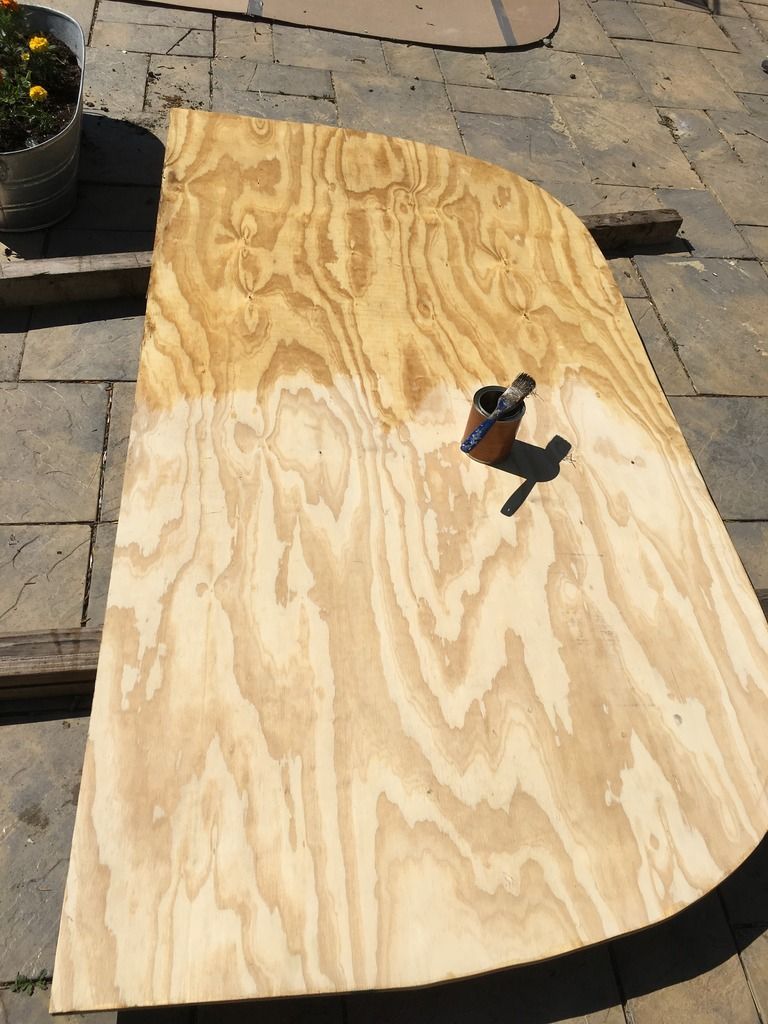
And set it aside while I take care of the next item...
I need to change out this original fanless vent with a new powered vent.
First I cleaned the roof with simple green.
Then center punched and drill off the rivet heads.
And pulled the vent assembly off by hand.
I've got to grind off the remainder of the rivets and the original sealant, but that's got to wait for later. I need the hole.
Eventually this fan will go in that hole.
I need the hole so I can put a board on the inside and then I used a load lock/ratchet strap to gently lift the rear of the Airstream shell to separate it enough to get the old floor out and new floor in.
Also to get the floor out I had to disassemble some of the other components..
The side trim.
And then the rear section of the belly pan "banana wraps"
Inside I used my grinder to cut these bolts in half.
For the floor to frame bolts, I bought a drill bit set that is designed to cut wood plugs, the 5/8" one worked perfect for getting around the elevator bolt heads.
I cut some notches out of the leading edge of the rear floor section and pried it free from the trailer frame.
I still couldn't get the sum'bish out so I cut it in half.
Tada!! the rear of the trailer frame and the black water (effluent) tank.
The tank was trashed already.
Cracked fitting for the exhaust pipe connection.
There is supposed to be a permanently affixed 'neck' on this hole to mate with the bottom of the toilet.
Onward and upward, out comes the black tankholding box (I don't know its real name)
There's a lot of detritus in there, I cleaned it all out.
Looks like a chunk of old barn wood.
I grabbed some large cardboard from work and taped it together.
Used the old floor section to make trace the shape onto it.
Cut out the template.
Test fit it
Trace the template back onto real wood 3/4" exterior rated subflooring.
Cut it out with a jigsaw.
And seal it with some poly.
And set it aside while I take care of the next item...
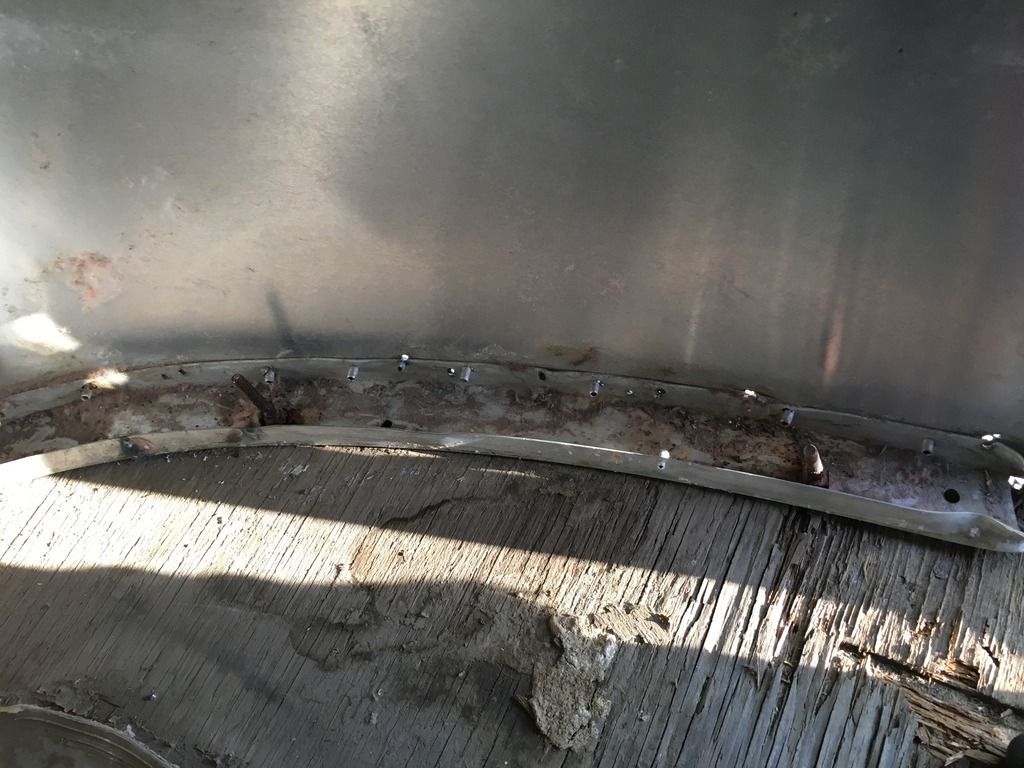
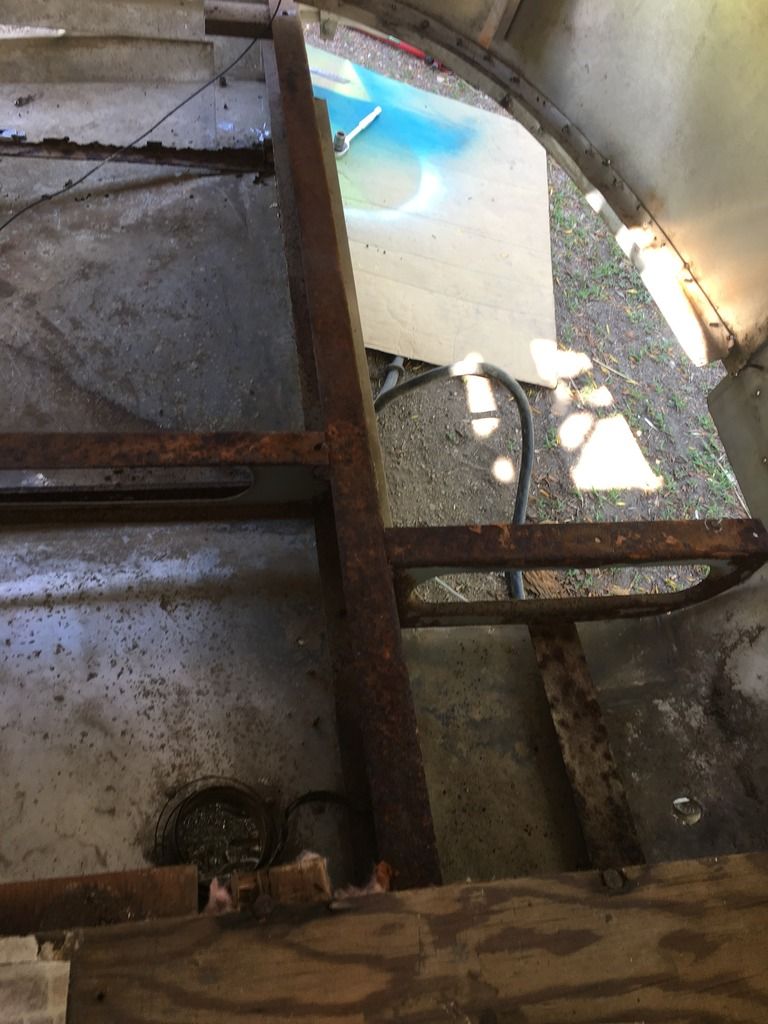
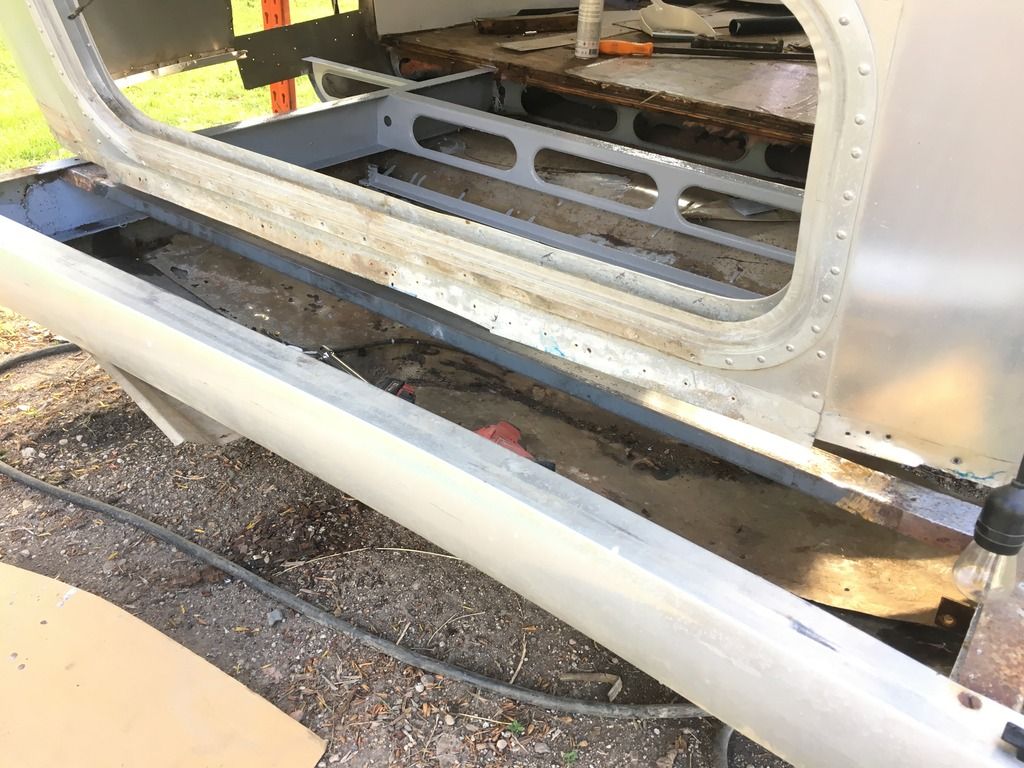
Before I can put the floor back in, I need to take care of this brace.
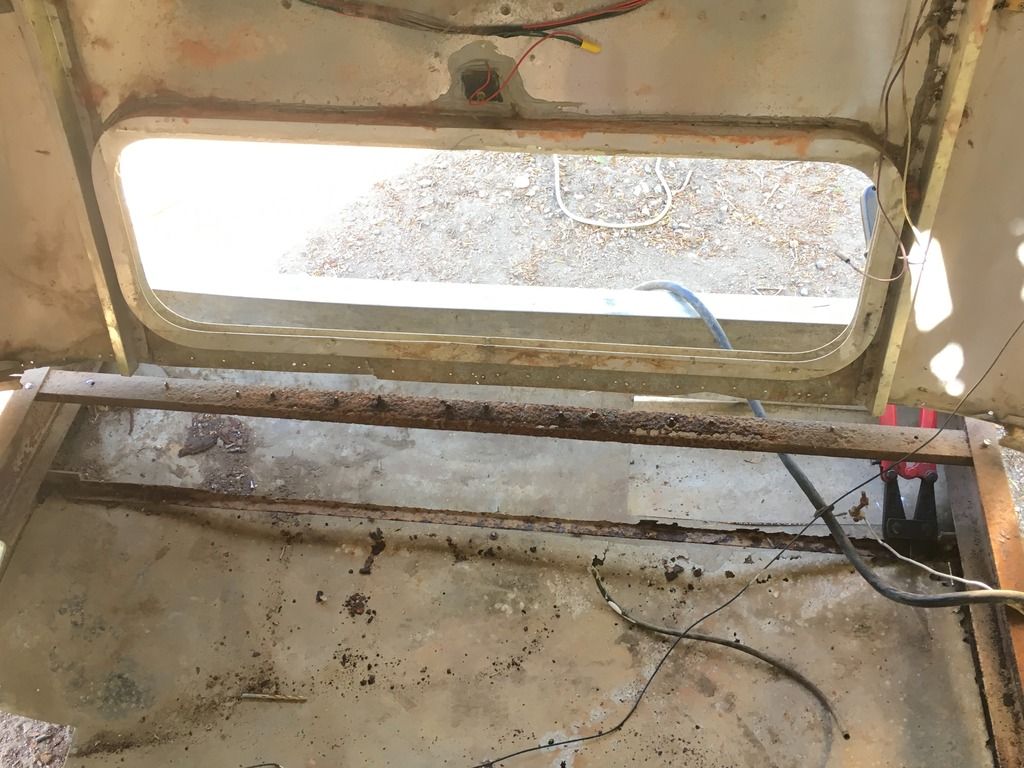
It must be Swiss; I'm replacing the top c-channel and the bottom angle iron braces under the rear window.
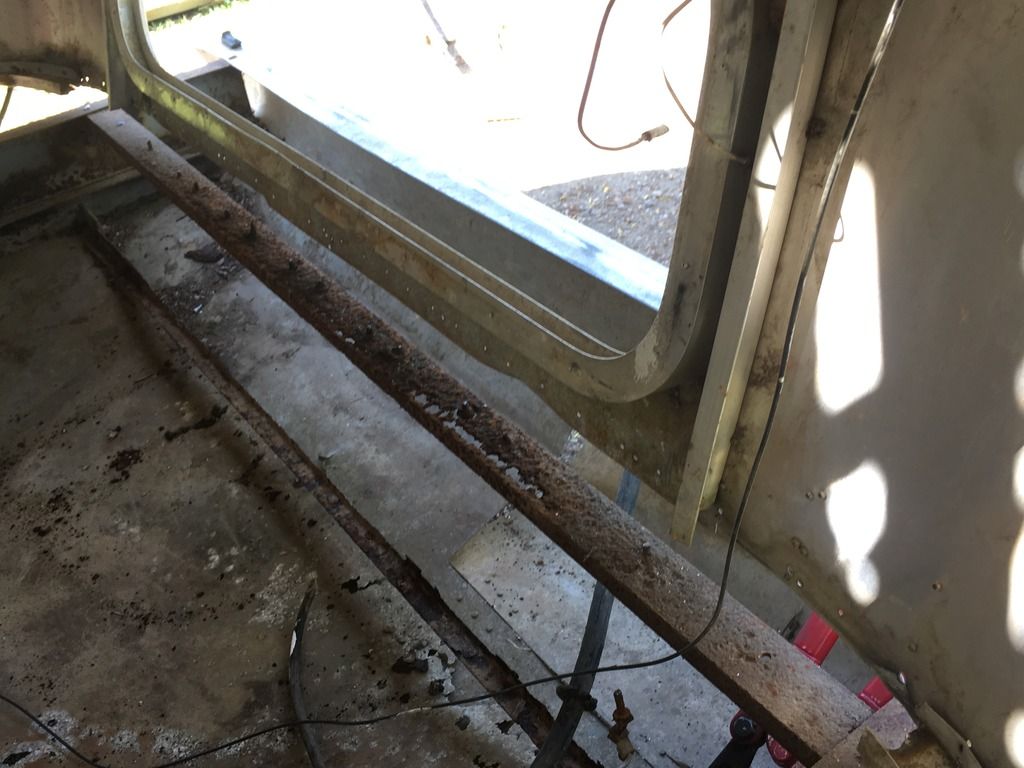
I cut out the top one, leaving some "stubs" to weld the new piece to.
The bottom one, I unbolted.
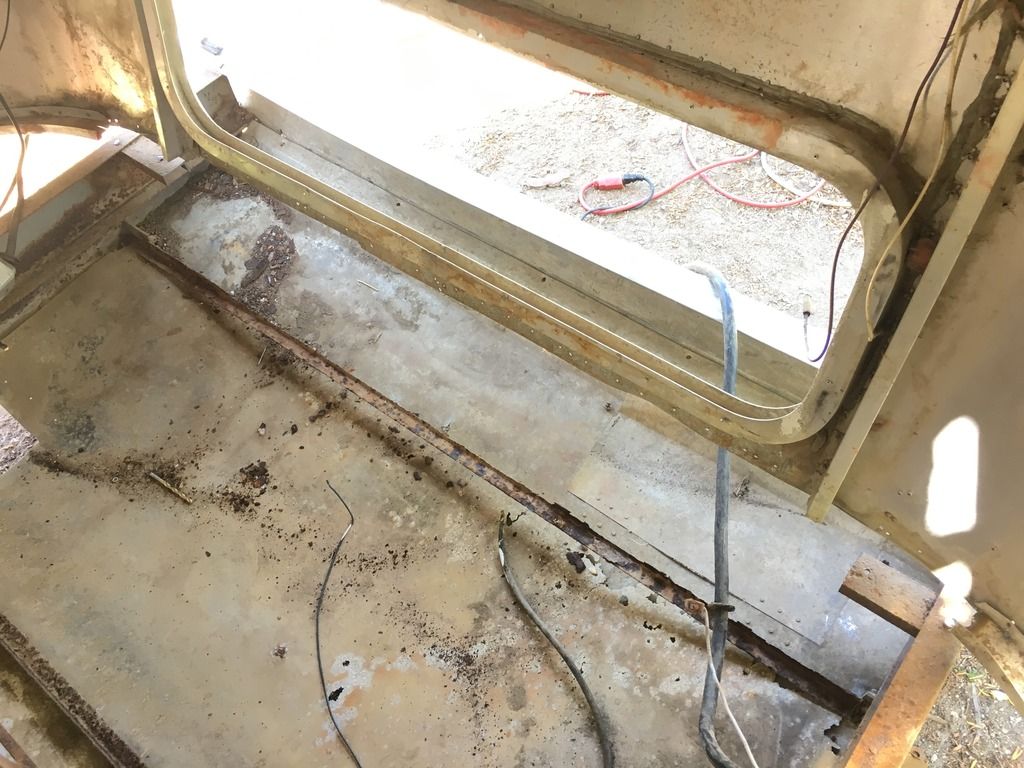
I also used a twisted wire wheel on my grinder and cleaned up the scale on the frame rails, then pretreated it in preparation for some rust encapsulator.
While I was at work, my wife and kids used paint brushes to apply the rust encapsulator, I can't remember what brand it was, but it wasn't POR15. I bought it at Napa, but Advanced Auto also has it.
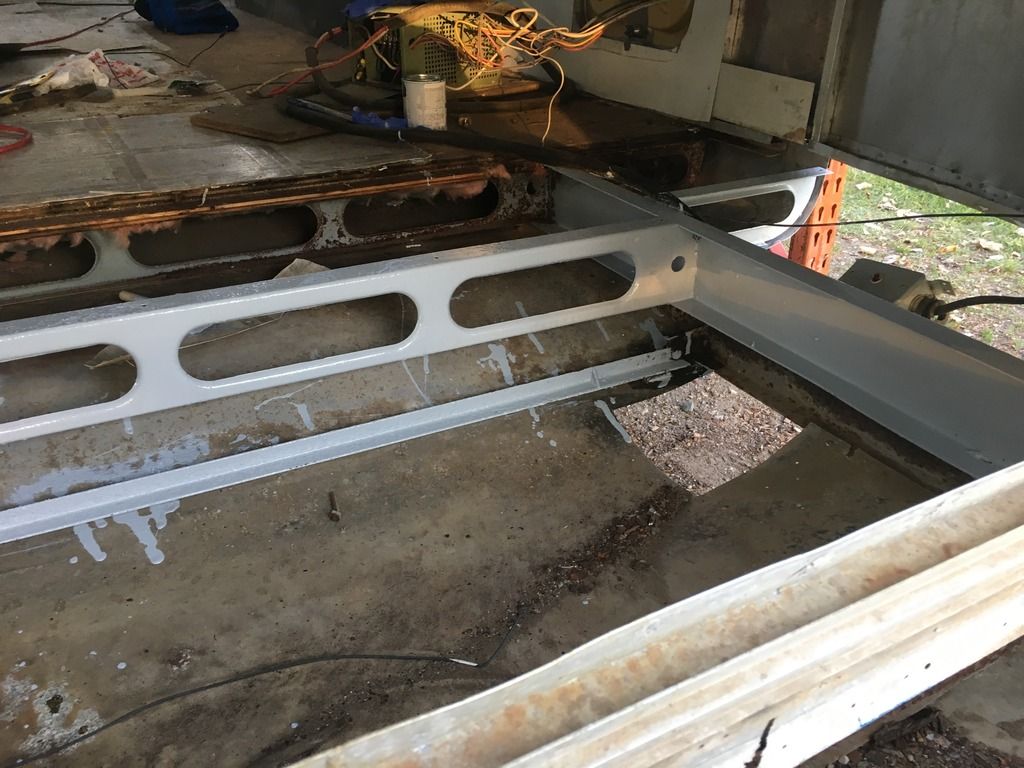
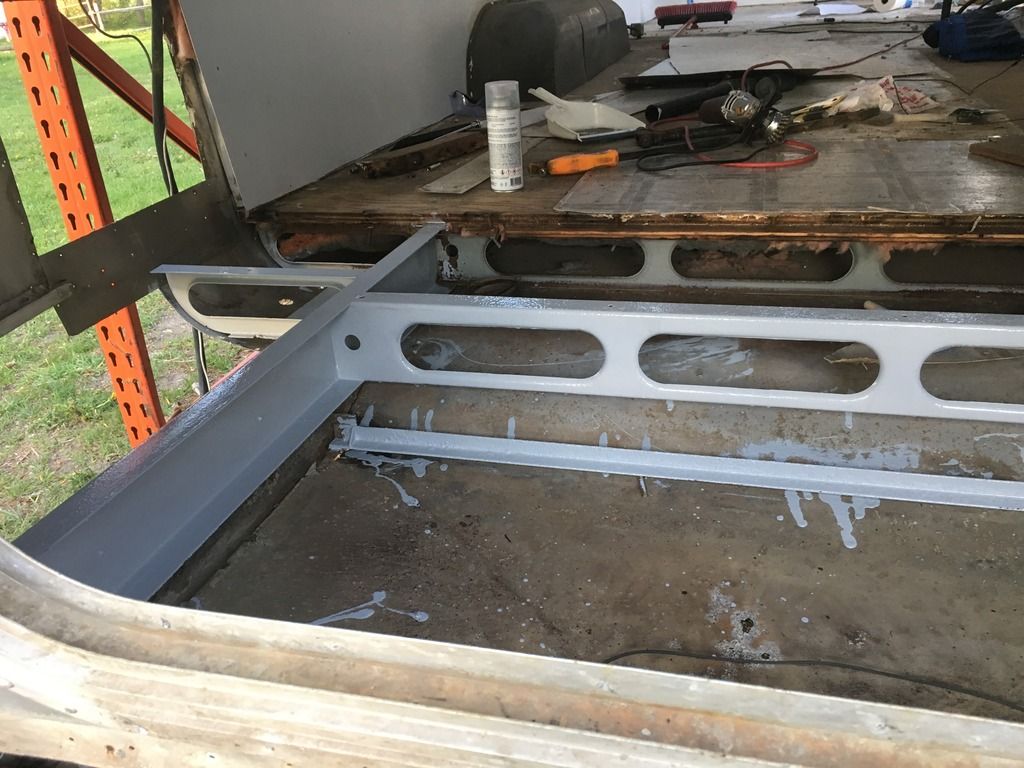
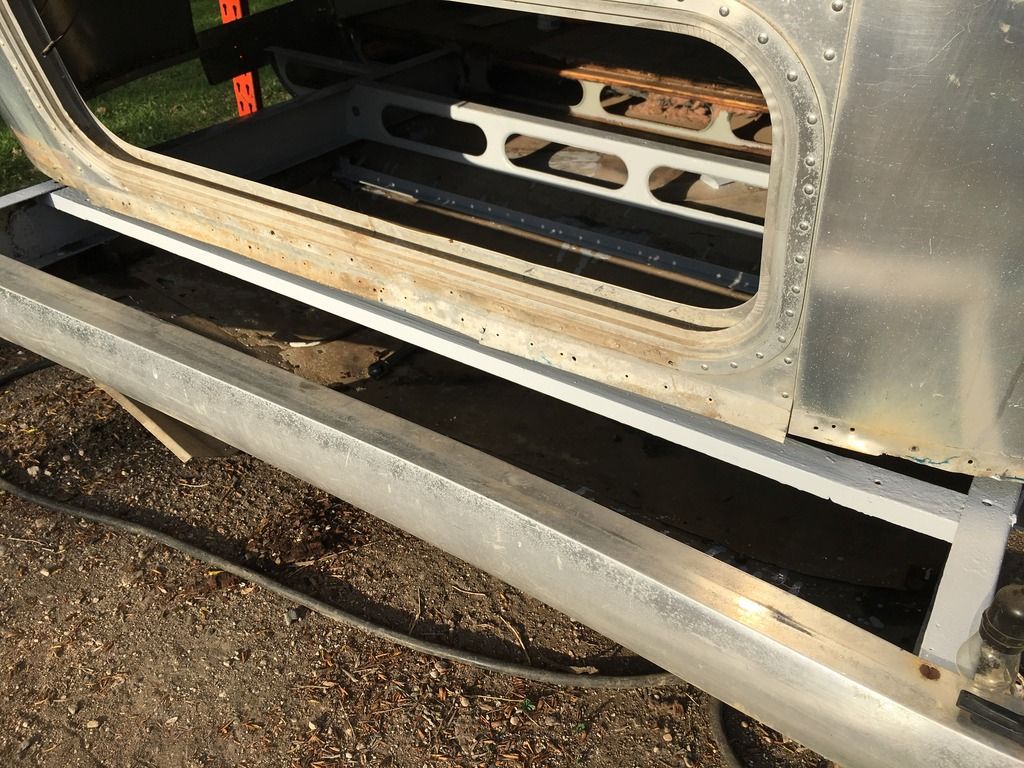
When I got home, I prepped the stubs to receive weld.

Then clamped in the new piece.

Weld, grind, and done!
My wife said she painted the POR onto the new piece while I was at work today. (5/12)
I have the other bolt in angle iron almost ready to be bolted back in.
I should be able to get the new floor slid in tonight and then let the shell back down on it so I can start bolting it back together. I've already picked up elevator bolts from the local hardware store. There are a few minor things that I need to take care of before I can button it up for good.
It must be Swiss; I'm replacing the top c-channel and the bottom angle iron braces under the rear window.
I cut out the top one, leaving some "stubs" to weld the new piece to.
The bottom one, I unbolted.
I also used a twisted wire wheel on my grinder and cleaned up the scale on the frame rails, then pretreated it in preparation for some rust encapsulator.
While I was at work, my wife and kids used paint brushes to apply the rust encapsulator, I can't remember what brand it was, but it wasn't POR15. I bought it at Napa, but Advanced Auto also has it.
When I got home, I prepped the stubs to receive weld.
Then clamped in the new piece.
Weld, grind, and done!
My wife said she painted the POR onto the new piece while I was at work today. (5/12)
I have the other bolt in angle iron almost ready to be bolted back in.
I should be able to get the new floor slid in tonight and then let the shell back down on it so I can start bolting it back together. I've already picked up elevator bolts from the local hardware store. There are a few minor things that I need to take care of before I can button it up for good.
Fst Blk
Well-Known Member
Wow. That's a lot of work. Nice job getting the family involved.
Sent from my iPhone using Tapatalk
Sent from my iPhone using Tapatalk
3175375
Well-Known Member
Great work!
tarafied1
Well-Known Member
WOW is right!!! Impressive amount of work going into saving that thing!Wow. That's a lot of work. Nice job getting the family involved.
Sent from my iPhone using Tapatalk
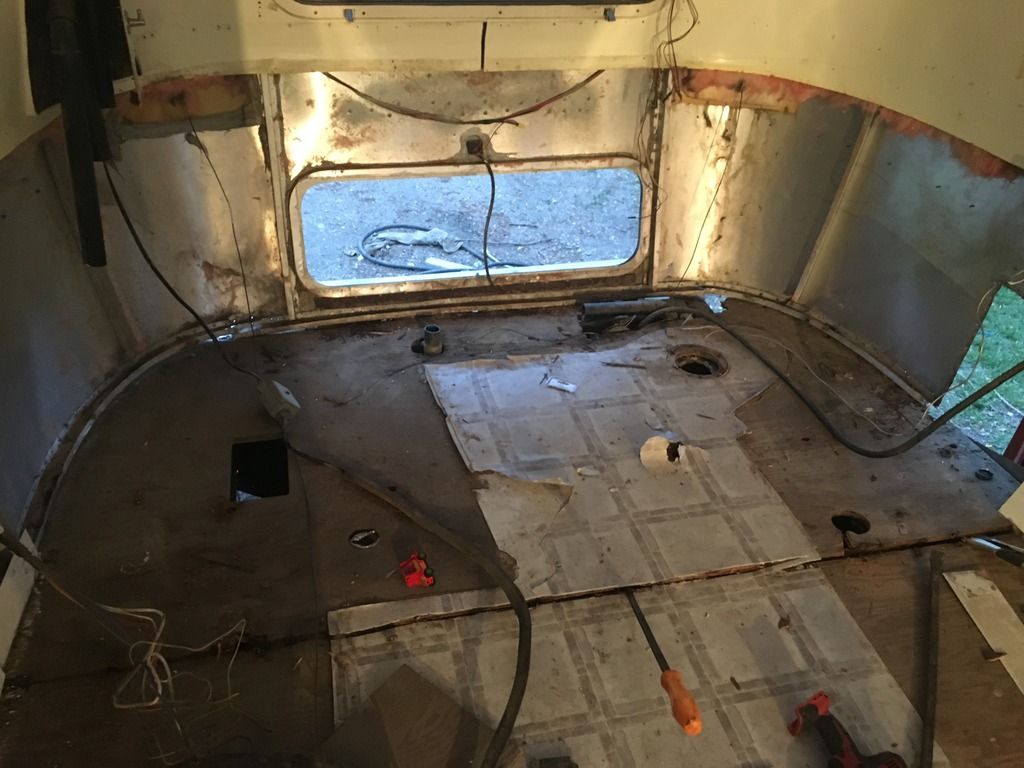
As promised, when I got home, the new welded in brace had been coated and was ready to receive.
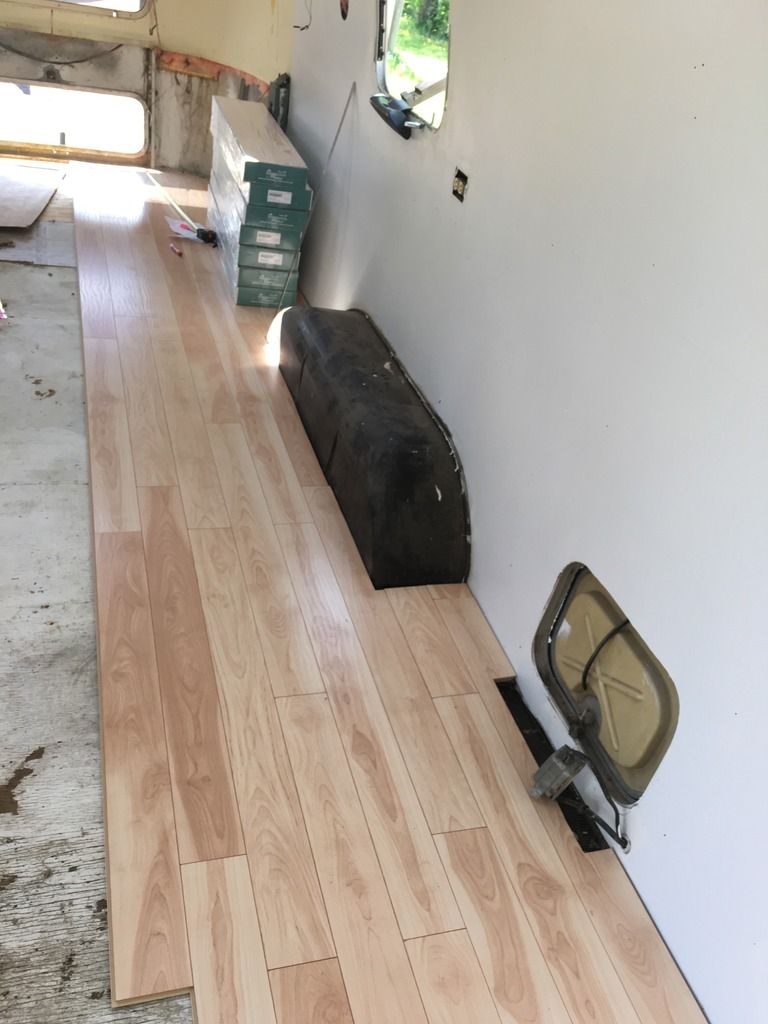
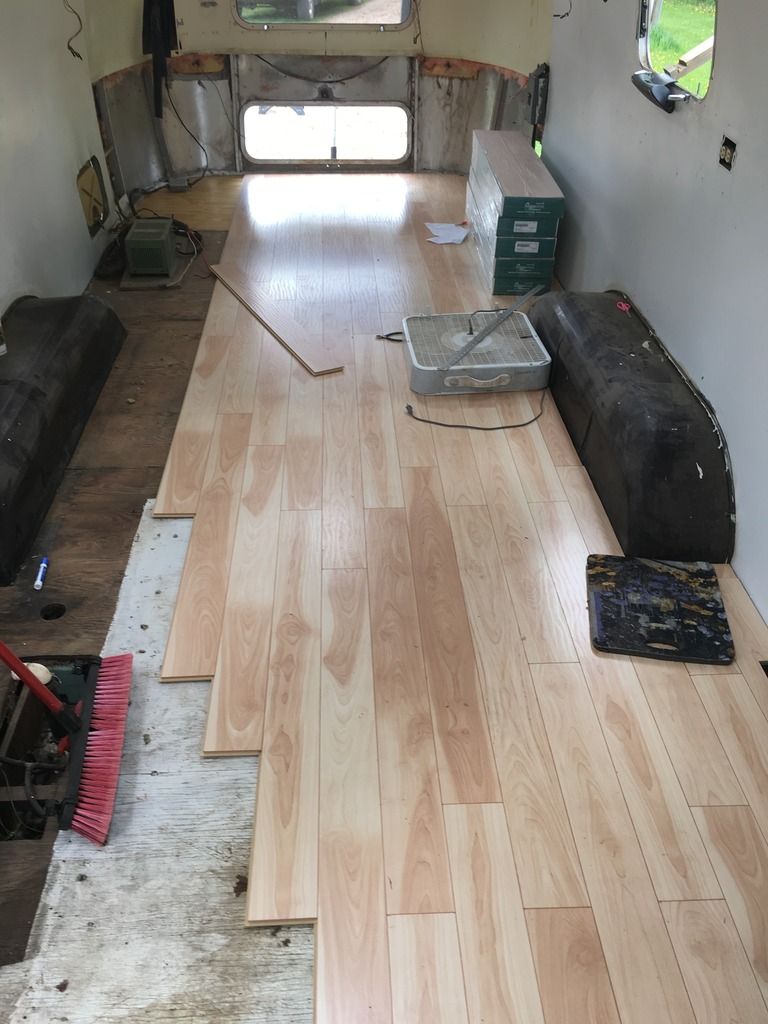
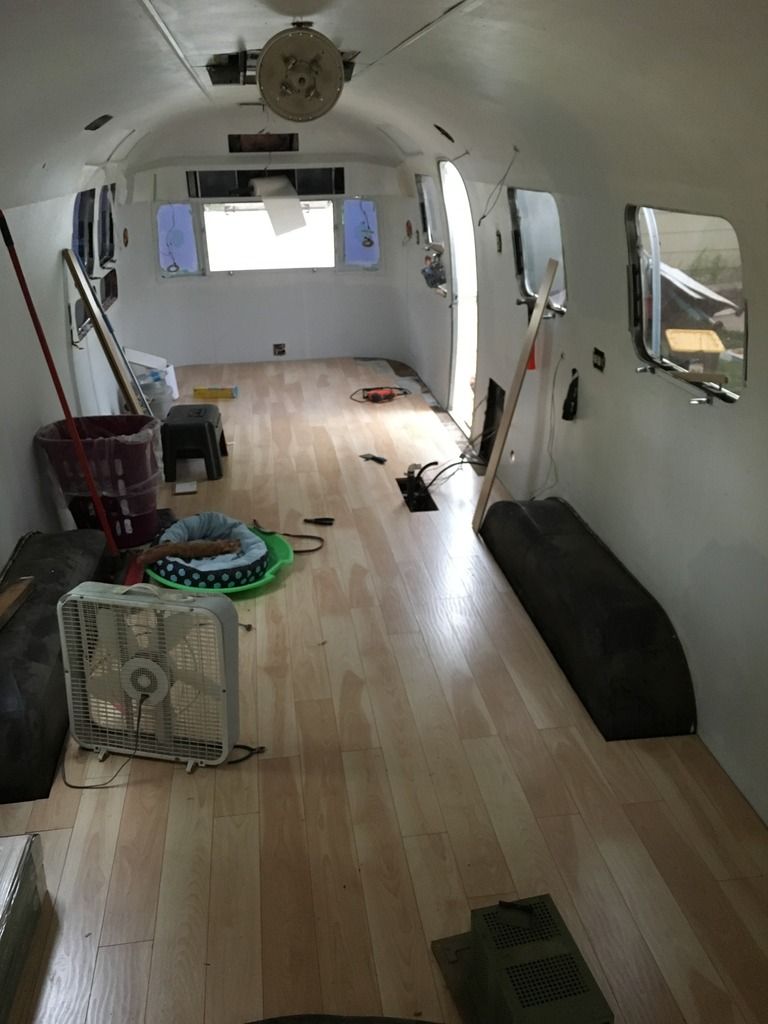
I wedged in the new piece of flooring.
And here it is, almost fully back into place.
it took some wiggling and drilling, this is the new floor piece in its final resting place. In this pic there are only elevator bolts in the stringers and under the wall channels through the floor board.

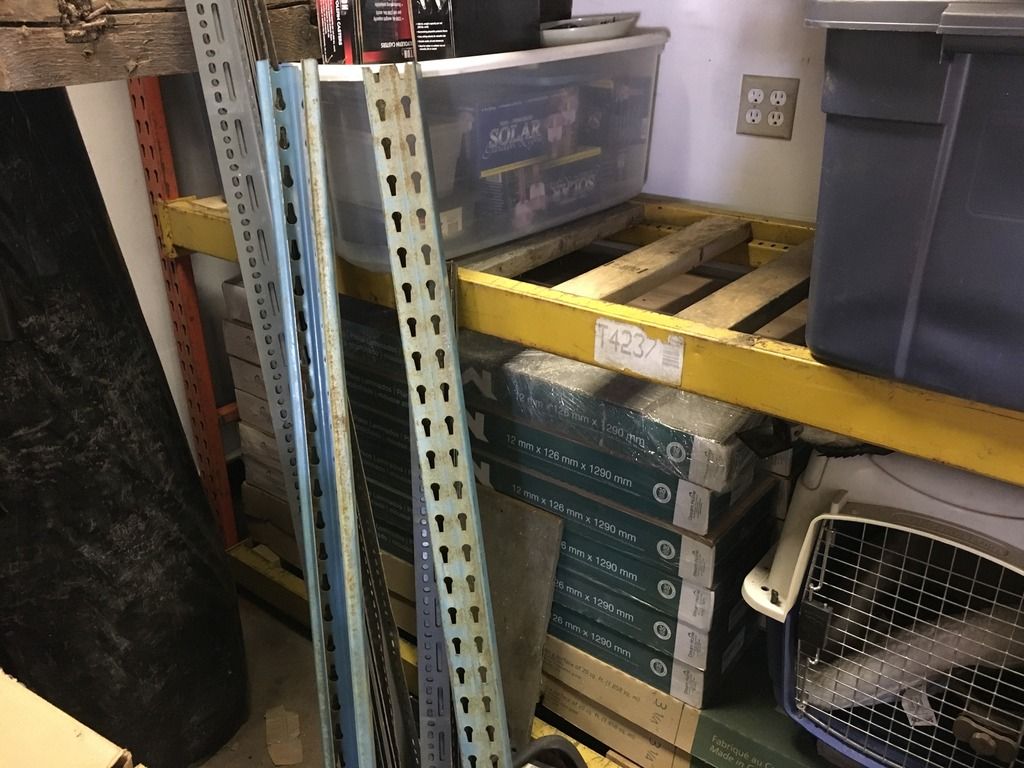
We bought the new laminate flooring last year, in July I think. Lumber Liquidators was running a sale and this was a clearance color, we bought all they had and its been in storage in my shop ever since.
Peeking through the rear hatch door.
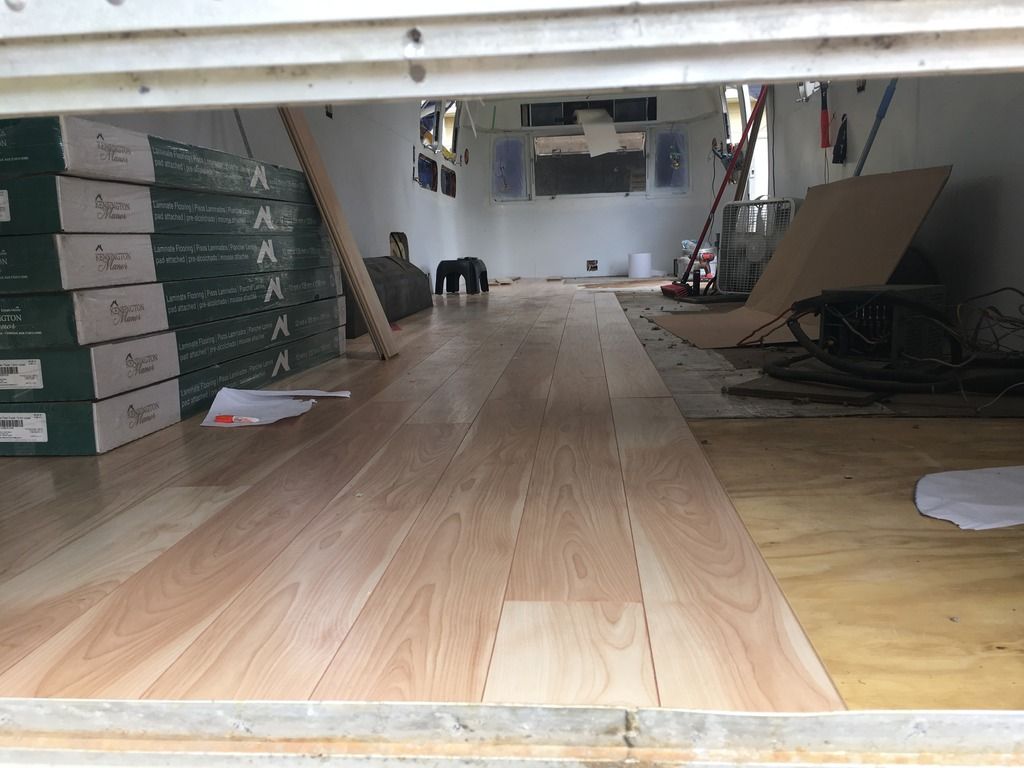
Things were steaming right along.
The rear was almost done.
Up front was looking good.
We trimmed around the fresh water tank connections because even if we have to replace that tank, we will use the same location. The gas lines were pulled out the bottom; if we need them again in the future, I'd have to run new hose/line anyhow so may as well cover it all at least for now.
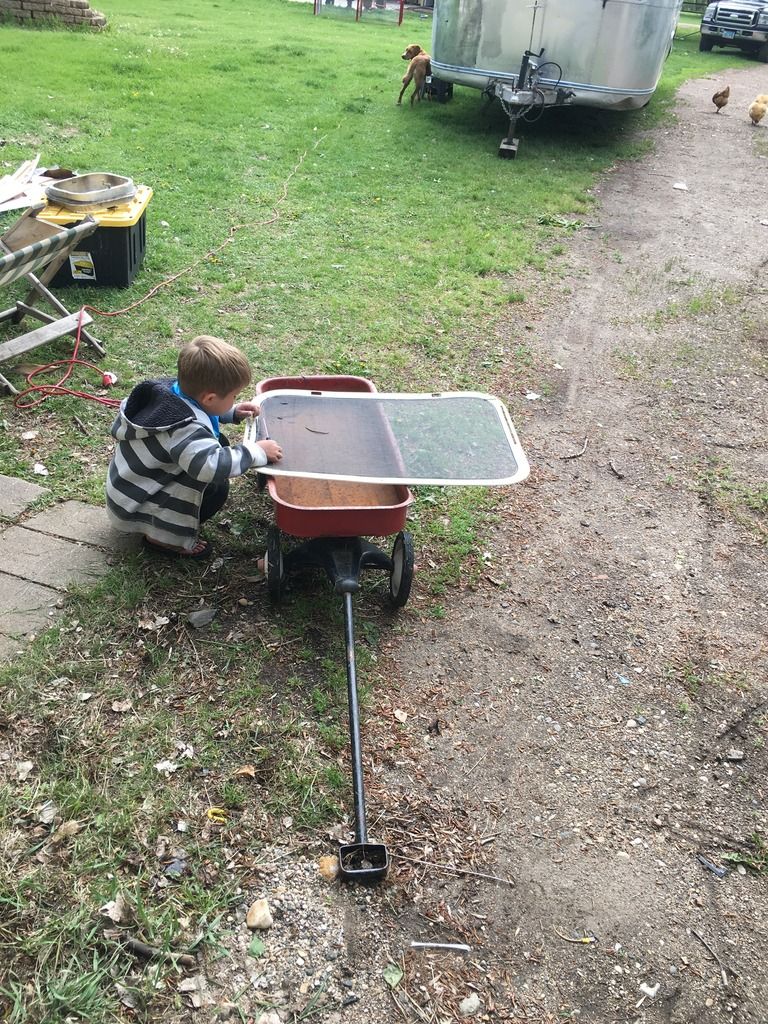
When I was getting down to some of the last few pieces my son came over with proper safety gear and vacuumed up my dirt pile.
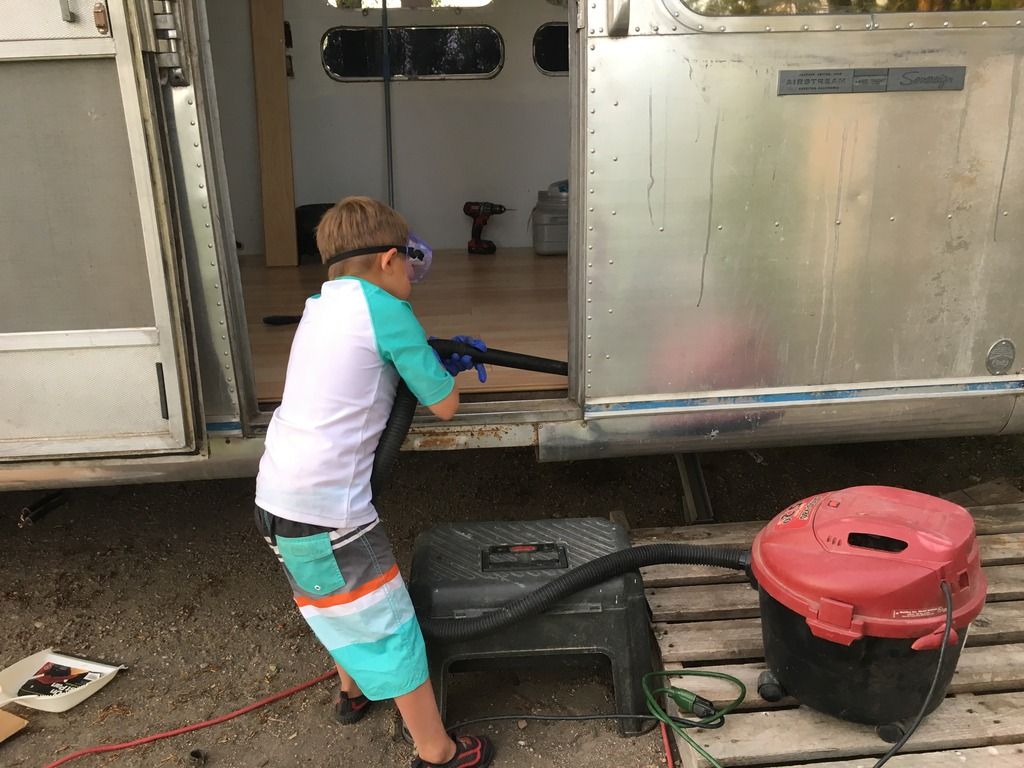
And this is where I called it quits for the night. I need about 6 more custom trimmed pieces up in the curbside corner and then the floor is done.
Then I get to fix the outer fender wells, then insulate them and install the new inner fenderwells (after I buy/build them) and get back to work replacing the rear most ceiling fan/vent, and start stripping the weather strip off the windows and access doors. Also I need to order some "Telescoping Access Door Locks" or "Baggage Door Pop Locks" as my trailer has NONE and I need (3). Battery door, Fridge door, rear access door. And I need to get the main walk door re-keyed or to have a key made for it.
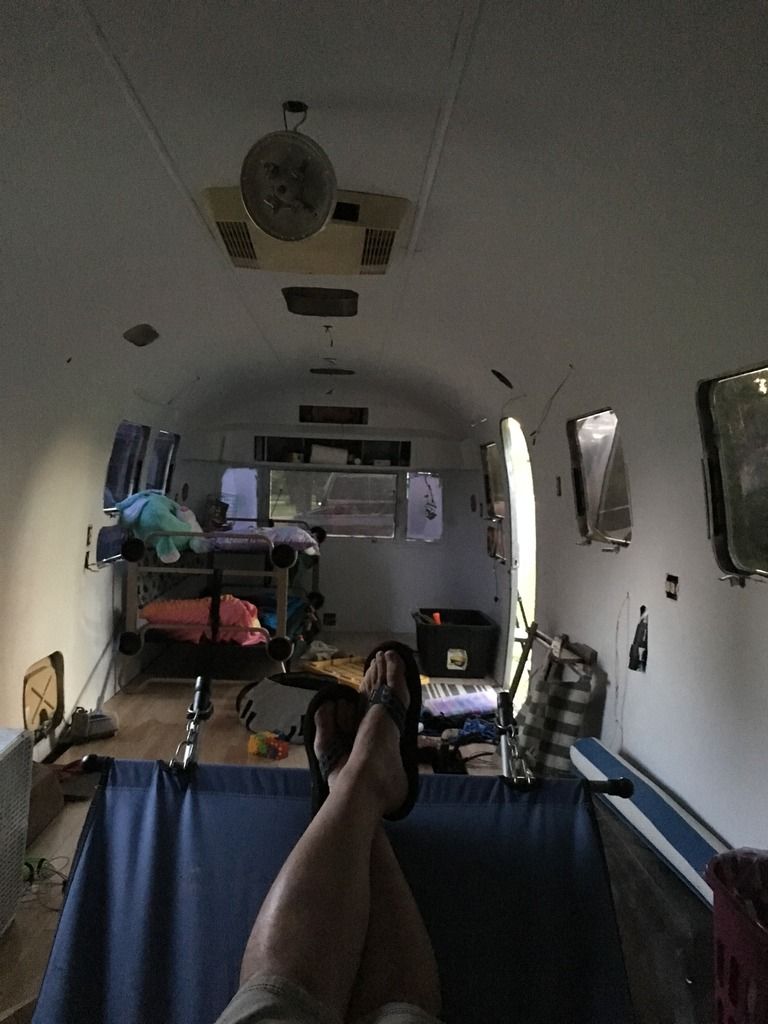
I really need to get my interior window frames fixed next so I can reinstall the window rods. I'm sure my neighbors loved the redneck window props when their kid had his graduation party yesterday.
I wedged in the new piece of flooring.
And here it is, almost fully back into place.
it took some wiggling and drilling, this is the new floor piece in its final resting place. In this pic there are only elevator bolts in the stringers and under the wall channels through the floor board.
We bought the new laminate flooring last year, in July I think. Lumber Liquidators was running a sale and this was a clearance color, we bought all they had and its been in storage in my shop ever since.
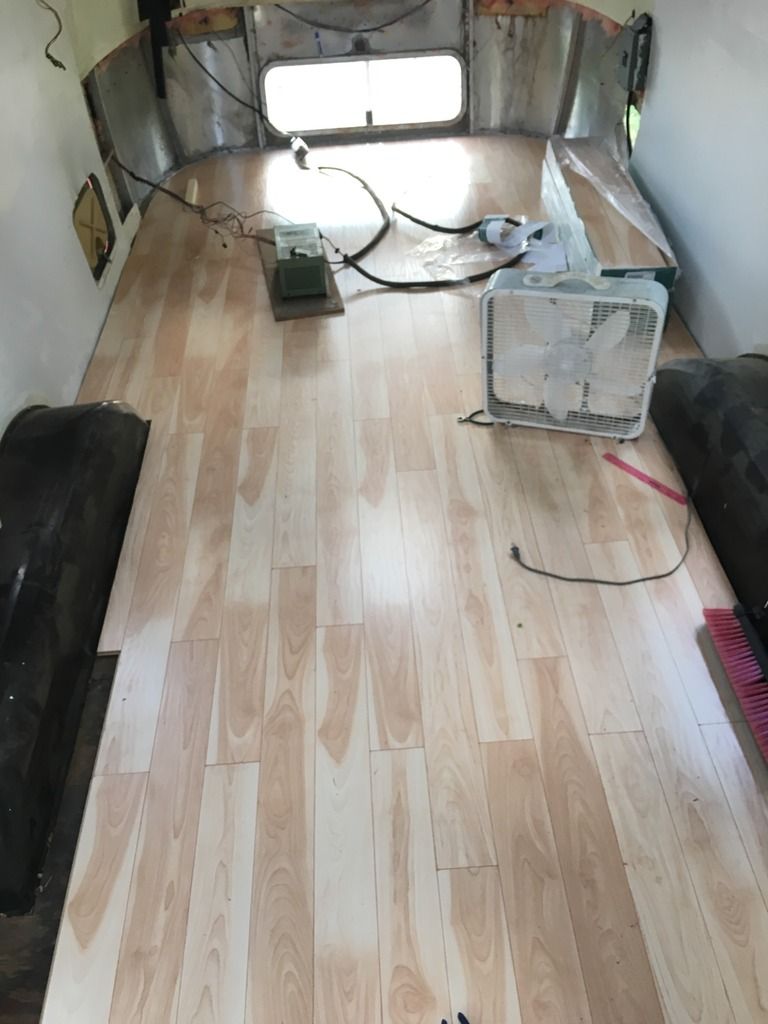
Peeking through the rear hatch door.
Things were steaming right along.
The rear was almost done.
Up front was looking good.
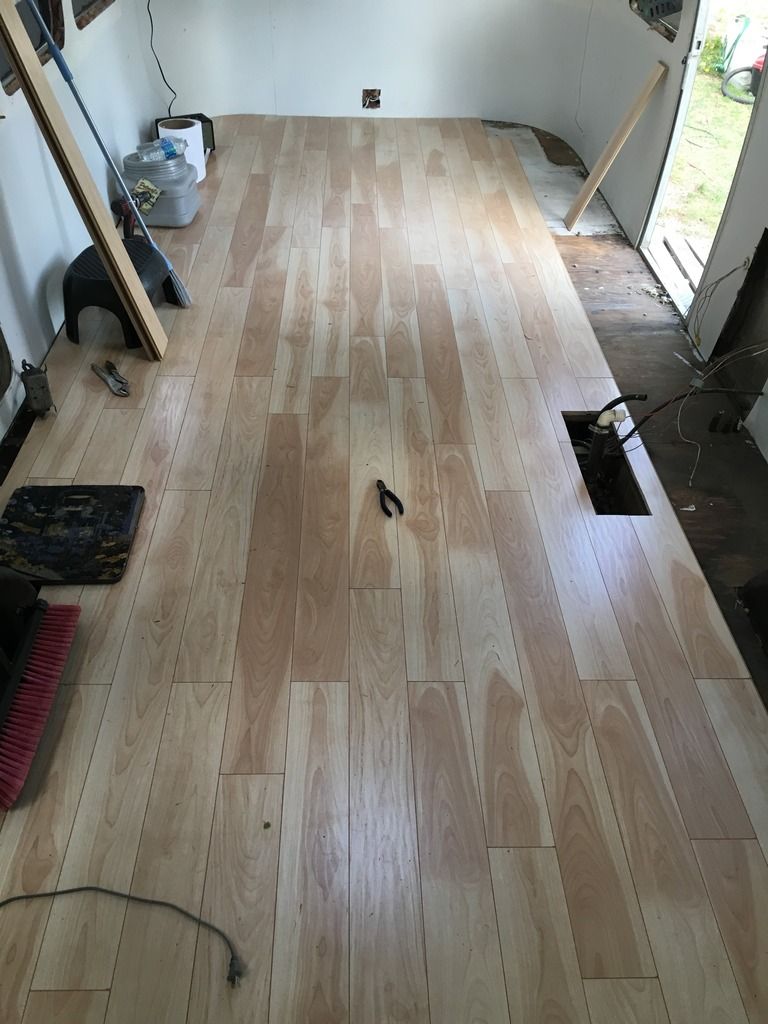
We trimmed around the fresh water tank connections because even if we have to replace that tank, we will use the same location. The gas lines were pulled out the bottom; if we need them again in the future, I'd have to run new hose/line anyhow so may as well cover it all at least for now.
When I was getting down to some of the last few pieces my son came over with proper safety gear and vacuumed up my dirt pile.
And this is where I called it quits for the night. I need about 6 more custom trimmed pieces up in the curbside corner and then the floor is done.
Then I get to fix the outer fender wells, then insulate them and install the new inner fenderwells (after I buy/build them) and get back to work replacing the rear most ceiling fan/vent, and start stripping the weather strip off the windows and access doors. Also I need to order some "Telescoping Access Door Locks" or "Baggage Door Pop Locks" as my trailer has NONE and I need (3). Battery door, Fridge door, rear access door. And I need to get the main walk door re-keyed or to have a key made for it.
I really need to get my interior window frames fixed next so I can reinstall the window rods. I'm sure my neighbors loved the redneck window props when their kid had his graduation party yesterday.
3175375
Well-Known Member
You are a Gift from God. Keep at your talent. We can all learn from it
3175375, I don't know about that. I think I just have a LOT of pent up automotive frustration that needs working out. And luckily this things needs a lot of love.
This is just labor that I hadn't found time to do previously.. work, wife, kids, life... no fun time.
The trailer was bought for a *really* good price and is well worth putting the effort into.
Don't tell my wife, but I think once this big one is done (done enough), I'll continue shopping for a smaller one, something like a 19fter that can be pulled behind a Scout II.
Most of the things that I am installing now have been sitting on a shelf for a year or longer.
The flooring since last Summer.
The chunk of subfloor since last Fall.
The window caulk/sealant and some of the weather stripping since August 2015.
That roof vent, some time late last summer/early fall.
This week I need to get that new vent installed, we are expecting rain/storms.
I think I'm going to put it back into the barn so I can pull the windows and strip their weather seals without worry of getting the interior wet.
And I need to figure out the best way to strip the aluminum interior window frames, currently they are painted, my wife said she wants them 'natural finish'
My buddy has a tumbler for his ammo casings, he said I should drop off my aluminum interior window handles and he'd clean them up for me.
And its about time to order some exterior access door locks as well as some .032 aluminum sheeting so I can make plugs/patches for the antenna holes. (after I remove the antennas)
I haven't been slacking, just failing to update.
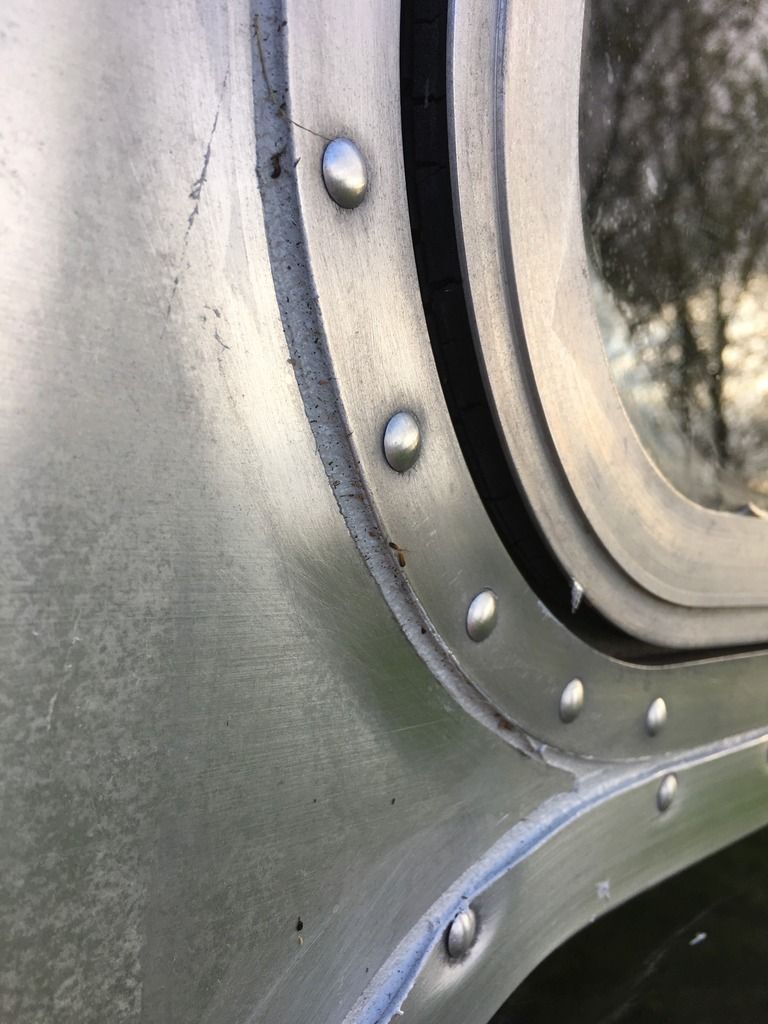
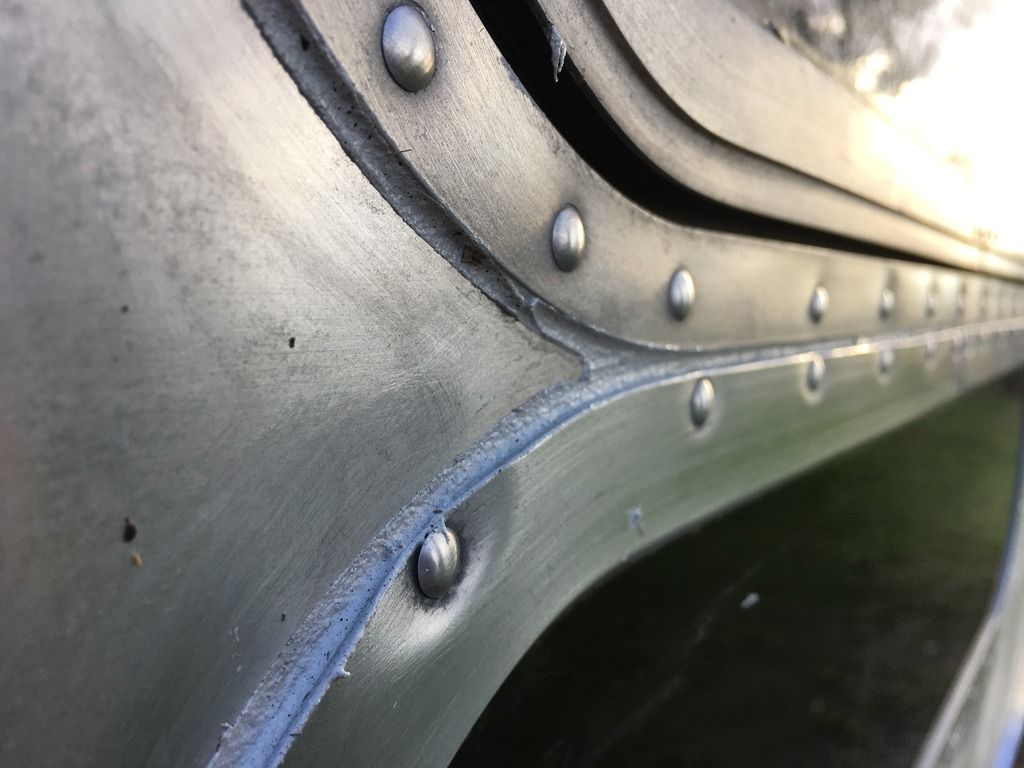
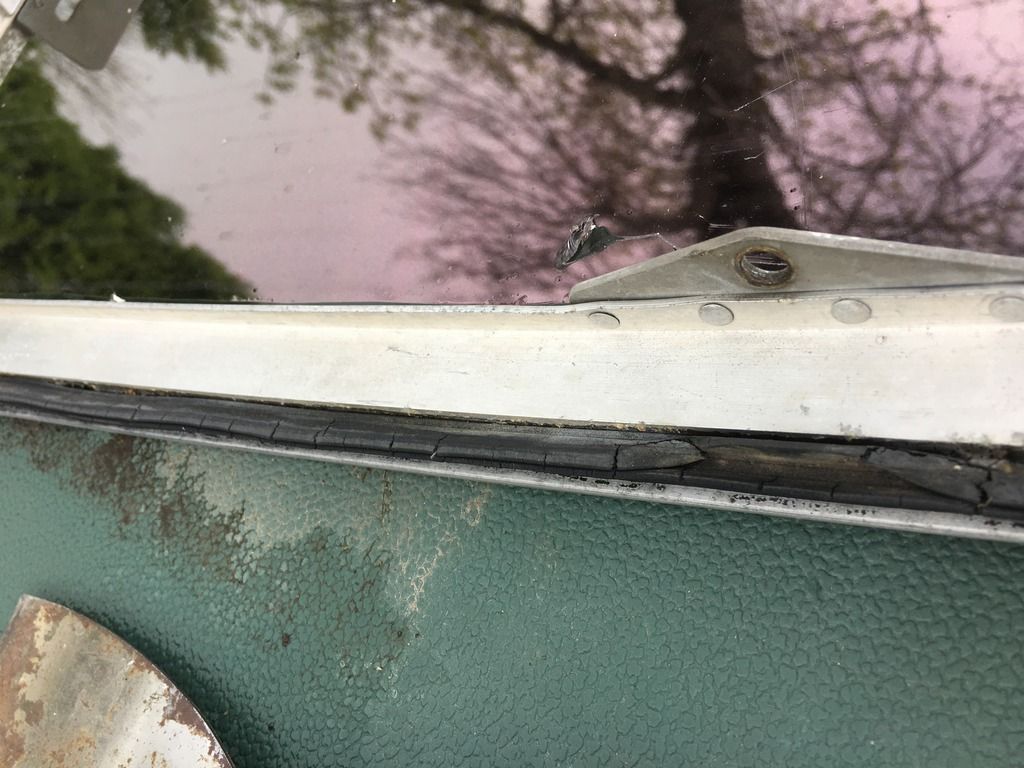
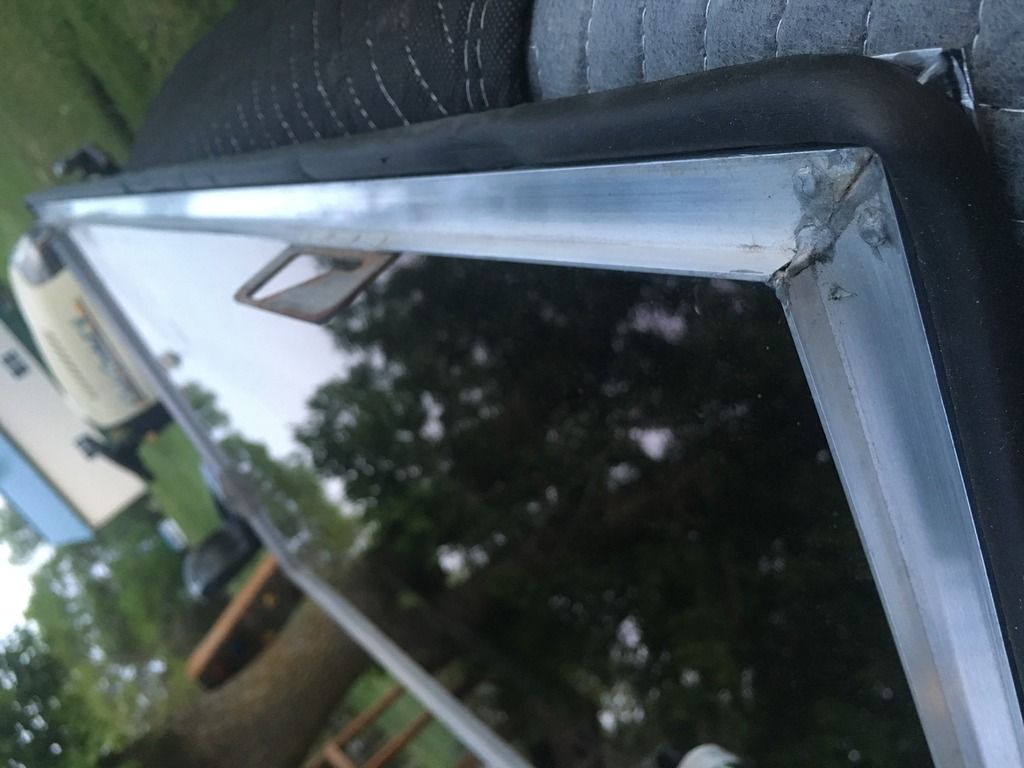
I started pulling access doors and windows.
This is a window, but it is an example of the condition of most window frame weatherstrip.
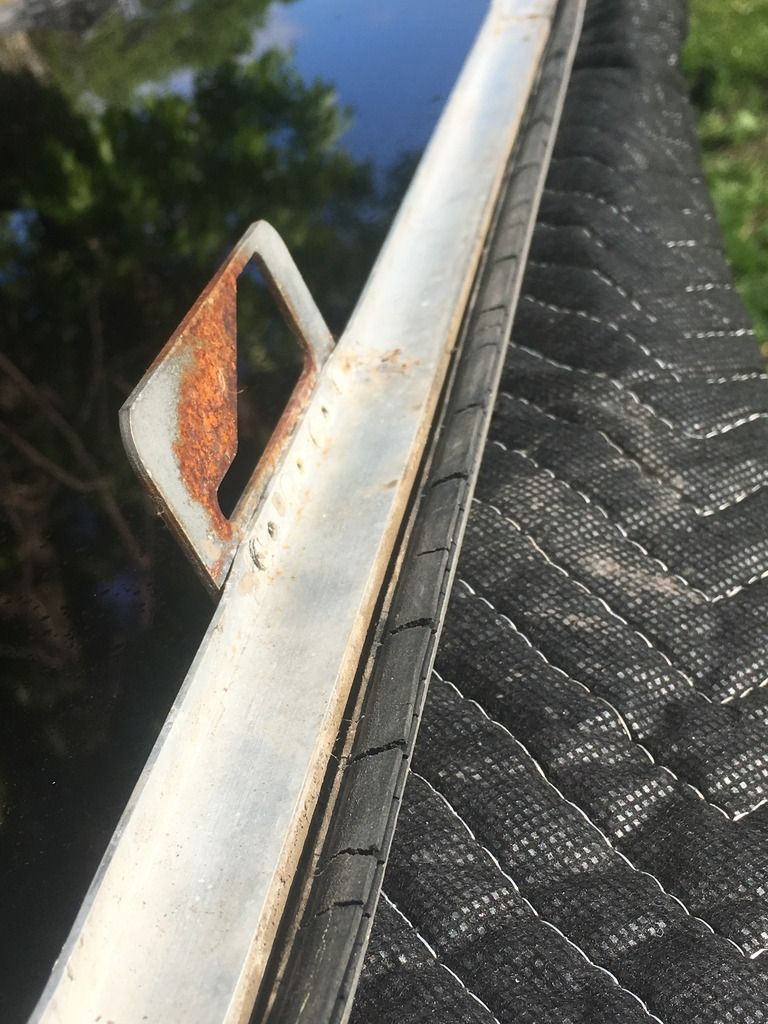
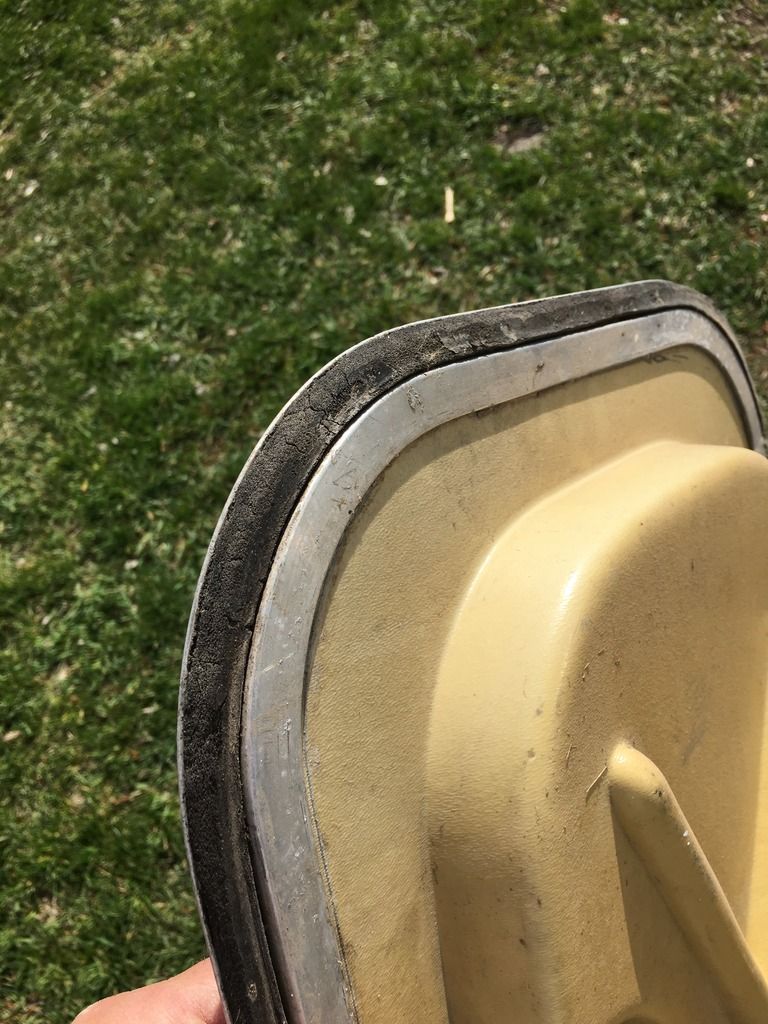
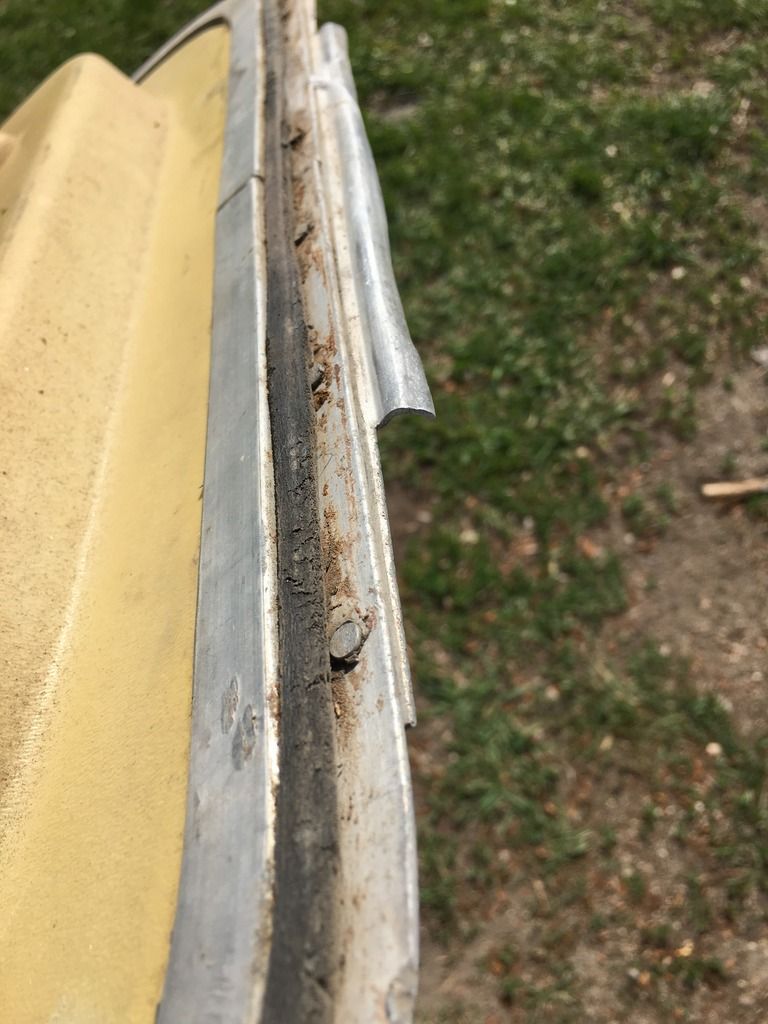
starting with the rear access door since it was directly related to my water leakage problem.
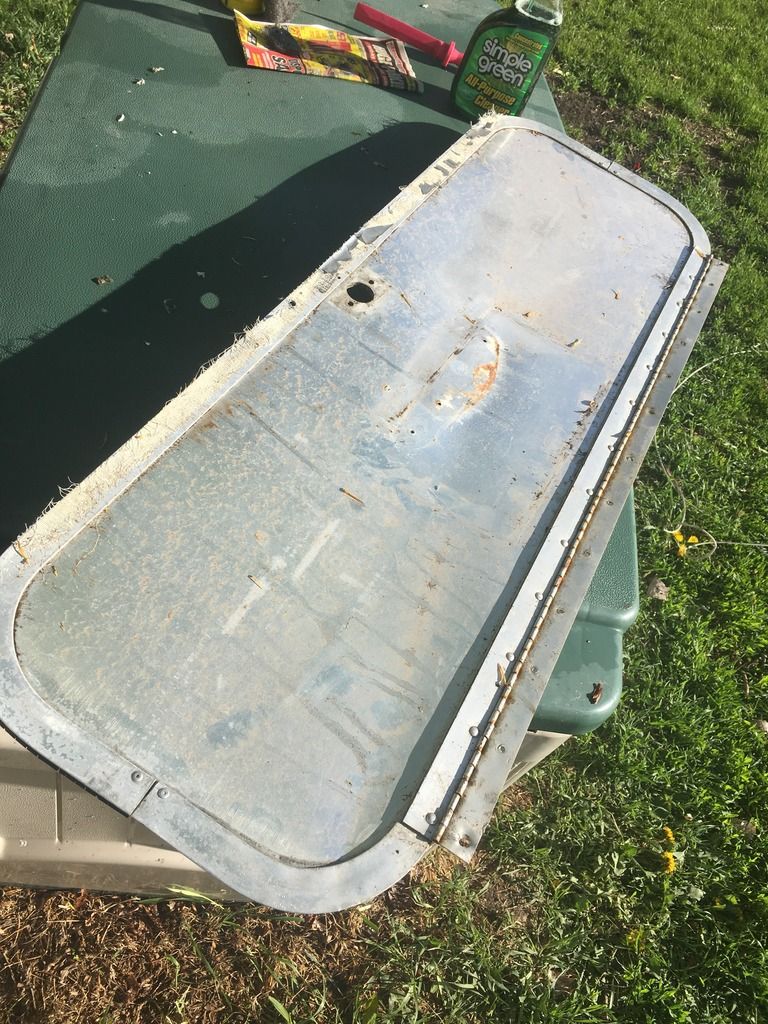
Scrubbed and stripped
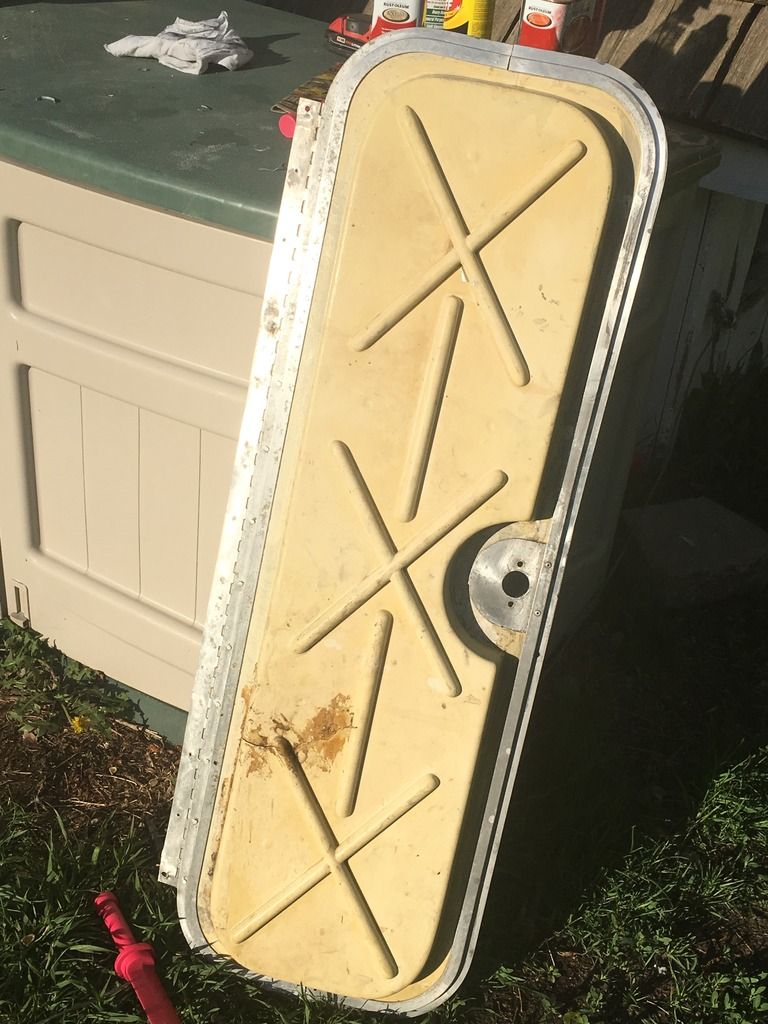
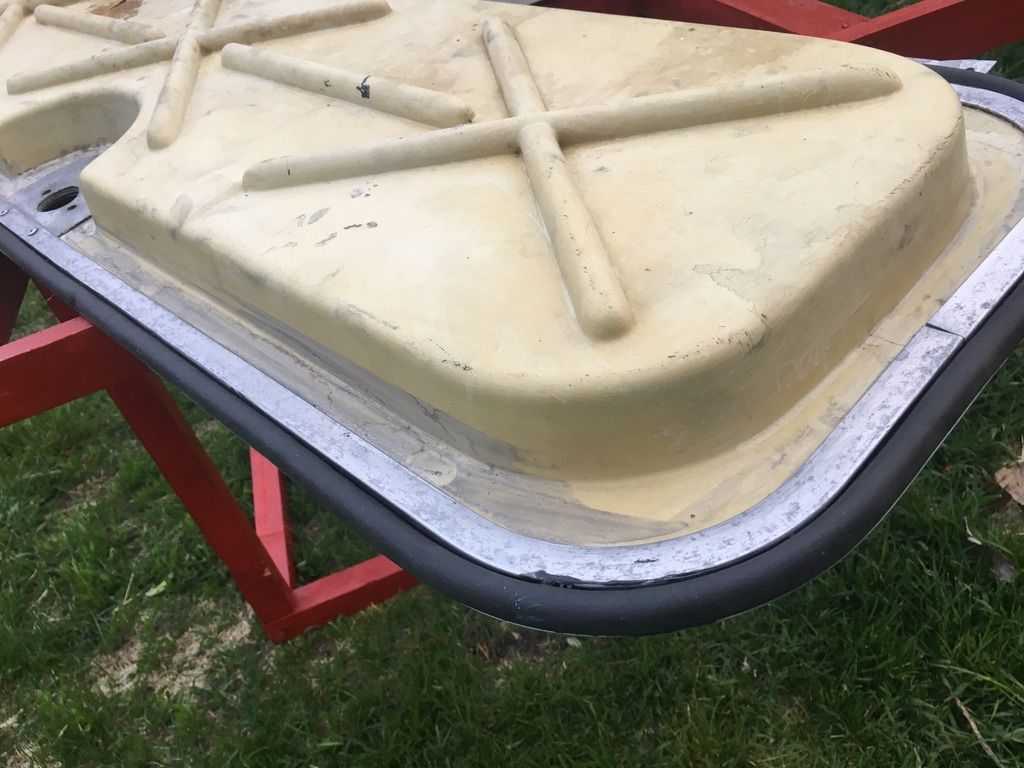
And then the new gasket installed.
After the rear access panel, I moved to the next biggest items, the back window.

The front window
I had ordered (3) matching pop locks for the access doors so they all use the same key.

For the first time, I can latch and lock the rear access hatch door.
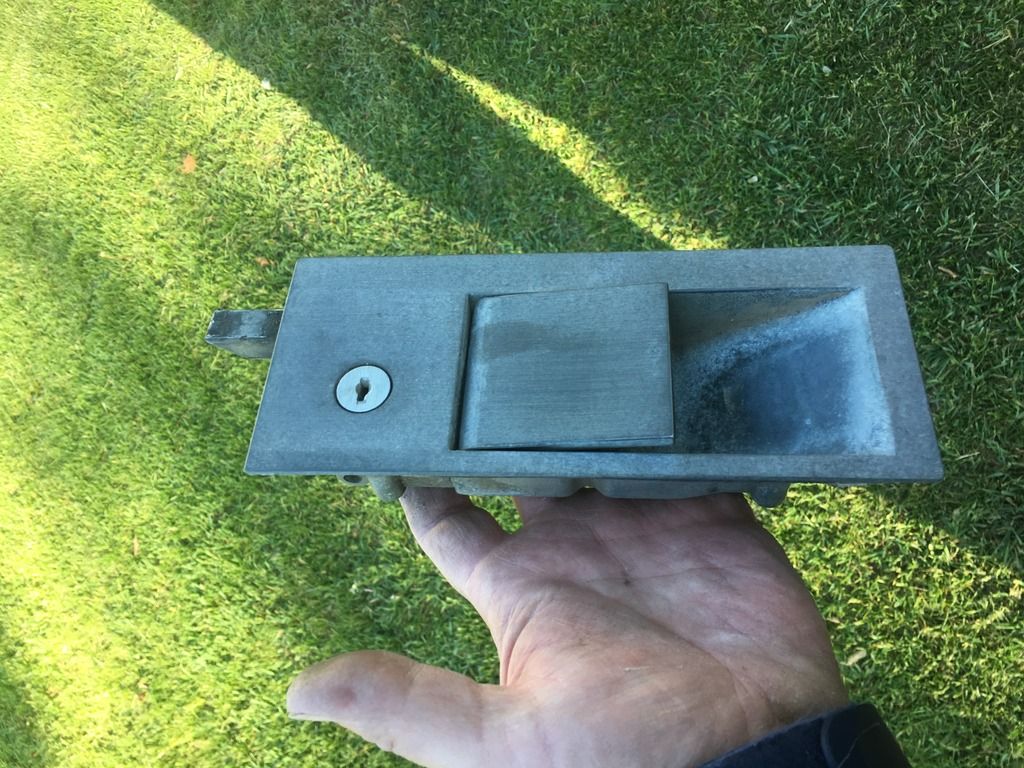
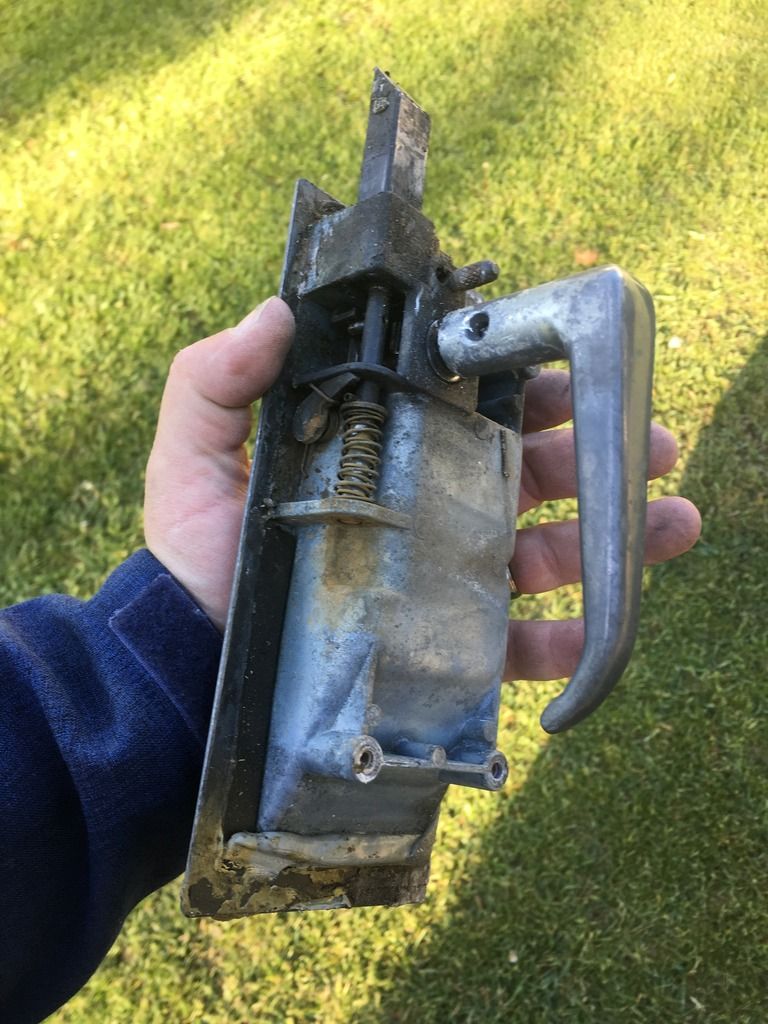
I also popped the walk door off and took the lock/latch out, then dropped it off with a friend of mine that works at a local lock shop, she made me new keys from an impression and since I'm such a nice person, she only charged me for (3) keys.
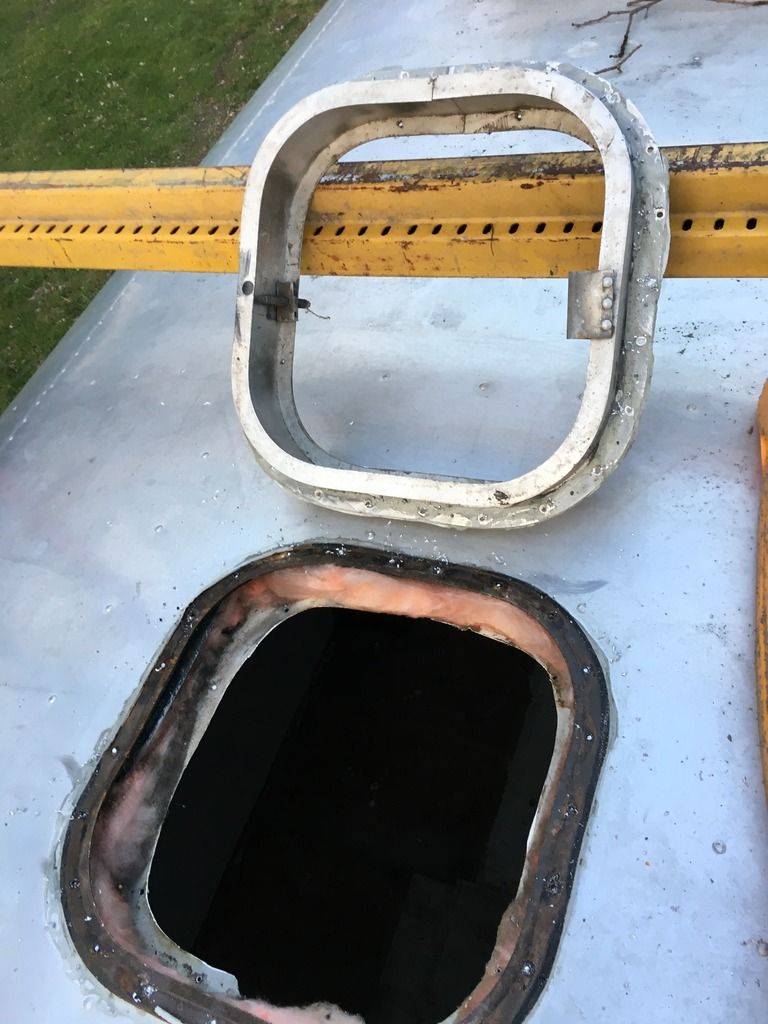
I finally cut aluminum and installed the ceiling fan.
I put screws in the holes after this pic.
I gave my boy a job to remove the screen window material from the inner window frames.
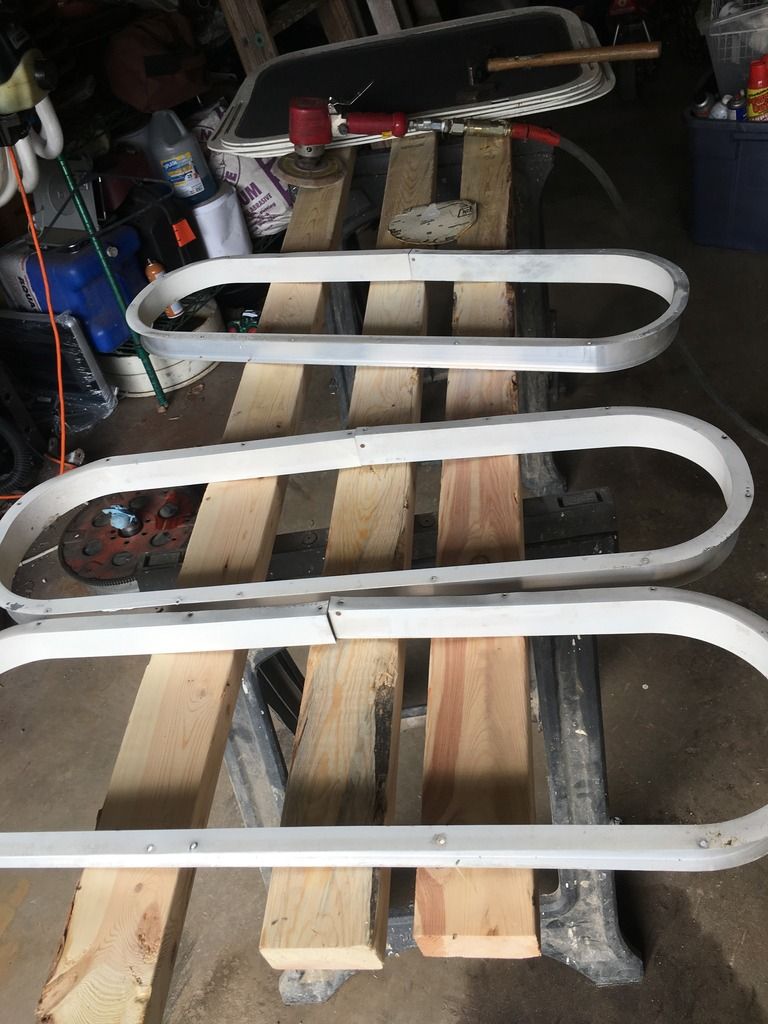
I started sanding the inner window frames, my wife thinks she wants them 'natural', but I'm going to try and convince her that we should go with an aluminum color or hammered finish.
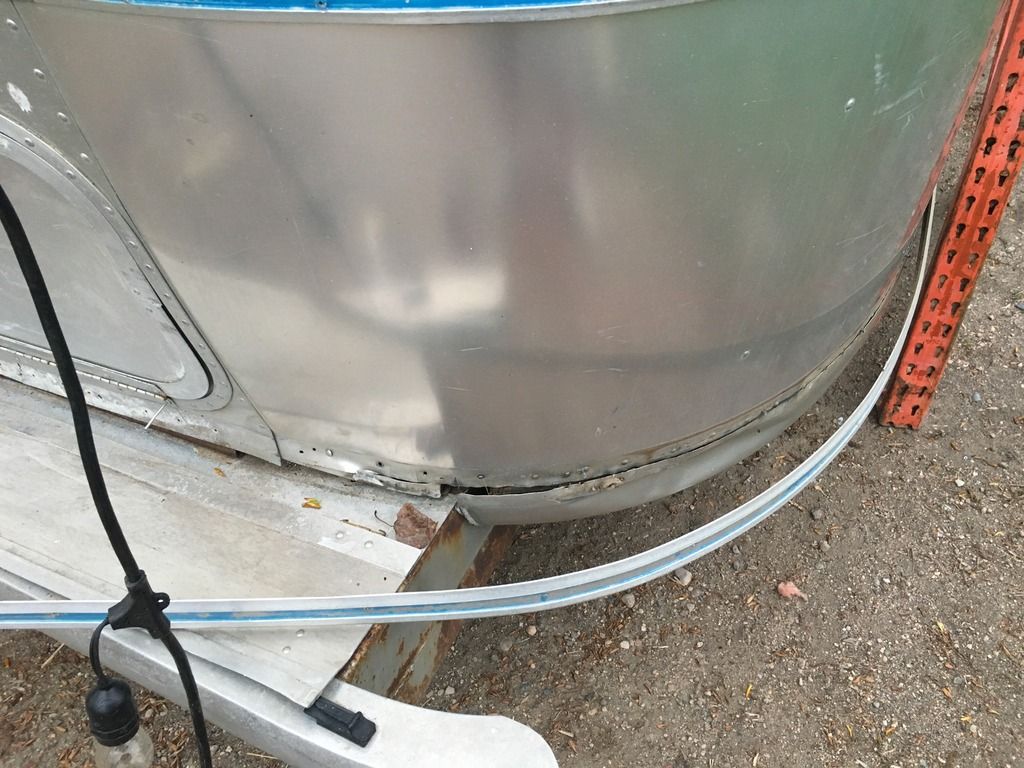
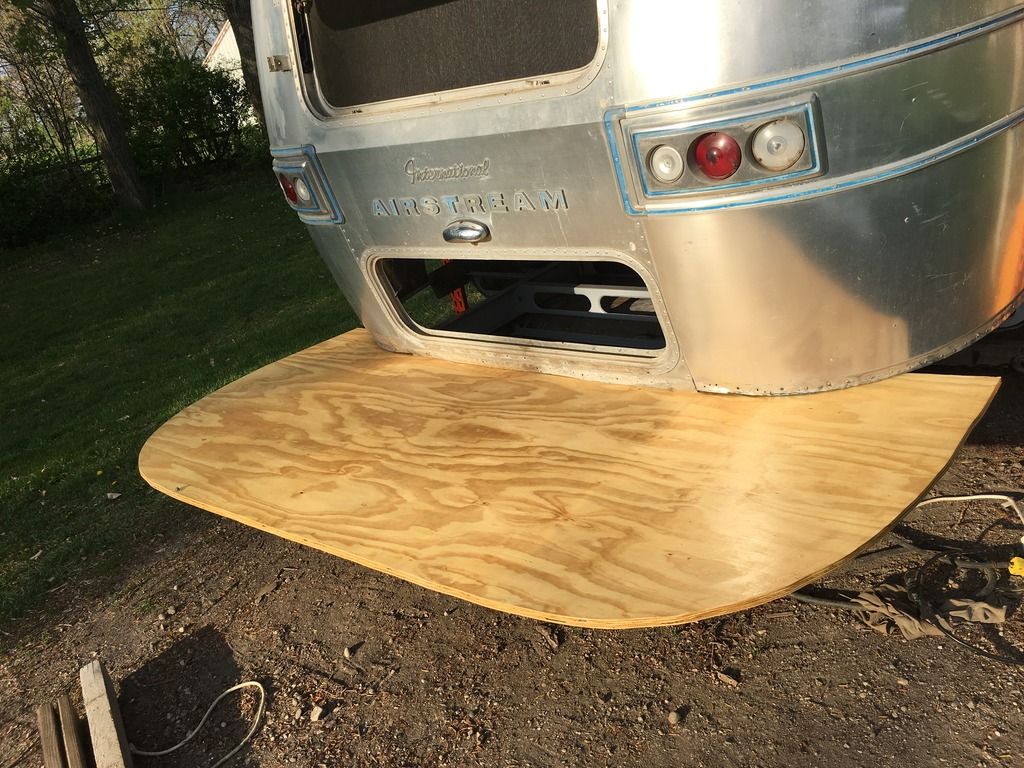
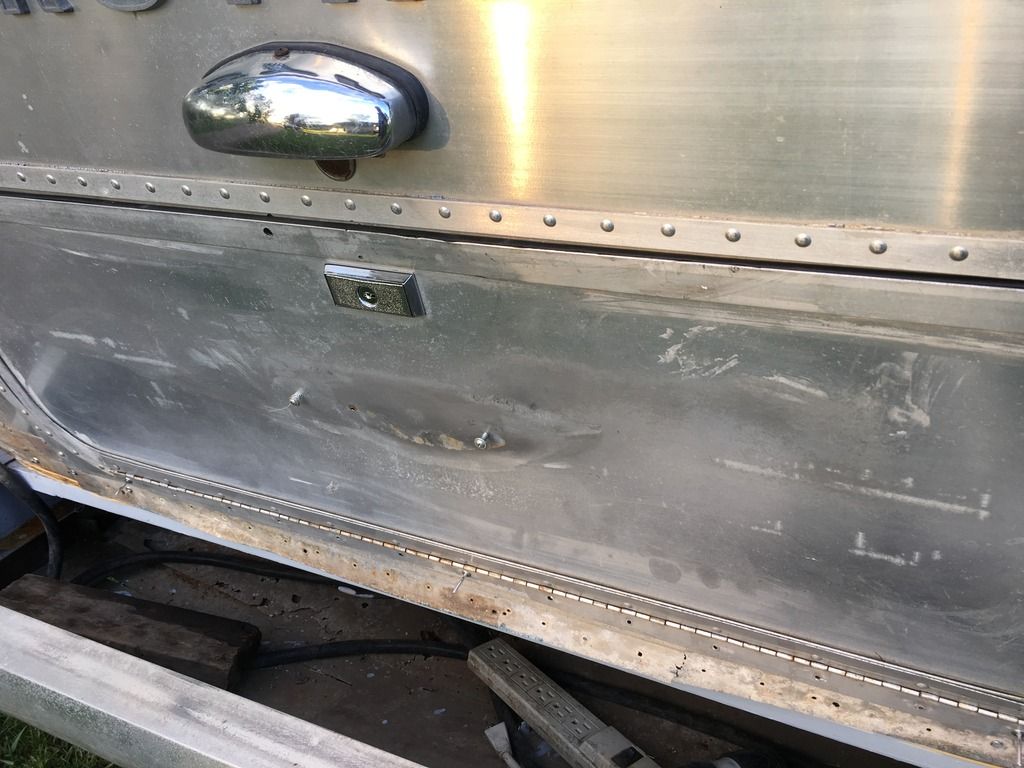
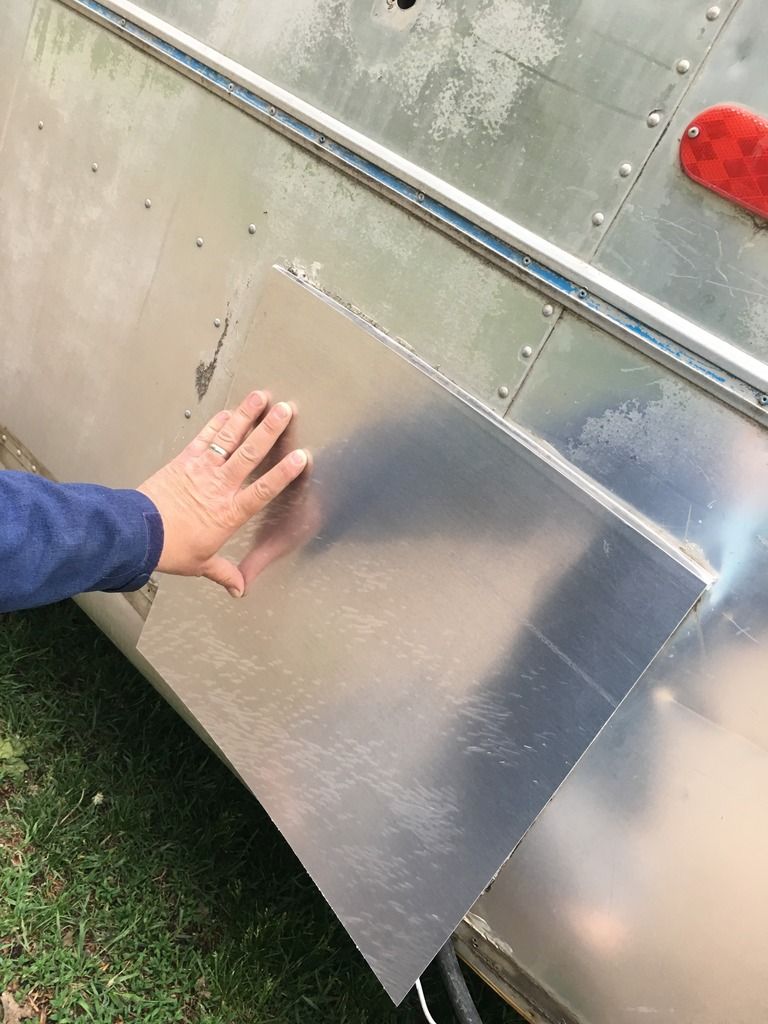
Sooner or later, I have to use this piece of aluminum
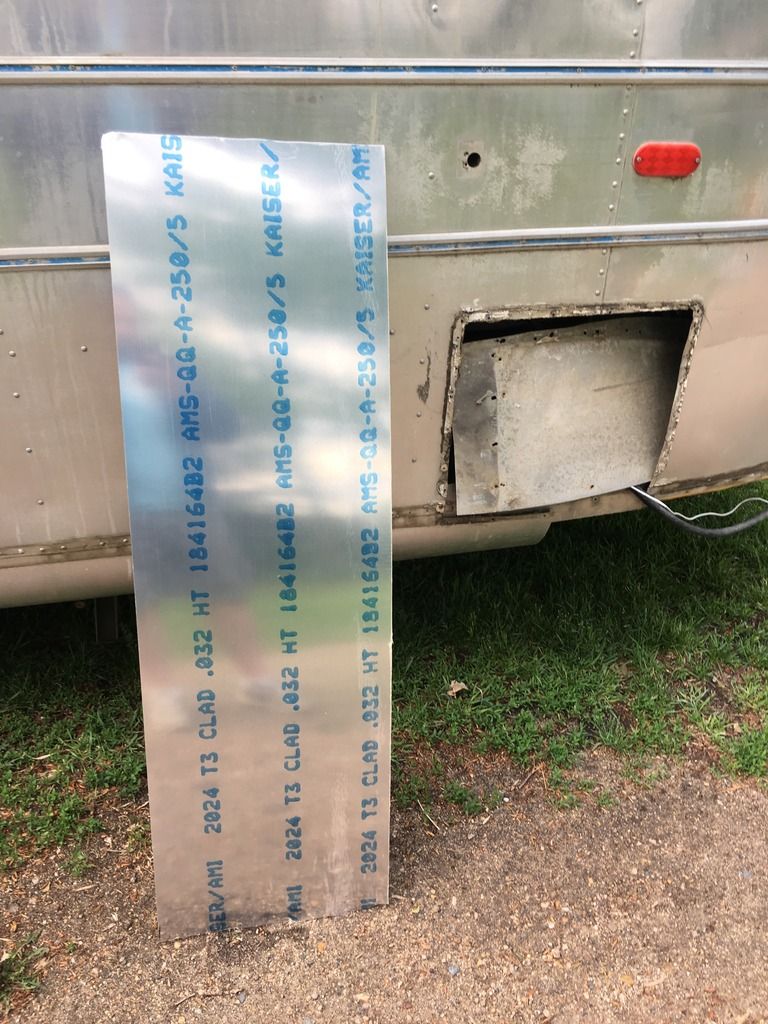
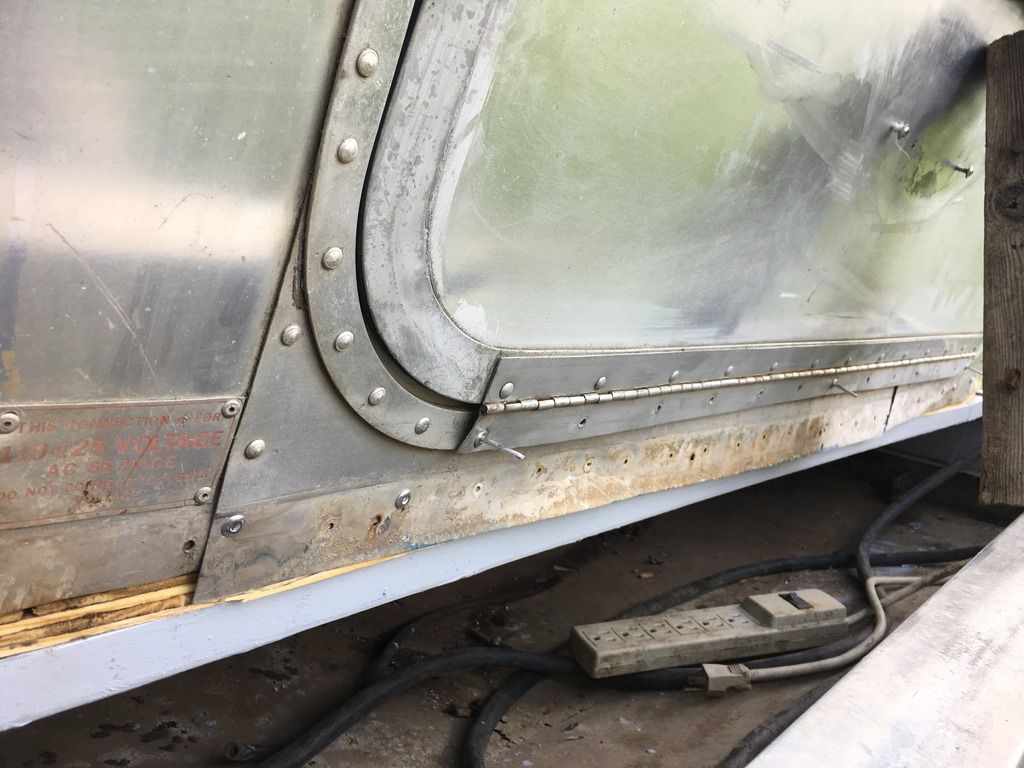
To replace this one under the rear hatch.
The piece that is in there now was up against a piece of steel and the aluminum corroded and tore in half, when I put the new piece in, I am going to extend the aluminum down past the bottom of the plywood floor so that it sheds water better than the original.
I removed the pins and took off the OEM TV antenna and the radio antenna.
I also picked up a piece of soft aluminum to plug the original water heater hole. This is soft, not T3 like the other piece.
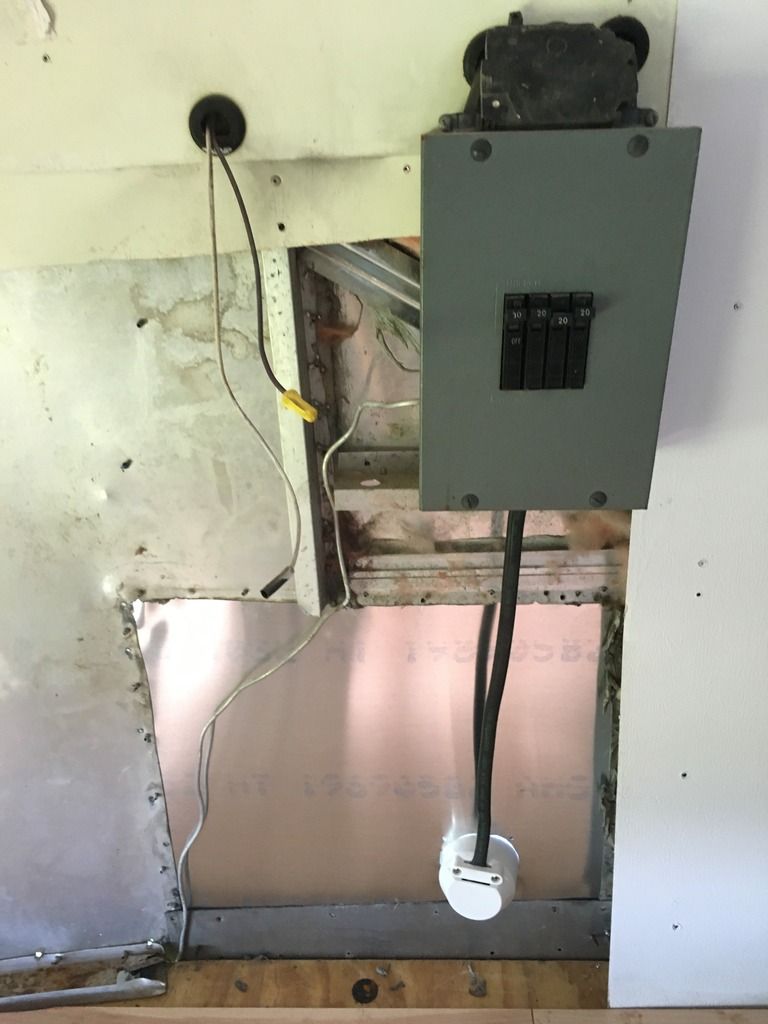
I really did not like or enjoy this 20ft long extension cord that was directly attached to the 110v fuse box.

I cleaned the old sealant.
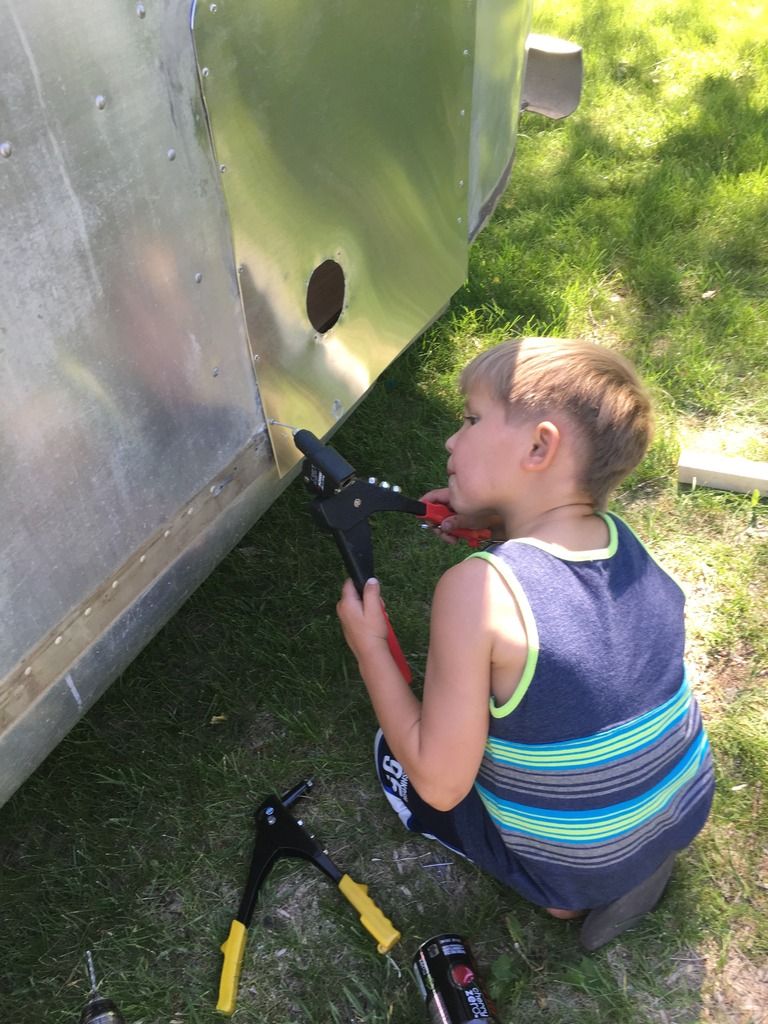
I trimmed the corners of the plate just a little for style points, then enlisted my local rivet professional.
From a local RV store, I bought a 30amp shore power connector port, then ran a short piece of romex from shore power box to fuse box.
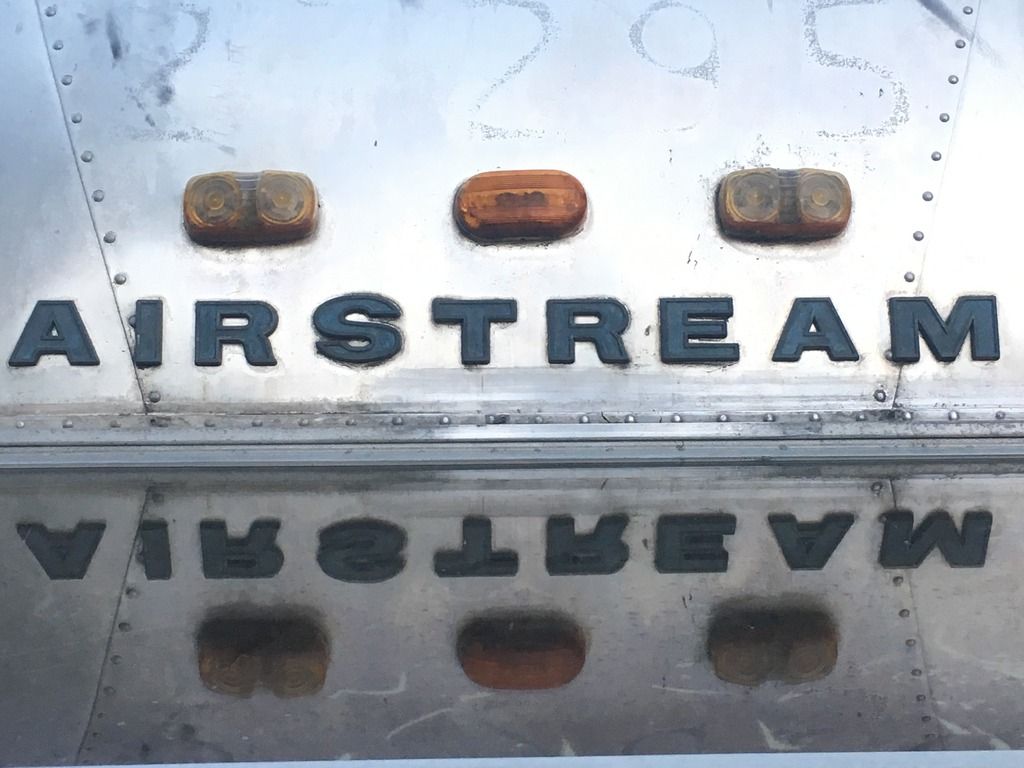
I still need to install the LED marker lights

Saturday I hooked up and hoped to take a short jaunt as a test drive
Sadly that did not happen, I didn't have any stop or turn signals, the marker lights worked just fine.
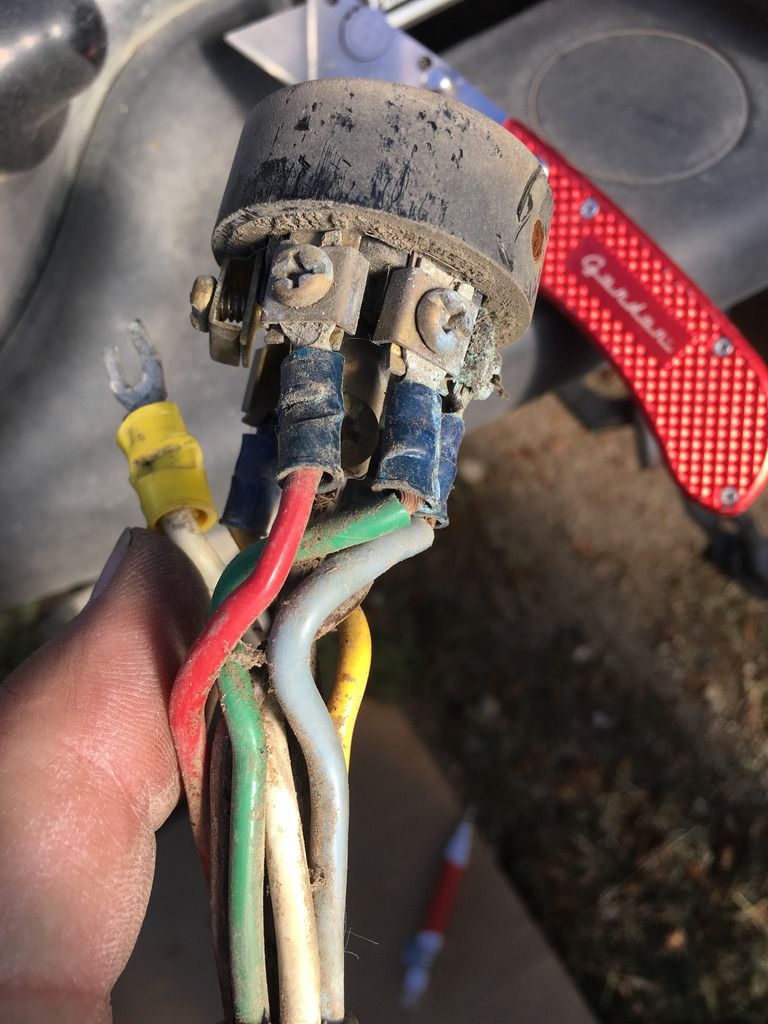
So first, I put a new end on the 7-pin connector.
Then I replaced the tail light bulbs.
Then I started troubleshooting the truck, and the 7-pin connector wasn't putting out power at most of the pins.
So I grabbed the owners manual and checked the fuse box, the trailer light fuse was good.
Next I hopped on google and it lead me to a fuse box under the hood, there I found a 20amp fuse that had popped.
Unfortunately by that time, it was already 8:30pm and I didn't think taking a 2hr trip to where I wanted to go with an untested trailer was a good idea.
So I sat back and chillax'd for a bit.
I started pulling access doors and windows.
This is a window, but it is an example of the condition of most window frame weatherstrip.
starting with the rear access door since it was directly related to my water leakage problem.
Scrubbed and stripped
And then the new gasket installed.
After the rear access panel, I moved to the next biggest items, the back window.
The front window
I had ordered (3) matching pop locks for the access doors so they all use the same key.
For the first time, I can latch and lock the rear access hatch door.
I also popped the walk door off and took the lock/latch out, then dropped it off with a friend of mine that works at a local lock shop, she made me new keys from an impression and since I'm such a nice person, she only charged me for (3) keys.
I finally cut aluminum and installed the ceiling fan.
I put screws in the holes after this pic.
I gave my boy a job to remove the screen window material from the inner window frames.
I started sanding the inner window frames, my wife thinks she wants them 'natural', but I'm going to try and convince her that we should go with an aluminum color or hammered finish.
Sooner or later, I have to use this piece of aluminum
To replace this one under the rear hatch.
The piece that is in there now was up against a piece of steel and the aluminum corroded and tore in half, when I put the new piece in, I am going to extend the aluminum down past the bottom of the plywood floor so that it sheds water better than the original.
I removed the pins and took off the OEM TV antenna and the radio antenna.
I also picked up a piece of soft aluminum to plug the original water heater hole. This is soft, not T3 like the other piece.
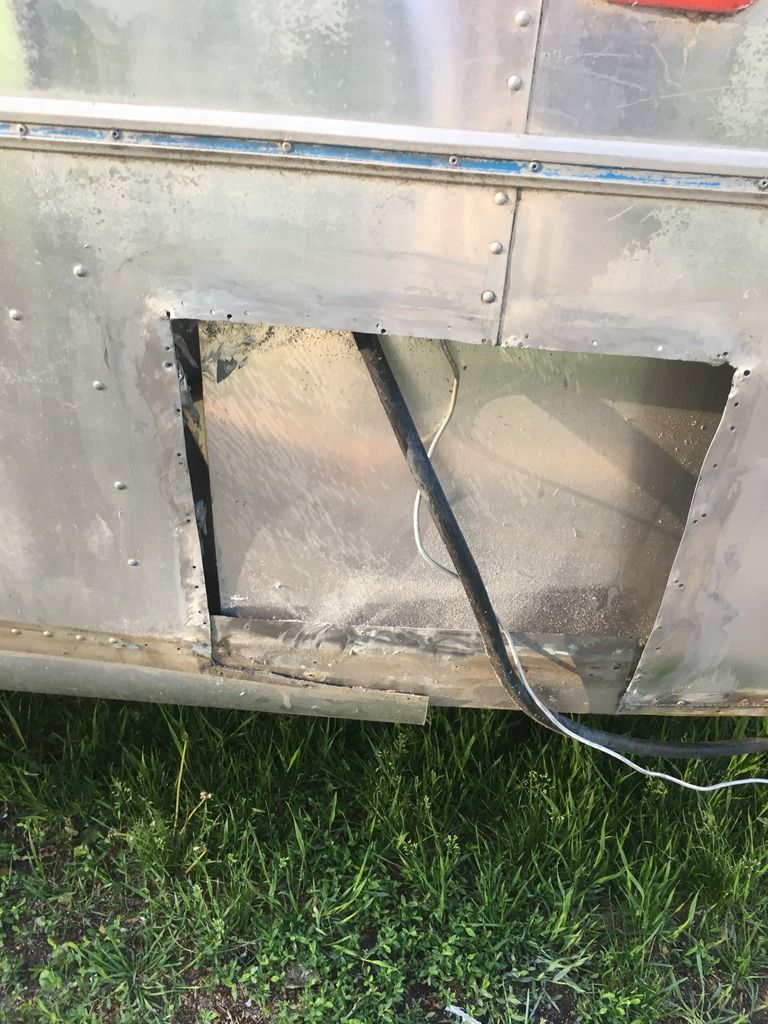
I really did not like or enjoy this 20ft long extension cord that was directly attached to the 110v fuse box.
I cleaned the old sealant.
I trimmed the corners of the plate just a little for style points, then enlisted my local rivet professional.
From a local RV store, I bought a 30amp shore power connector port, then ran a short piece of romex from shore power box to fuse box.
I still need to install the LED marker lights
Saturday I hooked up and hoped to take a short jaunt as a test drive
Sadly that did not happen, I didn't have any stop or turn signals, the marker lights worked just fine.
So first, I put a new end on the 7-pin connector.
Then I replaced the tail light bulbs.
Then I started troubleshooting the truck, and the 7-pin connector wasn't putting out power at most of the pins.
So I grabbed the owners manual and checked the fuse box, the trailer light fuse was good.
Next I hopped on google and it lead me to a fuse box under the hood, there I found a 20amp fuse that had popped.
Unfortunately by that time, it was already 8:30pm and I didn't think taking a 2hr trip to where I wanted to go with an untested trailer was a good idea.
So I sat back and chillax'd for a bit.
I do too! Keep 'em coming!
tarafied1
Well-Known Member
yeah, me too! love it
Me three
janschutz
Corn Hauler
Great update, makes me want one. I better not let Julie see this thread or she will make me get one.
Its kind of addicting.
And at the same time frustrating.
Airstreams aren't like most trailers, you CANNOT tow anything behind them, the frame and body structure won't even support a bike rack without causing separation issues.
I would really like to start attending automotive events, off road, mustang road course, or even travelling with a second smaller vehicle for excursions.
So I've been weighing my options.
1. A truck with car hauling capabilities (piggy back) and then bumper pull the AS
2. Tandem trailers, a really small 5th wheel trailer that can handle a single car, and then pull the AS behind that.
3. Build a whole new trailer from scratch.
And considering implementations.
1. I've passed already on a 1975 ford F650 crew cab 2 car hauler (I still kind of regret that) and now I'm looking at a 77 F350 crew cab that I could put on a f450 or 550 chassis.
2. Tandem:All states allow up to 65ft total length, some allow up to 75ft. FWIW, just my pickup and the AS is 52ft from front truck bumper to rear trailer bumper, so *if* I went this route the trailer in the middle could add at maximum 23ft (ideally add no more than 13ft), so this would be a very small trailer. But it would be a 5th wheel so the vehicle could be loaded on an inclined ramp.
3. I've been watching for sales of 'less than desirable' AS trailers . Damaged, abused, rusted frames, buy one mainly for the end caps, doors, and windows. Then build a custom low deck height toy hauler 5th wheel trailer so that the (widened) AS shell sits on top of it, modify the front to sit up on top of the 5th wheel tongue with a bed and shorten the living area so I can reserve a 16-18ft for toy storage (Mustang/Falcon/Scout/Bronco), maybe even add a popout like Airstream did in the 80's to increase living space. And also in the toy storage area the sides could be huge gullwings that would provide shade and access when at events.
Something like this.

I think my wife would euthanize me... best to focus on existing projects...
Anyhow.. my current issues are that I need to figure out the electrical situation.
I've got a good/used 65amp 3 stage charger/converter.
I picked up a new 6 circuit fuse box, the original setup has only 4 fuses.
I've got 2 Exide group 24 AGM deep cycle batteries, I am currently using them in my 2005 F250, which is supposed to be using Group 65 batteries. Buy the right ones for the truck and use the AGMs in the AS.. the AGMs 'work' in the diesel, but they are about 160CCA less than the stock batteries (320CCA total loss) and they don't have a 'burst' when first cranking, they are steady rate discharge, they never were great, but they worked. I only used them because I got them for a steal of a deal from Exide.
Eventually I'm going to have to figure out how best to integrate a power inverter. From the factory my airstream has distinct and disjoint 12v and 110v systems. On newer AS trailers they have built in inverters; then either dedicated 110v outlets off the inverter OR in some cases the whole camper can be powered off the inverter using an electronic switcher to automatically change from cord to inverter as needed. (clearly more research is required)
I need to add a breakaway box in case of emergency.
Instead of using friction sway control or any of the fancy "Virtual Point Interference" (VPI) hitches, I have been looking at adding electronic sway control, ideally I'd use Dexter Sway Control because the trailer has Dexter axles, but I haven't found a dealer that would give me an actual price and it can only be bought through a dealer. This is a comparable product (http://www.campingworld.com/shopping/item/sway-master-electronic-sway-control/91413)
My pickup weighs 8000lbs and my wife's Tahoe weighs 6000lbs. My Airstream currently weighs 4000lbs but I expect that to be closer to 5000lbs (dry) once fully loaded. I don't expect to need a weight distribution hitch.
I made a deal with a coworker to acquire the refrigerator, stove/oven, and sink out of a motorhome.
I need to go remove those and get them home so I can start planning their location.
Up top, I still need to buy and install the front powered vent fan; and another issue I haven't dealt with yet.
There is a sunroof, called an "Astrodome", right in the middle about 16"x24" that had a white plastic cover on it until a tree fell on it over the winter and busted it into a million pieces.
I'm going to try my hand at forming acrylic plastic to make a new one.
http://www.wikihow.com/Easily-Mold-Acrylic-Plastic-Sheets
I'll have to get the pictures up later, last night I convinced my wife to let me paint the inner window frames 'aluminum' color instead of sanding and clear coating them.
I got all (3) of the lower cluster window frames sanded/painted, as well as (4) out of (6) of the side windows done as well as the Astrodome inner frame, I still need to remove the inner frames from the front and rear big windows to sand/paint them.
Today I really need to make a run to Home Depot and get some new window screen material and the piping that holds it into the groove.
How can I quit my day job and maintain the steady inflow of cash so I can work on my own projects more?
And at the same time frustrating.
Airstreams aren't like most trailers, you CANNOT tow anything behind them, the frame and body structure won't even support a bike rack without causing separation issues.
I would really like to start attending automotive events, off road, mustang road course, or even travelling with a second smaller vehicle for excursions.
So I've been weighing my options.
1. A truck with car hauling capabilities (piggy back) and then bumper pull the AS
2. Tandem trailers, a really small 5th wheel trailer that can handle a single car, and then pull the AS behind that.
3. Build a whole new trailer from scratch.
And considering implementations.
1. I've passed already on a 1975 ford F650 crew cab 2 car hauler (I still kind of regret that) and now I'm looking at a 77 F350 crew cab that I could put on a f450 or 550 chassis.
2. Tandem:All states allow up to 65ft total length, some allow up to 75ft. FWIW, just my pickup and the AS is 52ft from front truck bumper to rear trailer bumper, so *if* I went this route the trailer in the middle could add at maximum 23ft (ideally add no more than 13ft), so this would be a very small trailer. But it would be a 5th wheel so the vehicle could be loaded on an inclined ramp.
3. I've been watching for sales of 'less than desirable' AS trailers . Damaged, abused, rusted frames, buy one mainly for the end caps, doors, and windows. Then build a custom low deck height toy hauler 5th wheel trailer so that the (widened) AS shell sits on top of it, modify the front to sit up on top of the 5th wheel tongue with a bed and shorten the living area so I can reserve a 16-18ft for toy storage (Mustang/Falcon/Scout/Bronco), maybe even add a popout like Airstream did in the 80's to increase living space. And also in the toy storage area the sides could be huge gullwings that would provide shade and access when at events.
Something like this.
I think my wife would euthanize me... best to focus on existing projects...
Anyhow.. my current issues are that I need to figure out the electrical situation.
I've got a good/used 65amp 3 stage charger/converter.
I picked up a new 6 circuit fuse box, the original setup has only 4 fuses.
I've got 2 Exide group 24 AGM deep cycle batteries, I am currently using them in my 2005 F250, which is supposed to be using Group 65 batteries. Buy the right ones for the truck and use the AGMs in the AS.. the AGMs 'work' in the diesel, but they are about 160CCA less than the stock batteries (320CCA total loss) and they don't have a 'burst' when first cranking, they are steady rate discharge, they never were great, but they worked. I only used them because I got them for a steal of a deal from Exide.
Eventually I'm going to have to figure out how best to integrate a power inverter. From the factory my airstream has distinct and disjoint 12v and 110v systems. On newer AS trailers they have built in inverters; then either dedicated 110v outlets off the inverter OR in some cases the whole camper can be powered off the inverter using an electronic switcher to automatically change from cord to inverter as needed. (clearly more research is required)
I need to add a breakaway box in case of emergency.
Instead of using friction sway control or any of the fancy "Virtual Point Interference" (VPI) hitches, I have been looking at adding electronic sway control, ideally I'd use Dexter Sway Control because the trailer has Dexter axles, but I haven't found a dealer that would give me an actual price and it can only be bought through a dealer. This is a comparable product (http://www.campingworld.com/shopping/item/sway-master-electronic-sway-control/91413)
My pickup weighs 8000lbs and my wife's Tahoe weighs 6000lbs. My Airstream currently weighs 4000lbs but I expect that to be closer to 5000lbs (dry) once fully loaded. I don't expect to need a weight distribution hitch.
I made a deal with a coworker to acquire the refrigerator, stove/oven, and sink out of a motorhome.
I need to go remove those and get them home so I can start planning their location.
Up top, I still need to buy and install the front powered vent fan; and another issue I haven't dealt with yet.
There is a sunroof, called an "Astrodome", right in the middle about 16"x24" that had a white plastic cover on it until a tree fell on it over the winter and busted it into a million pieces.
I'm going to try my hand at forming acrylic plastic to make a new one.
http://www.wikihow.com/Easily-Mold-Acrylic-Plastic-Sheets
I'll have to get the pictures up later, last night I convinced my wife to let me paint the inner window frames 'aluminum' color instead of sanding and clear coating them.
I got all (3) of the lower cluster window frames sanded/painted, as well as (4) out of (6) of the side windows done as well as the Astrodome inner frame, I still need to remove the inner frames from the front and rear big windows to sand/paint them.
Today I really need to make a run to Home Depot and get some new window screen material and the piping that holds it into the groove.
How can I quit my day job and maintain the steady inflow of cash so I can work on my own projects more?
tarafied1
Well-Known Member
I like the toy hauler AS but I also understand trying to have too many projects at once! I also wish I were independently wealthy...
Its kind of addicting.
And at the same time frustrating.
Airstreams aren't like most trailers, you CANNOT tow anything behind them, the frame and body structure won't even support a bike rack without causing separation issues.
Hmmm, interesting. Learn something every day.