• Hello there guest and Welcome to The #1 Classic Mustang forum!
    To gain full access you must Register. Registration is free and it takes only a few moments to complete.
    Already a member? Login here then!

Help putting 69 Dash back together

tarafied1

Well-Known Member
This 69 and the Mach1 we bought both had the dash out. I have some parts but not sure what all we are missing or how it goes together. Any help would be appreciated! I know 67/68 inside and out but this is the first 69 I have torn into.
$_57.JPG

$_12.JPG

$_57.JPG

$(KGrHqZHJ!4FJuf2UpQ7BSf!2zjEOQ~~60_57.JPG

$_57.JPG
 
Last edited:
Craig, yes all 69/70 parts in the first post. Second post I know for sure one of those brackets, not sure witch one, is a dash brace that goes from the Big lower dash section in picture 1 to one if the master cylinder mounting bolts under the dash. I'll check on the second bracket and see if I have any pictures for when you're ready to put it all back together.


Sent from my iPhone using Tapatalk
Thanks Larry, Buckydeamen said I would only need one of the brackets on the right. He said one of the ones I have pictured is bent.
We are going to need a lot of help on this one. I think most of it is here but it was pretty much all apart.
 
Once I worked on a 69 but it is awhile ago.
I remember that the lower part has to be installed first and the top part at last.
Correct me if I am wrong.
 
I think it's the bracket on the left and it's only bent a little on the right side at the flat, bent down a bit. I'll dig up some pictures and email them to you.


Sent from my iPhone using Tapatalk
 
Once I worked on a 69 but it is awhile ago.
I remember that the lower part has to be installed first and the top part at last.
Correct me if I am wrong.
it looks like you are correct. I think the lower metal dash needs to be installed first. I am assuming with some supports and/or brackets to the cowl, A-pillars and maybe the brake pedal support. I think we have all or most of the brackets. Lucas is in the process of combining the two lower dash pieces we have which include brackets and braces, knobs, heater control, etc. Then we will see if we have enough to install it. Then maybe we will get it soda blasted and powder coated.
 
Regarding the bracket, the picture below may help. If you have any questions let me know. I've had these dashes removed and installed many times and know it pretty well.

100022774_(18)-1028.jpg
 
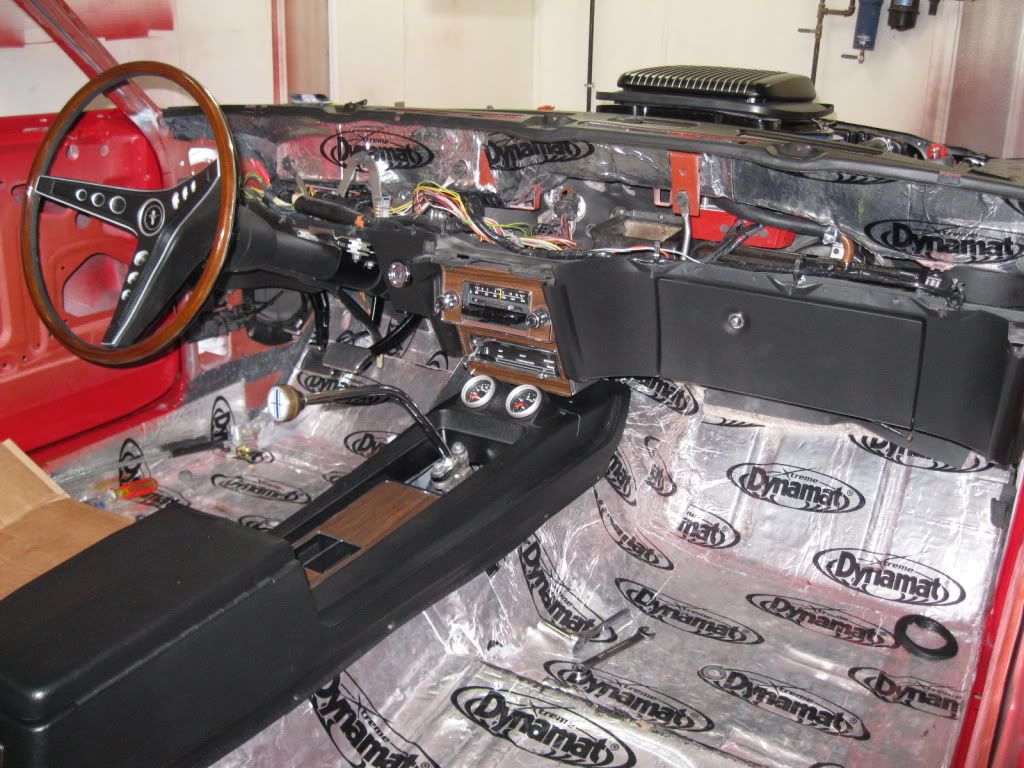
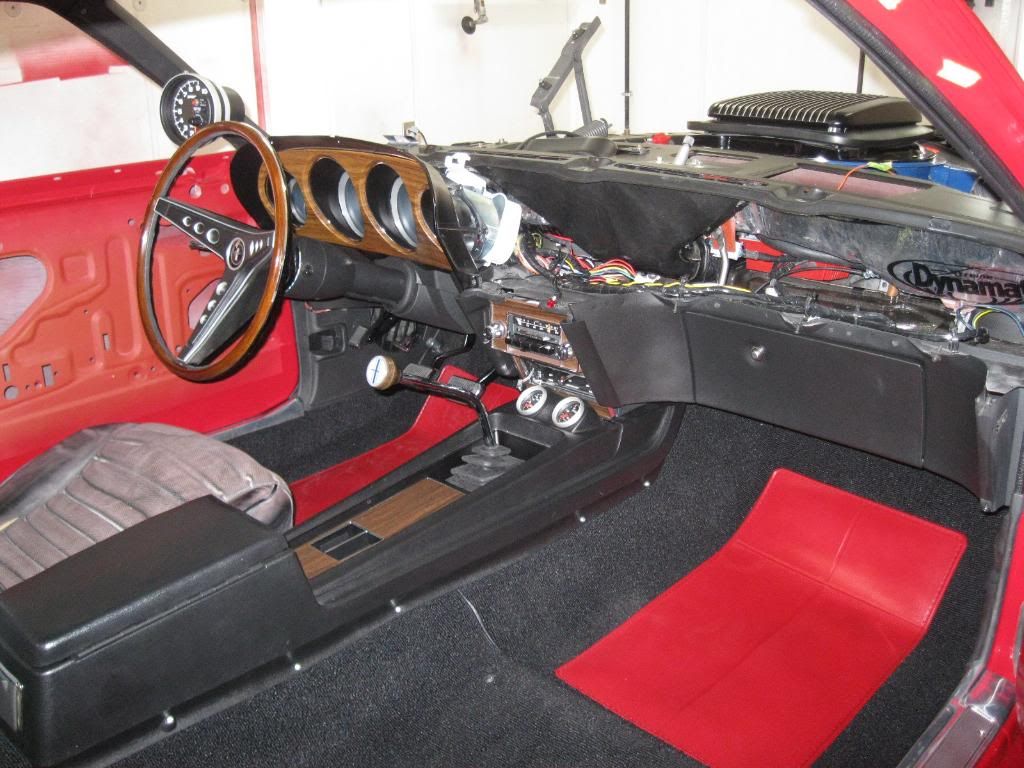
Install brake pedal support to firewall, heater box (or A/C box if equipped), attach brake pedal to M/C and clutch pedal if equipped (can be done later but access is easier now), install cowl vents (can be done after but easier to access with dash removed), install parking brake assembly, make sure wire harness is clipped in good to the lower dash with all connections hooked up for items already in lower dash (heater, heater light, turn signal and hazard cans, wiper switch, headlight switch, etc), then install lower dash assembly. There should be braces above lower dash at steering column that bolt to cowl/body, as well as a brace on passenger side near clock. There are L brackets at end of lower dash that bolt lower dash to body at each end. Adjustments may be needed for fitment, both at this time and when you install top dash pad. Once lower dash is all bolted up, finish hooking up wire connectors to heater/ac, firewall and engine bay, etc. Install instrument cluster to dash (parts of it are shown in your pics 4 & 5 above), then attach clock panel to top dash pad and install dash pad to lower dash (adjust lower dash location via end brackets as needed). Finally, install the end caps (end caps are what you show in your 3rd pic) and caps near heater/radio, bolt up steering column and install steering column trim and collar. Make final wiring connections. Off the top of my head that is the process I have followed. There are a ton of pictures in various states of assembly if you google "69 mustang dash" and choose Images. An assembly manual would also save you some headache
 
I would mention that those vents on either side, that go behind the kick panels, need to be installed before the heater box and before the parking brake assembly.
 
I had my vert torn down to the level that Buckeyedemon's top photo depicts, sans Dynamat. Even though I took it apart I was sort of intimidated and kind of despairing of ever getting it back together after I had it all torn down. It actually went back together without any serious hitches. Not even any over and short screws.:)
 
Thanks for all the replies and pictures.
Unfortunately its been real cold and snowy and the car is outside so we have not done anything recently. All this info will be a help when we get going again. My biggest issue is making sure I have all the correct parts since I never took a 69/70 apart before. I know we are missing some things. I think getting a manual will be an excellent idea


Sent from my iPhone using Tapatalk
 
Back
Top