• Hello there guest and Welcome to The #1 Classic Mustang forum!
    To gain full access you must Register. Registration is free and it takes only a few moments to complete.
    Already a member? Login here then!

Journey of Steel eleanor hood.

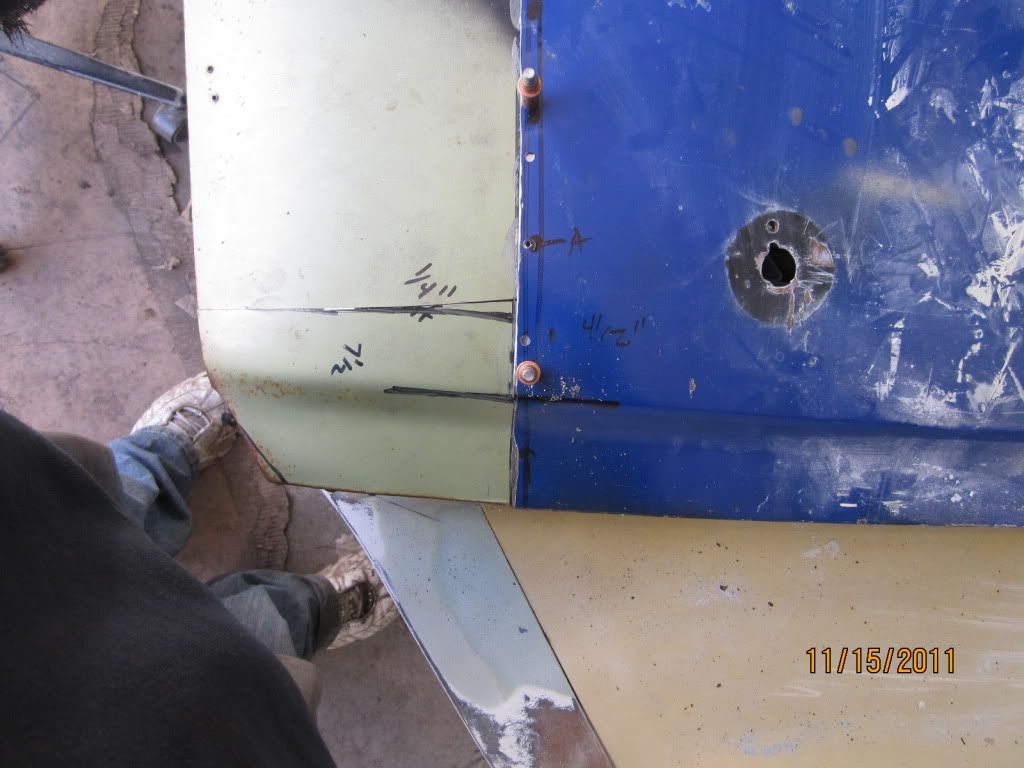
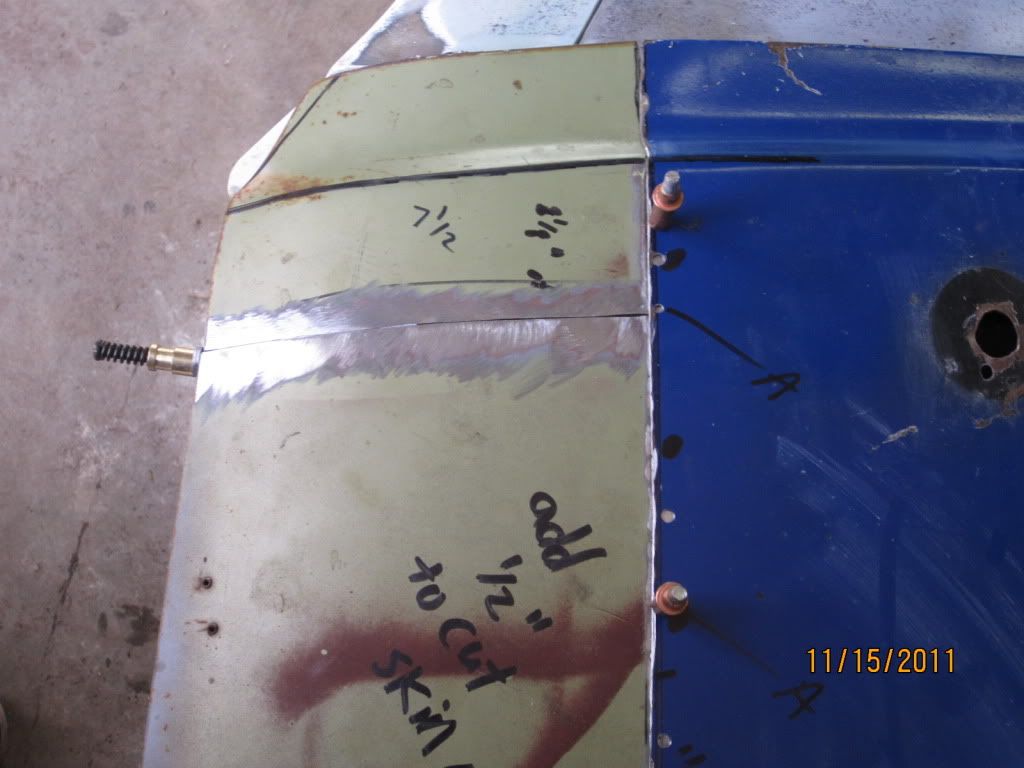
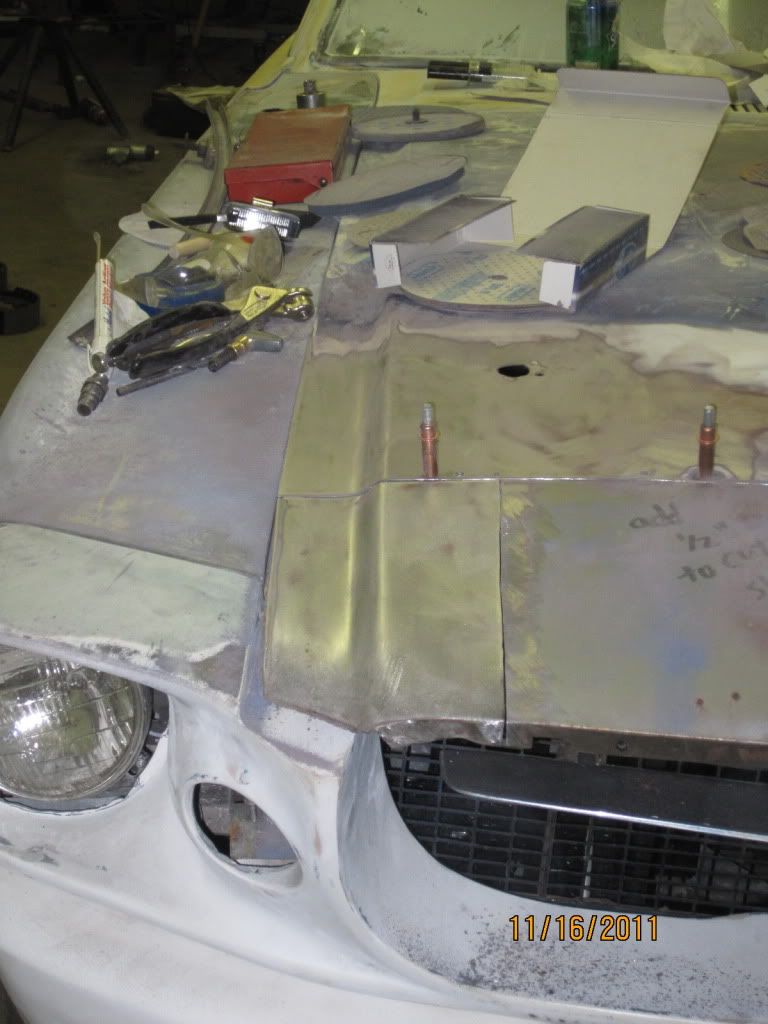
Thanks for the replies everybody! :wor, Lethal Its not the camera angle on that pic i just skinned that piece and put it on just to get an idea of how much work it would take, I will need to adjust the corners Like craig wrote on his drawing which was Dead on.
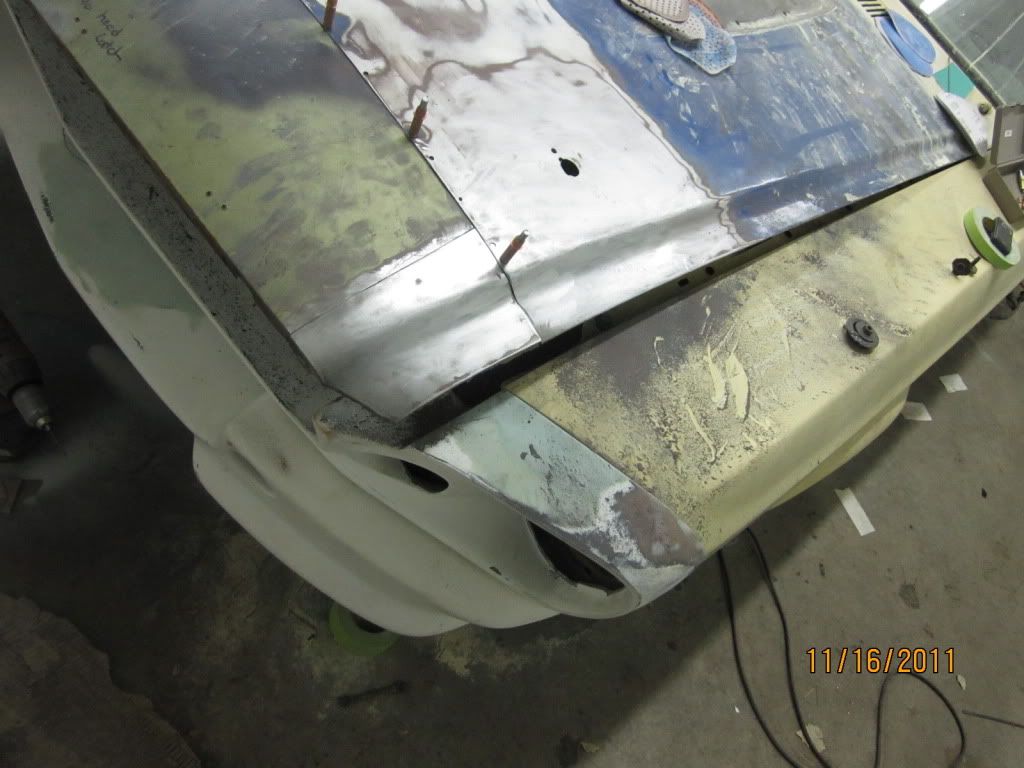
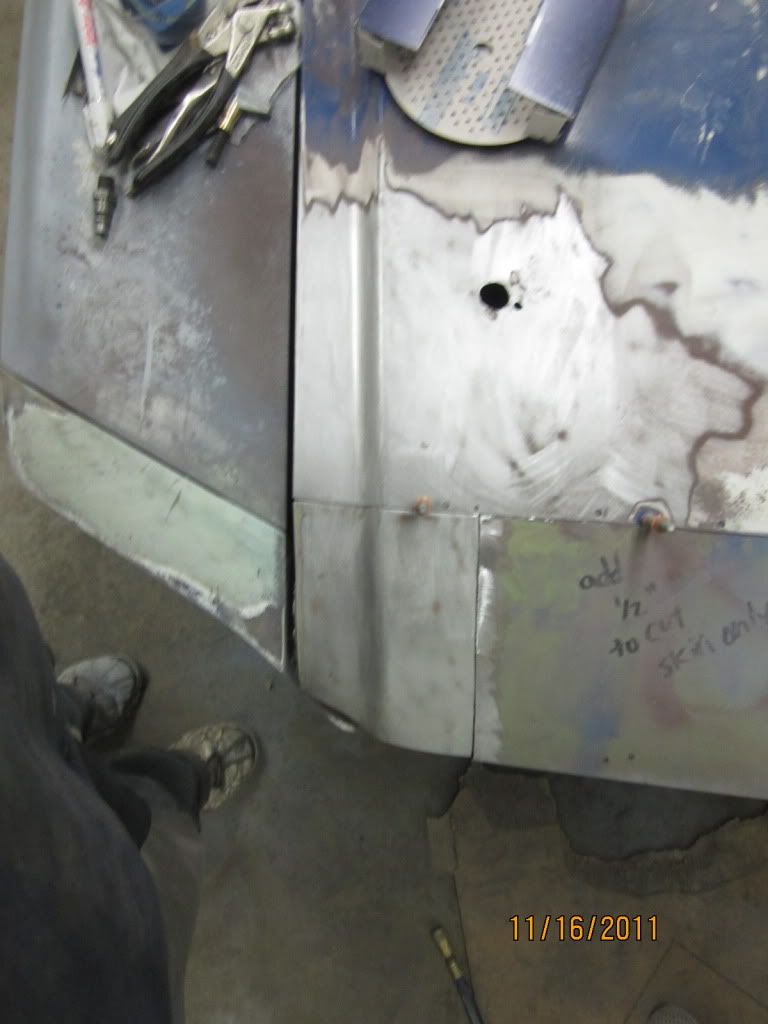
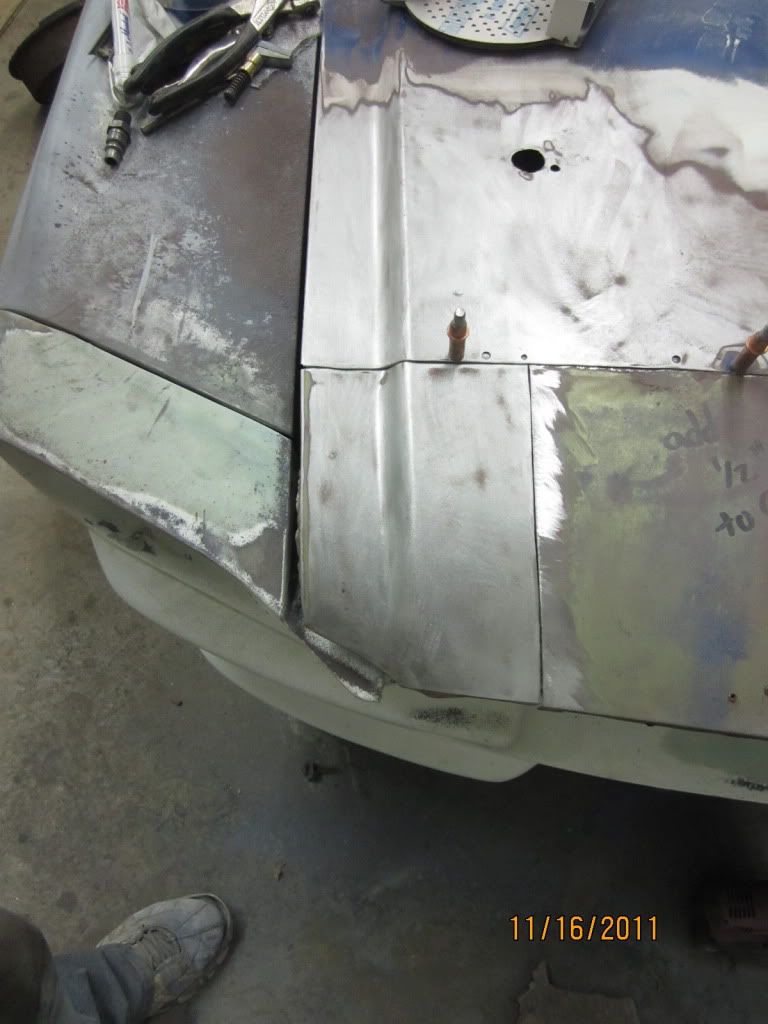
Stangg your idea is brilliant and will be the first thing i do tommorrow. I'm just wondering if i should Glue or Weld the sections together where you made that cut line. I was planning on tack welding the whole thing to the blue part then adding kitty hair to cover the small bump where they meet but now im thinking of butt welding???? :confu
 
Will do Pete thanks, hopefully that tool will Uncrimp.... :hide It was the first time i used it, worked pretty good. Im thinking i'll butt weld the center section to the blue hood right away then monkey with the sides untill they look good.
 
I wonder....I see some vertical offsets between the center line and the two outer character lines between the hood and the extension. Could you bend the extension to match the side-to-side profile bringing in one character line and extending the other? Just curious if the difference between the two is simply because the profile of the two hood sections aren't exact.

If you could clamp the two hoods together better somehow...
 
"Midlife" said:
I wonder....I see some vertical offsets between the center line and the two outer character lines between the hood and the extension. Could you bend the extension to match the side-to-side profile bringing in one character line and extending the other? Just curious if the difference between the two is simply because the profile of the two hood sections aren't exact.

If you could clamp the two hoods together better somehow...
I thought about that too, But there isn't much give to it, after putting 1/8" Aircraft plugs in it it wouldn't suck up i have some bigger ones 3/16" that have more grip, but i don't think they will do the trick, It's just enough difference to make it Alot bigger project. :guns
 
Maybe some persuasion with a dolly and hammer, or an English wheel...I'd ask the opinion of someone well versed in sheet metal work what can be done before you start cutting, splicing, and welding. Welding thin sheet metal is fraught with problems, particularly on a hood.
 
this issue is why I was thinking of taking the sections out closer to the center. Pete's idea of working it in the center might be best... Maybe Steve Sellers could offer some advise. He is a metal working god!
 
I wish i could run an english wheel, the stuff people can make is crazy!, I wish it had some give, The sides of the hood aren't too big a deal to me because i could use a heavy steel staight edge and make them narrow. If i put it on the top i might be able to tack/ and hammer from the middle out to match the hood lines.
 
"tarafied1" said:
this issue is why I was thinking of taking the sections out closer to the center. Pete's idea of working it in the center might be best...

This is the exact reason why you want to work closer to the character lines... the curved edges add to the rigidity and greatly reduce the chances of warping. If you cut mid center you would more than likely see the warpage span a much larger area. The two 6" long cuts on either side are the least of your worries, the long horizontal weld will be the most challanging but not impossible. Stitch in a tack weld, cool it immediately (keep an air hose handy) , move away to another spot and repeat.
 
Whipped out the Die Grinder/Angle grinder and shaped this hood a little better I'm not man enough to tack anything yet, Maybe 2moro?? what do you think?
IMG_3594-1.jpg

IMG_3595-1.jpg

IMG_3596.jpg

IMG_3598.jpg
 
Last edited by a moderator:
Looks very good... but before you tack it in, where you have your marker line right on the character line, sand that off as well as 12" - 24" up the length of the blue hood and then sight it from various angles. Sometimes when you have a mismatch of colors / material its hard to see if the lines are right on.
 
LOL!, I had the gun up there but was shaking BAD, Too much MD this morning... Thank You for the offer Craig! but i still have a couple more hoods, Was even toying around with cutting another to make a Cowl induction 429 scooped/Louvered Shelby hood-But i realize you CAN go too far with a hood...P.S.I kinda likey this hood
1105phr-02-o1967-mustang-fastbackfront.jpg

I Still have to make the bottom frame for the hood but that will be easy.
 
Last edited by a moderator:
"stangg" said:
Looks very good... but before you tack it in, where you have your marker line right on the character line, sand that off as well as 12" - 24" up the length of the blue hood and then sight it from various angles. Sometimes when you have a mismatch of colors / material its hard to see if the lines are right on.
DAMB! you are a smart man-I should have learned that with the decklid 1/4s they looked good untill i primed them all 1 color then i added 6 hours of work to them :char Thanks for the Great advice! :thu :thu
 
Looking good.

How is the look from the side? The side lines on the hood get increasingly deeper as they go forward I believe. Just curious.
 
lethal made his cowl induction hood from steel

and I saw that overkill car in person
 

Attachments

  • Picture 017.jpg
    1.8 MB · Views: 16
Heres some side pics Pete, I'ts not the best but i think i can get it to work out, Im going to take every spec of paint off this hood, then break out the welder The Air compressor Is MAD AS H3LL AT ME been working double overtime the past week.
IMG_3604.jpg

IMG_3607.jpg

IMG_3602.jpg

IMG_3600.jpg

they both need a little adjusting,
 
Last edited by a moderator:
Back
Top