• Hello there guest and Welcome to The #1 Classic Mustang forum!
    To gain full access you must Register. Registration is free and it takes only a few moments to complete.
    Already a member? Login here then!

Lethal289 Build thread - Exploring the 8.8

lethal289

Active Member
I brought my car home in may of 2008. Prior to me owning it, it had been stored in a garage for 13 years uninspected, and not running. After a solid tune - up and fluid change, new battery, solenoid, and coil, I rebuilt the carb :lol, replaced the distributor, and it fired up. The motor was original, and just over 100k but would burn oil pretty bad.

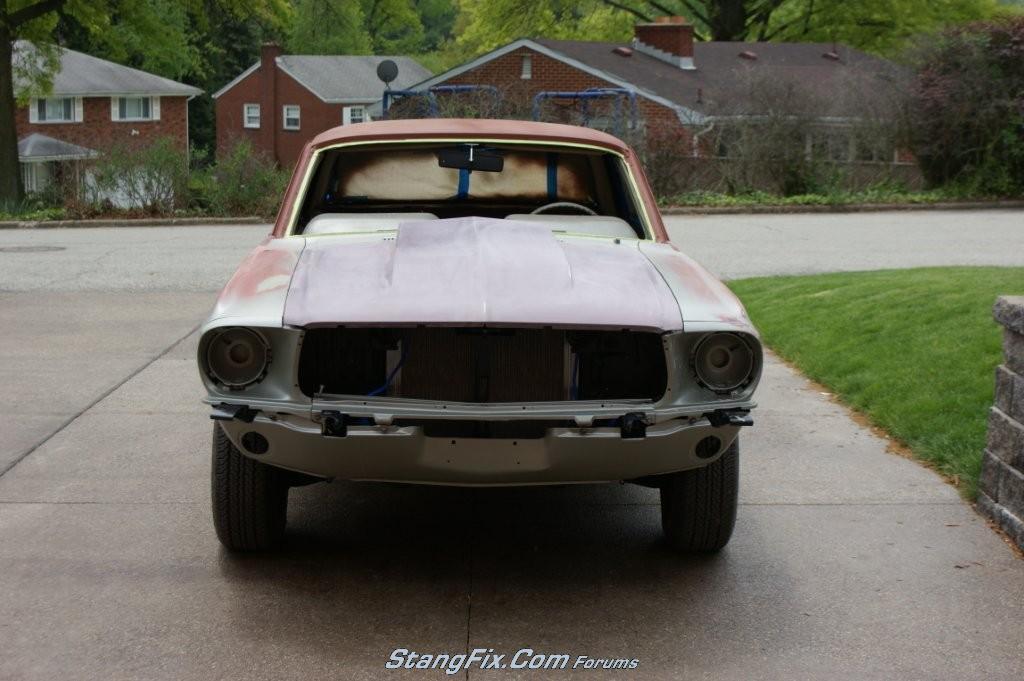
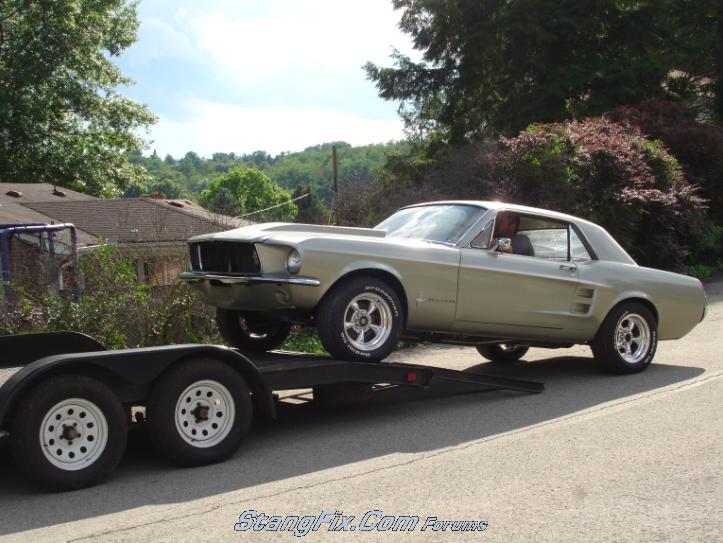
The day i brought it home:

home.jpg


Its amazing what a new set of wheels and a buff will do for a ride!

car.jpg


I knew of a 66 mustang coupe laying in a field, so i went to talk to the owner and was able to get a 289 from it. The transmission was already gone, the carb, water pump and accessories were already removed, but the motor would spin freely if turned by the harmonic balancer. So i brought it home.

motor1.jpg


The Owner of the motor had no idea if there had ever been any work done to it, but wouldnt let me lift the head to see. I had to wait till i got home to discover that it still had the standard 4.0 inch bore.

motor2.jpg


I drove the car all summer, It was an oil burning beast. But i made it to a bunch of car shows, and cruises, and even got a few dash plaques. I dont think any shows around here really do the trophy thing. I rebuilt the motor through the summer, doing it all myself except the boring and honning. It was bored .30 over, i used keith black hyperutectic pistons.
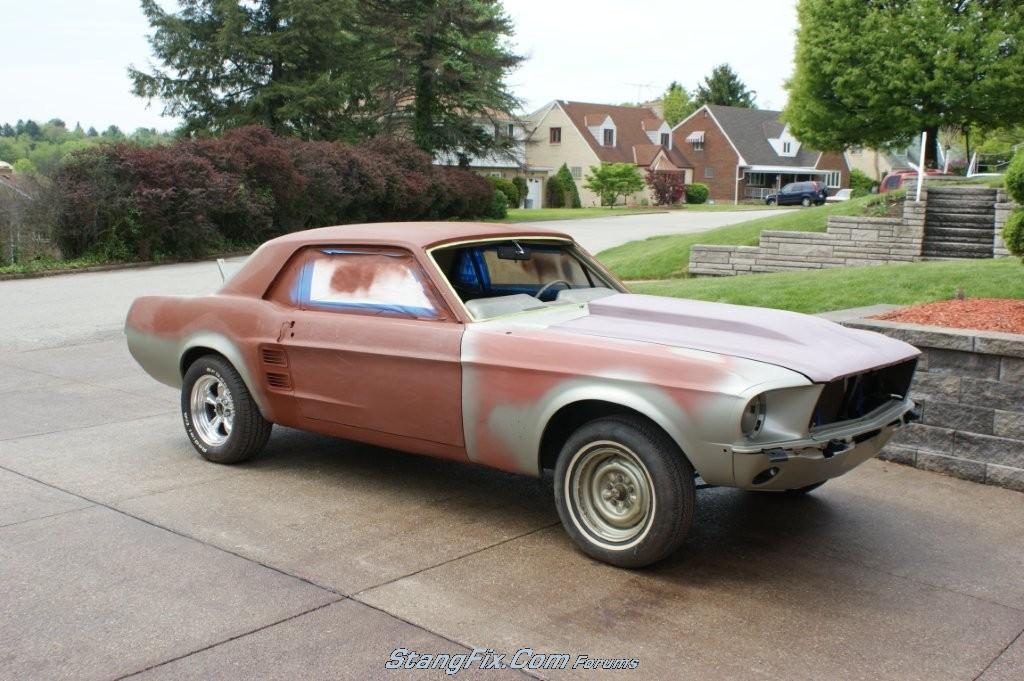
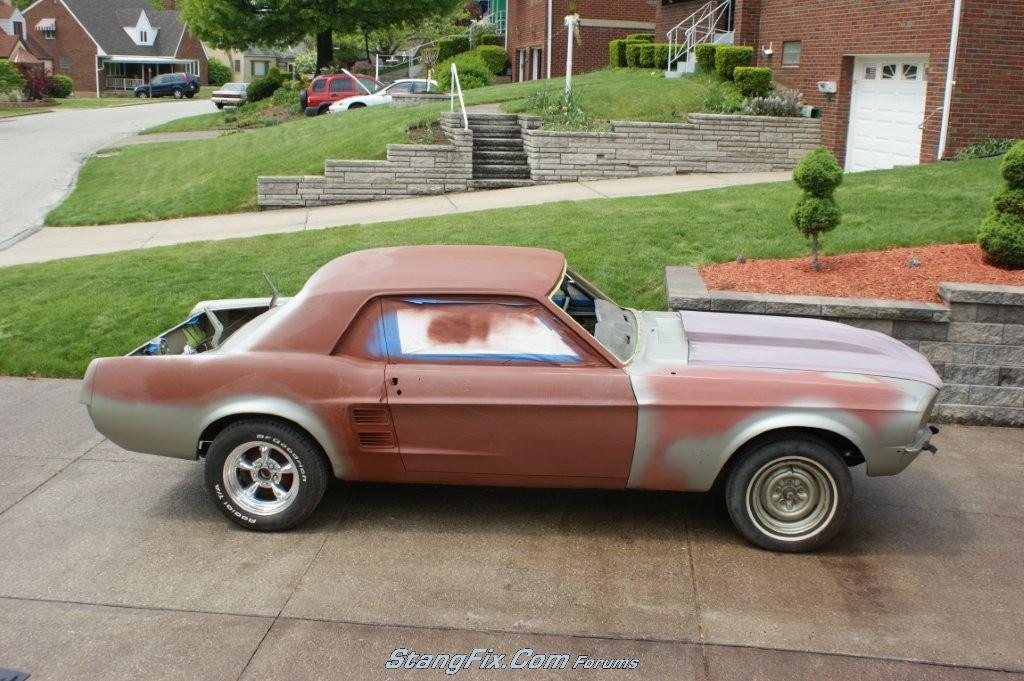
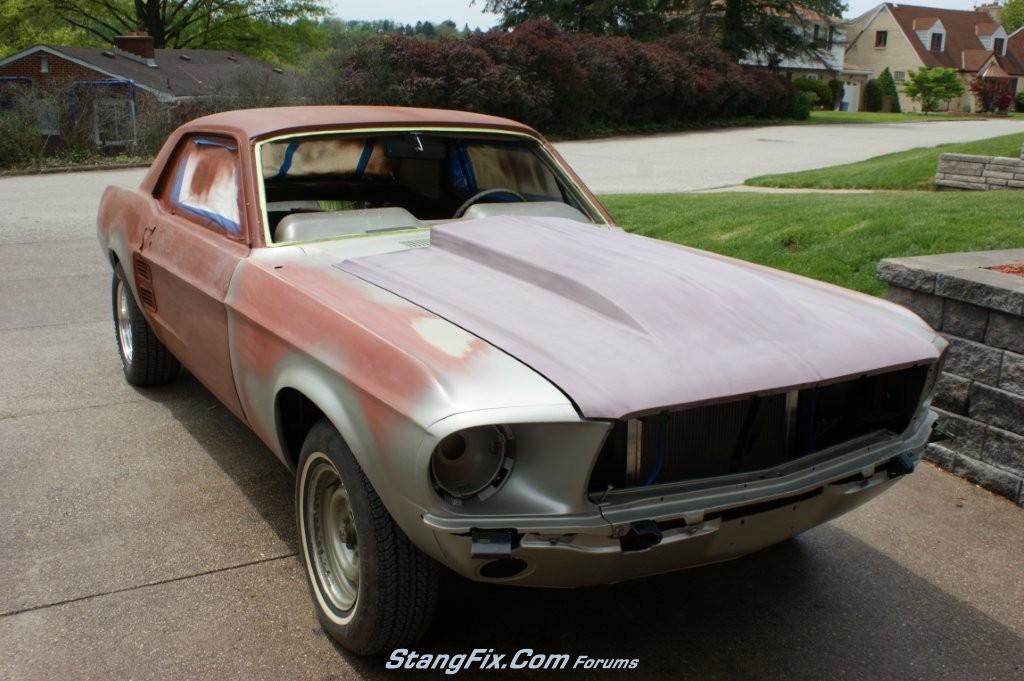
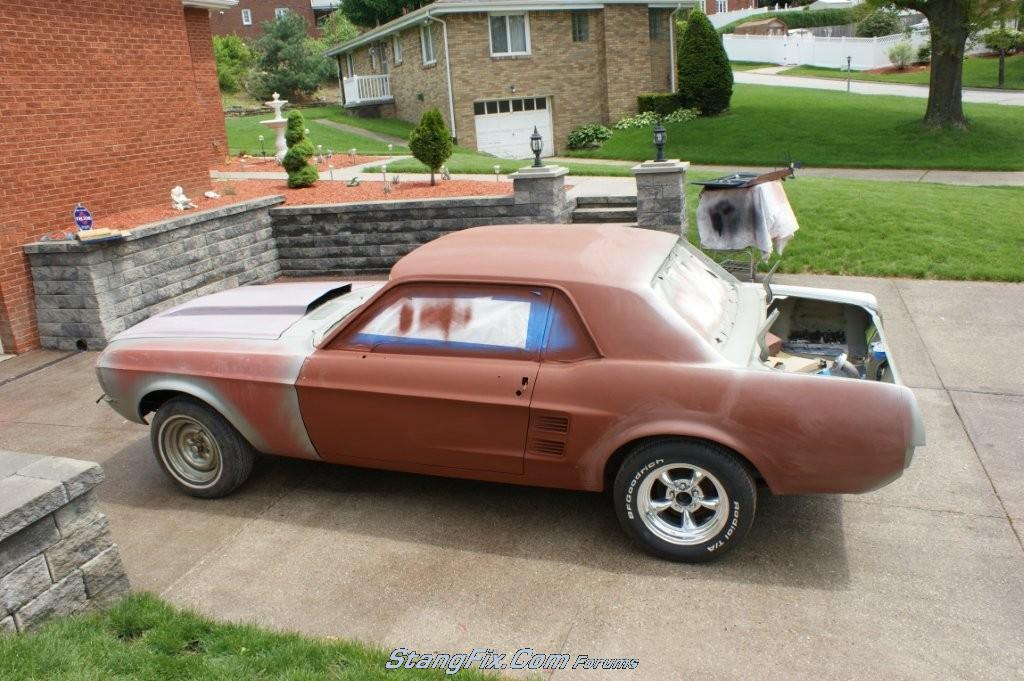
motor3.jpg


next came paint:

motor4.jpg


motor5.jpg


vodoo roller rockers, all alluminum setup edelbrock cam, carb, lifters, heads, timming cover, water pump, fuel pump, you name it.

mo1.jpg


mo3.jpg


motor.jpg
 
Last edited by a moderator:
Re: Lethal289 Build thread For TaraFied1

In november of 2008, after the local car show season was over, and winter in PA was approaching, i decided it was time for the original motor to come out, and make room for the newer, older 66 motor!

three.jpg


out.jpg


i think its safe to say that the engine compartment was in need of a refreshing.

out1.jpg


Next came the joys of redoing the engine compartment, first would be get rid of years of grease, grime, caulking, weather sealant, paint. At some point some one paint bombed the engine compartment, because i sand blasted it and discovered all the original stickers and labels, on the shock towers.

To begin sandblasting, i would have to build a tent in my garage to control the dust, sand, and debris Notice the tarp zipper purchased at home depot. I use it to make a door in the plastic tarp to seal it off when i went inside to blast.

tent.jpg


I began sand blasting:

blast.jpg


blast2.jpg


I found a few supprises along the way, but this was the worst.

rust2.jpg


so i got a new front frame rail, cut the old one out, and flush welded it on.

rust1.jpg


I must also mention that the previous owner used this car as somewhat of a work bench so there are dings nicks, and scratches through out. I will fix them as i get to them. Im starting in the front and working my way back. The first to be dealt with was the cowl. Lucky for me the inner cowl seal doesn't leak into the passenger compartment, so there was no point in going any further on that one.

cowldent.jpg


i worked it out with a body hammer and a bent piece of steel that i could slip down through the vent, then repainted:

cowl1.jpg


cowl2.jpg


I repainted the engine bay also, PPG low gloss black.

bay.jpg


Since i am doing a restomod, all the hardware bolts, (hinges, bracketry, supports, fender bolts, shock tower bolts, will all be the same as this shock tower bolt:

sh1.jpg


ran some wires, and used blue loom on everything.

wiring2.jpg


Even used Goodyears, blue hoses, i think it would look good with the motor.

wiring3.jpg


new Export brace - Dropped right in, (everyone seems to complain about spreading the shock towers, and jacking the car up, i didn't have those problems). Monte Carlo bar to follow with chrome shock tower tops after suspension.

export.jpg


brace.jpg
 
Last edited by a moderator:
Re: Lethal289 Build thread For TaraFied1

I was bored and decided to spruce up the garage. It stands about 5 feet tall. I masked off the wall, drew it free hand (with the help of a yard stick) and cut it out with a razor. About 3 hours of razor work.

1223071507.jpg


Sprayed it with black gloss Krylon rattle can.

1223071542.jpg


Peeled the tape of and admired the work. Turned out pretty good. Still trying to decide if i want to fill the red white and blue bars? Would you?

0211091922.jpg
 
Re: Lethal289 Build thread For TaraFied1

[member]March – 09

Motors In.

DSC04675.jpg


DSC04668.jpg


DSC04679.jpg


new.jpg


The Bel Air was a barn find, we put a chevy DZ302 in it last summer, the blue one you see is a life size picture of a car my buddy use to own. If you look real close however, there is a 54 vette convertible in primer behind the bel air next to my car. That car has some history, raced and built by yenko then sold to my friends grand father, been in his family ever since. Its about to recieve a frame off resto.
[/member]
 
Last edited by a moderator:
Re: Lethal289 Build thread For TaraFied1

Now for the Hood

After exhausting all avenues to try and find a steel hood with a cowl scoop, i've decided to make my own.

0128091114.jpg


Its a repop 67 Plain hood and a 2.5" Scoop from Goodmark Industries.

The plan was to change the rear taper of the scoop a little.

3.jpg


In order for the hood scoop to sit down on the hood, some relief cuts needed to be made.

4.jpg


The hood prepped for welding and then welded.

5.jpg


8.jpg


The hole needed cut.

6.jpg


9.jpg


Some body work, and the Seam feathered out. I got pretty lucky and had no real warping issues to deal with.

11-1.jpg


Put to a guide coat.

13.jpg


17.jpg


18.jpg
 
Last edited by a moderator:
Re: Lethal289 Build thread For TaraFied1

[member]I should have added a video of the engine first firing. Immediately following the video i went into cam break in.

First Fire Video

front1.jpg


Then Painted in my driveway by yours truly.

DSC00008.jpg


DSC00004.jpg


DSC00002.jpg


DSC00003.jpg


A view from behind the wheel.

32.jpg


33.jpg


[/member]
 
Last edited by a moderator:
Re: Lethal289 Build thread For TaraFied1

I took a few pics of my recent exhaust work. Hope you like it. Magnaflow kit with 3 inch tips, and shelby manifolds. Doesnt sound any where near as throaty as i thought it would.

166_05_07_09_11_05_48.JPG


166_05_07_09_11_07_59.JPG


166_05_07_09_11_05_09.JPG
 
Last edited by a moderator:
Re: Lethal289 Build thread For TaraFied1

[member]I've made some changes to the original design. So i figured i would start all over. Im pretty happy with this so far. So its a keeper. Today, i started from scratch, so heres the info.


After cutting out two identical sides. I made my marks for assembly. The plan is to wrap these in vinyl to match my interior. By no means do I claim to be a cabinet maker, but I tried my best.

166_09_10_09_6_50_38_0.jpg


The pencil marks lay out the glove box. The shifter base in the console, and a future opening for gauges. You can also see that i beveled the bottom edge so the console will sit down, and hug the trans tunnel.

166_09_10_09_6_50_39_1.jpg


These pieces will soon make up my glove box.

166_09_10_09_6_50_39_2.jpg


It was assembled using regular yellow wood glue, and 18 gauge 1-[sup]3[/sup]/[sub]8[/sub]" brad nails.

166_09_10_09_6_51_00_0.jpg


Then clamped tight and the glue was allowed to set.

166_09_10_09_6_51_00_1.jpg


166_09_10_09_6_51_00_2.jpg


The shifter bezel for the console, was tapered to fit, and then I used a table saw to put two 27 degree grooves 1/2 inch wide to accept the vertical panels.

166_09_10_09_6_51_01_4.jpg


Im sure a dado blade would have been a lot more efficient, However, i only have the basic power tools.

166_09_10_09_6_51_19_0.jpg


166_09_10_09_6_51_19_1.jpg


166_09_10_09_6_51_19_2.jpg


166_09_10_09_6_51_19_3.jpg


I then made a lid for the glove box, and tapered the front three edges.

166_09_10_09_6_51_19_4.jpg


Soon i will seal the MDF (Medium Density Fiberboard), and begin the upholstery process.

[/member]​
 
Last edited by a moderator:
Re: Lethal289 Build thread For TaraFied1

Today i picked up 4 yards of whisper black vinyl. Its possible to do the console with one, i just wanted to have extra on hand. Except for the very feminine dude at the cash register, I was the only guy in the store! :gobp :yikes That did not stop me from making my selections. I used 2 inch high density foam for the padding of the armrest. Then cut out the pieces that will make it up.

166_10_10_09_6_50_22_0.jpg


166_10_10_09_6_50_22_1.jpg


I then sewed them together and pulled them tight around the glove box lid.
166_10_10_09_6_50_22_2.jpg


166_10_10_09_6_50_22_3.jpg


166_10_10_09_6_50_22_4.jpg
After much debate and some research, i went with shellac as my sealer of choice. It needs diluted with alcohol in order to be sprayed properly. I see the common finish, is 2 parts shellac, to 5 parts alcohol. I found that with my oldest primer gun, with a 1.8 inch tip, that a 1:1 ratio sprayed nicely. So i went with that. After one coat it was obvious the color of the piece changed immediately. The shellac really seems to darken up the mdf. I put 3 heavy coats on. And i mean heavy. I wasn't trying for runs, but i got one. and when i went back for the second coat, the run actually dissipated out into the piece. I was shocked because now there are no sighs of it.

166_16_10_09_2_16_33_3.jpg


166_16_10_09_2_16_32_2.jpg


As evident in this piece where ever i got the wood glue, the shellac would show much yellower.

166_16_10_09_2_16_32_1.jpg


On a few Audio Forums, the sealer of choice for mdf is a 50/50 ratio of Yellow glue and water, I was reluctant to put anything with water on it, so i went with the shellac. I think the yellow glue may have done the job too. It appears to have worked well in that pic.

Ohh, and never mind the kitty litter buckets. You have to use what works :pep

I took advantage of the great day in college football to sit in front of the T.V. and get some sewing done. Here was my weapon of choice.... :yikes

166_17_10_09_8_08_42_0.jpg


When i made the console, i made a third side to use as a stencil for the upholstery. I laid it out on the table to trace out the pattern for the vinyl.

166_17_10_09_8_08_42_1.jpg


166_17_10_09_8_08_42_2.jpg


All sewn up. I never noticed the pic was blurry but its the only one i have before i started to fit it.

166_17_10_09_8_08_43_3.jpg


I made the front so it would slip right on pull itself tight. That way i wouldn't have to stretch it as much.

166_17_10_09_8_08_45_4.jpg


The back is the same way, once its pulled tight over the glove box, the front would help to eliminate a bunch of possible wrinkles.

166_17_10_09_8_11_58_0.jpg


Here it is, stretched out, and stapled.

166_17_10_09_8_11_59_1.jpg


I still have to stretch out the glove box area. I dont want to just staple the bottom down, im thinking about trimming with a piece of aluminum on the bottom. We will see once i start cutting up the metal.

166_17_10_09_8_11_59_2.jpg


166_17_10_09_8_12_00_3.jpg


166_17_10_09_8_12_01_4.jpg


So since i got the aluminum, i have been prepping it as time permitted. It had some minor nicks and scratches, so i started with some 220 grit on an orbital sander. That basicly cleaned up the consistency of the metal. I followed up with by hand with 600 grit, then 1000. Finishing off with my trusty buffer and some compound. When it was done, it was near mirror finish with just a slight haze. However, i think i want a brushed look, in sunlight it is really reflective, and i think that might be annoying while driving.

220 grit

166_19_10_09_5_23_04_0.jpg


166_19_10_09_5_23_07_2.jpg


600 grit

166_19_10_09_5_23_06_1.jpg


This is the layout of the console, here you can see all the nicks and scratches. The side i finished is the bottom side in this pic. The plan is to cut it out maybe a 1/16th big so i can file it down to fit perfectly.

166_19_10_09_5_23_08_3.jpg


My weapon of choice for the cutout.

166_19_10_09_5_23_09_4.jpg


Here you can start to see the mirror finish out in the sun.... :yikes way to bright for me.

166_19_10_09_5_32_09_0.jpg


Somewhat together, though it still needs some fine tunning.

166_19_10_09_5_32_09_1.jpg


166_19_10_09_5_32_10_2.jpg


Like some trimming on the top.

166_19_10_09_5_32_11_3.jpg
 
Last edited by a moderator:
Re: Lethal289 Build thread For TaraFied1

[member]I cut the base out to fit around the shifter.

166_21_11_09_3_15_19_0.jpg


Marked a more exact hole in the aluminum Piece

166_21_11_09_3_15_20_1.jpg


Cut it out rough and filed it smooth. I also marked the location of the trim bezel for the shifter. This is a pic of the rough cut.

166_21_11_09_3_15_22_2.jpg


Then i mounted the bezel.

166_21_11_09_3_15_22_3.jpg


166_21_11_09_3_15_24_4.jpg

[/member]

Sorry for the crappy pics, the light in my garage sucked, one of my 8 foot bulbs went out and i have to go pick some up.

[member]i Mounted the back plate with two nickel screws. The kind that hold door hinges on. I counter sunk them in the aluminum. When the glove box is closed, they are located high enough that they are not even noticeable while sitting in the car.

166_21_11_09_3_20_25_0.jpg


I purchased a chrome piano hinge from one of the big box home centers, it mounts nicely on the mdf, and feels real secure. it also hold the glove box lid in the open position with no problems.

166_21_11_09_3_20_26_1.jpg


I used a radio delete gauge bezel and mounted the radio in the console. I figure the radio is easier to remove then the gauges if i ever need to get under the console for somethig.

166_21_11_09_3_20_26_2.jpg


Pretty much a final pic showing the overall placement of the console. I can say this, im glad this project is now behind me.

166_21_11_09_3_20_26_3.jpg
[/member]

Only thing needed now is a good cleaning and detailing of the passenger compartment. There is saw dust and finger prints on everything. Its shown in the pics, so i will post new ones once everything is cleaned up.
 
Last edited by a moderator:
Re: Lethal289 Build thread For TaraFied1

Finally got a chance to swap my springs out.

Stock height vs. 620# Grab a track.

166_23_11_09_5_16_18_0.jpg


166_23_11_09_5_16_19_1.jpg


There is 4 inches difference between the springs. So i decided to install them as is. I didn't cut anything off of the coils.

166_23_11_09_5_16_20_2.jpg


A picture of the fender height before installation (With stock height Springs).

166_23_11_09_5_16_20_3.jpg


A pic with the 620#

166_23_11_09_5_16_21_4.jpg


Almost 1 inch exactly lower in ride height.

From the fender to the top of the tire:

Before
166_23_11_09_5_18_19_0.jpg


After
166_23_11_09_5_18_20_1.jpg


The best i could do for a side shot as the weather had turned Nasty.

166_23_11_09_5_18_21_2.jpg


I'm a little disappointed because i was hoping they would drop the front even further. I guess ill leave it be for now, and maybe come spring if it has not settled any (I am doubtful it will) i will trim some off the coils.

At least now I dont have to worry about scrapping the roof off of my garage door pulling the car in and out.
 
Last edited by a moderator:
Re: Lethal289 Build thread For TaraFied1

Very nice job of dollying the cowl into shape. Very nice! I miss that part of working on cars now that Midlife is reasonably done.
 
Re: Lethal289 Build thread For TaraFied1

Thanks Mid, Me too. I can already see that the journey is more rewarding then the destination. I guess thats true with a lot of things in life.
 
Re: Lethal289 Build thread For TaraFied1

And here I thought your center console was your greatest accomplishment....

ALL of the work you've done thus far is commendable. Keep in mind that not everyone has the wherewithall to jump into any aspect of a project and achieve quality results. Every Mustang I've pulled home was one that someone else gave up on.

Keep up the good work and your car looks GREAT!
 
Re: Lethal289 Build thread For TaraFied1

Wow lethal, really great thread, thank you for posting this. Seeing others work always gives me that extra boost to get back in the garage. I admire your craftsmanship and ingenuity. Keep up the great work.
 
Re: Lethal289 Build thread For TaraFied1

WOW! I'm impressed! I knew you had skills but seeing it all together is cool! Love that hood! Engine compartment really turned out well too. Paint, console, etc. Very nice job. Thanks for sharing, I love this stuff!!!
 
Re: Lethal289 Build thread

I was cleaning out my older digital camera today, and came across a couple pictures my wife took of the car. So i figured i would post them here.

166_19_03_10_12_49_58_0.jpg


166_19_03_10_12_49_58_1.jpg


166_19_03_10_12_49_58_2.jpg


166_19_03_10_12_49_58_3.jpg


166_19_03_10_12_49_58_4.jpg
 
Last edited by a moderator:
Re: Lethal289 Build thread

it's neat to look back on the build photos, again that is one awesome coupe!
 
Back
Top