• Hello there guest and Welcome to The #1 Classic Mustang forum!
    To gain full access you must Register. Registration is free and it takes only a few moments to complete.
    Already a member? Login here then!

New Project! 1968 Volvo P1800 "Bullwinkle"

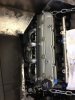
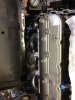
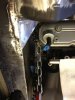
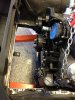
I was able to cut the floor to the rough shape of the transmission. I won't be able to put the engine and transmission in for a little while. I am at a stopping point while I wait for parts. The VA Front Runner setup should be here very soon, the transmission will be ready in a few days but I just ordered a paddle shifter kit and billet converter from Steve at Twist Machine. I should have the radiator and headers from Swedish Ops in the next week or so. The big delay is with my motor mounts. Don't have an ETA yet and it it looks like it will be more than a couple weeks I may just fab up my own. I received my F-body oil pan and have it on the engine.

Here are the places I am working with for these items. All of them are great to work with.
http://swinehartstransmission.com/
http://www.twistmachine.com
http://swedishops.com/
 
Here are a couple pictures if the items that got delivered today. The radiator is top notch. The welds are great, it is very thick and was packaged well. I had tabs mounted on the front of the radiator that I will mount a tranny cooler and AC condenser to. After I get my car mocked up I will likely have a shroud made for the Spal cooling fan. I just don't know how much space I will have once the Vintage Air kit is in place.

I got my power steering/hydroboost hoses from gottashow.com today. The only modifications I will do to them is to run AN fittings on the return hoses instead of clamps. I will run the same style hoses for my AC/heater hoses and fuel hose. I think they are very clean looking and make the car easy to work on.

My last surprise was a Swedish Ops work shirt! Thanks Robert! It looks and fits great.

I still can't do much until the transmission and torque converter are here. In the meantime I am trying to get all the items I need ready and here. I ordered some Raptor bed liner for the underside of the car. I can't spry it until I get the trans tunnel and firewall completed. I really want to get all of that done ASAP so that I can return the rotisserie I am borrowing. I hope it will be back to its home by July.
9epaty8e.jpg

pamyhy6e.jpg

puvatu5u.jpg

5esasu4u.jpg

8u7uqaza.jpg

nydusyze.jpg
 
Last edited by a moderator:
I couldn't wait anymore so I used my cherry picker to lower the engine in place today. It looks pretty good and there will be a lot of hood clearance.

I made some adjustment to the steering column as well. I had to lower it so that my steering wheel would clear the gauges. I will have to do a bit more clearancing here and there but I got it pretty close from using my estimates. Once the headers and engine stands arrive I will be able to dial it in.

ypuzepy8.jpg

jebane9e.jpg

9u2adetu.jpg

ypybehus.jpg
 
Last edited by a moderator:
It sounds like my headers will be in tomorrow and the engine mounts in the next week or so. In the meantime the transmission is ready to go. My paddle shifter is a couple weeks out.

To kill some time I pulled all of the suspension out, which only took about an hour, so that I could spray the undercoating. I used Raptor liner and was surprised how easy it was to use. I did as much as I could and used 3 of the 4 bottles in the kit. The final bottle will be used on the transmission tunnel when that is complete. I want to wait for the transmission tunnel construction until the engine is permanently mounted.

jetyru5a.jpg

yzadaqav.jpg

meguve2y.jpg
 
Last edited by a moderator:
It is a product from POL called Raptor Liner. Basically it is truck bed liner. I wanted something durable and not rubbery. If I need to remove it all I have to do is sand the area and it comes off without any drama.

I really like how easy it was to use a spray on coating and am now thinking about using Lizard Skin for the interior. I would use both the heat shield as the sound deadener products. When that is done I still may use a dynamat type product on top.
 
Nice. I like the look of the finished product. How was it to spray in your garage? Lot of overage on the floor, etc?


Sent from my iPhone using Tapatalk
 
It wasn't bad at all. I used some paint drop cloths under the car (did it on a rotisserie) and really didn't have much overspray. I sprayed it about a foot away from the car, perhaps a little closer. I masked off all the areas I did not want coated like suspension mounting points, bolt holes and areas I still needed to work on. It was try to touch in about 30 minutes and very durable within a couple hours. I don't think you would want to use it as a bed liner in that time but I could have reassembled the suspension by that time without worrying about tearing up the Raptor Liner.
 
I should have some engine stands in soon and then I can make some real progress. I am about to buy my AC unit for the car but I am undecided between Classic Auto Air/Restomod Air or Vintage Air. It sounds like CCA/RA (same company) build a better box but I really haven't heard anything bad about Vintage Air except there service may be not quite as good.

Other than that I am still waiting on the transmission controller and paddle shifter stuff from Twist Machine. That controller should have arrived at their place earlier this week and with any luck is on its way to me. I will also be ordering my engine wiring harness in the next few days from easyperformance.com. I plan on mounting all my wiring behind the back seat. I will have my engine, transmissions PCM's and my American Auto Wire fuse box mounted there. I figure by the time I get the AC in place withere will not be much room for wiring. I also hate climbing under the dash to look for problems if one ever comes up. This way I will just remove the rear seat and have easy access to everything.

Later today I am going to pick up a rear seat from a 1982-1992 Camaro that I will modify to fit my car. The back seat is pretty small and I am sure I will have to modify the seat to work but it should be more comfortable and sporty looking than the original.
 
I have 2 CCA units. The one in the Mustang I took on the power tour vibrated at idle They replaced my compressor and upgraded it from a 5 piston to a 7 piston unit at no cost. I just got it yesterday and can not give any information that if it fixed the issue. But their customer support has been great. It also helps that they are only 32 miles from my house.
 
I am starting to get some of the interior planned now. I will be sending off the gauges to North Hollywood Speedometer today. I will have them rebuilt unless the cost is way out of my range. In the process they will convert the tach to V8, change the speedo to an electric unit and customize the faces a bit. I need to get a sample of the interior leather I will be using before I can send it off so that the gauges can be pulled into the rest of the scheme I have planned. I considered using an off the shelf gauge but none seem to fit just right. The verticle oil/water gauge kind of messes things up. If I changed out the gauges I would then need to redo all the aluminum on the face of the dash. That gets expensive and I am not sure I could duplicate the look of the original. I think Volvo did a great job with the layout of the early 1800's and don't want to deviate too much from it.

I ordered a Vintage Air AC system last night but I did not order any of the vents. I still have some planning to do on the vent layout before I commit to a specific type. There just isn't a place in the dash that will look good to add vents in my opinion. I will have to come up with a different solution. I have some ideas but I need to get the transmission tunnel completed before I go too far and to do that I need to get the engine in its final resting spot.

I received the paddle shifter and transmission controller this week. The engine harness has to be made and will be about 3-4 weeks before it is completed. I plan on putting all the wiring (engine computer, transmission controller and fuse box) behind the back seat but in front of the trunk. It should clean up the wiring under the dash and make it much easier to work on later if I need to. It will all be hidden behind the seat and I will have a package tray made to enclose it from the top. The back of the rear seat will fold forward or be removable for easy access to the wiring.

It looks like my personal life may be starting to slow down a bit and I should be able to get some of the parts I have been stockpiling on the car. About the only thing I haven't planned out mechanically is the fuel tank. I have some time before that is the bottle neck so I am not worried. I am debating building a new top for my tank (pretty rusted) or waiting for Sweedish Ops to finish up on their tanks. It will be sometime this Fall/Winter before that becomes the most important part. :)

Here is a picture of my steering wheel mounted to the Twist Machine paddle shifter.
dagatu2y.jpg


Darreld
Sent from my iPhone using Tapatalk
 
I had a little time to work on the car today and started a couple projects. Earlier in the week I received my Vintage Air kit and realized I have a clearance issue with the condenser. It was about a 1/4" too high. It was 12" high by 24" wide. When the hood raises it is pretty close to the hinges.

a8e4anyh.jpg

a8a5y3a9.jpg


I decided to buy a piece of 1" x 1" x .065" tubing. I cut out 1 side and then cut out a section of the panel behind the grill and in front of the radiator support. Since I was working in this part of the car I decided to open up the radiator support to the frame rail. This will allow me to run a 16" x 24" radiator.

ta2yhura.jpg


I still need to weld everything in place and to add a drain in the bottom of the channel so water doesn't pool and cause rust. It should look great when I am done and be very functional.


Darreld
Sent from my iPhone using Tapatalk


Darreld
Sent from my iPhone using Tapatalk
 
I had a chance to put the engine in the car today. It went in without any problems. The Swedish ops engine stands and headers worked out great. It sits about 1" further back than my original mock up position. That has solved one problem but created another.

The radiator now has plenty of room for either a puller or pusher fan. Before I was questioning if I could use a puller like I wanted. That isn't an issue now.

The problem that developed is with the steering. I had it all planned out and now one of the header tubes interferes with my u-joint. Not a big deal but it now forces me to redesign that area. I should have waited to get all my conversion pasts from Swedish Ops before cutting. The one thing I haven't tried was to raise the engine via the adjustable motor mounts. That may fix the problem but I did not think about it until my wife started to give me a hard time for spending a few hours in the garage.

I think my Dad may come over tonight and help me put in the 4L60E automatic transmission tonight. When it is in I should be able to finish up the steering, trams tunnel and start on the driveshaft tunnel.
 

Attachments

  • engine 1.jpg
    engine 1.jpg
    108.4 KB · Views: 37
  • engine 2.jpg
    engine 2.jpg
    107 KB · Views: 37
  • engine 3.jpg
    engine 3.jpg
    107 KB · Views: 32
  • engine 4.jpg
    engine 4.jpg
    102.9 KB · Views: 37
  • engine 5.jpg
    engine 5.jpg
    109.8 KB · Views: 37
I ran into a problem with the driveshaft tunnel. The fab shop could only roll a tunnel 5.75" wide. I had buy a 4.5" exhaust tube and then use my metal shears to cut it in half. I then got a half sheet of 16 gauge sheet metal and cut it down to 6" strips. I will weld the 3 pieces together to make the tunnel I need. When I get the pieces back from the fab shop I can finish up the rear of the trams tunnel and all the ds tunnel.

I am having the fab shop use their bead roller to run a 1/2" flange on the sheet to make it easier to weld together. I have a manual bead roller but I don't think it will work on this thick of metal.

I still need to finalize the steering shaft location. I have it eyed out but just don't have much time to finish it. Once that is done I can finish the last part of the trans tunnel by the drivers feet.

I can also finish the back of the trans tunnel and driveshaft tunnel when I get the stuff back from the fab shop.

va3u4uzy.jpg

2y4upe5u.jpg


Darreld
Sent from my iPhone using Tapatalk
 
I feel kind of weird posting this project on this site so if you guys are't interest let me know or I could always move this to the non-Mustang off topic section. Let me know, I won't be offended.

After spending the last month working on house projects I can finally get back to the Volvo project. I'm almost done with the driveshaft tunnel. There's just a small section next to the shifter I need to weld. After that I'll be able to put the car back on a rotisserie and weld the bottom then prime and undercoat. Picture of the radiator and back portion of the driveshaft tunnel.

I picked up a new custom radiator today. I had it designed to my specifications. It is about 4 inches wider than the factory radiator and has the transmission cooler I need. It was even built to follow the contour of the radiator support. It retains the factory dowel on the bottom. I just need to fabricate some mounts for the side. I think it turned out awesome!
6u4y3aqe.jpg

9ery6a2u.jpg

upu7unu3.jpg

egeneguh.jpg


Darreld
Sent from my iPhone using Tapatalk
 
Looking good.

And keep posting updates and pictures. I think we all like to watch a build whether its a mustang or not. Besides pretty soon no one on here is going to have a mustang anymore. They're droppng like flies.

Sent from my BNTV600 using Tapatalk 4
 
"RapidRabbit" said:
Looking good.

And keep posting updates and pictures. I think we all like to watch a build whether its a mustang or not. Besides pretty soon no one on here is going to have a mustang anymore. They're droppng like flies.

Sent from my BNTV600 using Tapatalk 4
+1
 
Back
Top