Navigation
Install the app
How to install the app on iOS
Follow along with the video below to see how to install our site as a web app on your home screen.

Note: This feature currently requires accessing the site using the built-in Safari browser.
More options
-
Hello there guest and Welcome to The #1 Classic Mustang forum!
To gain full access you must Register. Registration is free and it takes only a few moments to complete.
Already a member? Login here then!
You are using an out of date browser. It may not display this or other websites correctly.
You should upgrade or use an alternative browser.
You should upgrade or use an alternative browser.
Selene/Fred is a San Jose built 1965 Mustang
- Thread starter abrahamfh
- Start date
Grabber70Mach
Well-Known Member
Nice, agree about the drilling part.
Sent from my DROIDX using Tapatalk
Sent from my DROIDX using Tapatalk
Grabber70Mach
Well-Known Member
Re: Re: Selene/Fred is a San Jose built 1965 Mustang
PUNCTUATION
The difference between "helping your Uncle Jack, off his horse." and "helping your uncle jack off his horse."
Sent from my DROIDX using Tapatalk
"Horseplay" said:Please. I was lucky to make it through HS. I do, however, love me some punctuation!
PUNCTUATION
The difference between "helping your Uncle Jack, off his horse." and "helping your uncle jack off his horse."
Sent from my DROIDX using Tapatalk
70_Fastback
Hell Bent for Speed
Re: Re: Selene/Fred is a San Jose built 1965 Mustang
:sm_TMI
HAHAHAHAHA!!! :thu
"Grabber70Mach" said:PUNCTUATION
The difference between "helping your Uncle Jack, off his horse." and "helping your uncle jack off his horse."
Sent from my DROIDX using Tapatalk
:sm_TMI
HAHAHAHAHA!!! :thu
As you all know I am awaiting the big move in about four days, life has been seriously crazy. I have not wanted to do anything major to Fred right now due to the possibility of hitting some speed bump and then trying rush myself to repair it before loading Fred on the flatbed to SoCAL.
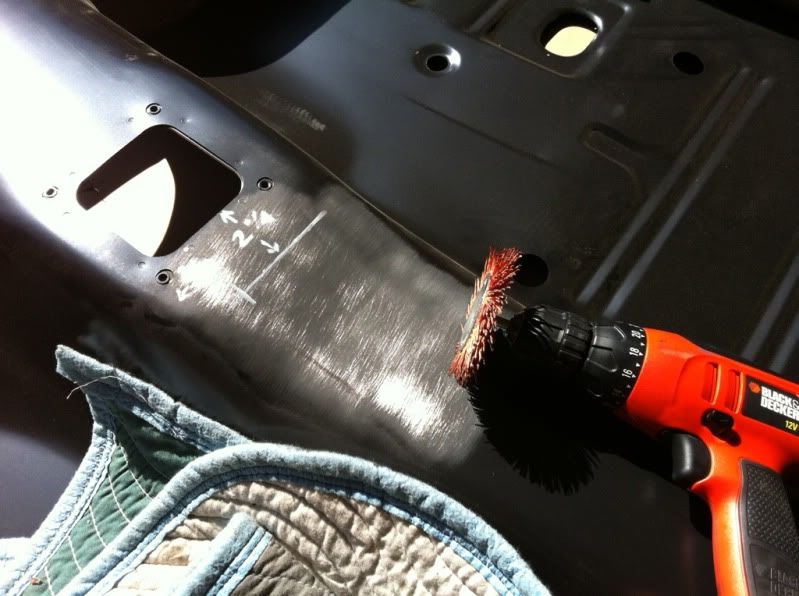
I figured it would be a good time to do the little things. I thought I would start by adding the reverse light wiring indent to the floor pan. A lot of massaging but I think it came out pretty darn good.
Scuffed up the EDP and made some reference lines
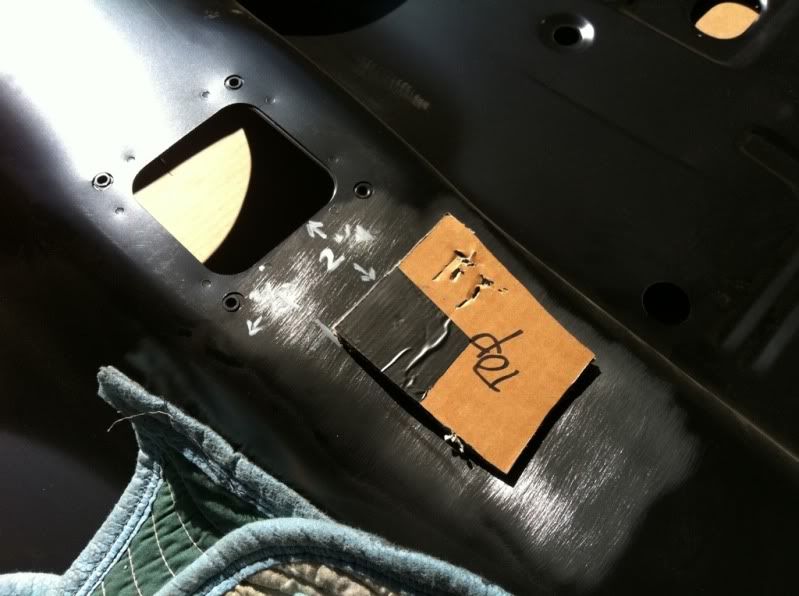
Made a template and made the actual cut a little smaller to make sure I didn't have to weld up a huge gap which would not have been a problem but I like it when it is as tight as I can get it.
Before welding on the real thing, practice practice practice. NOTE: It looks nasty because I forgot to scuff off the EDP on the practice welds
Top side
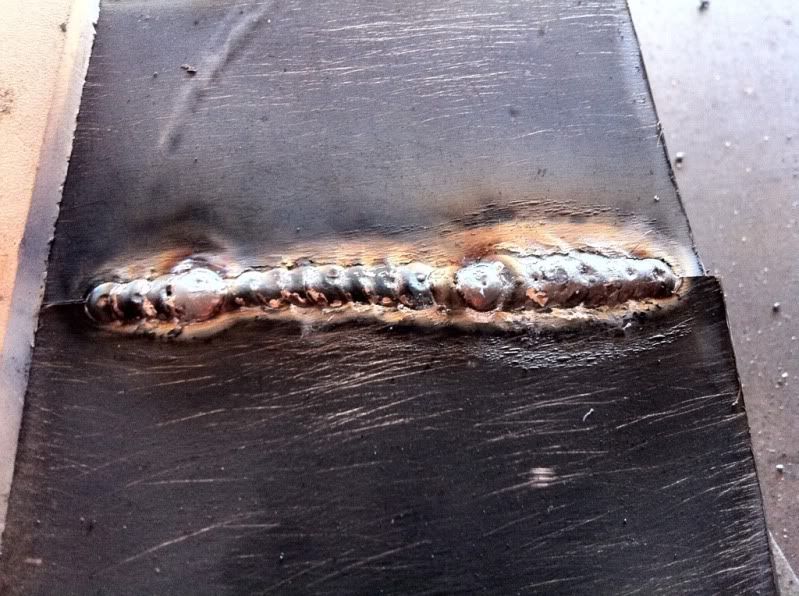
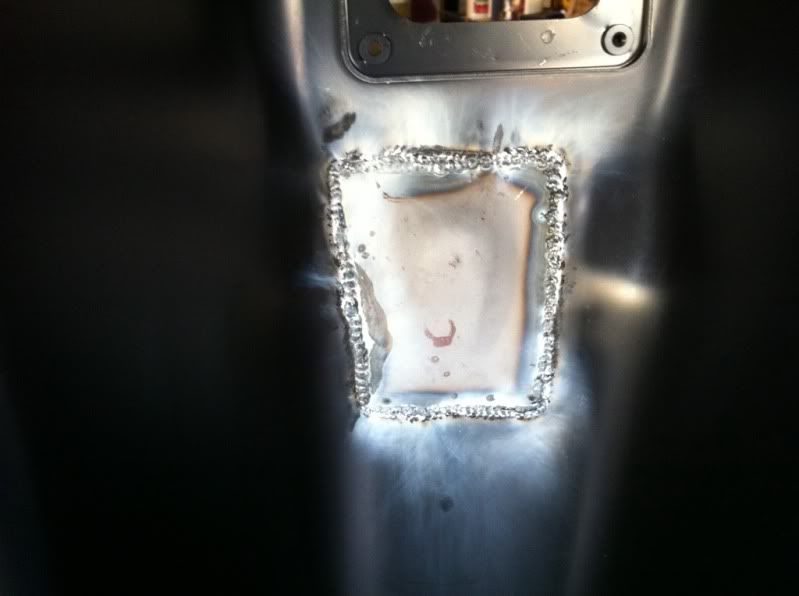
Bottom side
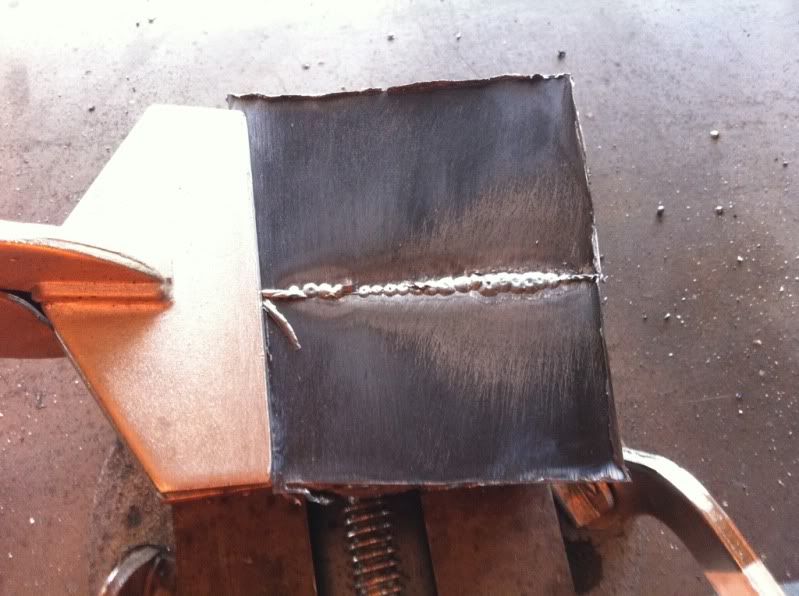
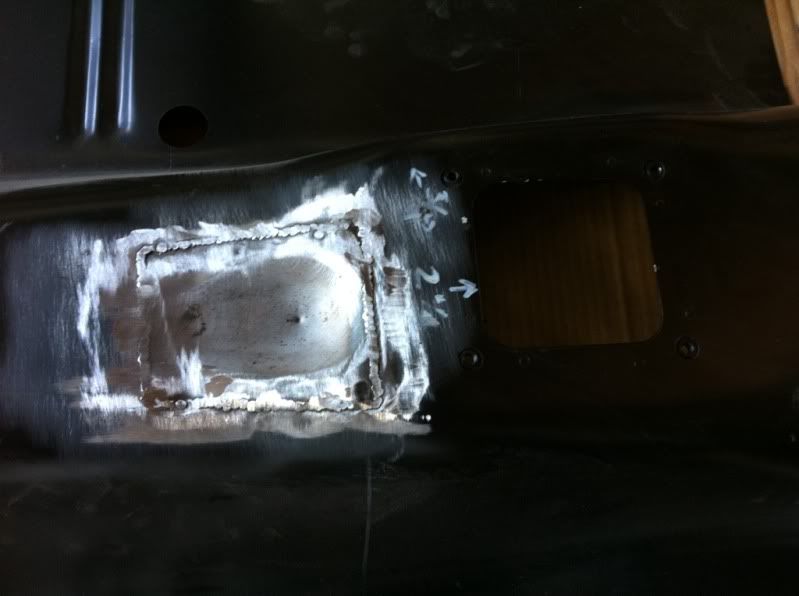
The real deal
Top side RAW
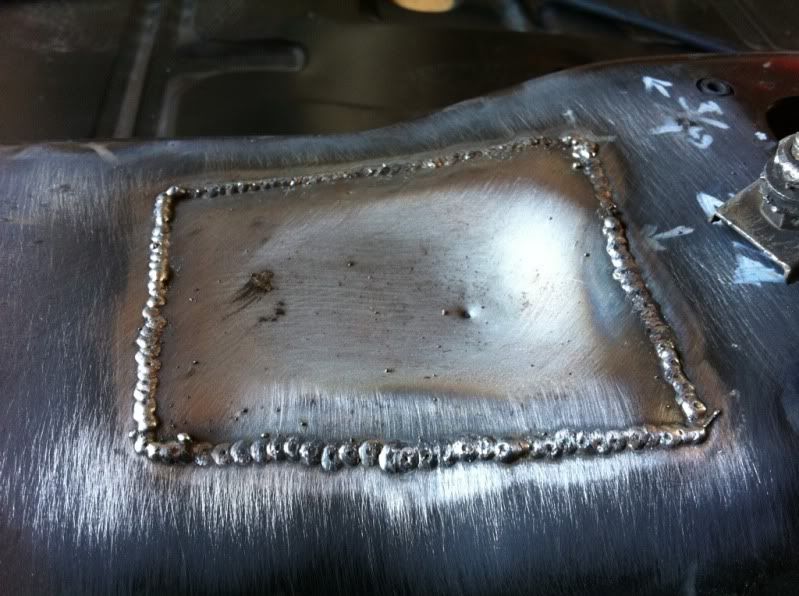
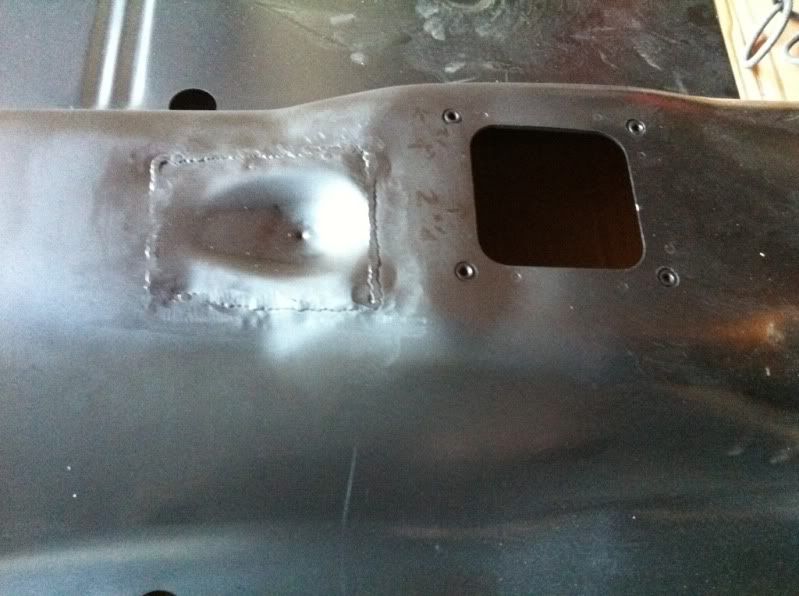
Cleaned it up just a little bit because once again, I have been told leaving some filler material aids the overall strength of the weld.
Some primer to protect the bare metal
The bottom side before I hit it with some primer as well
I figured it would be a good time to do the little things. I thought I would start by adding the reverse light wiring indent to the floor pan. A lot of massaging but I think it came out pretty darn good.
Scuffed up the EDP and made some reference lines
Made a template and made the actual cut a little smaller to make sure I didn't have to weld up a huge gap which would not have been a problem but I like it when it is as tight as I can get it.
Before welding on the real thing, practice practice practice. NOTE: It looks nasty because I forgot to scuff off the EDP on the practice welds
Top side
Bottom side
The real deal
Top side RAW
Cleaned it up just a little bit because once again, I have been told leaving some filler material aids the overall strength of the weld.
Some primer to protect the bare metal
The bottom side before I hit it with some primer as well
O
opentrackerSteve
Guest
Abe,
Me confused. Why are you welding in patches over good steel?!? WTF?
In the pic titled 'Scuffed up the EDP and made some reference lines' the hump looks fine. Then you show welds and it almost appears you've welded in a plate over the steel that was there?
What is EDP?
What am I missing?
Me confused. Why are you welding in patches over good steel?!? WTF?
In the pic titled 'Scuffed up the EDP and made some reference lines' the hump looks fine. Then you show welds and it almost appears you've welded in a plate over the steel that was there?
What is EDP?
What am I missing?
The hump didn't have the indent as the original. He welded in a piece with the indent. EDP is the black coating you see on replacement pieces.
70_Fastback
Hell Bent for Speed
Cleaned it up just a little bit because once again, I have been told leaving some filler material aids the overall strength of the weld.
For a structural weld - yes. For what you are doing - it's kind of a moot point. As long as you maintained a decent gap, between pieces, allowing for decent penetration, you're fine.
I would dress those seams up and make them disapear if it were me.
And nice job of that patch work. Did you ever invest in any butt weld clamps to help set a consistent gap for welding?
O
opentrackerSteve
Guest
"Horseplay" said:The hump didn't have the indent as the original. He welded in a piece with the indent. EDP is the black coating you see on replacement pieces.
indentation is for mounting a center console?
Like Abe wrote in his post, it is for the reverse light wiring. I'm far from a factory condition expert but I as I understand it not all cars had this indentation for the factory. Not sure why or if this is even accurate, to be honest."opentrackerSteve" said:indentation is for mounting a center console?


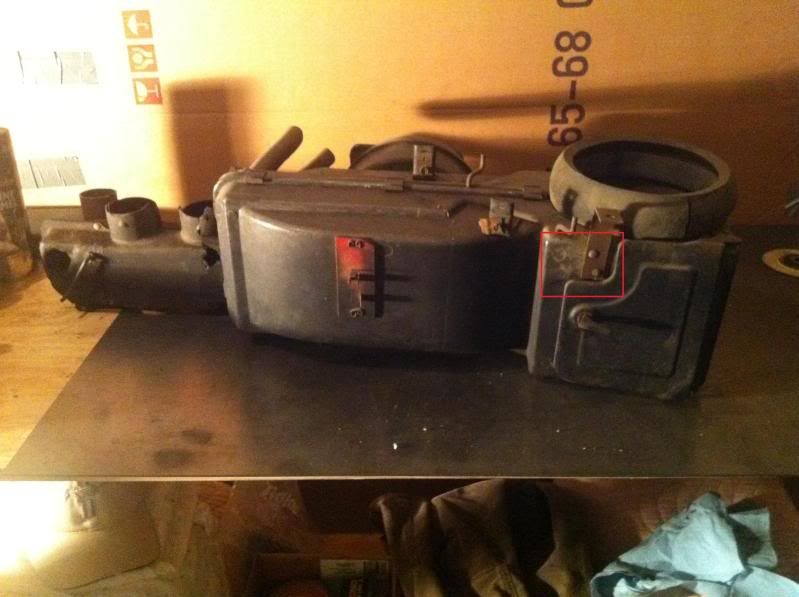
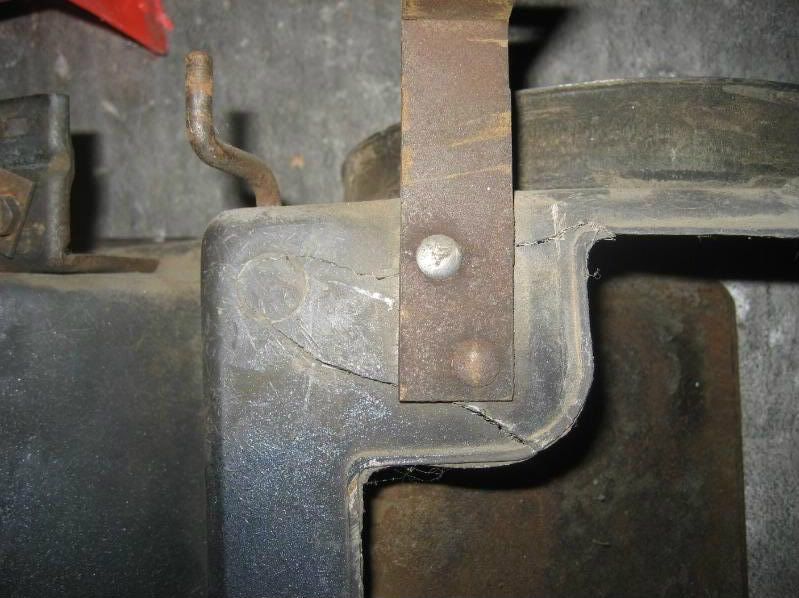
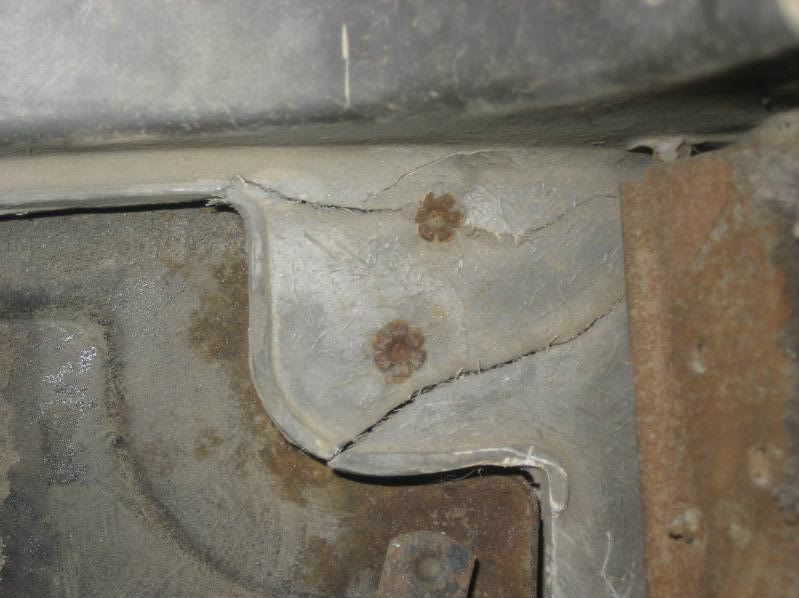
I found these cracks on the heater box. I was wondering if anyone could clarify for me that air is the only thing passing through this section of the box. I looked on NPD and a new heater box is over $200 and I would really like to salvage the one I have if possible. It seems as though the heater box is made of fiberglass, what would be the best route to repairing something like this if possible?
Thanks everyone
Location on box
closer from outside
closer from inside
Thanks everyone
Location on box
closer from outside
closer from inside
guruatbol
Always on vacation!
Nice Abe. How hard was it to get out?
I am sure I have to tear mine out.
Mel
I am sure I have to tear mine out.
Mel
"guruatbol" said:Nice Abe. How hard was it to get out?
I am sure I have to tear mine out.
Mel
I actually removed it a while ago but since I can't work on Fred I figure why not get the small stuff out of the way.
Originally getting the beast out wasn't too hard, it was mostly about documenting where the temp control cables went. Took me about thirty minutes.
Removing the heater box itself is fairly easy and straight forward. Just be careful with it as age and heat make them somewhat prone to breaking (the box itself)
"abrahamfh" said:I found these cracks on the heater box. I was wondering if anyone could clarify for me that air is the only thing passing through this section of the box. I looked on NPD and a new heater box is over $200 and I would really like to salvage the one I have if possible. It seems as though the heater box is made of fiberglass, what would be the best route to repairing something like this if possible?
Remove the brackets an epoxy the pieces back together. Sometimes it's good to notch along the break so the epoxy bonds to a little larger surface area. If you want to stiffen it up some, after it cures, dress the inside, and could trim a small piece of sheetmetal and epoxy it to the inside to give it some additional strength or just a layer or two of fiberglass cloth. Since the bracket needs to be re attached, I'd probabaly go for the metal backer. For the front, I wouldn't notch it if your're trying to keep the repair somewhat stealthy. Leaving the outside edges alone should make it easier to align the broken piece... just lightly epoxy along the fracture so you don't get too much squeezing out.
I used a fiberglass repair kit to mend mine where necessary. You can run some strips across the cracks (on the inside if you want to hide the repairs) which I hope will produce a much stronger repair over time.
Abe,
When are we loading Fred onto a trailer? Restoring the heater box has always been one of my more enjoyable projects. Be sure to do a leak test on the new heater core before you install it.
When are we loading Fred onto a trailer? Restoring the heater box has always been one of my more enjoyable projects. Be sure to do a leak test on the new heater core before you install it.
Thanks for all the advice guys, I will be jumping into the heater box and applying the tips real soon. I am really in the mood to do some cutting, grinding and welding so I had my folks bring down Fred's seat risers this last weekend. I will be lowering them an inch so my oddly shaped noggin doesn't hit the roof. I have been doing some online browsing on this topic and was getting ready to start measuring and marking when I noticed something a little different about my seat risers.
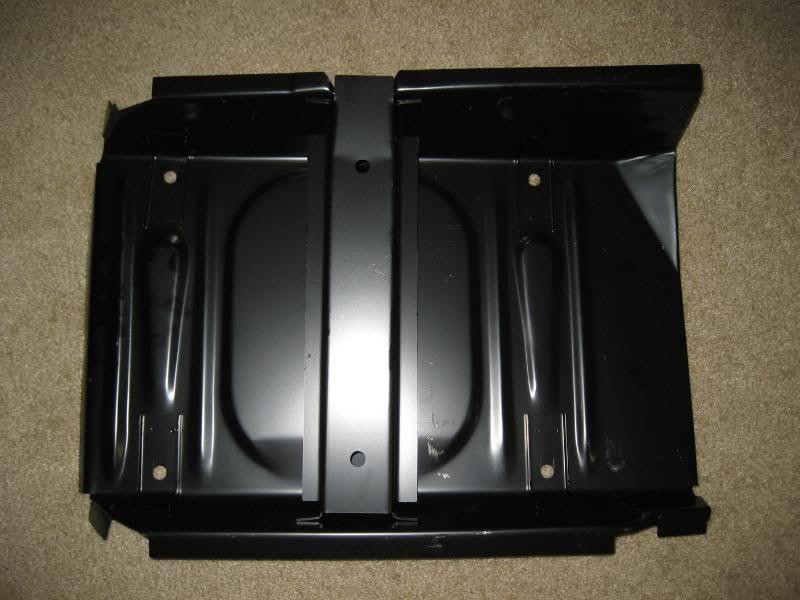
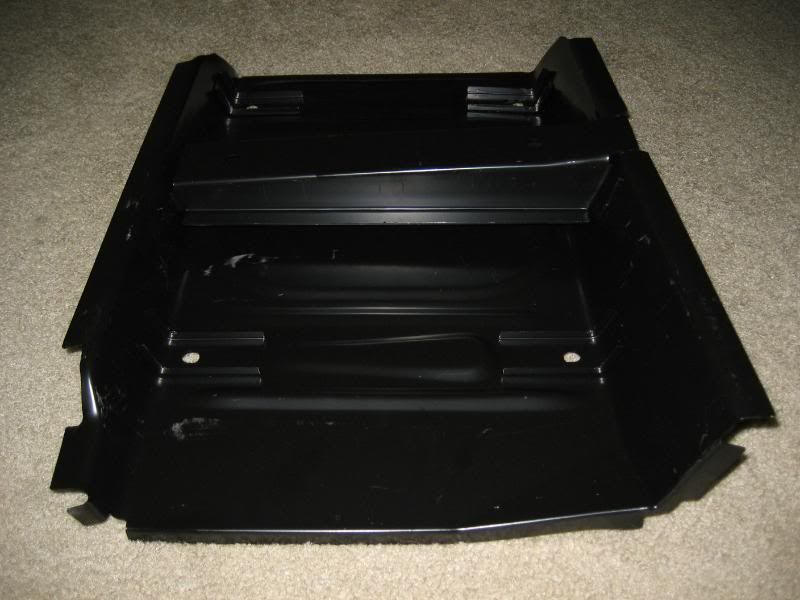
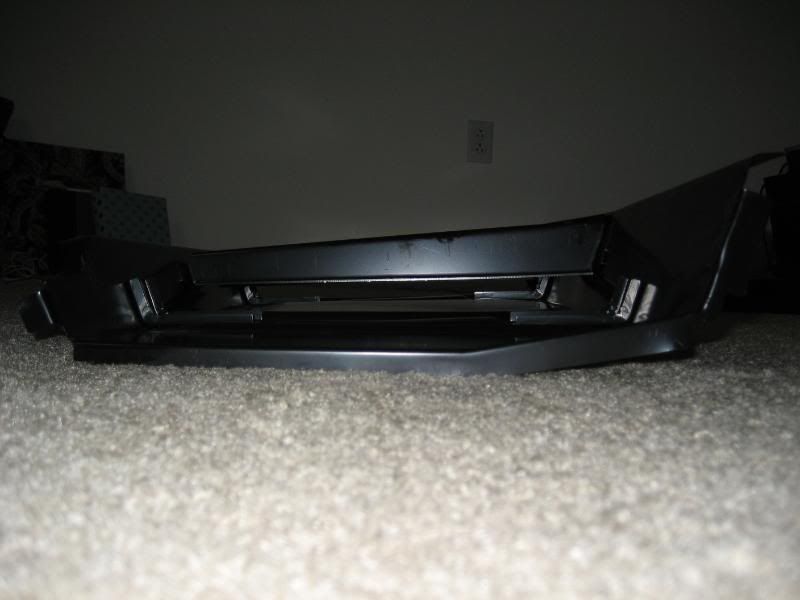
It seems as though the originals did not have this bracket across the middle of the riser so I am going to have to do some extra spot weld cutting and determine how to shorten it so I can relocate it.
It seems as though the originals did not have this bracket across the middle of the riser so I am going to have to do some extra spot weld cutting and determine how to shorten it so I can relocate it.