• Hello there guest and Welcome to The #1 Classic Mustang forum!
    To gain full access you must Register. Registration is free and it takes only a few moments to complete.
    Already a member? Login here then!

65 FB Scratch Build

65-408

Member
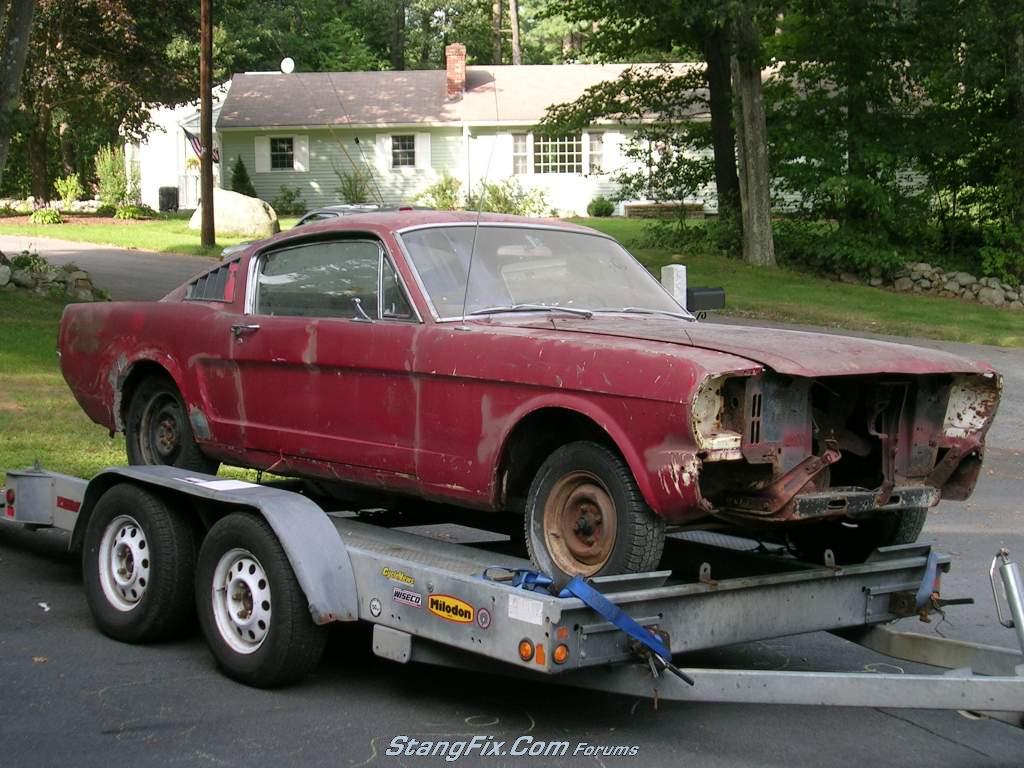
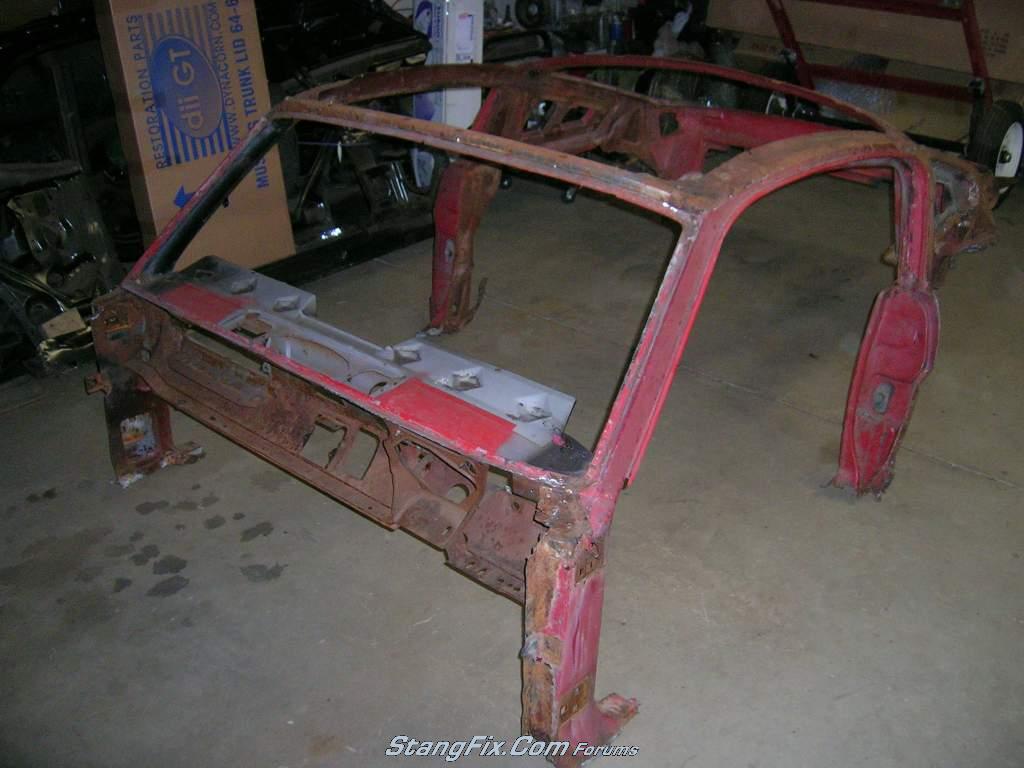
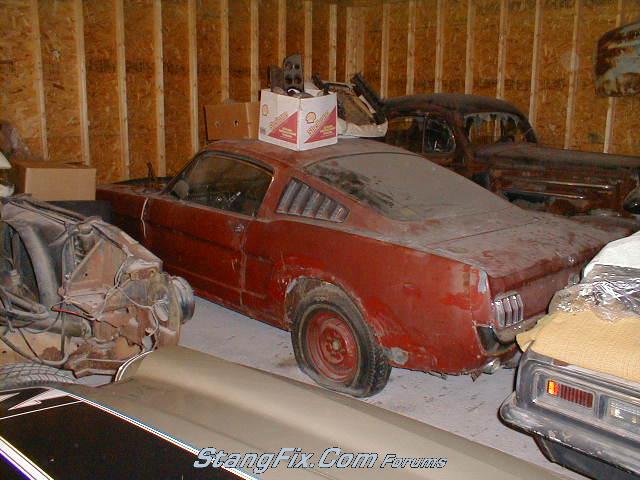
When I dragged this pathetic POS home, my 3 year old dubbed it "Rusty". The name stuck and even now that there is not a spec of rust on it, it is still "Rusty".

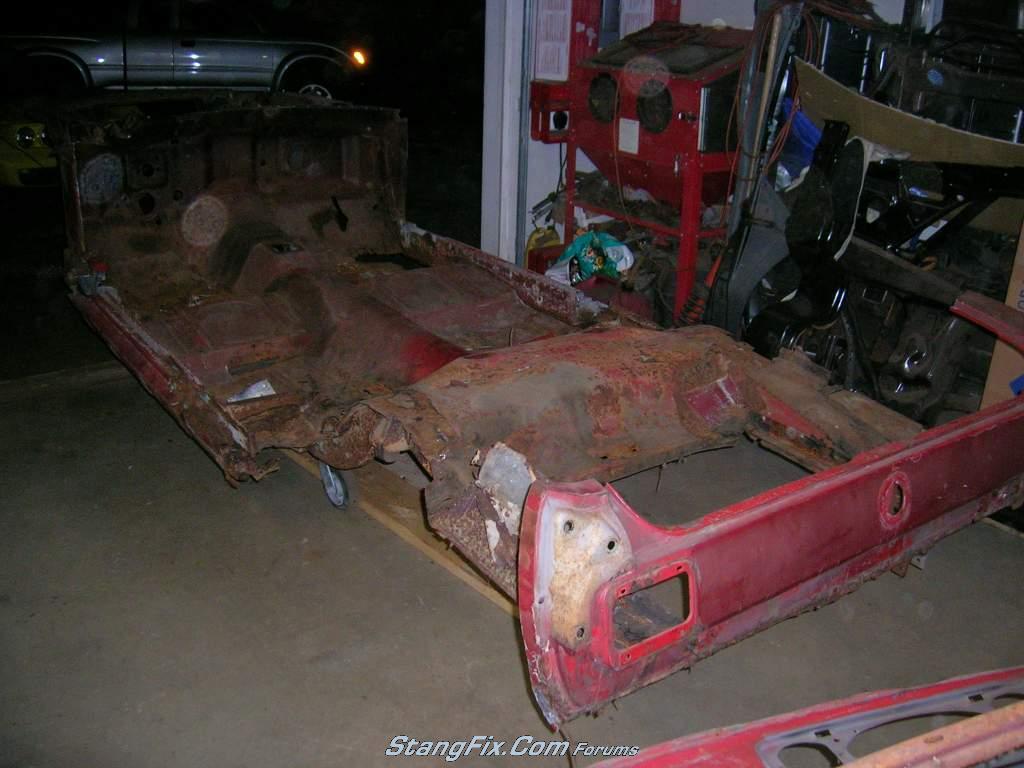
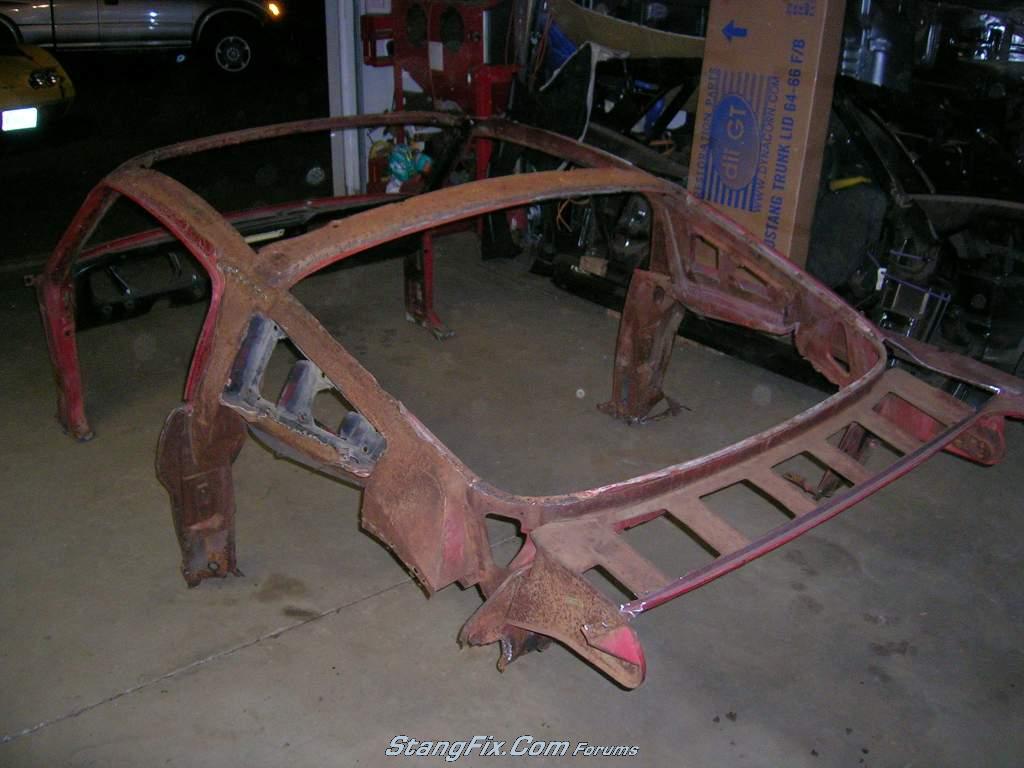
Anyways, I had been looking for a 65/66 fastback for about 6 months, watching ebay auctions, searching craigslist. Wanted a project, but was undecided wether to buy something driveable or a basketcase. Found lots of "drivers" with rotten floors, original interiors, etc., for $12K-$15K. I figured, why spend that much on something that I will strip to the shell and replace most everthing anyways? So the search turned to basketcases, but I was specifically looking for something complete. Wanted to take it apart myself (to record) and wanted to make sure I had all the misc. parts, brackets, etc. that would take a lifetime to track down later.

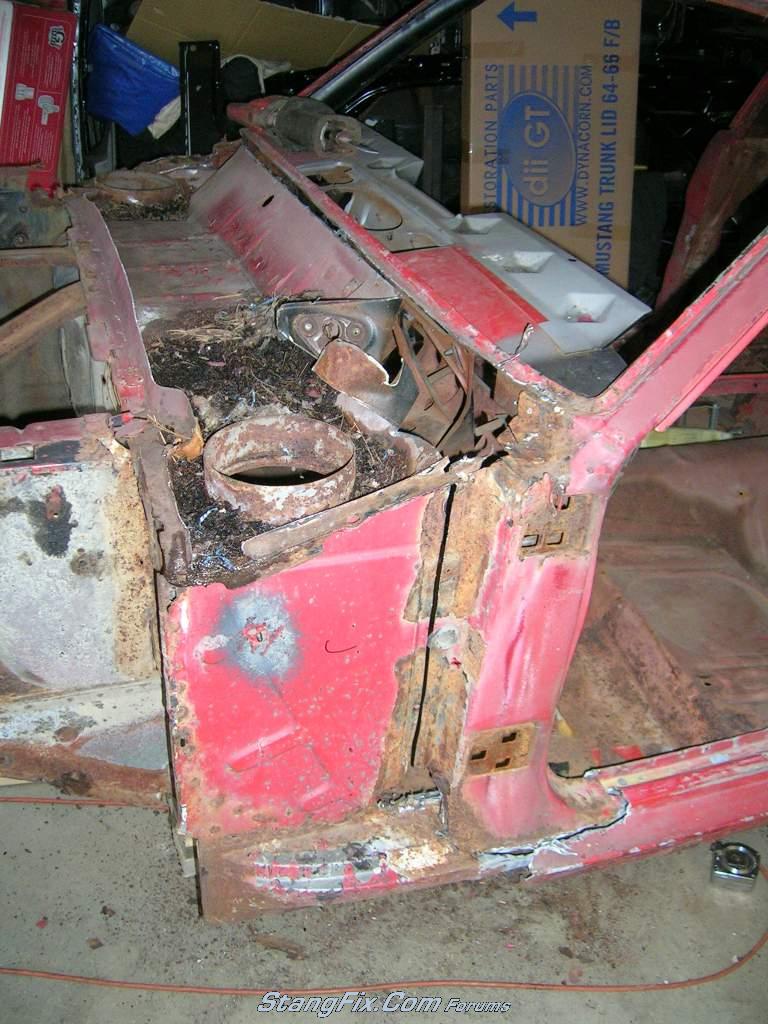
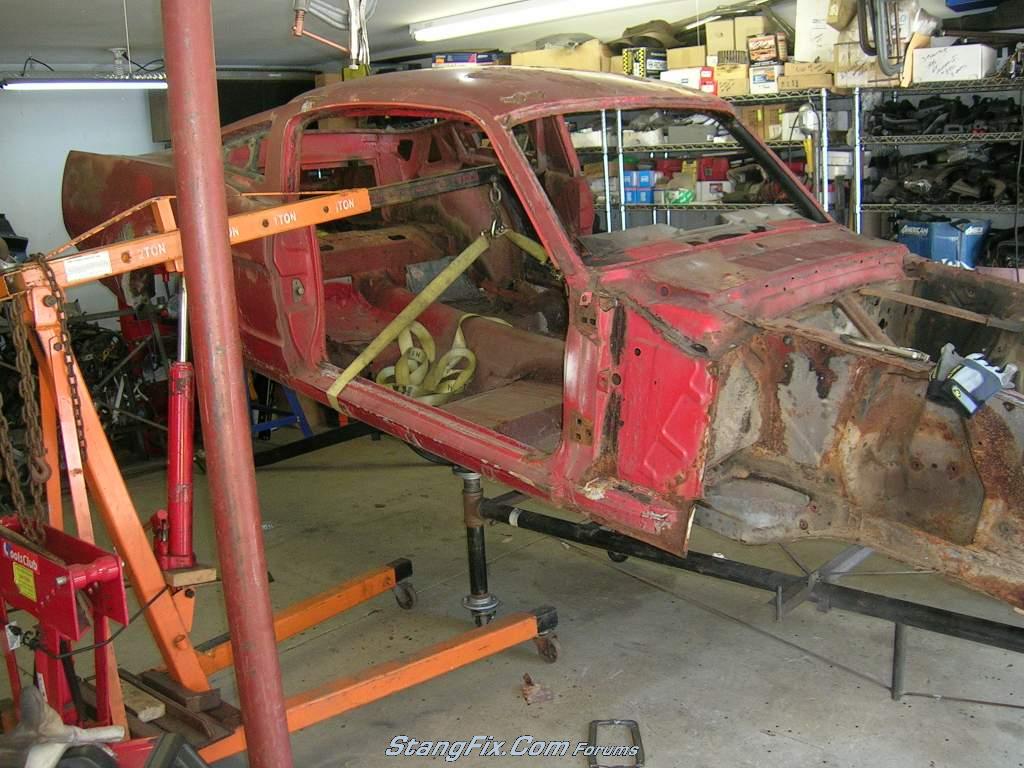
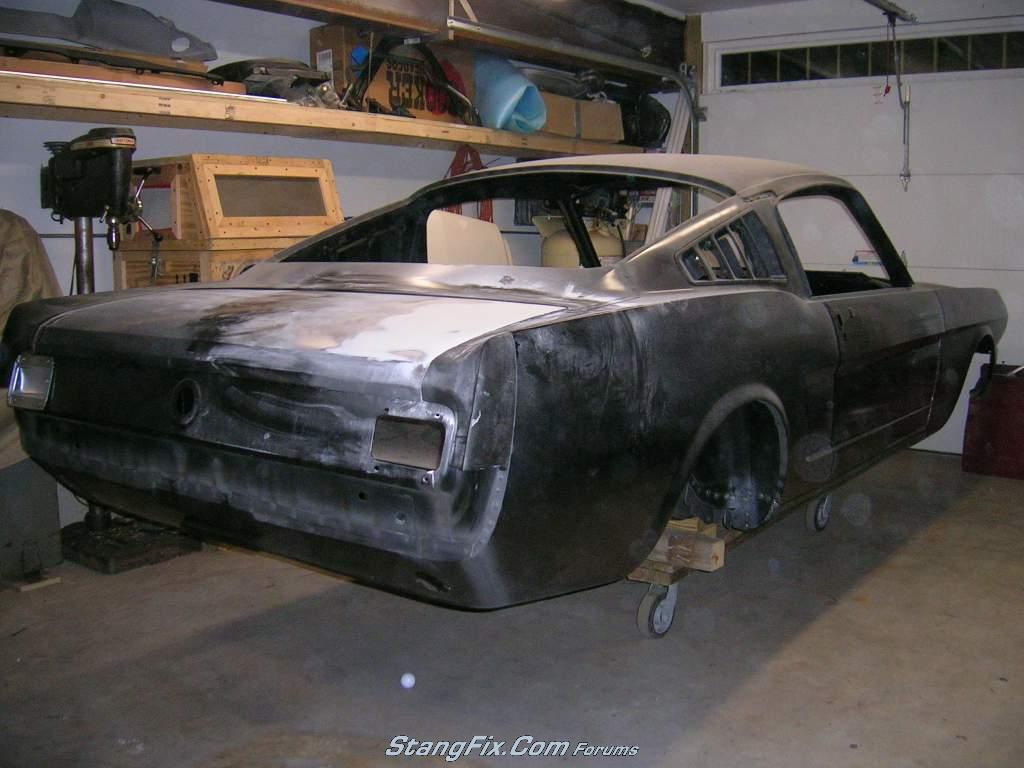
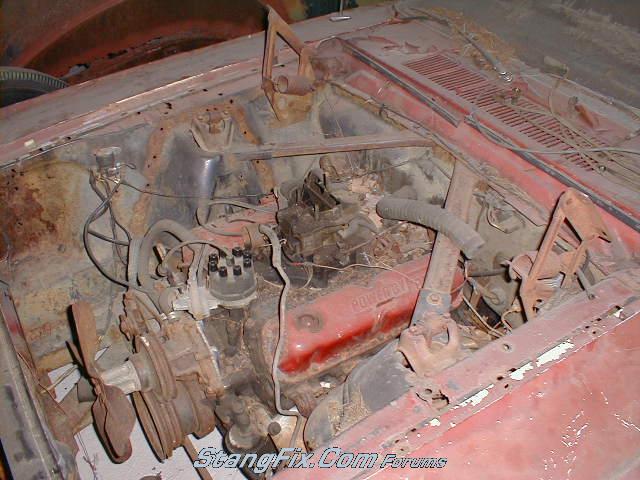
Found this baby in Maine less than an hour drive, had not driven in 20+ years, even spent some time in a chicken coop according to the previous owner. Got it for $1800. Originally a 6cyl. car, got a half upgrade to a 68 302 w/ a C4 at some point (suspension and rear were not changed).

My dad went to pick it up with me, he thought I was nuts, but he should know better by now. We stopped to get fuel on the way home and had 2 guys come over to check it out on the trailer, what more justification do you need than that?

330_01_11_10_5_13_16.JPG


Complete with a trailer hitch:
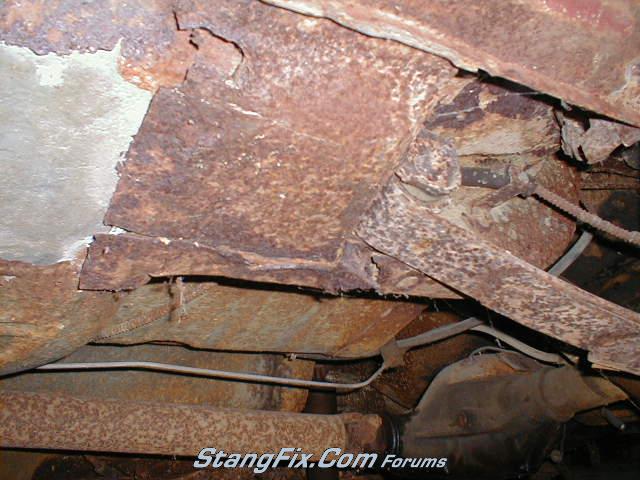
330_01_11_10_9_06_31_0.JPG


330_01_11_10_9_06_31_1.JPG


330_01_11_10_9_10_16_0.jpg


330_01_11_10_9_06_32_2.JPG


330_01_11_10_9_06_32_3.JPG


330_01_11_10_9_06_32_4.JPG
 
Last edited:
I can literally see the chicken poop on the rear fold down seat!

Nice build with major modifications to come, I hope...
:weas
 
Home on the trailer, doesnt look that bad
330_02_11_10_4_51_38_0.JPG


Got an extra set of headlight buckets (that will prove handy in the future) and some NOS splash shields and battery tray:
330_02_11_10_4_51_39_2.JPG

330_02_11_10_4_51_39_1.JPG


Surgery begins:
330_02_11_10_4_51_40_3.JPG


Massive, nasty, mouse nest. That sucked cleaning that out:
330_01_11_10_9_10_18_4.JPG


The Schlitz can defroster duct was a nice touch:
330_01_11_10_9_10_17_3.JPG


This is why cars from maine are not for faint of heart:
330_01_11_10_9_10_16_2.JPG

330_02_11_10_4_53_40_0.JPG


Every bolted on part removed, the rockers and the roof were pretty solid, but the roof had a giant dent on the passengers side from maybe a tree falling on it, had about half inch of filler in it.
330_02_11_10_4_51_41_4.JPG
 
Last edited by a moderator:
Begin the Extreme De-Rustification process:
330_02_11_10_9_01_31_0.JPG

330_02_11_10_9_01_31_1.JPG

330_02_11_10_9_01_33_2.JPG

330_02_11_10_9_01_34_3.JPG


Down to all good solid metal, a little Great Stuff and Bondo and she will be good as new! If I remember right, this took about 3 hours...
330_02_11_10_9_01_35_4.JPG

330_02_11_10_9_02_28_0.JPG


$300 to have a guy blast and epoxy prime:
330_02_11_10_9_11_48_0.JPG

330_02_11_10_9_11_49_1.JPG

330_02_11_10_9_11_49_2.JPG

330_02_11_10_9_11_51_3.JPG
 
Last edited by a moderator:
Shopping List:
Desc. Dynacorn PN:
radiator support bracket 3640T
radiator support bracket 3640U
complete shock tower 3630P
complete shock tower 3630Q
radiator support 3640E
battery tray M3534
Cowl 3648G
firewall 3631Z
Firewall to Floor Support set 3631ZC
roof panel 3543XA
floor pan 3648C
seat platform 3647YC
Rocker 3647LB
Rocker 3647MB
quarter 3647EA
quarter 3647FA
outer wheel house 3631M
outer wheel house 3631N
inner wheel house 3631K
inner wheel house 3631L
rear deck filler panel 3647YZ
rear frame rail 3601A
rear frame rail 3601B
tail lamp panel 3643D
tail lamp panel brace 3649I
rear valence 3642D
Torque Box 3654
Torque Box 3655
trunk floor 3649S
 
Dude you got some big ones :ep to take on a project like that. When you said scratch built I never thought it would be this gone. Can't wait to see pictures of the progrees.
 
OK, here goes the shell build, I have posted this before, but want to summarize it all in the build thread so it is all in one place. The shell was done last fall with a past co-worker of mine (Tony P) that now runs muscle car metal in seabrook NH. He has been building 1st gen Camaros from scratch for many years and is a dynacorn distributor. Got the parts through him (all dynacorn). Some were better than others, but generally all were great for the price. This was his first ford endeavor, the dark side as he calls it. We built it together from the frame rails up like Ford did and I learned a ton (he is way up the curve on build your own unibody techniques). We adapted his camaro jig. The construction is basically the same, except for the GM front clip. The jig is basic, but effective. It picks up on all the tooling and reference holes that are dimensioned in the factory manual frame drawing. The shell was built in about 2 months (including alot of head scratchin and figurin time...). If anyone want a more cost effective solution to a new Dynacorn body, Give Tony a call, he can build/rebuild anything, 65-70, also does complete floor assemblies.

We started by putting the rotten old shell on the jig to get the frame rail reference points in the ballpark and get a general idea of how to approach modifying his jig. The shell was then removed and the points checked and tweaked against the drawing (the shell was far from perfect).
330_05_11_10_4_41_59_0.JPG


One piece shock towers and floor supports on the jig, the passenger side was pretty bent up out of the box.
330_04_11_10_9_20_10_1.JPG


Rear frame rails and full trunk floor on the jig:
330_04_11_10_9_20_09_0.JPG

330_04_11_10_9_20_11_2.JPG


Firewall in place:
330_04_11_10_9_20_11_3.JPG


Full floor in place:
330_04_11_10_9_20_12_4.JPG


Rear torque box:
330_04_11_10_9_25_45_0.JPG


Floor to firewall:
330_04_11_10_9_25_46_1.JPG


Front torque box (67/68), these are awesome parts very thick and in my opinion one of the best mods that can be made to a 65/66 body to increase torsional stiffness, very effective at tying the front of the car to the rockers and creating a continuous chain from front to rear frame rails:
330_04_11_10_9_25_46_2.JPG

330_04_11_10_9_25_47_3.JPG


Rockers next :
330_04_11_10_9_30_15_0.JPG


Join inner and outer wheel houses:
330_04_11_10_9_25_50_4.JPG


Looking like something now:
330_04_11_10_9_30_18_1.jpg


Test fit the rear quarters and tail panel. Rockers were attached after this fitting and we also held a door in place to make sure the rockers were in the ballpark:
330_04_11_10_9_30_19_2.JPG

330_04_11_10_9_30_19_3.JPG

330_04_11_10_9_30_21_4.jpg

330_04_11_10_11_43_30_0.JPG


Shove the old structure into the new:
330_04_11_10_11_43_31_1.JPG

330_04_11_10_11_43_32_2.JPG

330_04_11_10_11_43_32_3.JPG

330_04_11_10_11_43_35_4.jpg


Roof Skin:
330_05_11_10_4_43_22_0.jpg


Rear valance, decided to weld it on and go seamless:
330_09_09_10_9_13_31.JPG

330_09_09_10_9_14_18.JPG


Lower cowel and side pieces and you have an almost brand new, rust free 65 mustang fastback:
330_05_11_10_4_42_01_1.jpg

330_09_07_10_2_09_56.jpg
 
Last edited by a moderator:
wowsers...smimply wow. what a save in action. it appeared in one of the pics that the suspension on the original was a 6 cyl. might want to check and make sure it was all converted over to v8. I swear I saw 4bolt tires in one of the pics but i didnt see the rear wheels that well...just a simply observation
 
Thanks for the heads up. Yep, it was a T code car, everything suspension related was scrapped... Actually, I think I kept the steering stops, the upper shock caps and the steering box...
 
steering centerlink, fuel lines and brakes lines will need to be replaced also..you might be able to get a 8.8 rear end in the rear , since you will need a rear end and a driveshaft also. all things I have been looking for in my T coupe
 
Thanks for posting this.

Looking back do you think it would have been worth the money to purchase the floor/frame assembly from a mustang vendor over building it in pieces? It's about $2k + truck freight and I would guess your labor was cheaper than the retailer selling them, but for a person that does not have a jig it may be a wash?
 
The doors, fenders, hood, valance, trunk, etc are rough fit. The doors needed to be cut on the bottom edges some, the fenders needed lots of rework to fix the door gap, door to rear quarter was perfect, trunk lid needed some fitting as well.
330_29_10_10_4_42_49_1.JPG

330_29_10_10_4_42_49_3.JPG

330_29_10_10_4_41_13_1.JPG

330_29_10_10_4_41_16_4.JPG

330_29_10_10_4_41_14_3.JPG

330_29_10_10_4_41_14_2.JPG


Added Rivnuts to correct headlight bucket crack issue:
330_13_10_10_4_59_17.JPG

330_13_10_10_4_59_59.JPG

330_13_10_10_5_00_25.JPG

330_13_10_10_5_03_57.JPG

330_13_10_10_5_05_53.JPG

330_13_10_10_5_07_31.JPG
 
Last edited by a moderator:
Back
Top