• Hello there guest and Welcome to The #1 Classic Mustang forum!
    To gain full access you must Register. Registration is free and it takes only a few moments to complete.
    Already a member? Login here then!

Mustang Distractions OFCC and AS

phlegm

Active Member
A lot of my time this Spring has been dominated by these two..
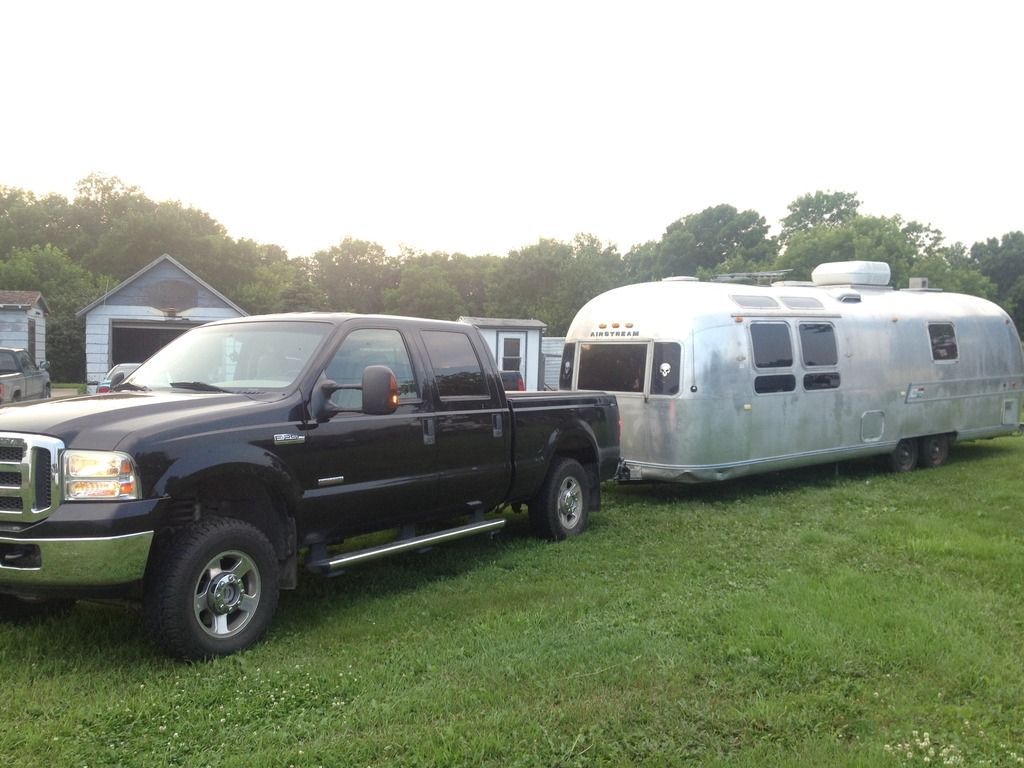
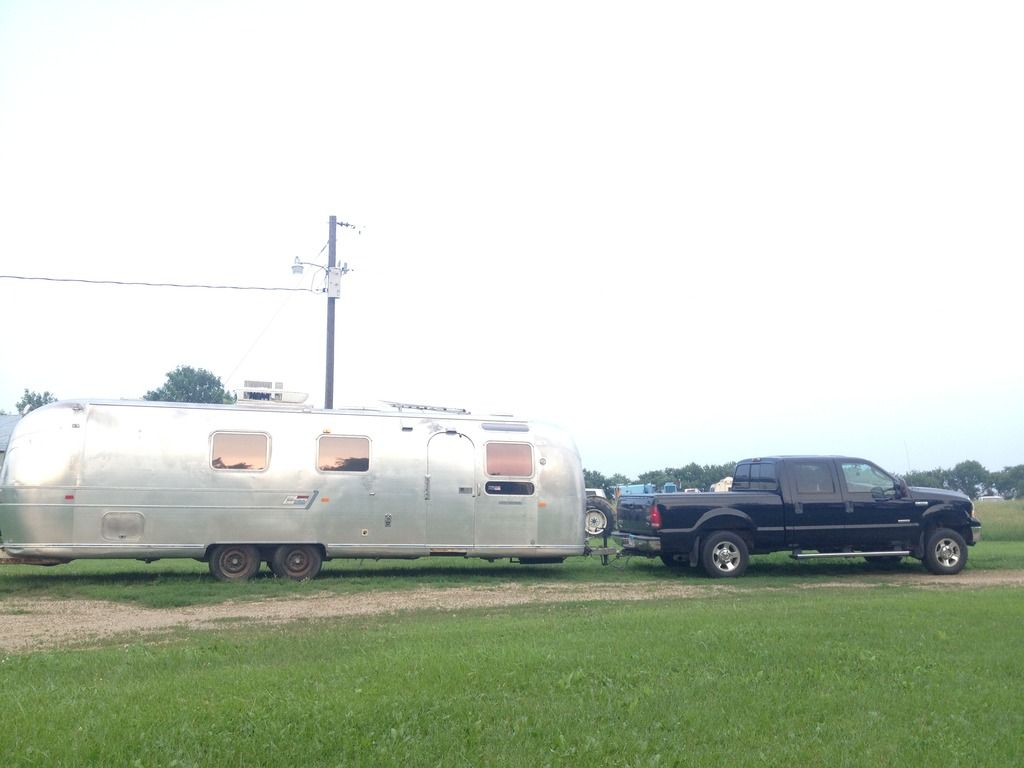
1971 Airstream Sovereign 31ft (AS -- AirStream)
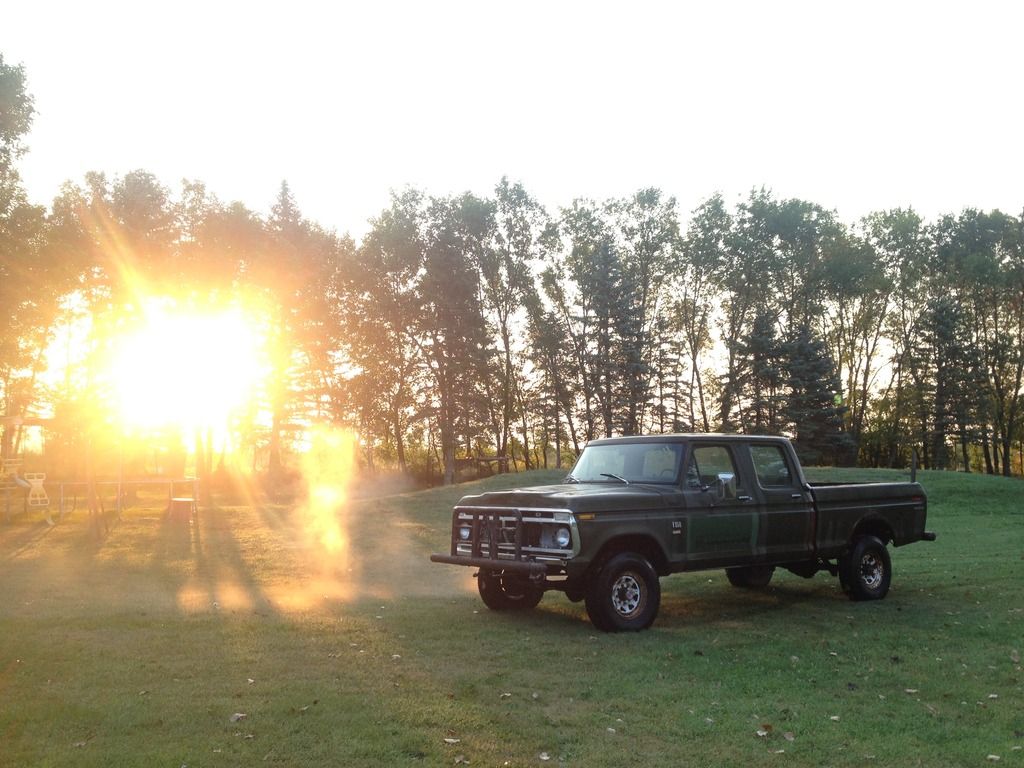
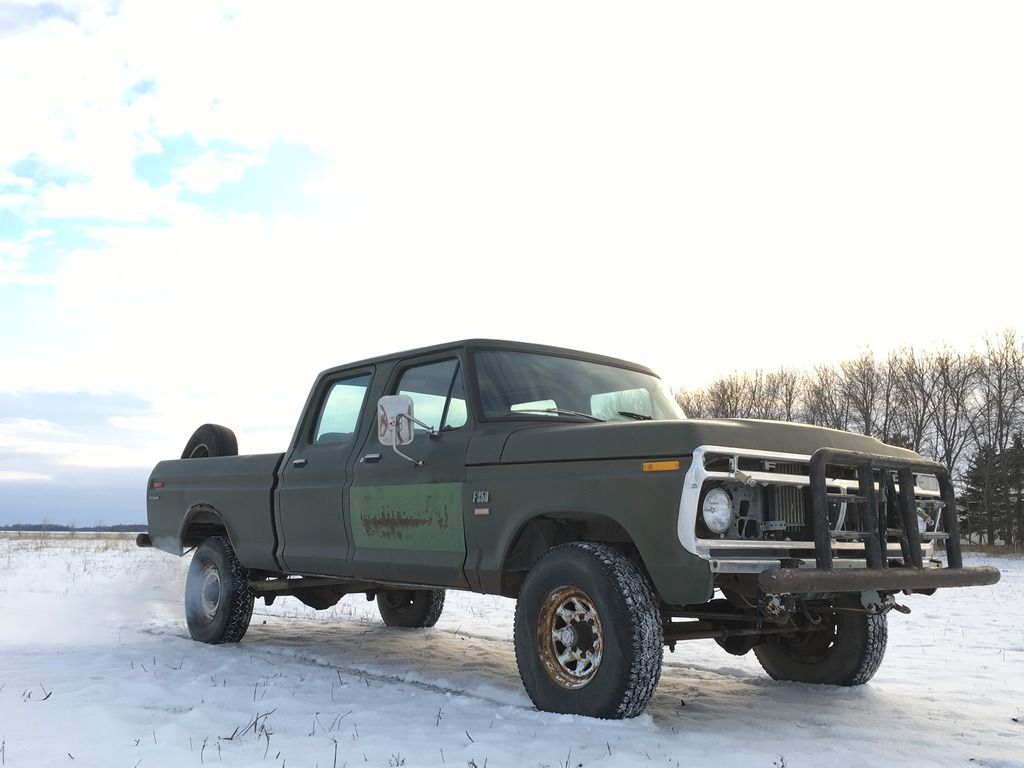
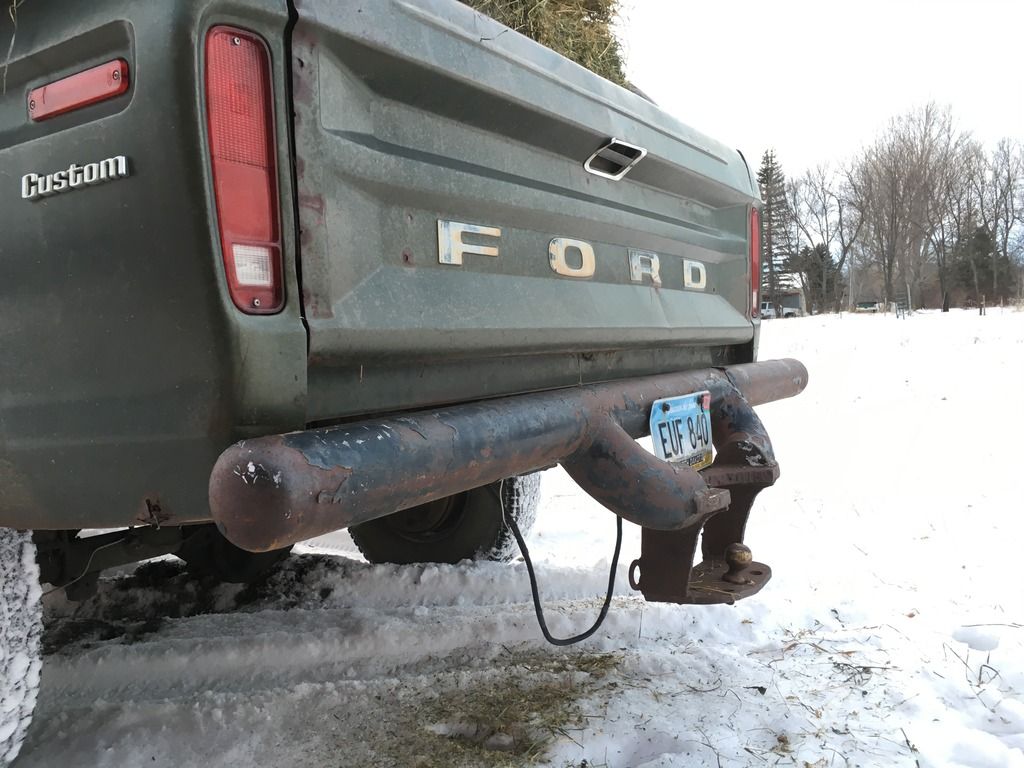
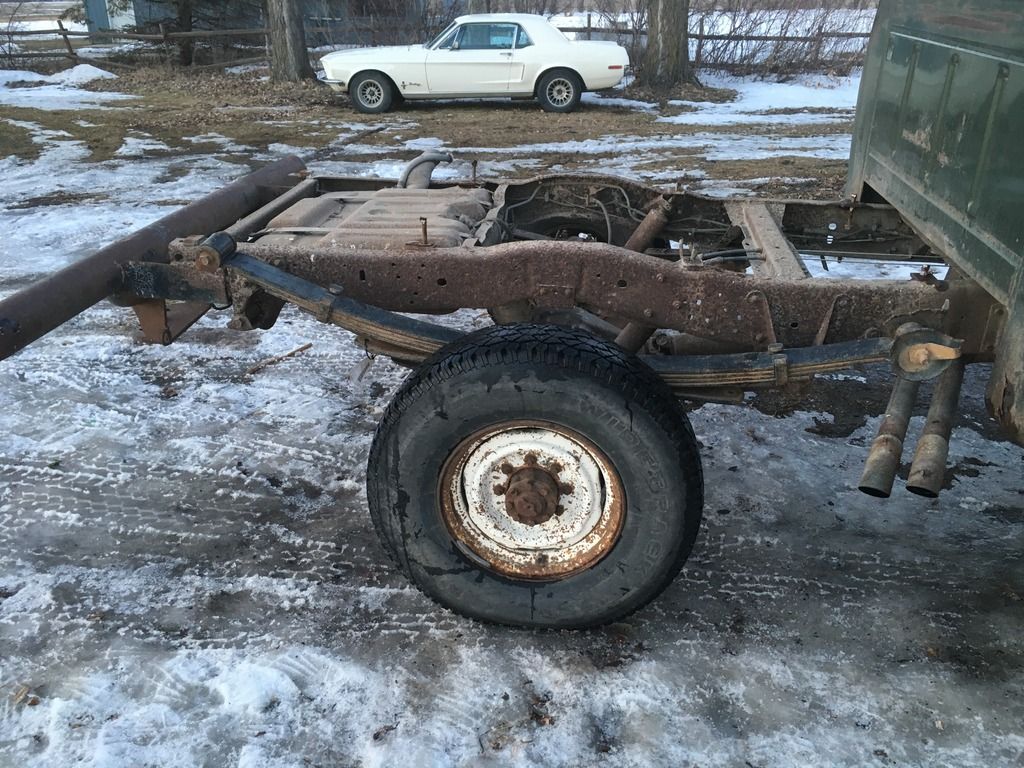
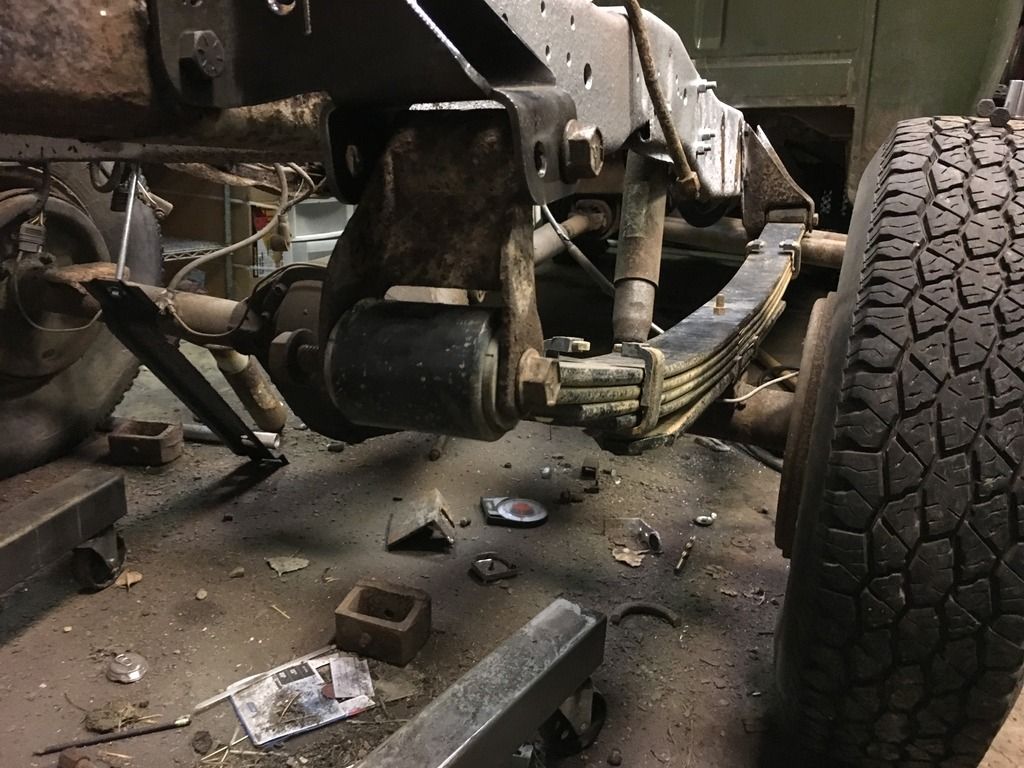
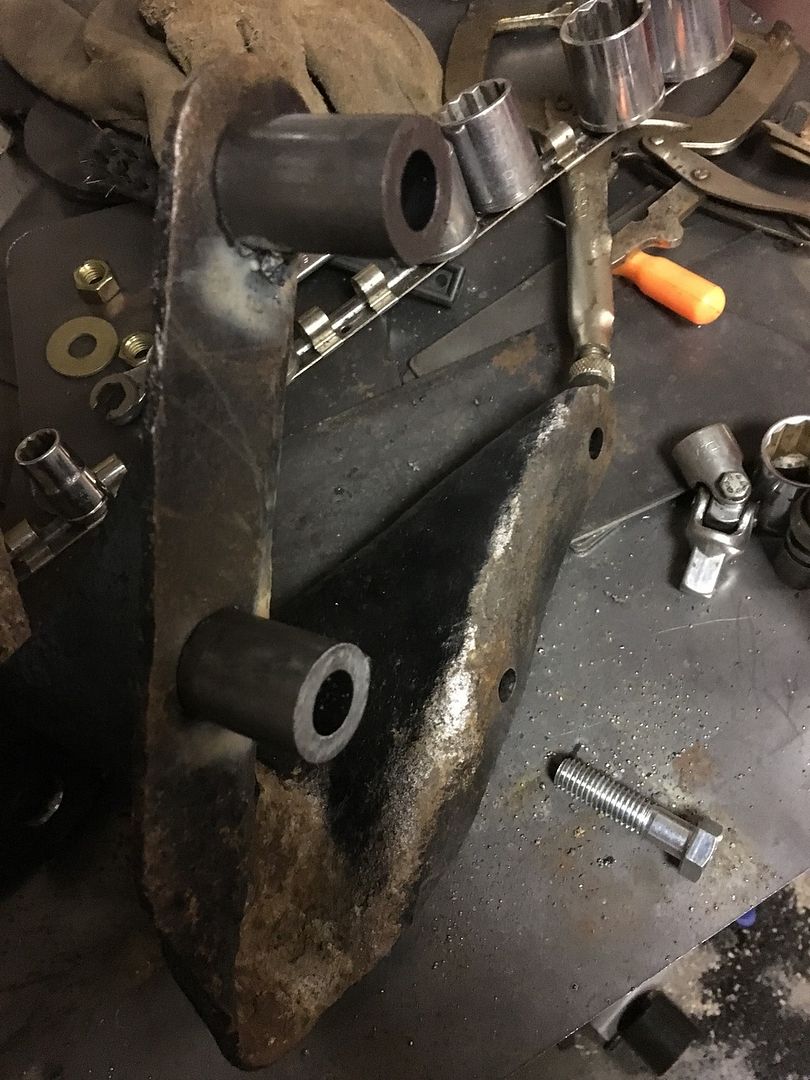
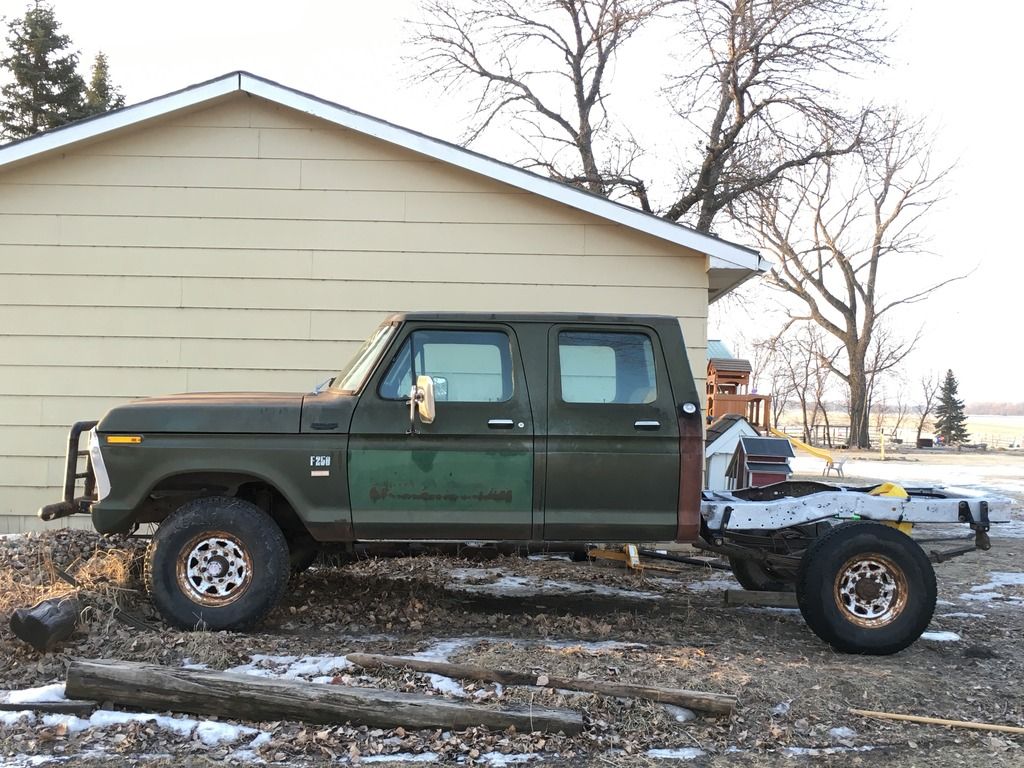
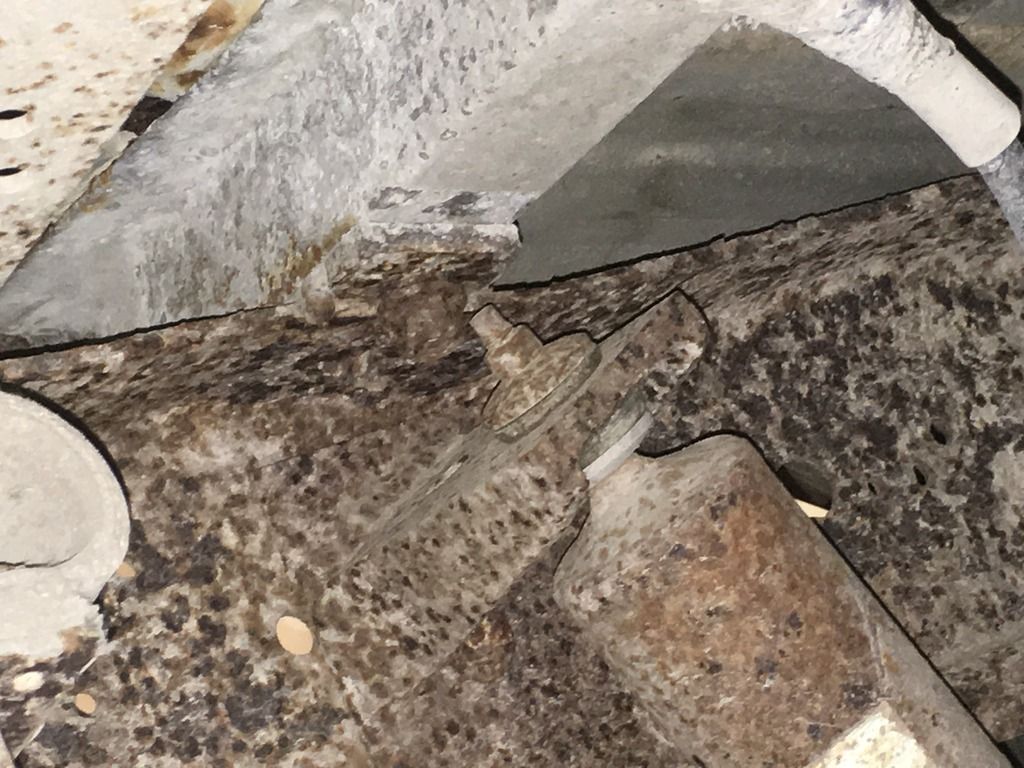
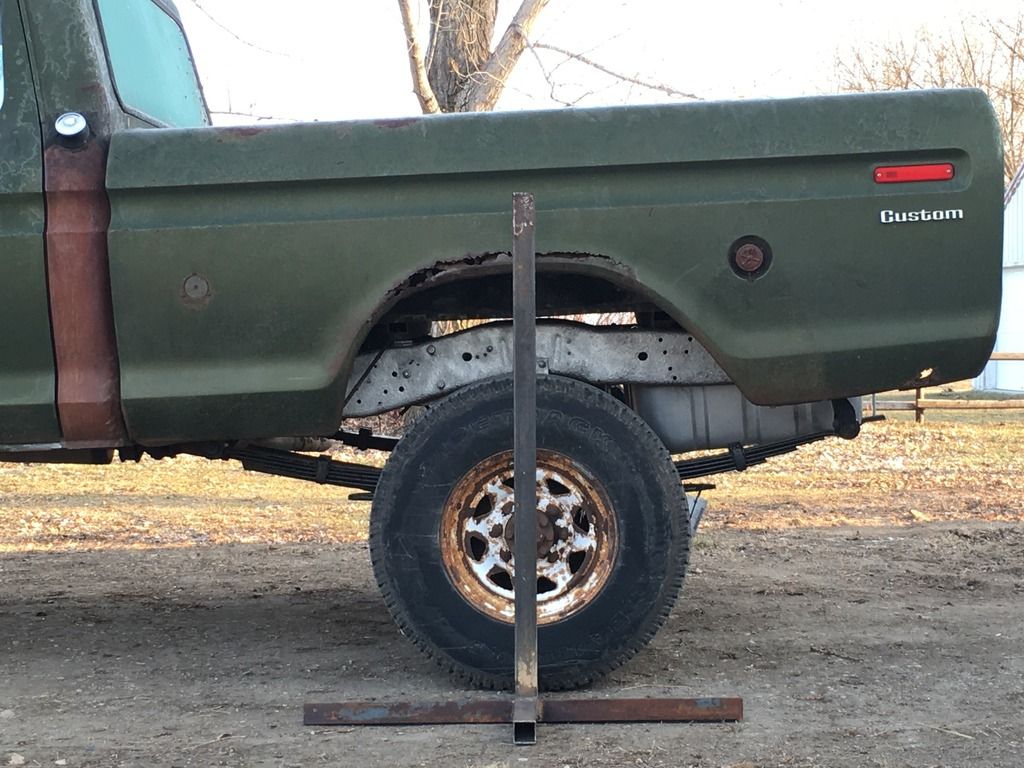
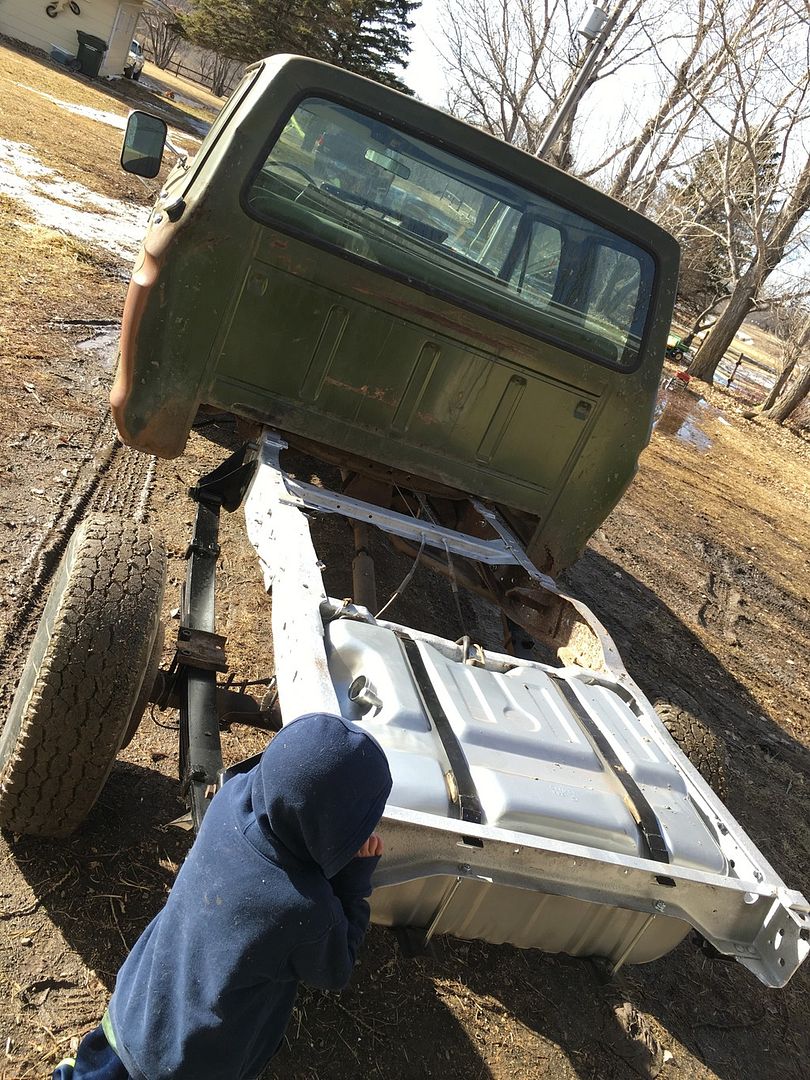
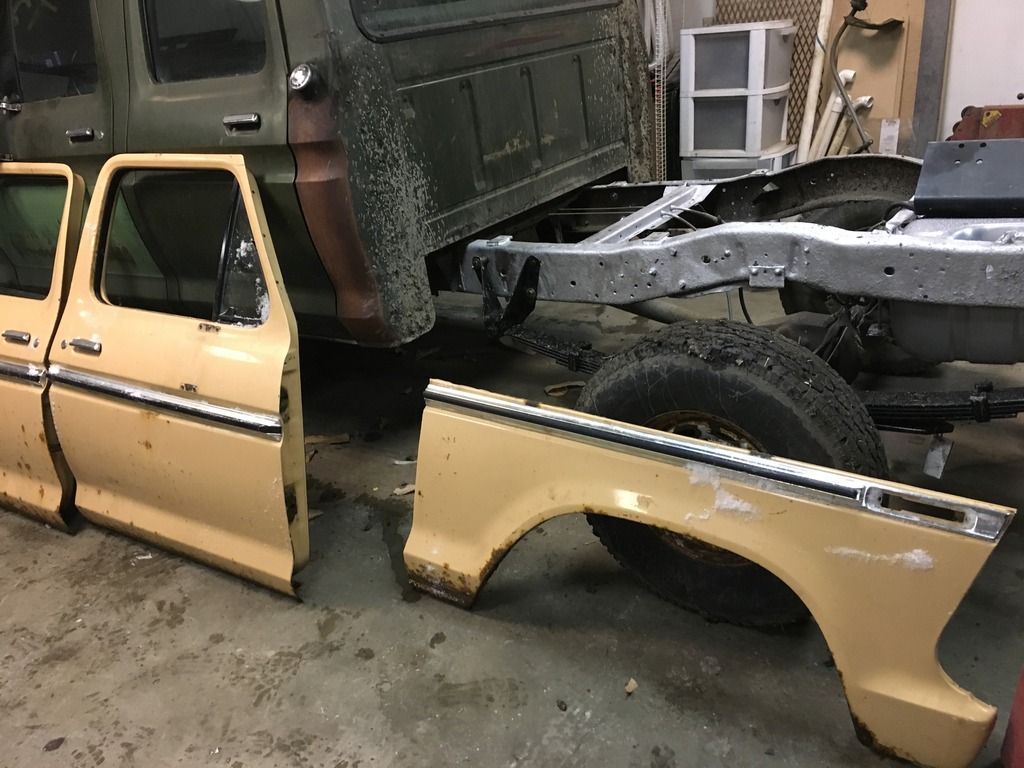
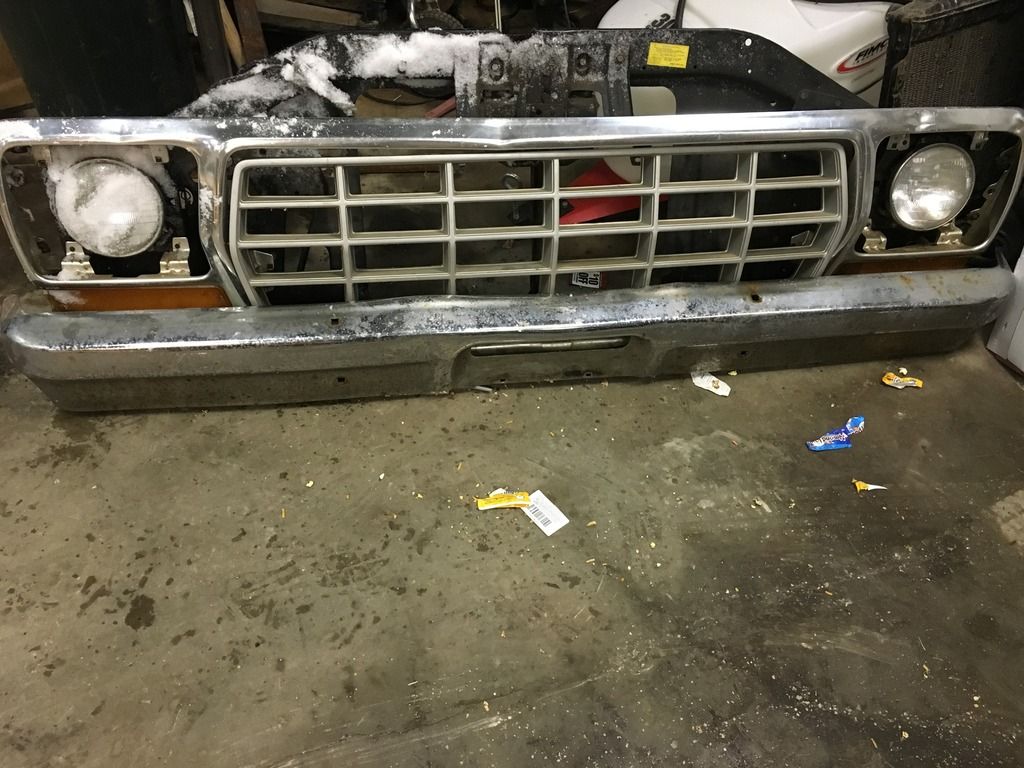
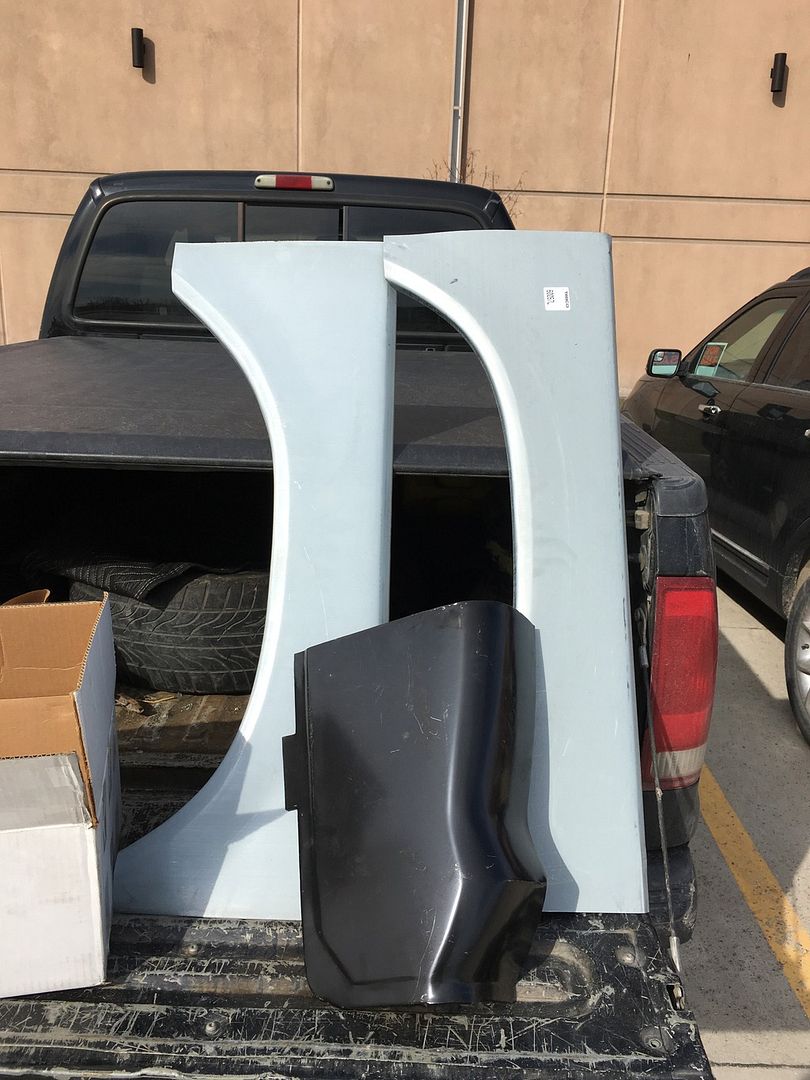
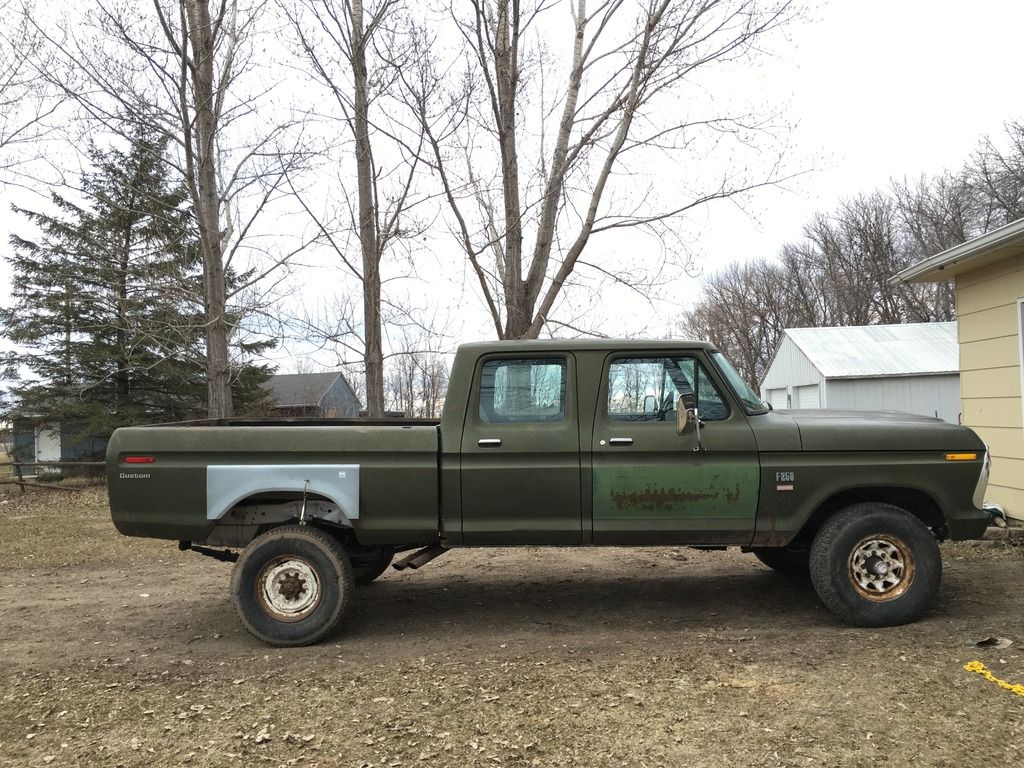
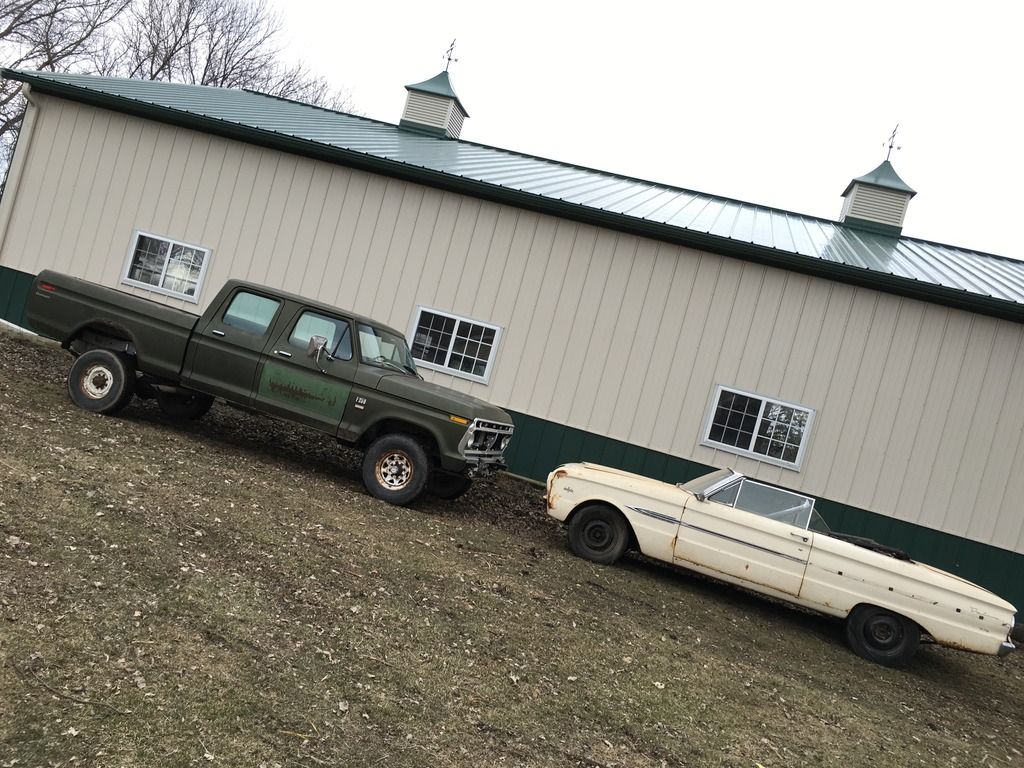
1975 F250 F-250 Crew Cab Short Bed 4x4 400/C6 (OFCC -- Old Ford Crew Cab)
IMG_2742_zps2g6yaavp.jpg

IMG_2743_zpsoswl766z.jpg


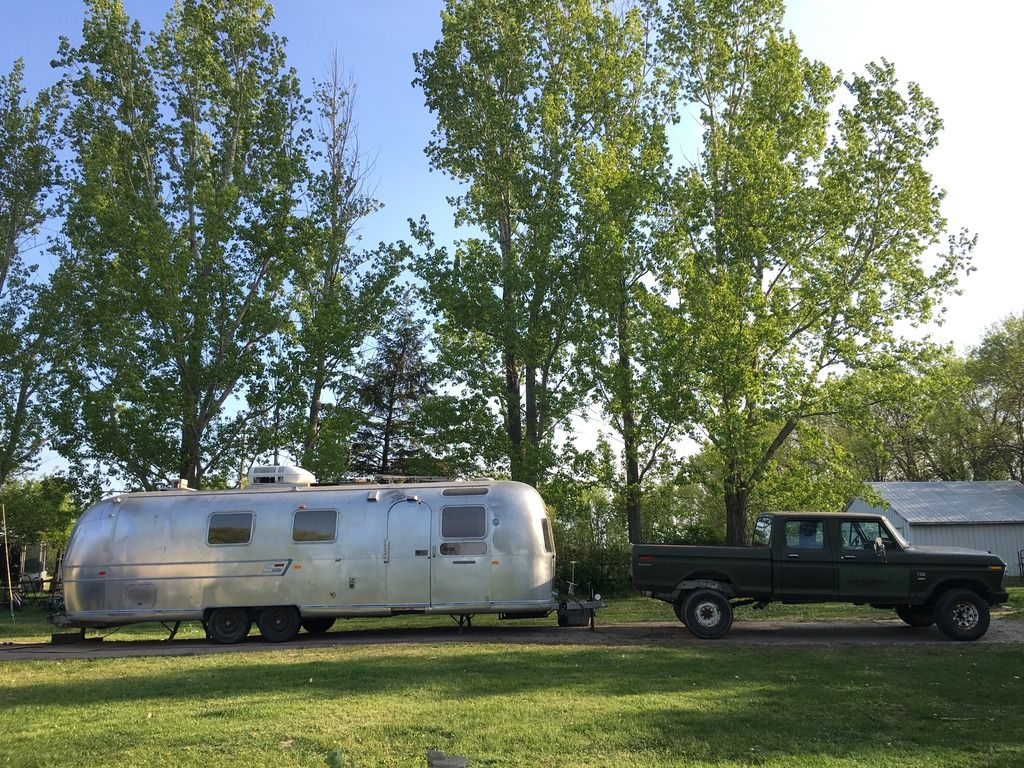
I bought these both last year, the Airstream over the weekend of July 4th and the truck in late August.

The trailer was bought out of a hay field, mainly for the shell
IMG_4491_zpskurpdmuj.jpg

IMG_4474_zpsdfemmqwq.jpg

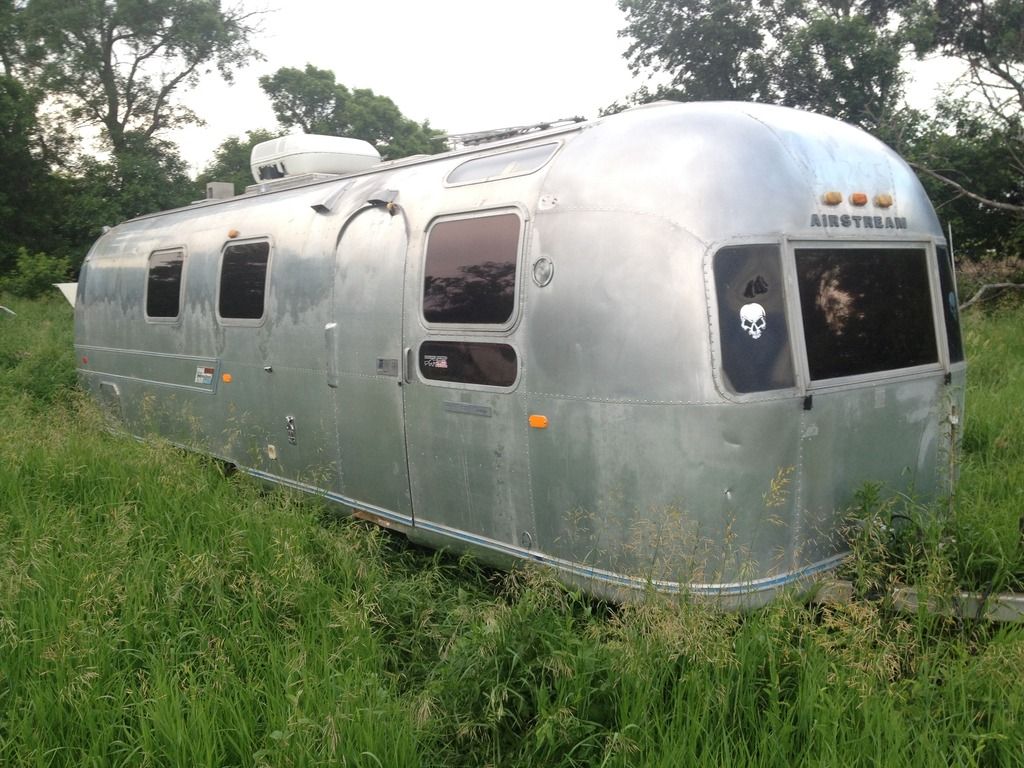
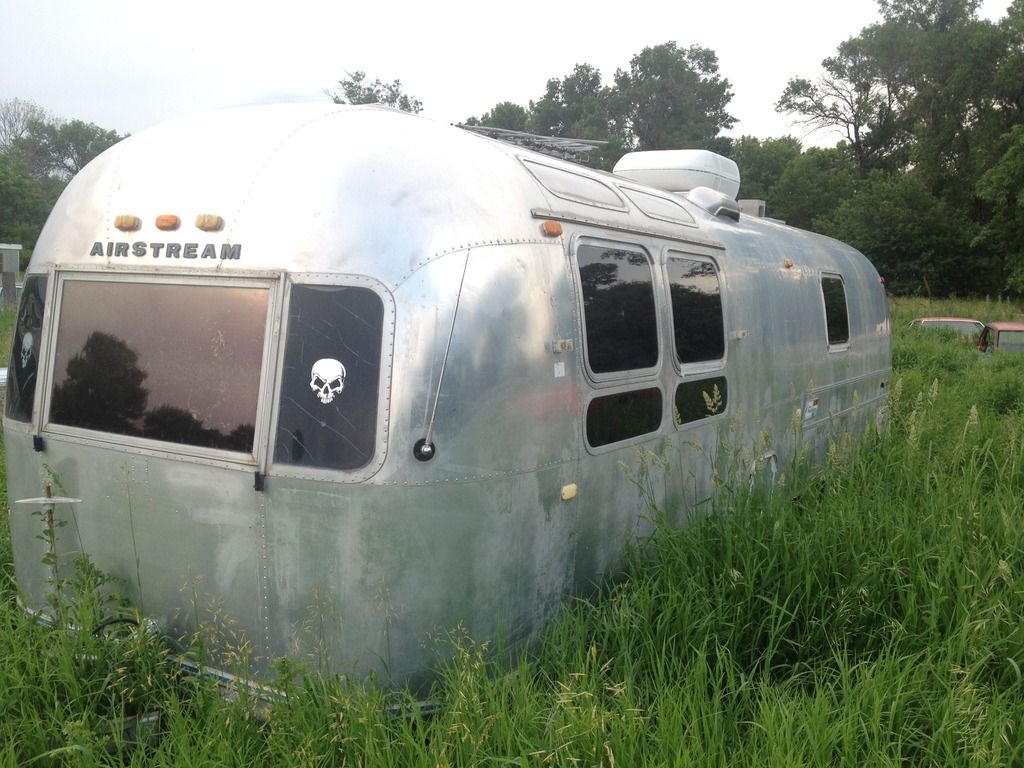
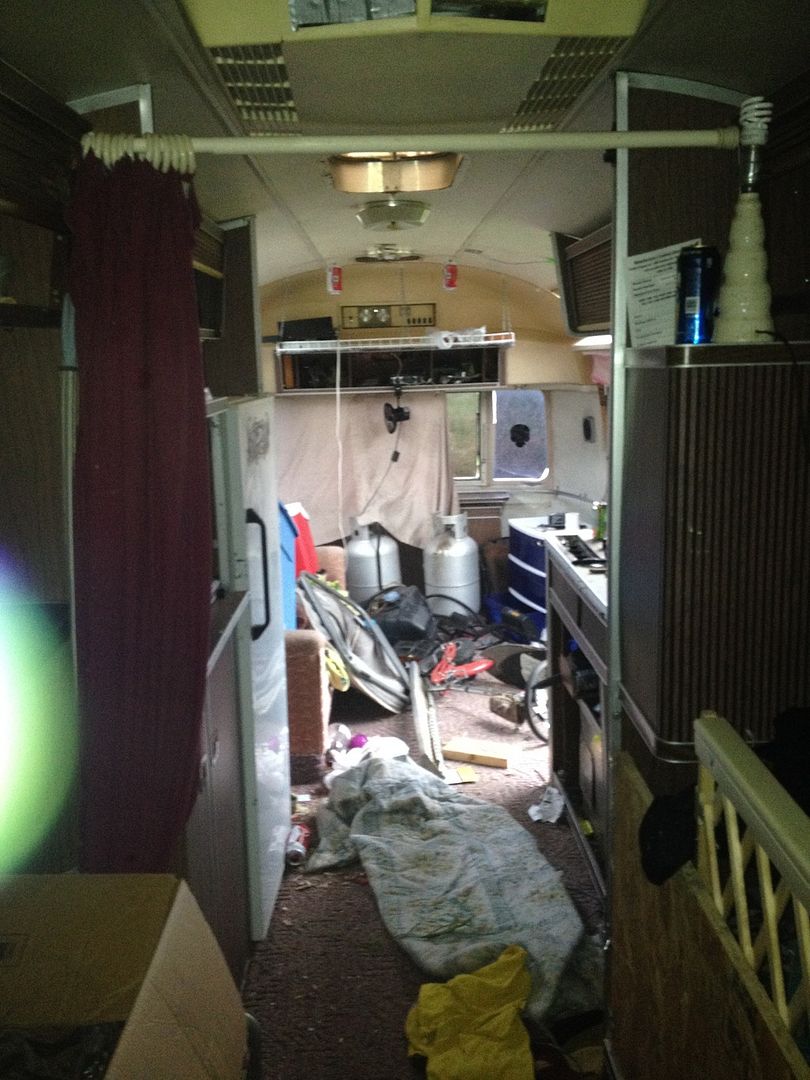
But the previous owner had trashed the interior. He lived in it for 2 years, then one day he just left and moved out leaving all his 'stuff' in it. It was disgusting.

Interior Before
Looking rearward
IMG_4515_zpsr4rkdtc0.jpg

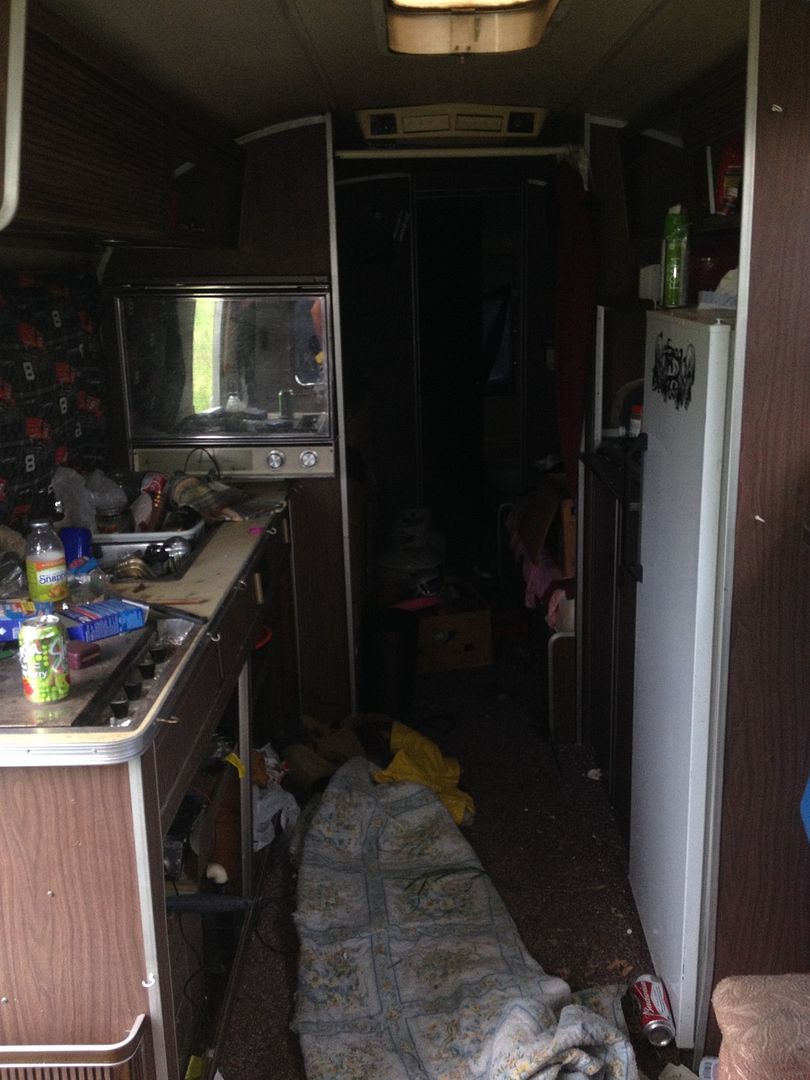
From the rear looking forward
IMG_4514_zpsj264a00p.jpg


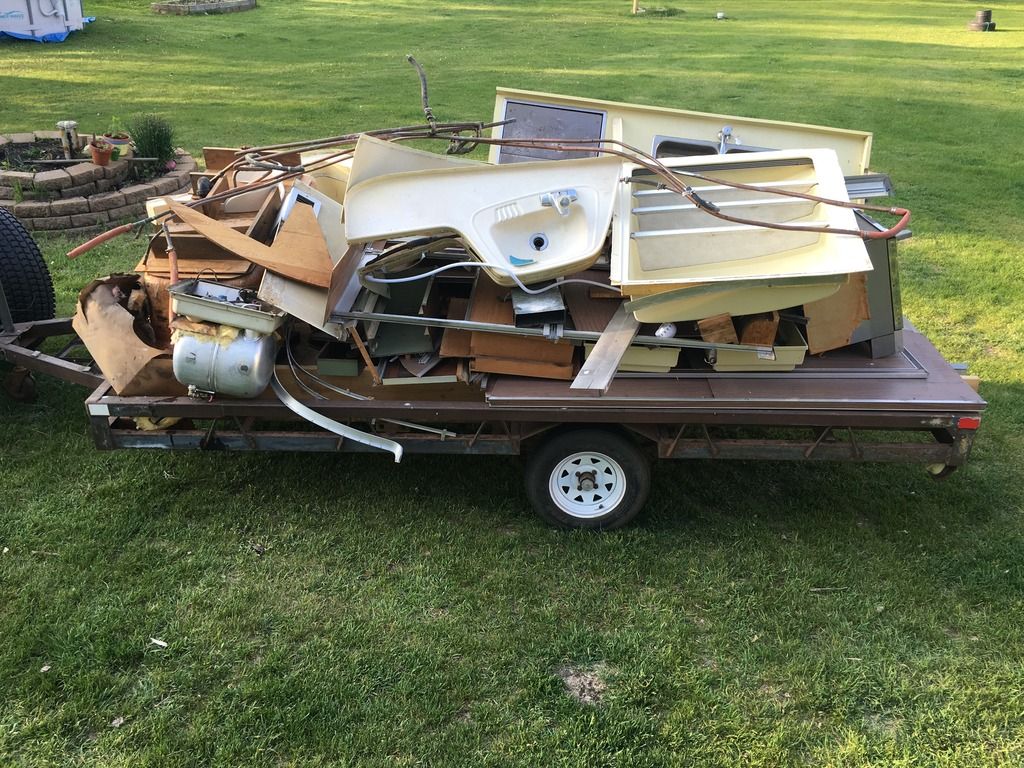
Basically anything that was not part of the airstream and was burnable, I burned, if it was metal, I recycled it at work, and it it was trash, I trashed it..
1 truck load of recycle
2.5 truck loads of garbage
2 truck loads of burnable

I have no idea how he fit that much 'stuff' into this trailer.

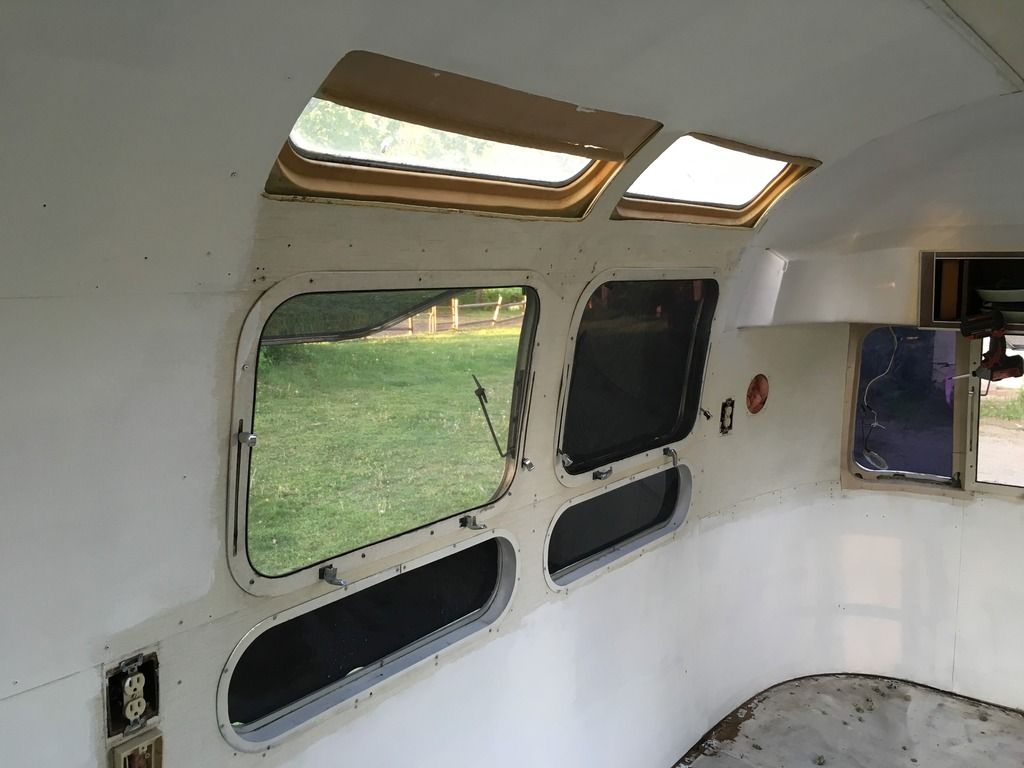
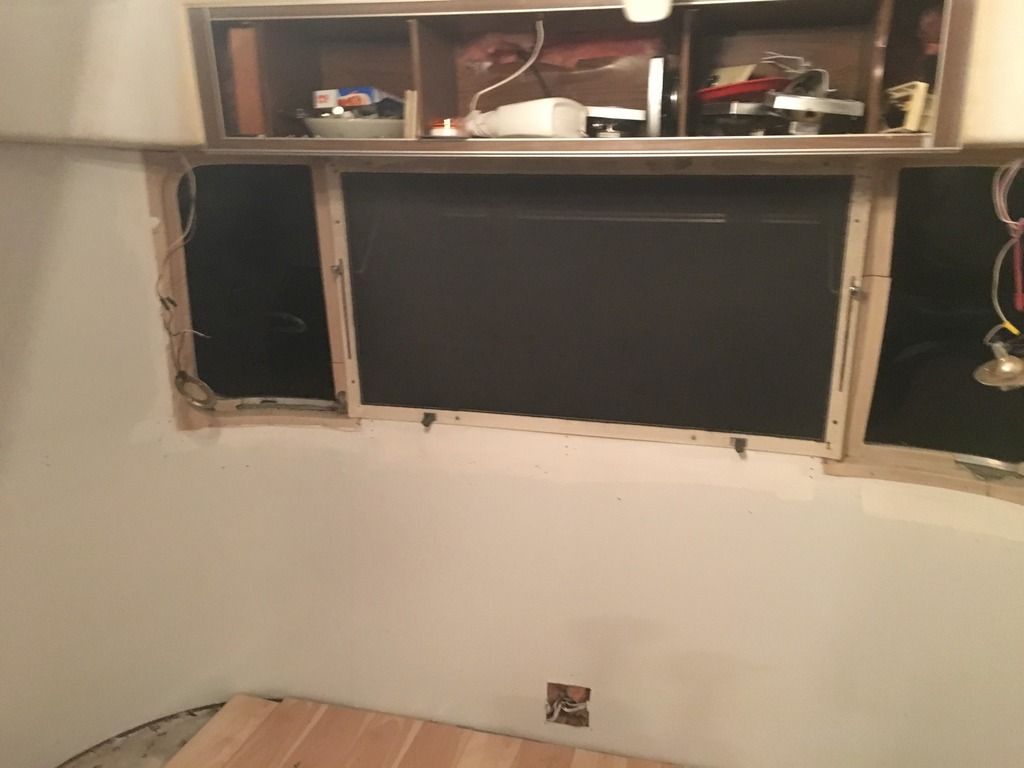
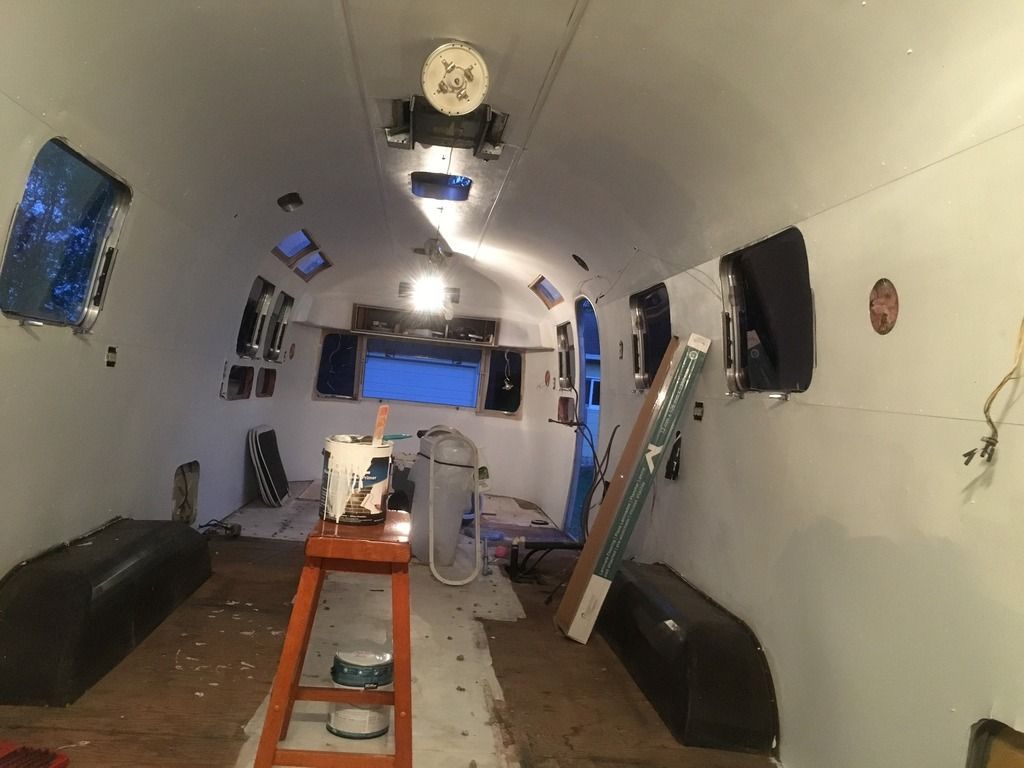
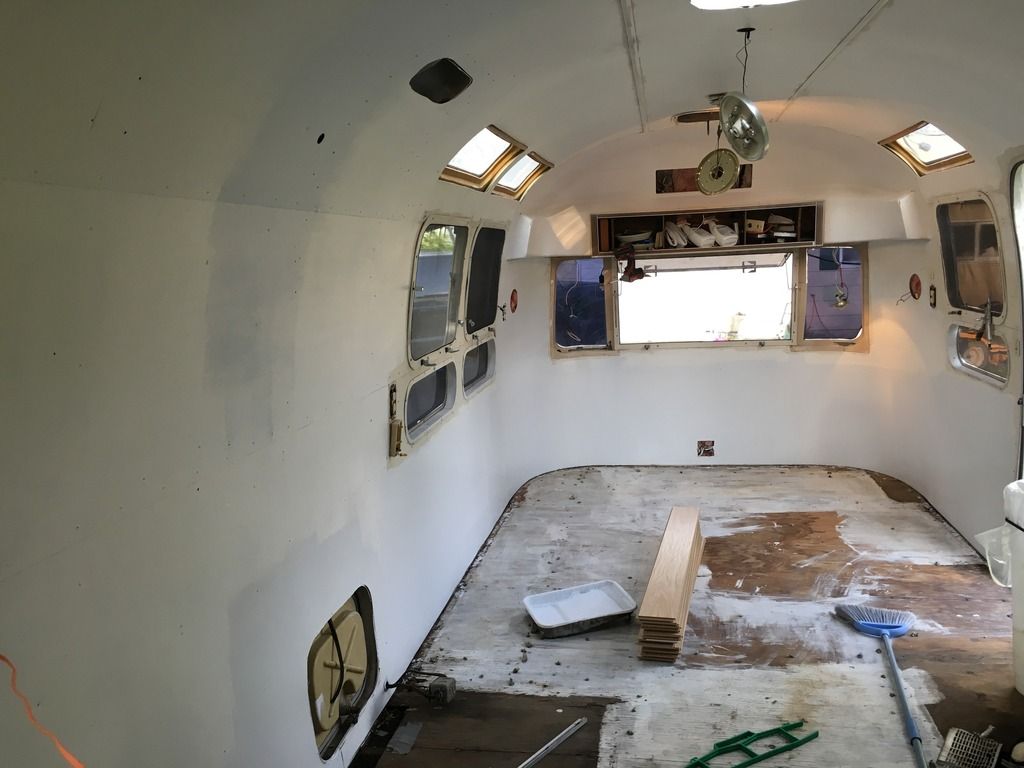
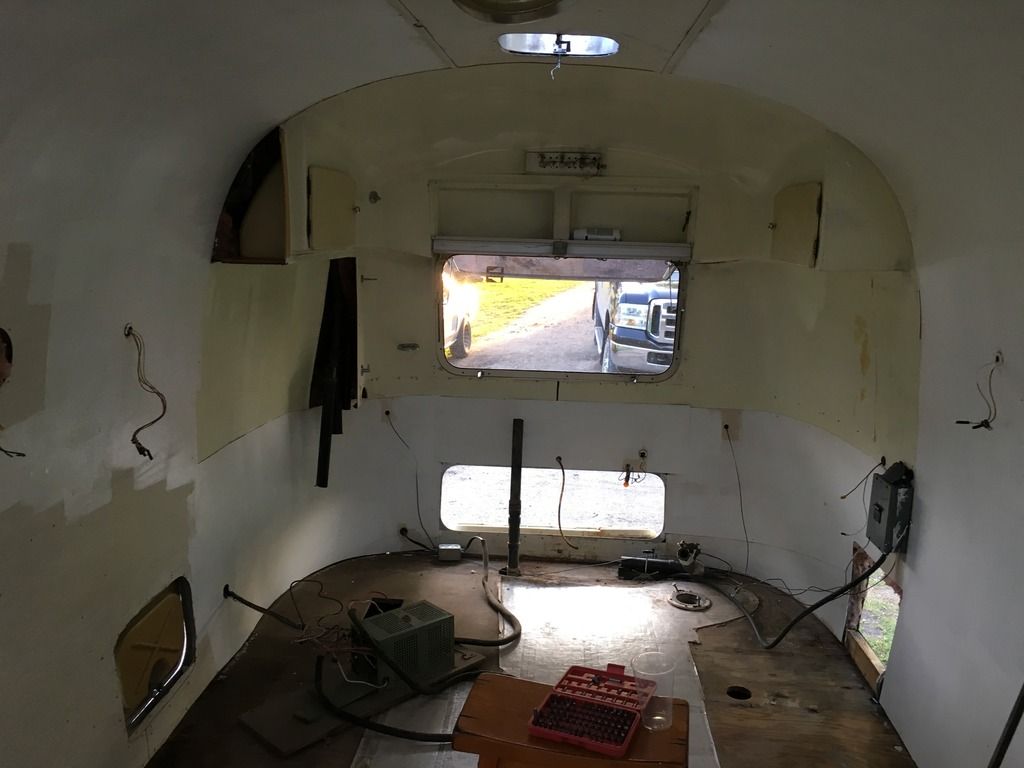
Fast forward to this last weekend (5/21 - 5/22) and the interior of the shell has been stripped of all walls, appliances, flooring, plumbing, and even some of the copper line for propane. We have primed the walls and started painting the interior and getting a feel for the new flooring.
IMG_2864_zpsq7kqlbng.jpg

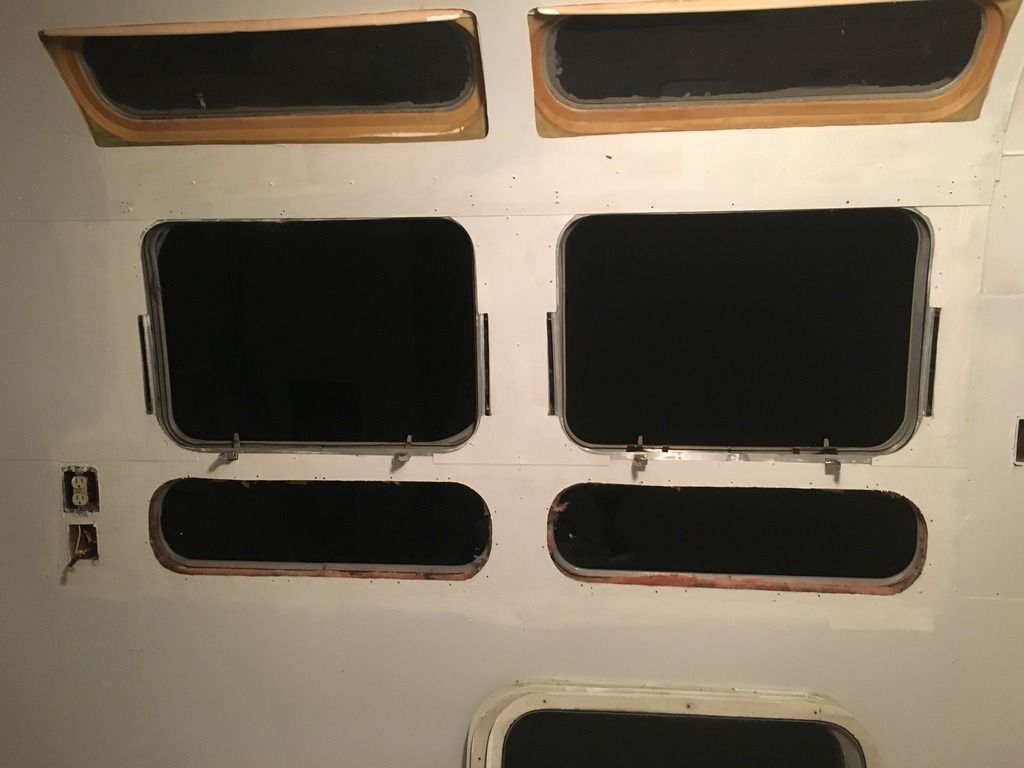
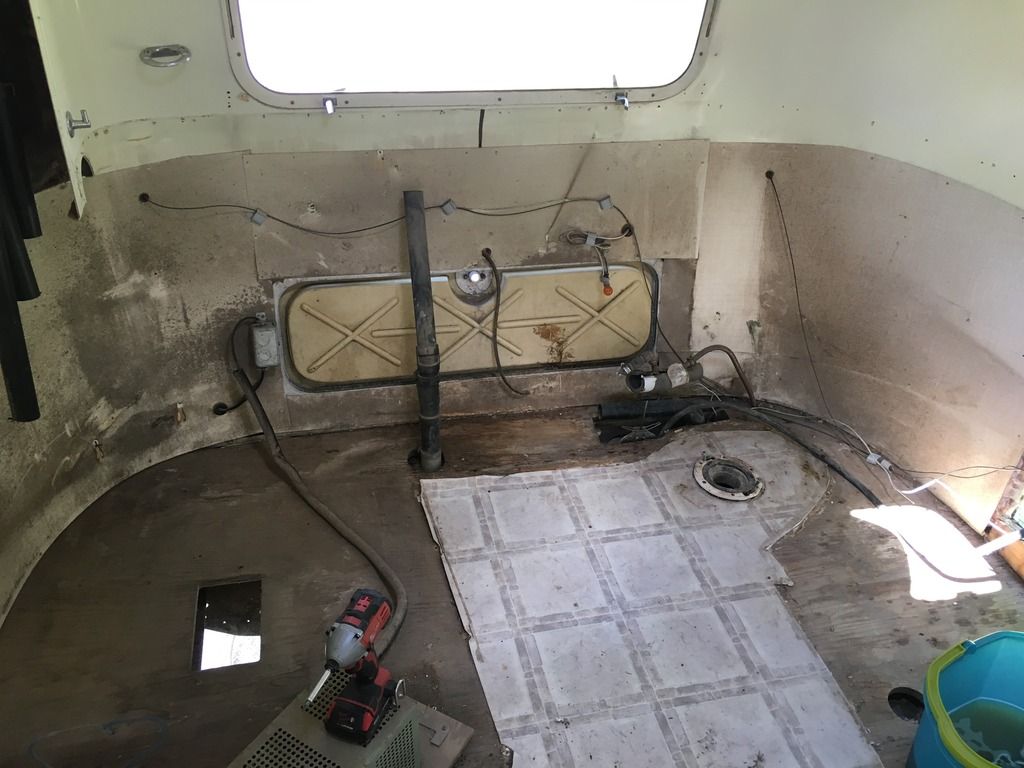
The rearend where the bath room had been, also has a huge exterior hatch for access to the plumbing, the walls back there were filthy disgusting from road dirt. The clean swipe on the right was my first wipe of the wall, it took a lot more elbow grease
IMG_2807_zpsv0v0hue2.jpg

This was while I was priming the lower wall after the scrubbing.
IMG_2828_zpsbgkmkl2f.jpg


The plan is to remodel the entire floor plan so that we (adults) get a master bedroom in the back, the bathroom is moved to the side (along with the black tank) and then we will probably use it for the remainder of this year while I do other piddly things like replacing all window seals and I'll hopefully start polishing the shell. If time or money allows, we will start refitting appliances, starting with hot water and a refrigerator.
 
So far I have kept all the stock AirStream parts, the appliances, walls, counters, pantry, bathroom surrounds. I will be reusing some of the parts, like the partition walls for templates, and their mounting channels for new walls. With Airstreams, you have to be careful about weight and weight distribution, they aren't heavy trailers, and they do not respond well to heavy items being in them, especially behind the axles. Towing and even a bumper mounted bike hitch are a no-no and they will cause a condition called 'sag' where the trailer separates from the shell. This trailer has some sag/separation and I will be fixing that before the flooring goes in.

As for the rest of it, I'll be listing it on a different forum for 'collectors' or 'restorers' who like/want originality.

This is what came out of the kitchen, and rear bath.
IMG_2732_zpsvkejp9kx.jpg

There is an amazing amount of stuff in there.
 
Wow....good on you. We're planning on buying a used AS after retirement and travel. Also plan on getting a F250.
You might want to be different and dare I say....paint the exterior. Now that would be a rogue AS owner.:eek::D
 
Painting the exterior of an Airstream isn't "rogue"

That is an Argosy!
https://en.wikipedia.org/wiki/Airstream

Argosy rolled off the same assembly lines as Airstream, but they were painted from the factory!
Argosy vs Airstream construction
When I was looking for my trailer I looked at both. The Argosy was built as a more afordable trailer at the time, but I think they are just as well built as the Airstreams. BTW, the Argosy is made of aluminum just like the airstream except for the endcaps which are one piece and made from steel. I think the Airstreams of the same era also have larger water and holding tanks. The bottom line is, An Argosy is an Airstream of color. I think they look great and the people who own them love them. I would have bought one if I found the "right one" when I was looking.

http://siouxfalls.craigslist.org/for/5549137286.html
00L0L_hE3vdePdfnC_1200x900.jpg


When you start shopping, if you are going old school like mine, shop for the shell, but also be wary of the rear half of the frame behind the axle, specifically that last 4-6 feet. The wood does rot, the frames do rust, and the ears for mounting the body to the trailer do separate from the main rails.

Terminology.
Curb Side -- Passenger side of vehicle, also the side with the walk door
Street Side -- Driver Side, no door

You see that mine is missing the awning and window coverings?
Eventually I will have to pony up about $3000
$360 for the front window protector
$200/each for the 'segment protectors' (optional to keep rocks off the front lower corners)
$2400 for the curb side awning, street side front window cover/shade and rear window cover/shade.
Also, I'm going to need axles
When the trailer is unloaded, the trailing arms of the axle should be around 20° down, mine are more like 5°, meaning the rubber inside them has hardened and is worn out, this will lead to accellerated separation at the rear due to excessive bouncing, and also I will have decreased ground clearance so the tail will drag.
About $1200 after shipping for the pair of them.
In regards to the axles, you can get them with a more agressive drop of 32° for increased ground clearance, and you can specify a higher weight rating, but the higher rating also means the trailer will be rough when unladen (see above about separation).

Once I get my trailer refitted, I will weigh it, the stock axles were 3200lbs each and the trailer had an advertised weight of 4910lbs (empty, no food/gear/water)

blah... Airstreams are a bit of a money pit... They have all the expenses of a house, plumbing, electrical, furnace, water heater, air conditioning, but with the added costs of being a trailer with both 12 and 120v electrical systems.
 
Last night I pulled off all the window surrounds and primed the aluminum behind/under the surrounds.

Before
IMG_2827_zpsmkk48t8i.jpg

And after, with the surrounds removed.
In this picture you can see the Vista windows are still a nasty yellowed plastic, nobody repops the vista window covers. I will have to research aftermarket replacement options.
IMG_2921_zpsa7zh7cnj.jpg


I plan on stripping down the surrounds to bare aluminum, then clear coating them before they go back on, however since they are held on by screws, they are easy enough to take off/put on.

Up at the front window, I primed right up to the surrounds, but did not move them, because they are falling apart.
I should start shopping for new ones. Also worth noting that the outer windows on the front of my airstream are plastic, they should be glass. My guess is that they were replaced after a rock (or rocks) damaged the originals.
IMG_2922_zpsidqukare.jpg


I really should start looking for the glass. I will have to learn how to use a new (to me) style of rivet called an 'olympic rivet', that when installed correctly looks just like a 'buck' rivet.

I also primed the ceiling center strip
IMG_2917_zpsxizren9j.jpg


While I said above that the AirStream is a bit of a money pit, if you compared my total investment so far, it would be cheaper than staying in an 'average' hotel for 8 days.
That is my gauge as to how crazy I spend money, and why this trailer will likely NOT have new awnings or window shades this year.

One last note, once I get the ceiling fans replaced and the TV antenna removed from the roof, I will be painting the very top white.
 
I'm certain I mentioned this before, somewhere.. But I have another F250 as well
2005 F250 Crew Cab/Short Bed 6.0L/Auto Lariat/FX4/Camper Package (ya... it does everything)
IMG_4629_zpsx0rsbkt0.jpg

And no the trailer isn't heavy, the previous owner of the truck put in a leveling kit in the front. But when he did it, he put in about 1" too much 'level', I jokingly wrote it off as "Cali Lean"
IMG_4631_zps5aofxuit.jpg
 
Now the truck, bought in late August from an Estate Sale as a
1975 F250 Crew Cab 400/C4 RCSB
It is an ex-NDSU truck, hence the painted over door logos -- no vinyl stickies back in the 70's..
IMG_6110_zpsw0ym6sgf.jpg

One of the previous owners welded up a set of super heavy duty bumpers

Front
IMG_8756_zpsayqcqivz.jpg


And Rear
IMG_8761_zpsjdws2hv2.jpg


I've wanted an old crew cab for a long time, but in this neck of the woods they are rare and hard to find that are not completely rusted out.

I developed some guidelines
Roof Height not to exceed 80" (I want to be able to park inside the garage)
Tire diameter not to exceed 35" (currently 235/85R16 -- 31.7")
Engine will eventually be built that is minimum 350hp/400tq (400 is stock 130hp/260tq)
Ride height should make it look like a factory High Boy (which it is not)
I also want to get the gas tank out of the cab; while also increasing capacity
I need more comfortable seats
This truck must have at least the same towing capacity as the '05

The plan
1999+ SuperDuty Crew Cab leather seats front and rear (I'd love to find a special edition Harley or King Ranch, but that is dreaming)
2004 F250 front leaf Springs (purchased, but not installed yet)
2008+ F250 rear leaf springs (done)
38 gallon rear tank upgrade/swap (done)

Motor upgrades to the 400
So far I have acquired (but not installed) an Edelbrock S.P.2.P. intake ($65 including shipping) and an Edelbrock 1406 ($30 local CL)
IMG_6538_zpszhvyvjwq.jpg

I pressure washed and degreased the intake.
It isn't a great intake, but it is a 4bbl intake for super cheap.
IMG_6551_zpsfjj8xxnu.jpg

And then later on Craigslist, I picked up a set of brand new, but dented, Hooker Headers. Another $50.
IMG_9096_zpsrk0pwh5u.jpg

I still need to pick up a "straight up" timing chain set from a '71 400, and a cam/lifters. I did a bunch of homework and decided on a Melling CL-MTF-2 kit, it is very similar to the Edelbrock specs, but with a slightly lower LSA, it should keep torque a little lower in the RPM range. I am building a low RPM torque motor, not a high RPM HP motor.
Cams_zps99oex7f1.jpg


With those upgrades, I'm hoping to break 240hp (almost double the stock rating)
As it sits now, the truck will spin the tires without any problems, but I have not driven it at highway/road speeds
 
The leaf spring swap was pioneered by others, but I still did my homework, I compiled a listing of stock leaf springs (73-79 and 1999-2010+
leafSprings_zpscgbczcr0.jpg

This was when I realized something was 'wrong' with the truck. Everything I found in my research said I was working with a 1977-1979, but the title says 1975. This didn't matter much, but as a '75 I should have had a closed knuckle king pin D44 up front and a divorced transfercase. The spring packs were all wrong, the steering box was all wrong.

Much later, I talked to a guy who knew the previous owner and the full story is that my '75 F250 Crew Cab, started life as a '78 F250 Crew Cab and that the original truck was in an accident that was bad enough that it was easier to replace the body than it was to fix it.

Since I have a ton of work to do under the box, I decided it was easier to remove it.
Work to be done under the box
Leaf Spring upgrade (done)
Bumper removal (done)
Rear Gas Tank upgrade (done)
Receiver hitch installation (acquired but not installed)
5th wheel hitch installation (nobody makes/sells one for this application -- acquired but not installed)
Sway Bar installation (researching)
Shock Relocation (pondering)
Need for device to control axle wrap (TBD)

I used my highly precise heavy duty lift apparatus to remove the box.
IMG_9505_zps6li7urpi.jpg

IMG_9506_zpsxspei71h.jpg


The Driver Side leaf spring was broken in forward and aft of the u-bolts.
IMG_9516_zpsnfxstbbr.jpg


I should say that if i were to have used 1999-2007 F250 rear leaf springs (asymmetric), I could have bolted them right in with virtually no additional work, however as an owner of a 2005 and knowing that in 2008 Ford increased the leaf spring length to improve ride quality, I decided to make the extra changes to install the longer 66" (symmetric) leaves, I also decided to flip the shackle and dump the lift blocks.

Here is the 'new' spring laying over top of the original springs to get a feel for how much will change in regards to mount locations.
IMG_9508_zps9irj8tl9.jpg


My engine hoist could easily lift the frame, but none of my jackstands were tall enough to support the frame while I worked on the leaves.

So I built this stand.
IMG_0020_zpskkviz0fw.jpg


Engine hoist and home built stand
IMG_0051_zpszgh0dlms.jpg


To get the brackets off, I used a hand grinder to take the heads off, then a large chisel and 3lb hammer to remove each bracket.
IMG_9970_zpswizdpmsh.jpg


I drilled out the holes in the frame for the brackets to 1/2" and bolted on the shackle flip brackets that I ordered from Gatsby Shackle Flip brackets (http://www.gatsbycars.com/ford.html)
IMG_0115_zpsnqpgvqvx.jpg


Old Springs are out and here they are next to the 'new' 2009 rear leaves.
IMG_0179_zpsoevy337s.jpg


I did some math to figure out how much farther forward the front leaf spring mount needed to be moved.
IMG_0212_zpsytewoywd.jpg


The magic number is 9.5"
To make certain that I couldn't screw up anything, I made a measuring tool.
I transferred the hole locations for both the upper and lower sets of bolt holes from the front leaf spring mount, so it would have to be installed "flat". Then 9.5" forward of the rear most perch mount hole, I drilled another 1/8" pilot hole.
IMG_0315_zpsgvdqcrgd.jpg


And bolted onto the frame, virtually idiot proof!
Just drill out the tiny hole that is farthest to the right.
IMG_0319_zpsf0ca6fas.jpg


With the two most rearward bolt holes pilot drilled, then opened up to 1/2", I bolted on the front spring perch to use itself as a template to drill the front 2 holes. And that is when I realized I have a problem. On my truck, the frame narrows exactly where I need to bolt it together.
IMG_0352_zpsgytiykrj.jpg


I bolted in the new springs and the shackle reversal bracket/kit to help determine how thick I needed for the spacers.
IMG_0354_zpscgrmcgys.jpg


I cut some spacers out of thick walled DOM, and tack welded them to the backside of the leaf spring perch.
IMG_0424_zpscbjzqcok.jpg

I've been warned by some that this is not strong enough, and once I get a little farther along, I will be taking it to a guy I know who builds race chassis for his opinion and to have the sleeves welded to the frame.

With 2009 leaf springs, shackle reversal, and removing the lift blocks, the truck sits about 3.75" higher than when I started.
IMG_0469_zpsyz1ttvy5.jpg


There are a couple reasons why the shock mounting location needs to be modified.
1. The passenger side shock mount at the frame isn't even a stock piece, it is a flat plate with a chunk of c-channel welded to it.
IMG_8937_zps4emnanvm.jpg

2. One of the PO's modified the lower shock mount (at the axle) by welding on extensions so he could use shorter shocks -- why didn't he just buy the right size shocks?
IMG_8938_zpso5lfywz2.jpg


My plan is to cut off the axle brackets, unbolt the frame brackets, then build custom brackets to install a B&W Flip over 5th wheel plate. Hopefully I will find a usable rear sway bar by that time. At that time I will determine the best shock mounting location to minimize any interference, but also maintaining maximum axle clearance, the shocks will be mounted on either the backside or top of the axle, and then I'll be angling them toward the center of the frame.

Original ride height.
Take a close look at the top of tire and top of frame spacing.
stock_zpsexjbw63t.jpg

Current Ride Height
The front end needs to come up almost 3" to level out the ride height.
IMG_1078_zpszffqx3ev.jpg
 
The gas tank was fairly straight forward.
IMG_9782_zpskqfqvkxp.jpg

To remove the old tank, I removed the bottom straps and supported it with a highly sophisticated spacer.
IMG_9781_zpsmkvz0gkg.jpg


Old and new side by side on the shop floor
IMG_9803_zpslpzbujxj.jpg

I sanded and painted the straps and started reinstalling the tank.
IMG_9807_zps0hoypzng.jpg


These brackets, which are special to my particular truck, were in the way even to get the tank installed.
IMG_9812_zpsxbam9fbm.jpg


The biggest problem faced with installing the 38 gallon tank is that there is no 38 gallon fuel sending unit. My original sending unit was crusty/rusty and the float had a crack in it.

The gas tank kit came with a piece of copper and some scotch locks (didn't use these).
The modifications I made to the sending uint was to bend the copper and use a piece of rubber hose that came with the kit, but with hose clamps that I bought. I gent directed it into the lowest portion of the fuel tank.

Then for the sending unit, I originally planned on cutting the arm and welding in an extension. For an extension, I planned on using a metal clothes hanger. But the process of welding it was horrid looking.
IMG_0524_zpsfv8urizc.jpg


What I ended up doing was using only the metal clothes hanger, and using the original float arm as a template, I bent a whole new one.
IMG_0531_zpsz3ed3pjy.jpg
IMG_0529_zps4d79xd8h.jpg


Springs and tank installed, that's my helpers head.. he helps himself to my tools now..
Since this picture, I had to order a new set of U-bolts.. long boring story. There are 2 u-bolts per side installed now.
IMG_0550_zpsm4h5oyji.jpg


This is looking down the fuel fill hole while the truck is running. The sock is in the fuel, the float is sitting on the fuel, and it is running off the new tank.
IMG_0541_zpsrs929tmn.jpg


My neighbor gave me a compatible Class V receiver hitch that I need to install.
I also have just the center section of the 5th wheel hitch, I *only* need to make all the brackets to install it, should be easy peasy..
 
In regards to the body, something unheard of happened.
A guy GAVE me a 1978 Ford F150 cab/doors/fenders/hood/grill/bumper, the parts I can use (doors/fenders/hood/grill/bumper) are in better shape than my current ones, virtually rust free, and completely dent free.
IMG_0610_zpsbsvq06kr.jpg


This is minor surface rust, nothing to get excited about.
IMG_0627_zpsdzbyx0lk.jpg

IMG_0628_zpslt9l17qw.jpg

IMG_0630_zpsmbl9l4t2.jpg


I bought rust repair panels for the box wheel openings and the passenger side cab corner.
IMG_0793_zpsvbwhg6f9.jpg


I still need to buy BOTH front floor pans and cab mounts, along with all new rubber cab mounts.

It will definitely
IMG_0994_zpsqxirp4rk.jpg
look better once these are installed.

There is a minor problem with the front of the frame for the bumper mount. Whichever previous owner welded on the bumpers also cut off the bracket that is supposed to mount the lower half of the bumper.
IMG_0976_zps1nzko9jx.jpg


Options are
1. bolt the bumper by the top bolt holes, and then make some brackets (bolt on) for the lower bolts. I already have a bumper so this wouldn't be too hard.
2. section another truck's frame horns onto this frame. I really don't want to do this because it is at the same place as the front leaf spring mount.
3. Full custom bumper.

I've got a plasma and a MIG, so option 1 and 3 are most likely candidates.
Eventually I am going to need some side steps too.

I have the 2004 front leaf springs and 3/8" metal for the custom front shackles at home already. I just need to find the time.
IMG_1072_zpsbs2v7qpa.jpg


It is easy to want to lift the bejeebus out of this truck and put it on some 37" tires, but I need to keep reminding myself that it must fit inside my shop and garage, both of which have only 7ft doors.
IMG_1031_zpshkpoqslr.jpg


If I ever get tired of playing with trucks and trailers.
There's always the old bird.. (actually it is in the shop right now waiting for a full brake rebuild)
IMG_1014_zpsrtfxohvo.jpg
 
Pretty awesome! You've got me thinking of doing an old truck instead of buying a new one.

Mel

Sent from my XT1030 using Tapatalk
 
We've got newer vehicles, my 2005 F250 and my wife's 2012 Tahoe, but neither has the same appeal as old rusty mouse piddle steel.
And my son says it smells like 'old gas'
 
Back
Top