• Hello there guest and Welcome to The #1 Classic Mustang forum!
    To gain full access you must Register. Registration is free and it takes only a few moments to complete.
    Already a member? Login here then!

Partial Rear Framerail Replacement

manley

Member
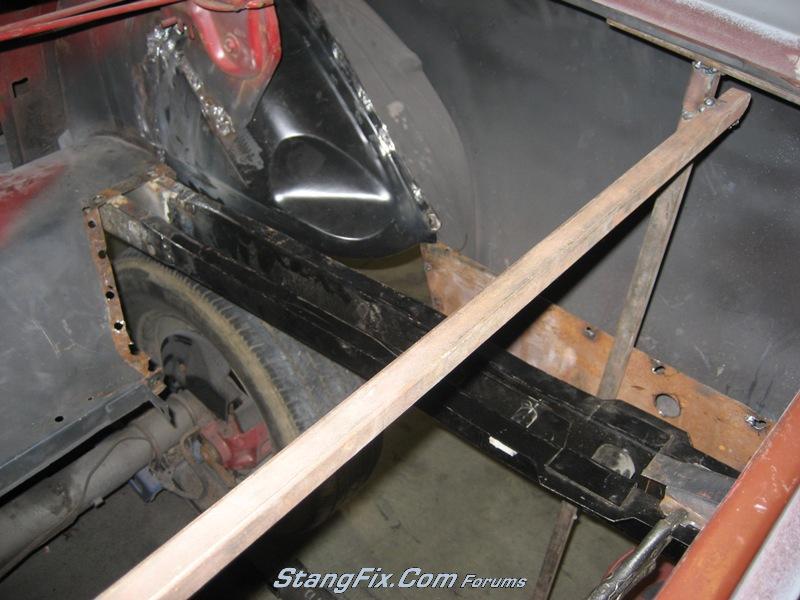
I need to replace part of the LH rear framerail on my 69, at least from in from of the mounting location for the tie downs. Years ago, I bought rear framerails from an Arizona car, but the guy cut them right behind the rear torque boxes. So, I am planning to probably cut this very rust free framerail to meet my needs for repair.

What I need to know, is the best method for welding the "new" piece on? Should I make it a little longer and use the extra length as "tabs" that will slide inside the framerail on the car and then drill holes and plug weld the original framerail to the tabs? Then run a solid weld around where I cut the bad part off and grind it smooth so it looks good? Will this be strong enough?

Is there another preferred method of replacing just the rear most part of framerails?

I know there are thousands of write ups about this, but I'm having trouble finding detailed info.
 
my repop frame rails had the "tab" feature. It was welded inside and out along the edges.
72_23_01_10_6_21_03.jpg
 
I would try and make a step like the repro rails have..this might be doable with a vice and some time or take it to a metal shop and see if they can do it for you. I would resist butt welding it unless you ran a fish plate on both inner sides. Whatever you do dont forget to rust proof the heck out of everything back there before the trunk floors go in. HTH
 
"napaguy" said:
I would try and make a step like the repro rails have..this might be doable with a vice and some time or take it to a metal shop and see if they can do it for you. I would resist butt welding it unless you ran a fish plate on both inner sides. Whatever you do dont forget to rust proof the heck out of everything back there before the trunk floors go in. HTH
I was thinking I'd just bend a channel maybe 4"-6" long to fit inside both ends (old & new), and plug weld on the sides and bottom of both pieces, then weld the joint. I'm waiting for the partial rails now, hope to get to it in the next couple weeks.
 
"napaguy" said:
I would try and make a step like the repro rails have..this might be doable with a vice and some time or take it to a metal shop and see if they can do it for you. I would resist butt welding it unless you ran a fish plate on both inner sides. Whatever you do dont forget to rust proof the heck out of everything back there before the trunk floors go in. HTH

I definitely won't be butt welding the pieces together. Cut the donor rail down tonight and made it 3 inches longer than what I am replacing. I'm going to make a cut at each corner to aid in getting that flange bent. It looks like a piece of 2x4 will fit snug inside to keep the rail from squeezing together while I use a vice or hammer or whatever works to add the flange. I plan to also drill holes and plug weld to the tabs that will be inside...then weld around where the "seem", grind the welds smooth and hope it turns out well!

Thanks for the help everyone and especially tarafied1 since it looks like I'm going to do the same thing you did!
 
Manley,
One more thing I used was a handful of self drilling screws to suck everything together...you need to double check your measurements after you do this and make sure everything still lines up. IIRC a 2x4 fit perfectly in my repro rail where it was flanged smaller so I think that would work for your oe rail.
 
Yup, a 2x4 fits in there nice. Can't wait for the weekend so I have time to get back to the car! That lame job thing keeps eating up all me time! :lol
 
Back
Top