• Hello there guest and Welcome to The #1 Classic Mustang forum!
    To gain full access you must Register. Registration is free and it takes only a few moments to complete.
    Already a member? Login here then!

Quarter panel patch-request for pics, measurements, ideas....

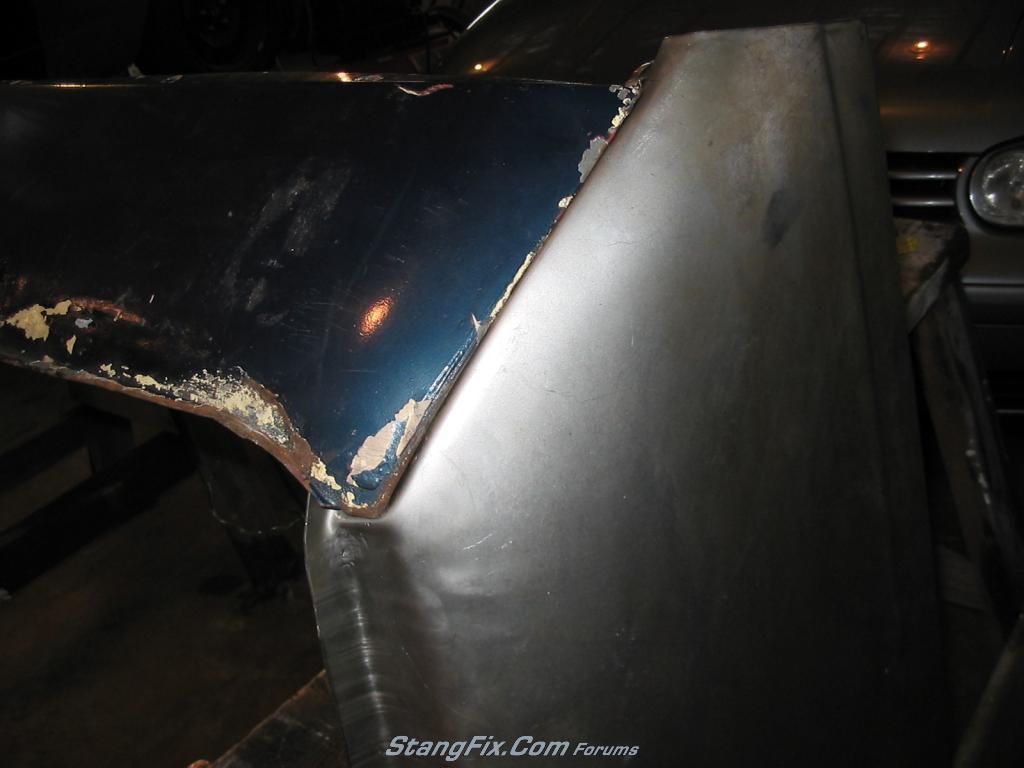
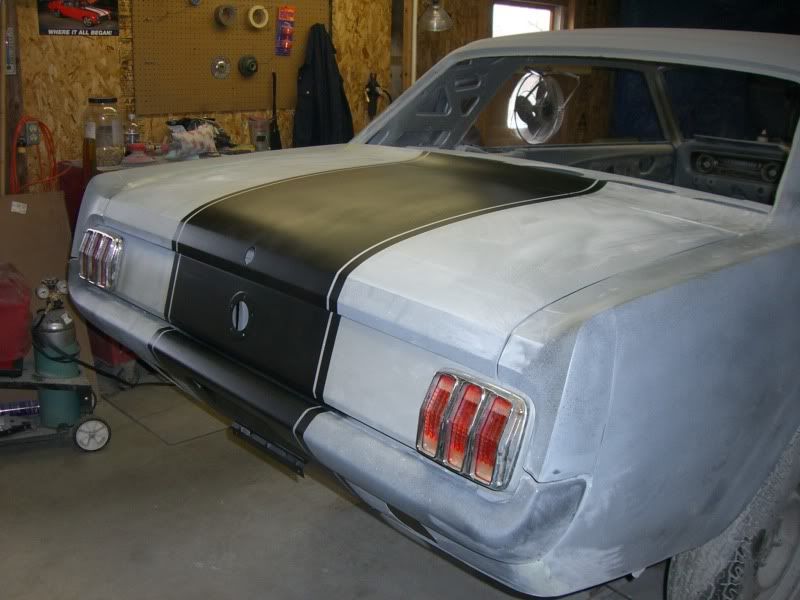
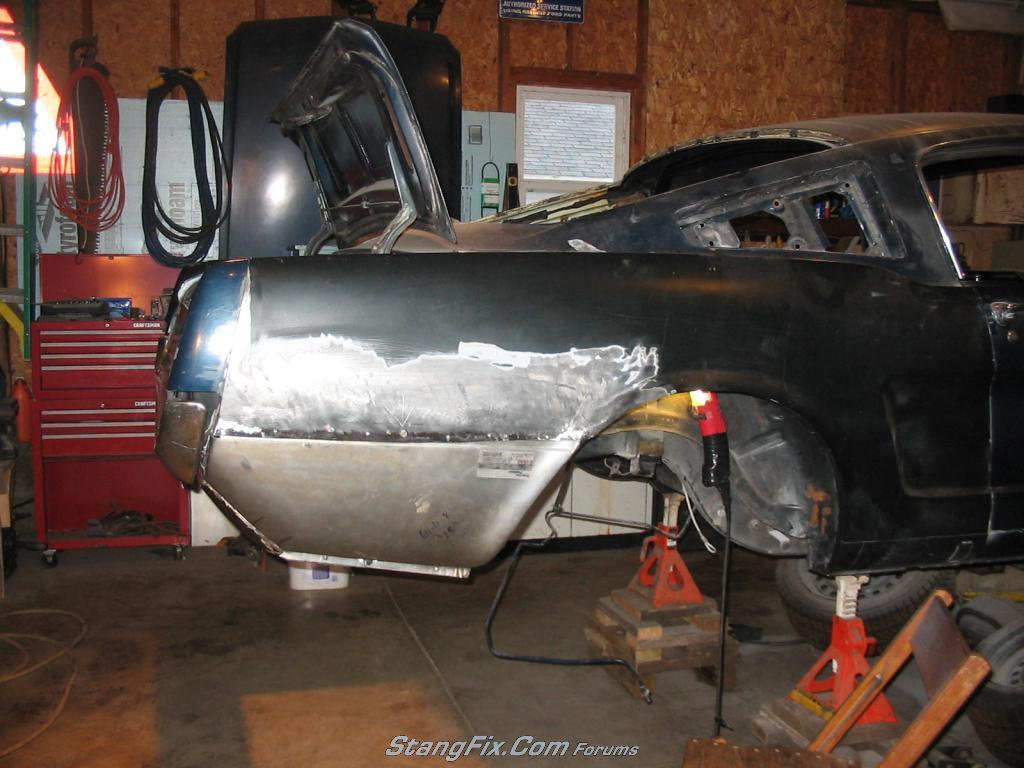
So I thought I start a new thread instead of continuing this one where I found out previously placed quarter panel patches are terribly mis-aligned. Here you can see the left side quarter lines up pretty well at the top of the valence:
114-210211091755-7508137.jpeg

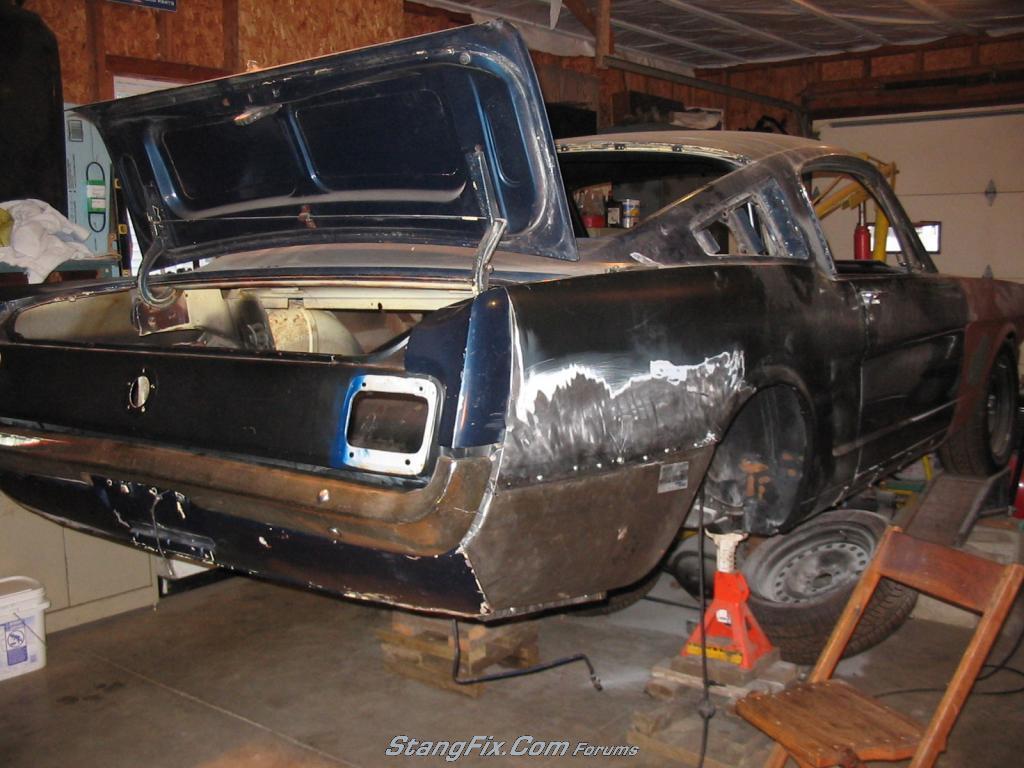
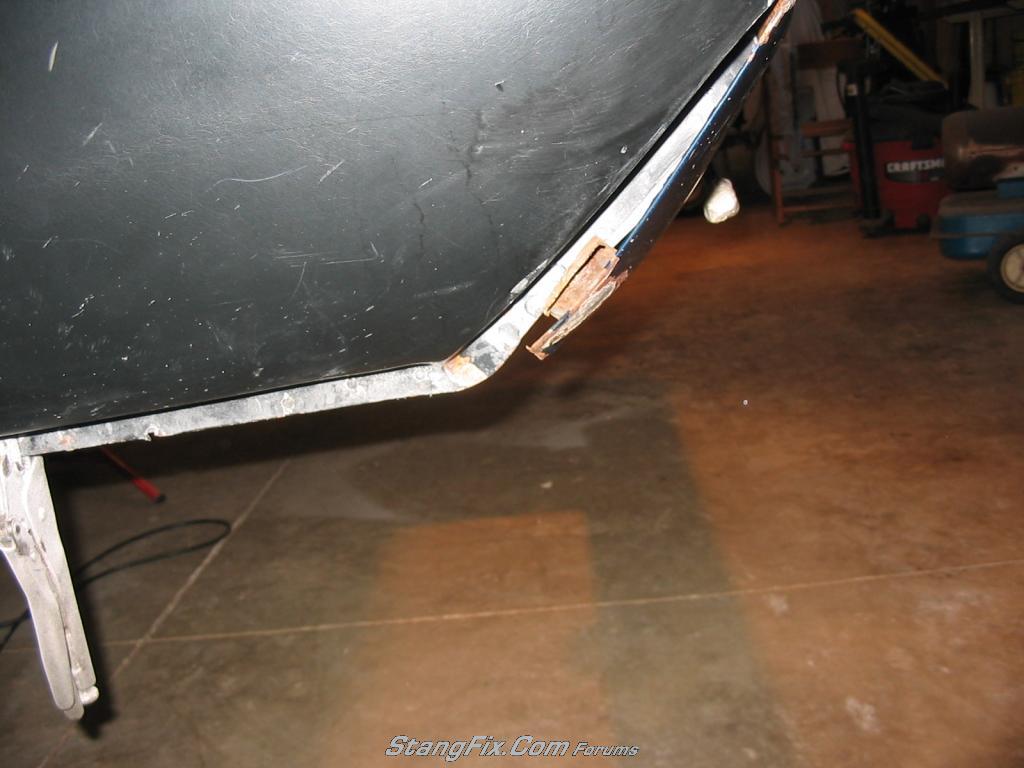
But the right side doesn't:
114-210211091826-7512864.jpeg

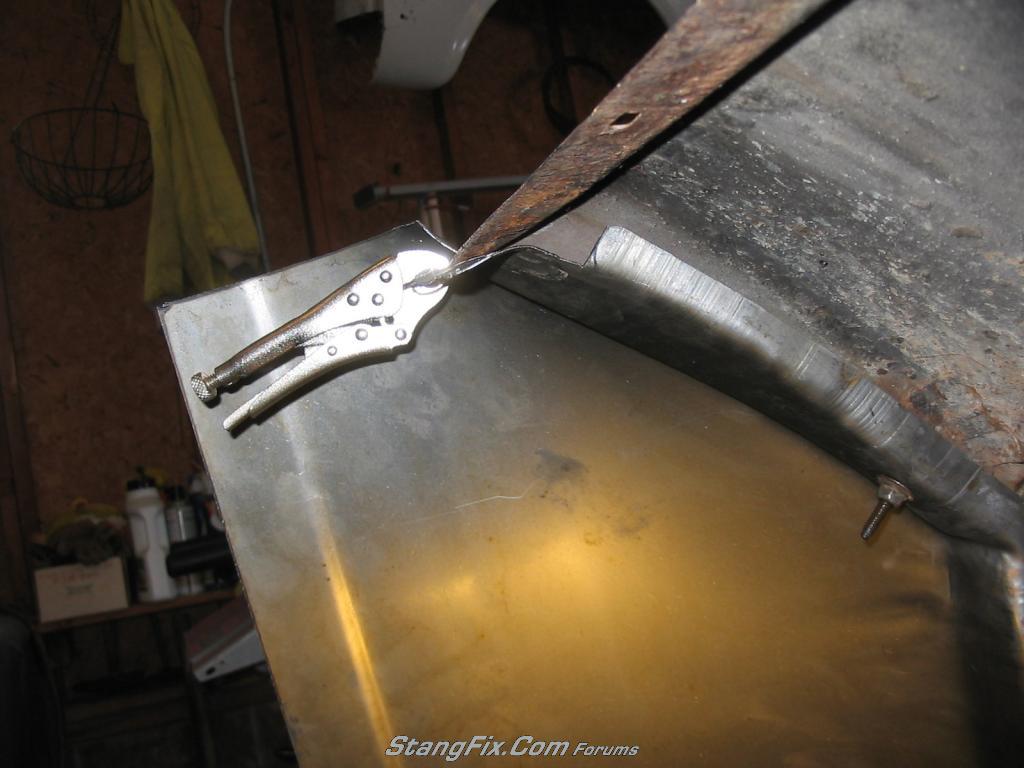
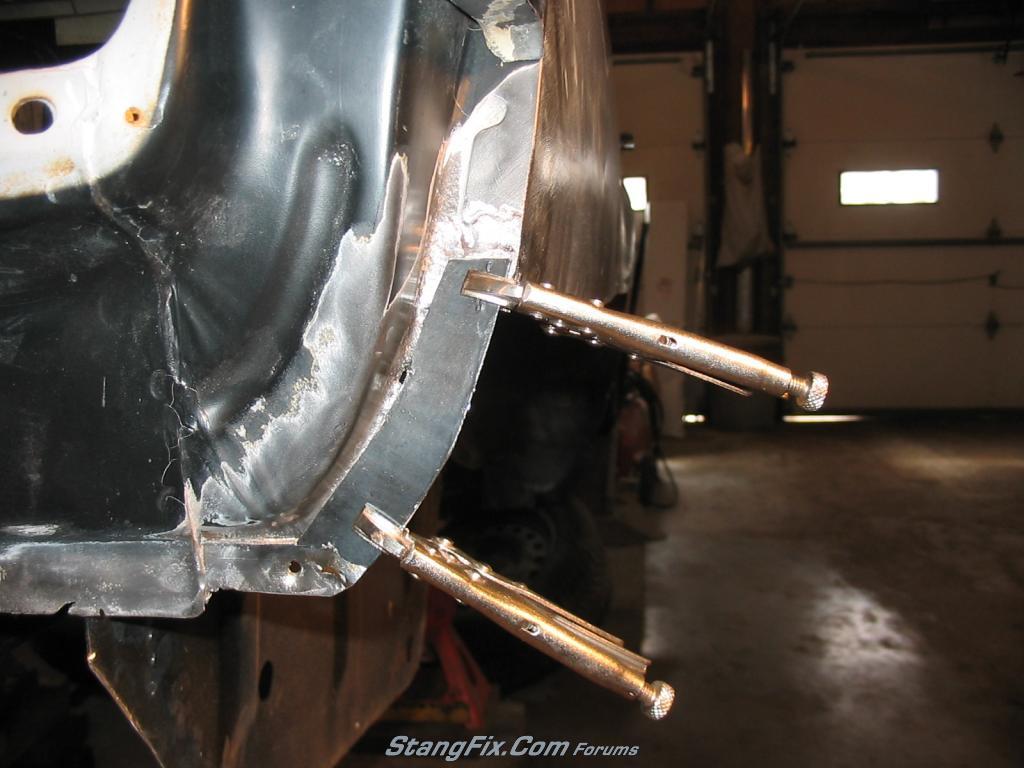
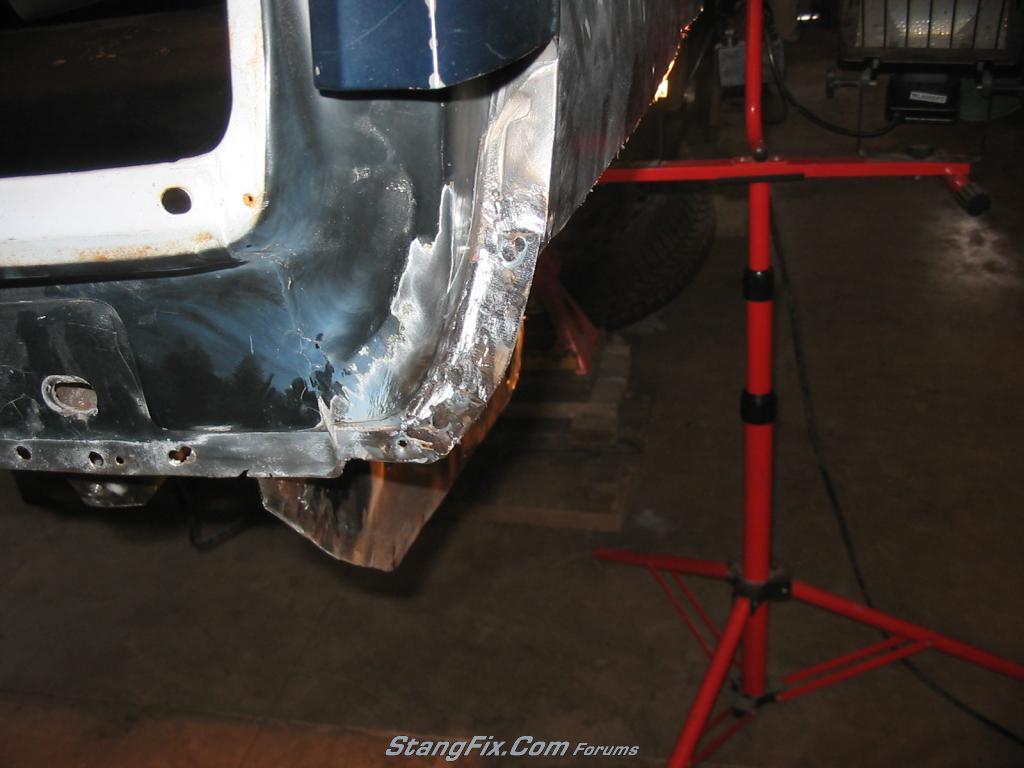
And it gets worse toward the bottom, with the gap approaching 3/4" or more. Both sides fail to line up with the bottom of the valence:
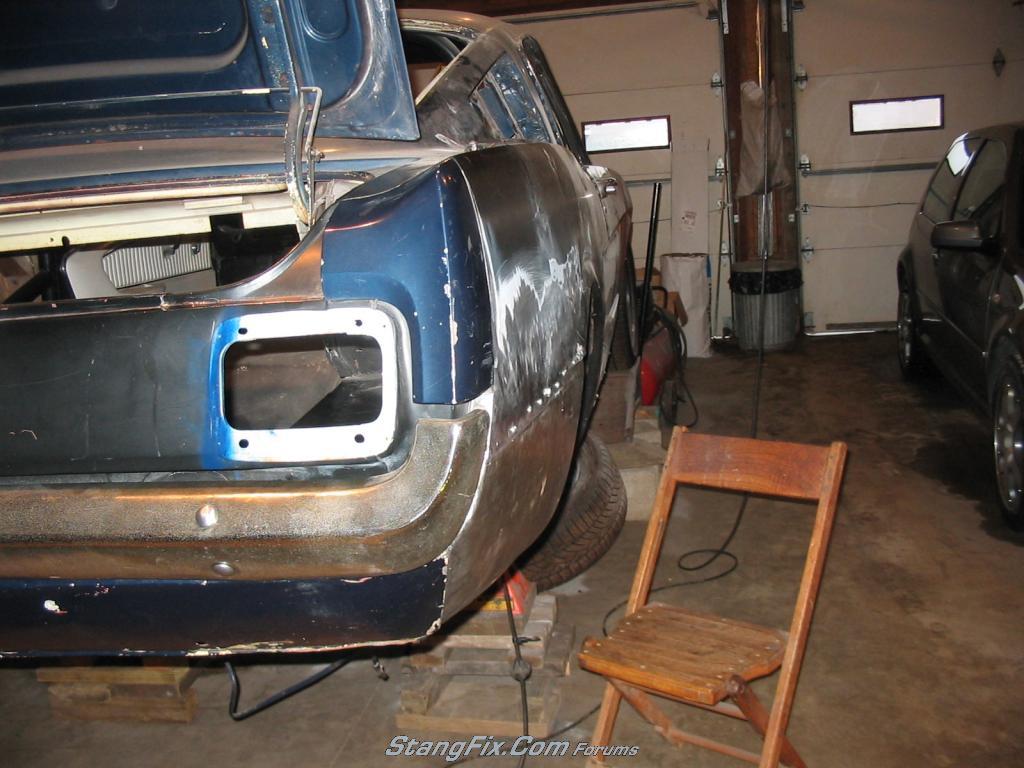
Right
114-210211091847-7514271.jpeg

And left:
114-210211091807-75101671.jpeg

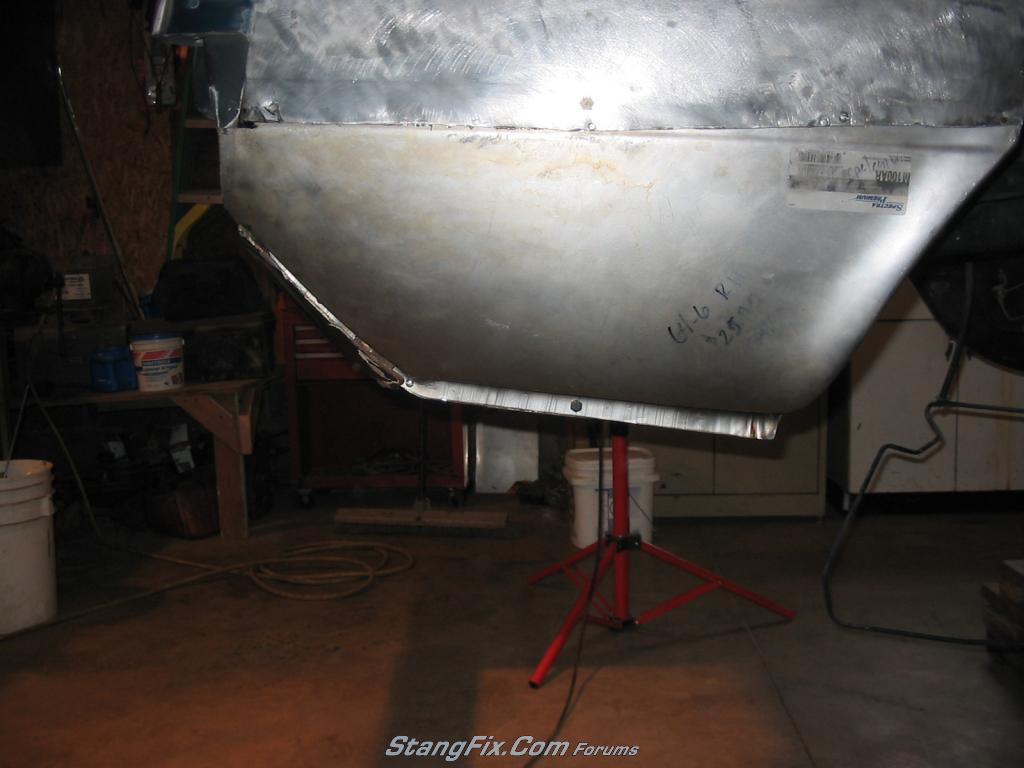
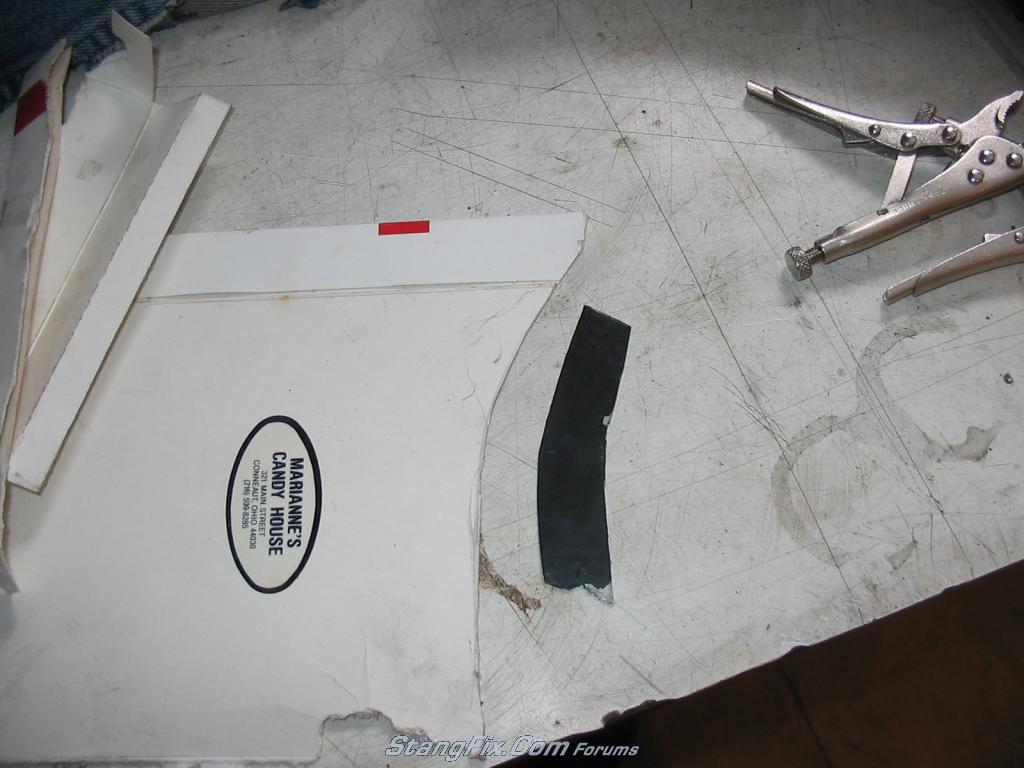
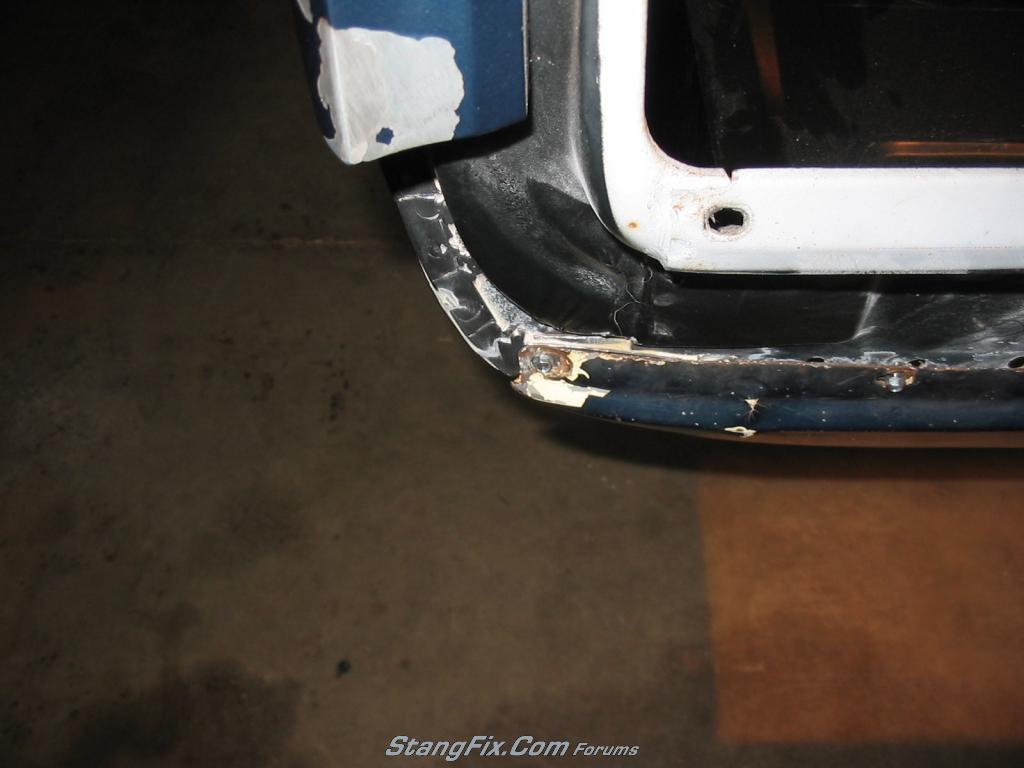
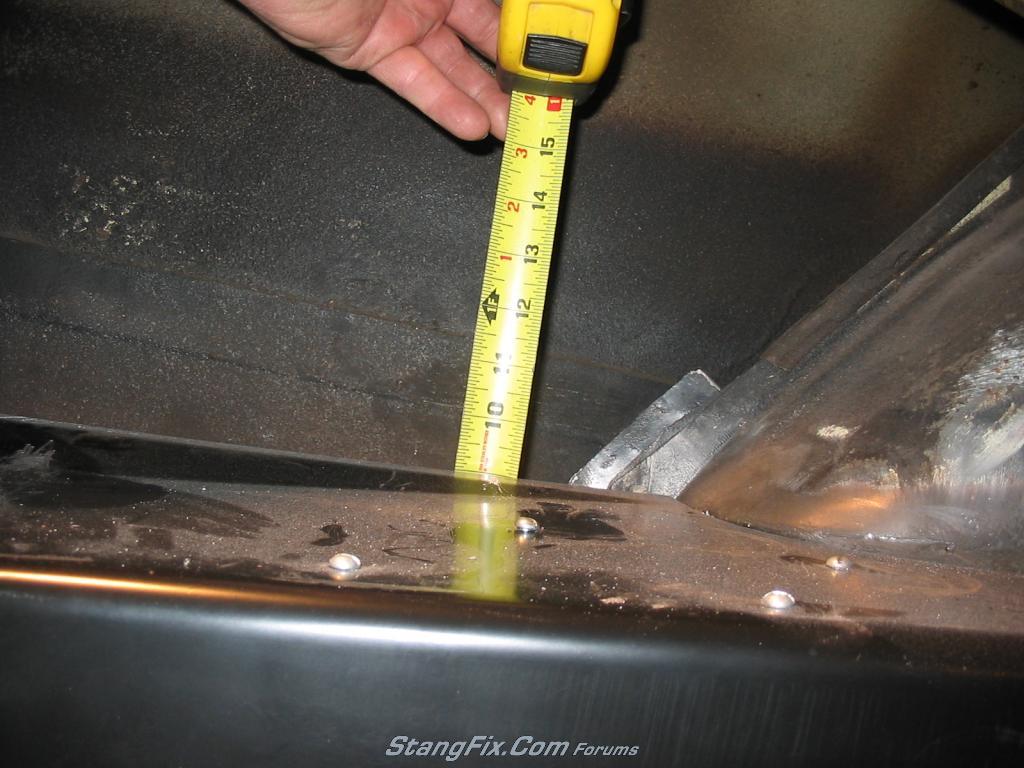
Judging from pics found on the web, I believe the bottom point of the quarter and valence should meet. I've recieved the new patch panels, and I believe I can massage them to meet the original valence nicely both top and bottom (I hope). That leaves me not knowing where the front end of the patch (the lower rear corner of the wheel well) should be vertically. I measured from the bottom of the existing screwed up quarter to the top of the trunk floor at the back edge of the wheel well (approx 18" forward of the tailight panel along the edge of the floor) :
114-210211091932-75171294.jpeg

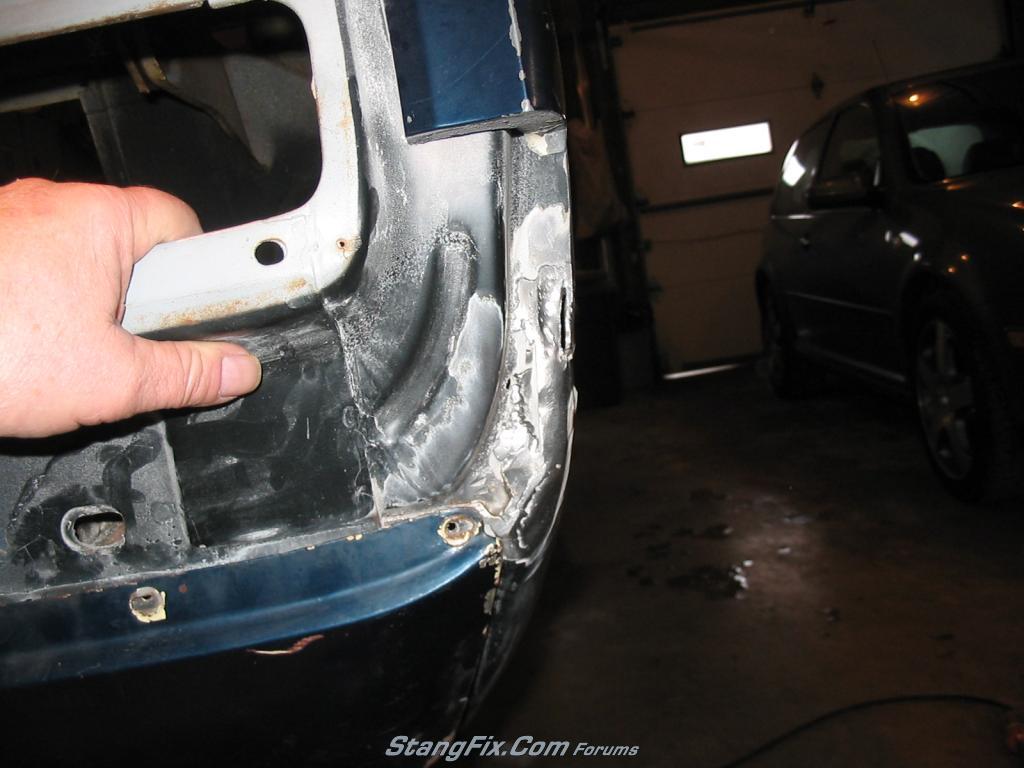
If anyone can confirm or deny that dimension, or has a better idea how to locate the patch, maybe in relation to the rockers or something, or has any pics of the area in question it'd sure be appreciated. I'm always open to suggestions, willing to look at pictures of most anything, and will listen to any comments.
 
Last edited by a moderator:
Maybe you should wait for someone with original 1/4s and trunk floors and frame rails...but for what it is worth, I got 8 1/8" on both sides.
 

Attachments

  • IMG_1815.jpg
    534.1 KB · Views: 3
  • IMG_1817.jpg
    985.8 KB · Views: 3
Thanks, jtfx6552. I know you gave me a dimension before for this. It looks like no one else is going to chime in, so I guess your's is it. No one has any good detail pics of this area?? Sure would like to get some more input.
 
I've been looking at this a few times... If I where you I would first better align the right side of the valence a little better. I seems about 1/4" - 3/8" too high based on the top body line alignment. If the gap widens as it goes down, then the angle of the valance and or the drop off is causing that.... be sure to fully attach the valance to get the right view. If they were pulled tighter would that help the fitment? The really odd thing is that it still seems that the valance is too short, or the bottom of the quarter where it kicks up is too long. Is that angled length any better on your new patch? If you valance has been beat up over the years, you might want to try another. It's hard to tell in pictures sometimes, but the overall look may not be too bad if you can get things to align a bit better and perhaps a little massaging on the rear valance. I know I had to weld ectra material to the ends of my repro valance to close the gap.... it's a pretty common issue. do you know if your current valance is a repro? If you are planning to replace it, besure you have it on hand for mock up.
 
If I where you I would first better align the right side of the valence a little better. I seems about 1/4" - 3/8" too high based on the top body line alignment.
I was hoping to use the valance as a starting point, since it and the tailight panel are original and the mounting holes are still there(except the very last one in the corner which is drilled into the new quarter patch).
The really odd thing is that it still seems that the valance is too short, or the bottom of the quarter where it kicks up is too long. Is that angled length any better on your new patch?
It appears from the new patch panels that they are made so that the top of the patch (directly below the taillight panel and quarter extension) has been allowed to run wild a little bit so it can be trimmed to fit. IOW I think I should line the bottom of the patch up with the valance and trim and massage the top. Several pictures I've found show the two points (bottom corner valance and quarter) matching nicely:
ford-00007-2.jpg

The arc at the top along the bumper is not part of the patch, so I'm thinking to make the quarter extension edge (which is kinda balled up on the right side, too) fit the bumper and put the patch to that.
I'm going to take some more pics, I took off a bunch of filler at the right top corner, and can see that it wasn't done very carefully.
do you know if your current valance is a repro? If you are planning to replace it, besure you have it on hand for mock up.
The current valance is the original, but the quarters have had the repro patches put in back in the mid-late '90s. I think I'm going to stay with this valance. The bumper, however, does have the common slight bow, haven't decided whether to replace it or not, but I don't think that will affect alignment of the quarter enough to matter.
 
When I was 16, I tried doing lower quarter replacement on my 65 with the American Designer crap replacement parts. Not knowing what I was doing, I ended up with the same problem. I cut and welded the stuff on without fitting first. I just recently redid everything. You have the right idea using the valance as a reference point. Mount the valance and take measurements from the tail light panel to valance to make sure its square and looks right. Fit the quarter patches in and attach with sheet metal screws. With everything together, measure, check gaps and everything else before welding. When I redid mine, I had to do alot of twisting and reworking of replacement panel. The lines were very rounded and in need of tweaking to fit right.
 
So I haven't worked up the moxie to cut the quarters yet, but started matching the new right side patch to the valence. Got the hole for the lower mounting bolt drilled so the bottom corners line up:
114-270211072233-75561207.jpeg

and snipped and bent a little at the top of the patch so it fits the valance better:
114-270211072259-75591913.jpeg

pluggin' away.
 
Last edited by a moderator:
OK, my cojones finally grew big enough to start cutting. Got the old patch off, and the new one roughed in:
114-030311045450-76161094.jpeg

Pretty obvious from the old cut line (the patch had been welded just on the bottom edge of the upper original quarterm and I cut right along it) that the old patch was cock-eyed. Once aligned, the rear lower edge of the flange was above the existing cut by at least 1/2", and the front can still be seen at least 3/4" below. I end up with a crooked cut because of it. I ended up right at 8" for the measurement I mentioned a few posts ago, so it's in the right ballpark with jtfx6552. Got to figure out whether to try and weld in a little wedge where the cut is too high, or just live with filler. I'm still nervous about trying to weld without warpage, so I may just live with it.
I think the main problem with the horizontal alignment was the edge of the QP extension was rotted a little, and the kid just gobbed some weld over it. Can't tell much from this pic, but it pushed the panel outboard some.
114-270211072143-7551329.jpeg

Made a little piece to put in by tracing the arc as best I could from the other side & burned it in.
114-030311045220-76102052.jpeg

114-030311045231-7611338.jpeg

114-030311045241-76121915.jpeg
 
Last edited by a moderator:
Dennis, before you do anymore welding, put the rear bumper on. You want to make sure the quarter patch and the bumper have the same radius. I got mine installed and noticed the repop panel didnt flow right with the bumper. I had to cut a pie shape out where you just welded that patch to get everything to flow.
026.jpg
 
Thanks, Ryan. I'd already checked that out before cutting that little piece. BTW, your gaps between the bumper and body look way tighter than mine, but I don't see any way to adjust them short of modifying the brackets, and I don't wanna open that can o' worms.
 
Got the patch as fitted as it's gonna get, it's begining to look like I'm better at metal work than photography:
114-050311060214-7626397.jpeg

114-050311060226-7627937.jpeg

114-050311060239-76281433.jpeg

If I'm missing something obvious chime in. Now I need to figure where and how to get it all welded.
 
Last edited by a moderator:
Now youre getting there. That looks nice!

My bumper is fiberglass and has been extended to close up the body gaps. Yours looks about right.
 
Back
Top