-
Hello there guest and Welcome to The #1 Classic Mustang forum!
To gain full access you must Register. Registration is free and it takes only a few moments to complete.
Already a member? Login here then!
You are using an out of date browser. It may not display this or other websites correctly.
You should upgrade or use an alternative browser.
You should upgrade or use an alternative browser.
Broken bumper bracket bolts in RS frame rail
- Thread starter abrahamfh
- Start date
mustangstofear
Active Member
I take a cutoff wheel and cut the top and both sides, then heat the bottom with a torch and bend it down, then heat the bolt and remove it. Then i will weld new nuts on the back side heat the panel back up and bend it back in place and weld it back up again. Rich.
If you go with the welded nut method, you might want to first soak the bolt with pb blaster for a few days, then clean it good before welding the nut on. Get a lot of weld inside the nut so that the heat carries into the threaded portion, and be prepared to immediately un bolt it while it is still hot. I like all three options in reverse order but I'll bet Rich has done it enough times to just not bother with the other issue you might be faced with...
mustangstofear
Active Member
What I have always found is the cage nut on the back will break before the bolt will come out, that's why I always weld a new nut on the back. Once the repair is done it can't be detected. Rich.
monkeystash
Active Member
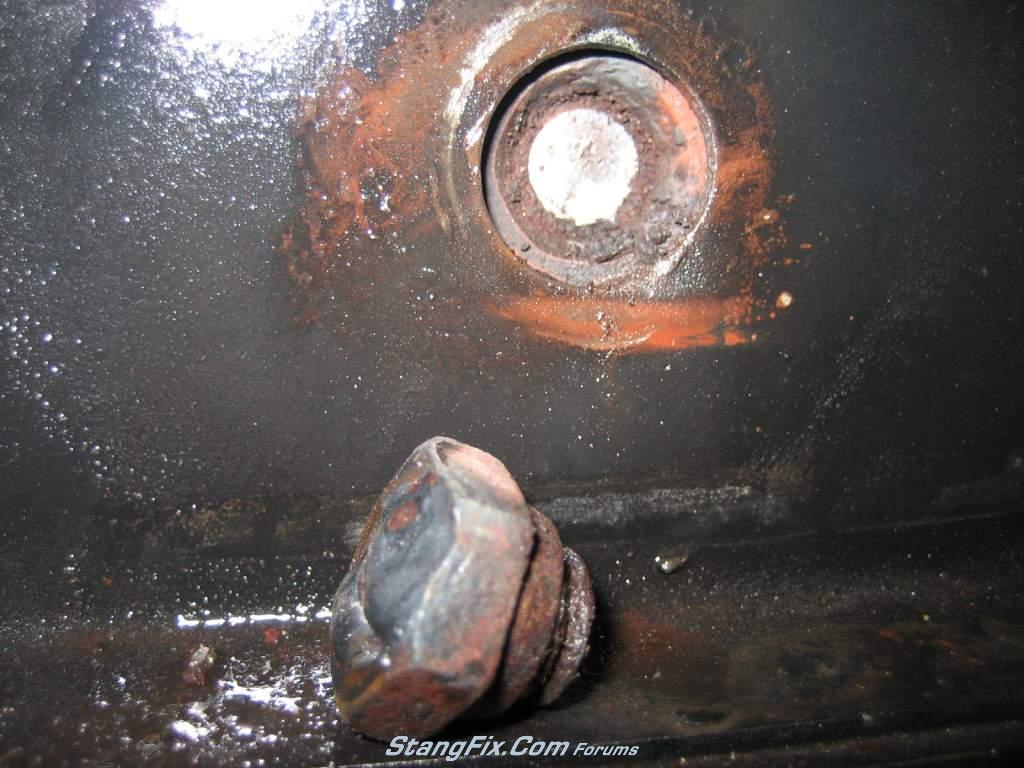
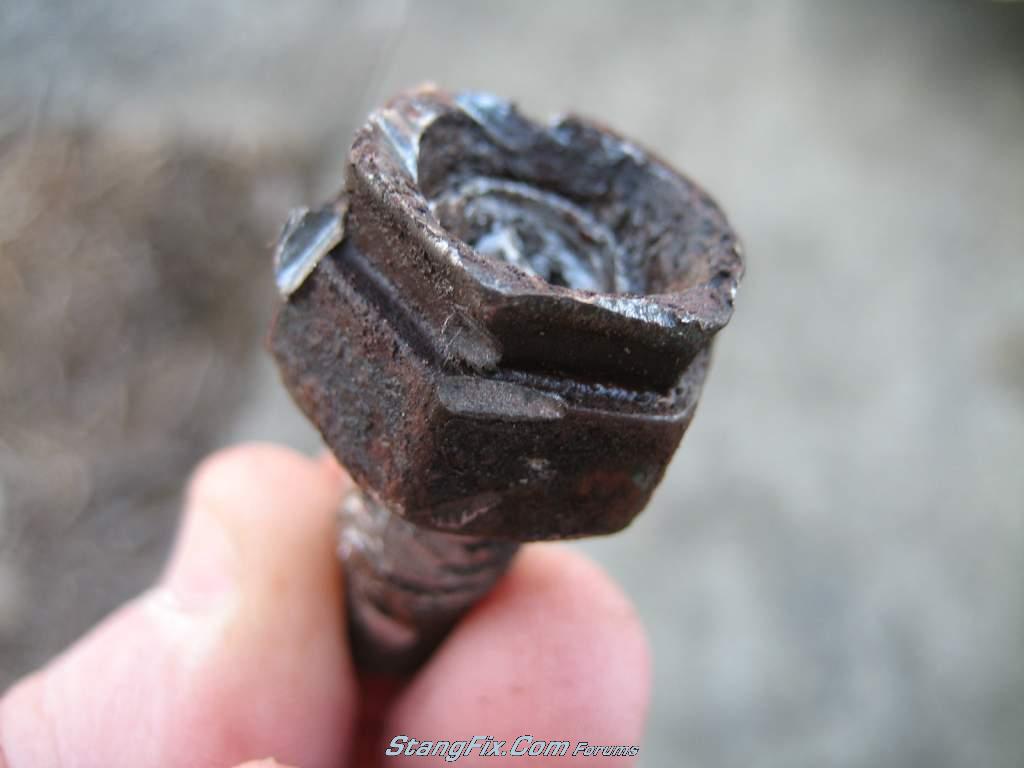
The weld-a-nut trick didn't work for me. It just broke off again, further inside:
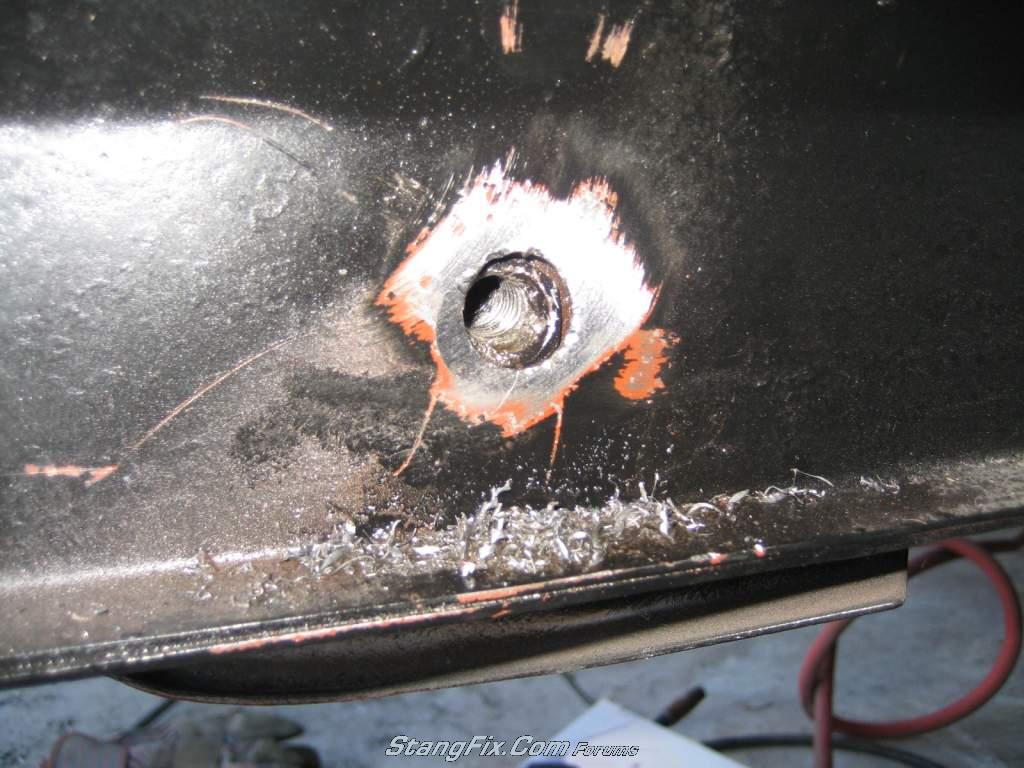
Drilled out and re-tapped:
One hole, the whole dang internal nut came out, whoops!

All done on one side:

Drilled out and re-tapped:
One hole, the whole dang internal nut came out, whoops!
All done on one side:
Last edited by a moderator:
Thank you everyone for the different suggestions in techniques.
So far, just like Ryan, the weld a nut route didn't work.
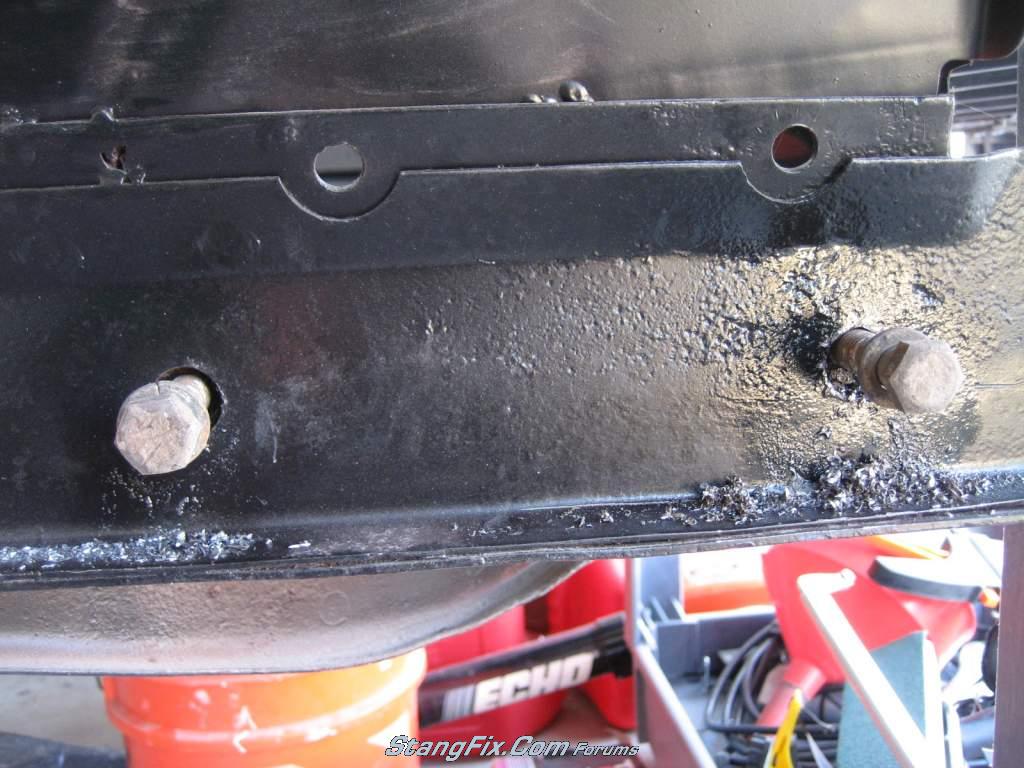
I figure I would drill out the broken bolt. So far, not looking to good. I think the internal bracket that holds the nut might be broke. It wiggled a little. Not sure if that means it's broke.
Only had enough time to drill out one hole before it got too cold.

Not sure what the next step is from here. Started with a small bit and worked my way up to bigger ones, but now I'm not sure what to do that I'm getting closer to the threads. (so I think)


So far, just like Ryan, the weld a nut route didn't work.
I figure I would drill out the broken bolt. So far, not looking to good. I think the internal bracket that holds the nut might be broke. It wiggled a little. Not sure if that means it's broke.
Only had enough time to drill out one hole before it got too cold.
Not sure what the next step is from here. Started with a small bit and worked my way up to bigger ones, but now I'm not sure what to do that I'm getting closer to the threads. (so I think)
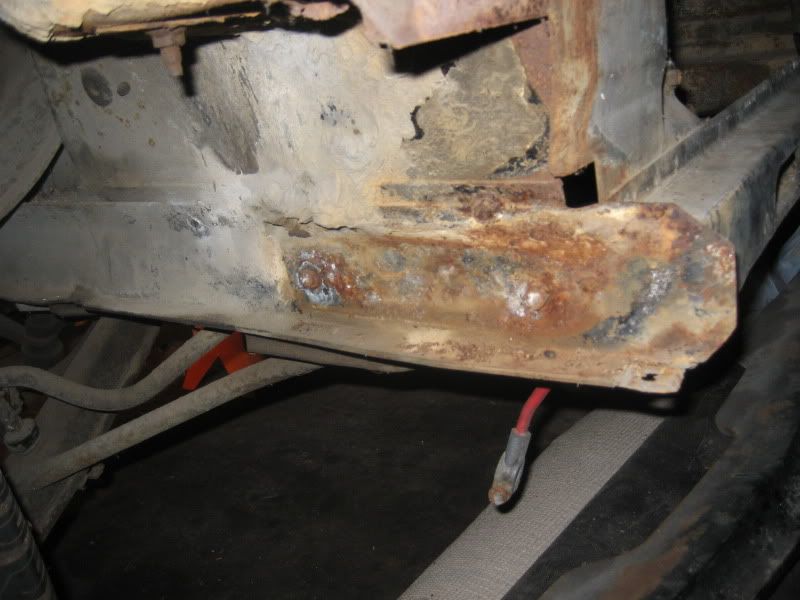
I think it may be time for you to consider replacing the frame rails with repro's. With that much rust, the structural integrity of the rails is IMHO questionable. I had to replace one on Midlife.
Ponyman66
Yak, yak, yak
I just opened my frame rails up Monday to repair this very problem (no pics because there's not a lot to see!). Three of the four nuts were so corroded they just broke and dropped down inside. I'd had problems in the past with getting the bolts out on previous cars, but had never had them just disappear. As such, I had never seen what they looked like inside the frame rail, assuming they were just a captured nut pressed into a depression.
While the right side was completely gone, what remained in the left one was interesting. The nuts are pressed into a structure. The surprise came when I discovered this structure is actually a 16ga box, for lack of a better description, with the nuts pressed in. The box is slid inside the rail and then spot welded in several places to keep the nuts aligned with the holes. In the picture that Ryan posted showing the nut, you can see the flange where it was pressed into the box. The picture he posted where you can see a hex shaped hole looking into the round frame rail hole is the box structure. You don't see this when everything is okay because the pressed nut just looks round and recessed. That's also why if anyone has ever had a bolt that just keep spinning (because it didn't break off first), it means you actually rounded out the hex shaped hole in the box structure or the nut itself!
If you can bring yourself to do it, I'd suggest taking the plunge and cutting open a section on the inside of the frame rail to allow access. Once you get everything out (it'll be pretty clear what you need to do once you see inside), weld some flanged nuts to the outside frame rail, centered in the holes. I suggest flanged nuts because they give more area to weld. Once done, just tack the removed sections back into place, weld them up and grind the welds flush. You'll never know they were opened once painted. The frame rail structure is made of 16ga steel, so it's pretty forgiving when it comes to welding. It took me about 45 minutes total to do both sides, plus another 5 per weld to dress them up.
Abe you should have enough welding time under your belt now that it should be pretty easy for you and you'll be proud of the results. Unless you really crank the heck out of the voltage, you shouldn't have any problems with burn through. Try to drill them out first, though IMHO it's a coin toss as to which would be more productive versus effort spent.
BTW, The rear bolt is located pretty close to the mounting bracket for the sway bar brackets. You won't be able to open up the frame rail to allow 360deg access around the rear nut for welding. You CAN get it close enough to allow welding about 90% of the way around it though.
Good luck with whatever you decide!
Here are my options to reach the internals and repair the bumper bracket bolts yada yada.
Option A, cut the outer piece of the frame rail, remove the internals and weld in the patch.

Option B, cut the inner piece of the frame rail, remove the internals, weld flange nuts to the outer frame rail and then weld in the piece that I cut out.

Option A, cut the outer piece of the frame rail, remove the internals and weld in the patch.
Option B, cut the inner piece of the frame rail, remove the internals, weld flange nuts to the outer frame rail and then weld in the piece that I cut out.
monkeystash
Active Member
How about option C, Rich's way? Seems the easiest and least intrusive.
"mustangstofear" said:I take a cutoff wheel and cut the top and both sides, then heat the bottom with a torch and bend it down, then heat the bolt and remove it. Then i will weld new nuts on the back side heat the panel back up and bend it back in place and weld it back up again. Rich.
"Midlife" said:I think it may be time for you to consider replacing the frame rails with repro's. With that much rust, the structural integrity of the rails is IMHO questionable. I had to replace one on Midlife.
????? Your kidding right?
67FSTBKRestoMod
Member
how bout just drilling some 1 inch or so holes on the other side and use nuts like such

new repop rails (one piece) come with these holes (yes they still have the "nut plate" inside them)
new repop rails (one piece) come with these holes (yes they still have the "nut plate" inside them)
Last edited by a moderator:
Ponyman66
Yak, yak, yak
Abe, the method I used is what you have labeled as option B. You have nice flat surfaces on the top and side to reference for leveling the piece back in. They're helpful too as a reference point when finish grinding the welds. The biggest thing you have to account for is the thickness of material your chosen cutting device removed, and space the removed piece back in the hole accordingly. I found the cut off disks at Harbor Freight are reasonably thin and are readily available. There are thinner disks available though a body saw is great because it makes a VERY thin line, but it can struggle a little with thicker gauge metal (dependent in part due to air pressure available for the saw, quality of the saw blades and quality of the tool).
I'm certainly not saying my chosen method is any better, or any worse that the others offered. Each has it's benefits and pitfalls. Just remember, any cutting, bending, reshaping you'll be doing is in 16ga. It doesn't move around as easily as 18 or 20 ga! Due to the sun setting when I get home from work I won't be able to do it until Sunday (my next day off), but I'll shoot a pic then and post it of my finished repair for you.
p.s. To space my removed section for welding, I just inserted a cut off disk into the lower cut. This raised it back close to the original height. I then moved it a little by hand to completely level before tacking. Once it was all tacked level, I just welded the piece fully.
mustangstofear
Active Member
By looking at your pictures your frame rails look fine. You could drill a hole on the inside but I doubt you will have enough room to try and weld a nut in there, Ford figured it was a problem and started making a large access hole on the inside in 67. Rich.
"napaguy" said:????? Your kidding right?
Why would I be kidding? The steel on all four sides was rusted through in places and it was easier to replace the front frame rail than to patch it.