
70_Fastback
Hell Bent for Speed
I actually did this upgrade a little while ago -- upgraded to all new 3" ARP wheel studs; but still wanted to post and share the pictures for anyone kicking around the idea of doing this as well.
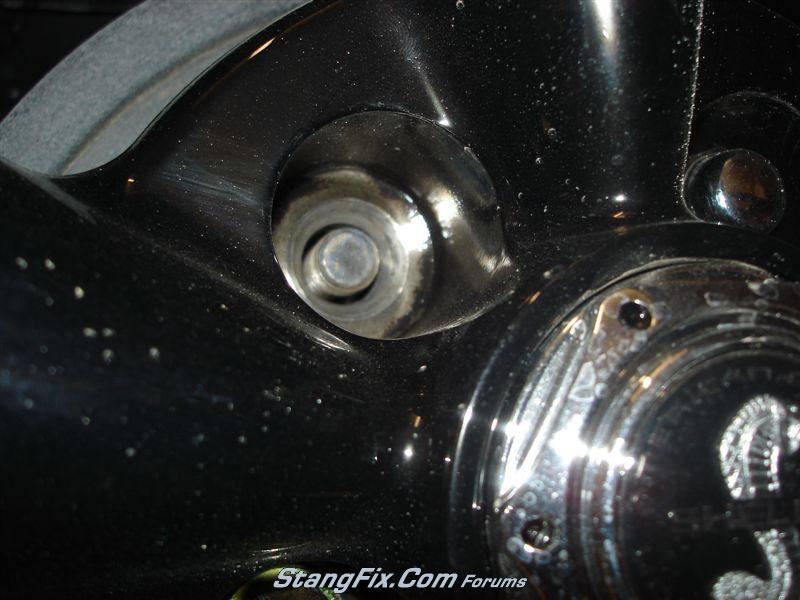
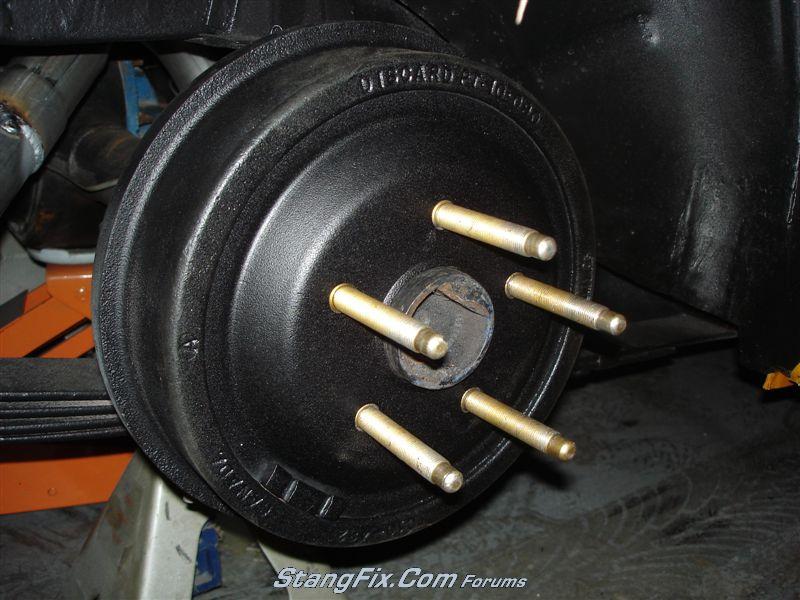
After installing the new A.R. Torq Thrust "M" wheels, it was glaringly apparent that the original wheel studs were not going to be long enough to run safely. Couple in the additional fact that I installed a 3/8" spacer/shim on the rears and there were hardly any threads left for a lug nut to catch on.
View of OEM stud with 3/8" spacer and new wheel. The end of the stud was barely flush with the top edge of the conical taper. There was maybe one thread for the lug to catch and that was it:
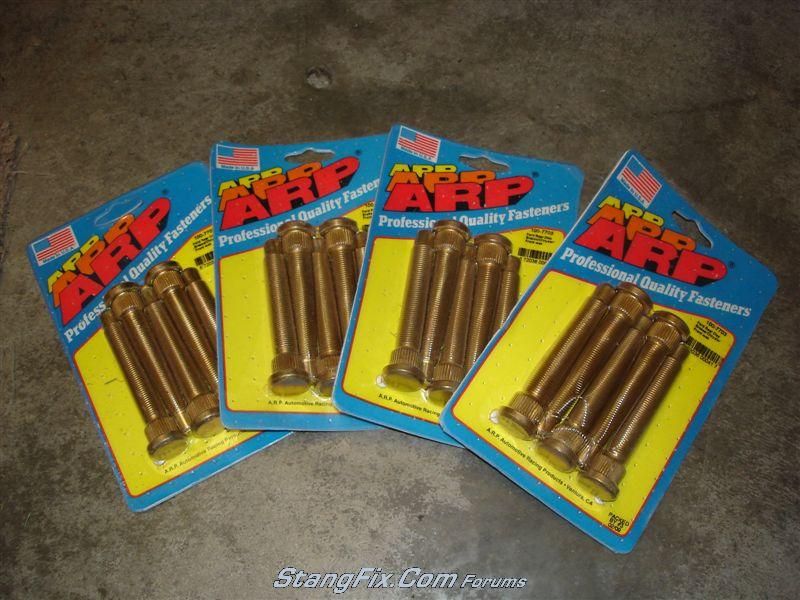
The fronts were more than likely OK as was, but I didn't like the idea of new 3" studs on the back and the shorties on the front. I didn't want the offsetting looks. So I opted to replace all 20 studs with new ARP studs:
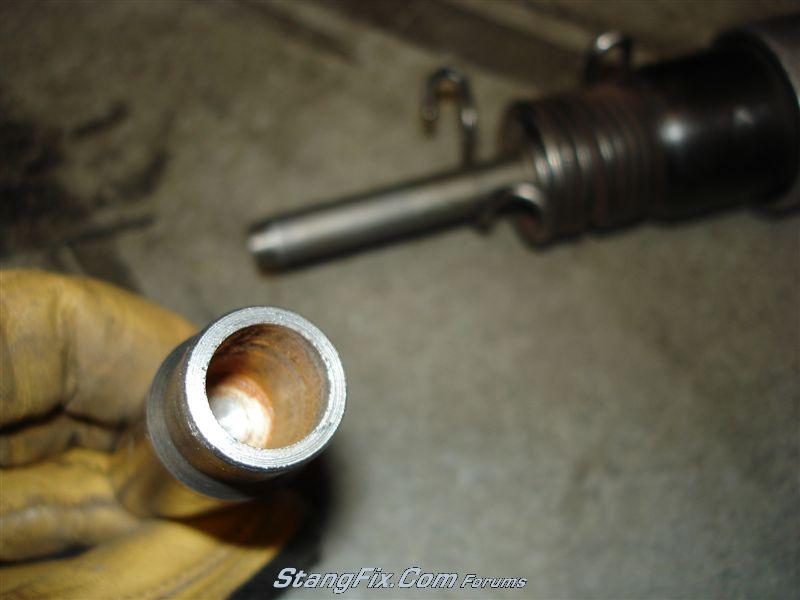
Next up was the removal of the old studs. And, with me being me, I decided to 'work smarter in lieu of harder', I didn't care much for the idea of using a B.F.H. to beat the tar out of the old stud, so I machined an adapter to use on my air chisel to buzz the old studs out with ease...
Machined adapter:
Machined adapter on standard pneumatic air chisel:
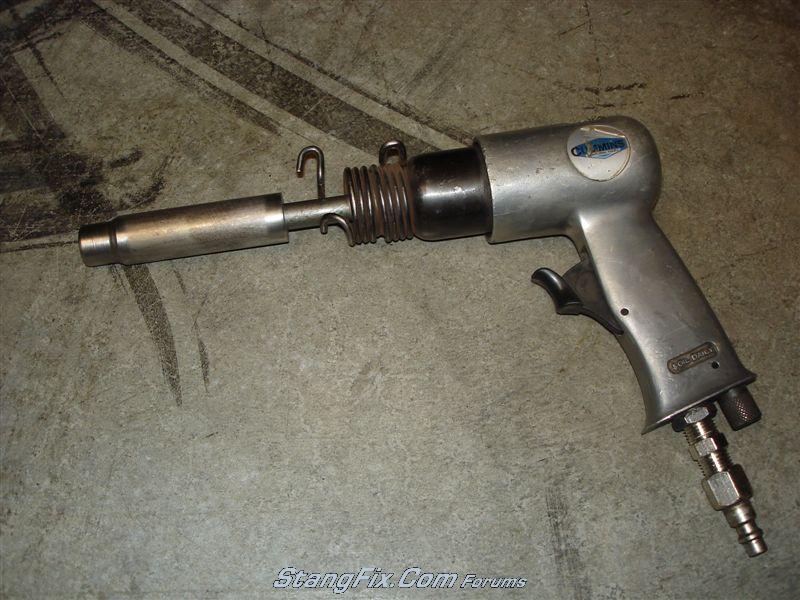
Install air chisel with said adapter over OEM wheel stud, seat squarely and pull trigger:
NOW... in theory, this should have worked like a charm... BUT it didn't. So I had to resort to the original method of the B.F.H. (please hold all laughter until end of post)
3 pound, short handle sledge.
I didn't want to bang on the axles with them still in the carrier, so I yanked them out and tapped them out in the vice. The studs came out pretty easily with 2 decent blows from the sledge.
Here is the difference between an OEM wheel stud and a new 3" ARP wheel stud:
Next up was pulling the new studs in. I didn't stop to take any pictures, but it's pretty straight forward. In a nut shell:
I installed a new stud through the existing axle hole, i used a standard cast bell reducer
like such:

as a spacer, so I would not have to zip the nut down as far. Seat the reducer over the protruding stud, I then installed a conical washer on top of the reducer and then follow with a sacrificial acorn nut to draw the new stud in with. Hand tighten assembly. Next use an air impact to draw the acorn nut down, thus "pulling" the new stud in. Tighten until the bottom of the knurl head is flush with the back of the axle face. Done.
All new studs installed and axles reinstalled. I would have had to remove the axles either way with these 3" studs as it would have been impossible to insert one from the back with the axle backing plate being in the way.
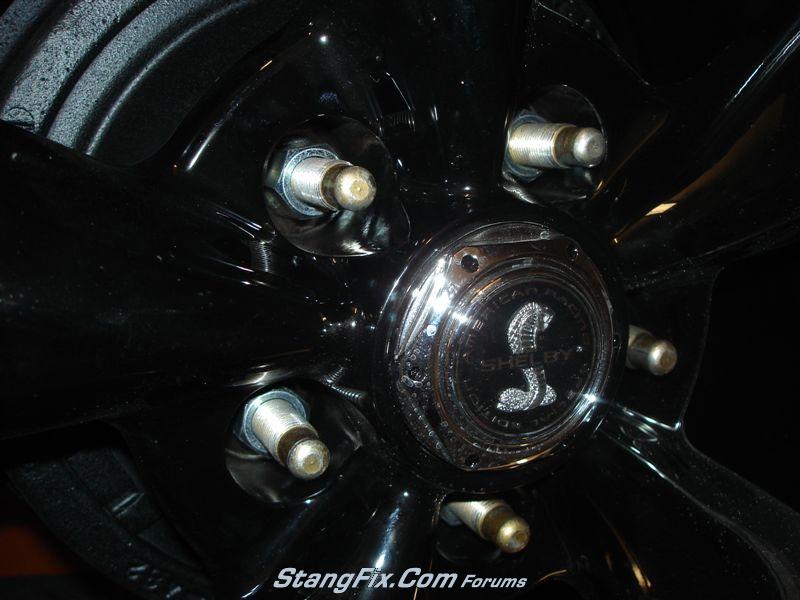
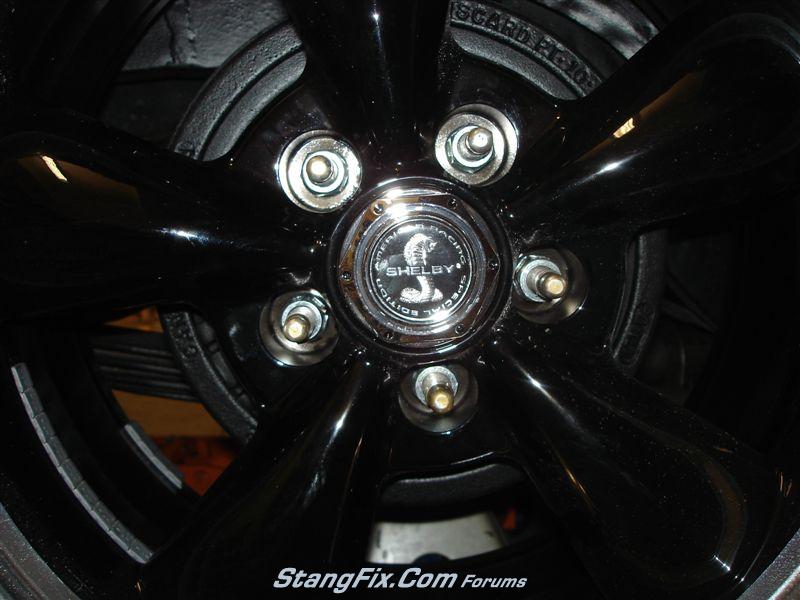
Plenty of threads left now, with all new open acorn lug nuts:
Fronts were about the same process.
After installing the new A.R. Torq Thrust "M" wheels, it was glaringly apparent that the original wheel studs were not going to be long enough to run safely. Couple in the additional fact that I installed a 3/8" spacer/shim on the rears and there were hardly any threads left for a lug nut to catch on.
View of OEM stud with 3/8" spacer and new wheel. The end of the stud was barely flush with the top edge of the conical taper. There was maybe one thread for the lug to catch and that was it:
The fronts were more than likely OK as was, but I didn't like the idea of new 3" studs on the back and the shorties on the front. I didn't want the offsetting looks. So I opted to replace all 20 studs with new ARP studs:
Next up was the removal of the old studs. And, with me being me, I decided to 'work smarter in lieu of harder', I didn't care much for the idea of using a B.F.H. to beat the tar out of the old stud, so I machined an adapter to use on my air chisel to buzz the old studs out with ease...
Machined adapter:
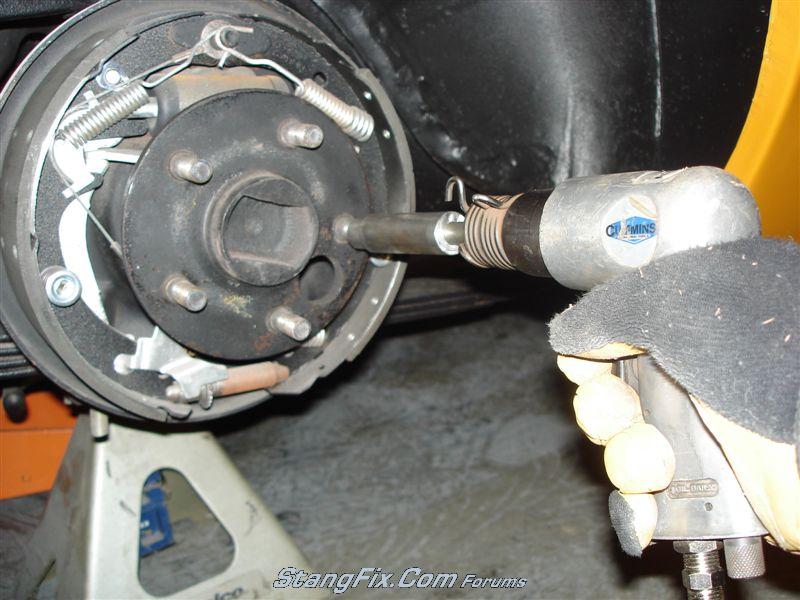
Machined adapter on standard pneumatic air chisel:
Install air chisel with said adapter over OEM wheel stud, seat squarely and pull trigger:
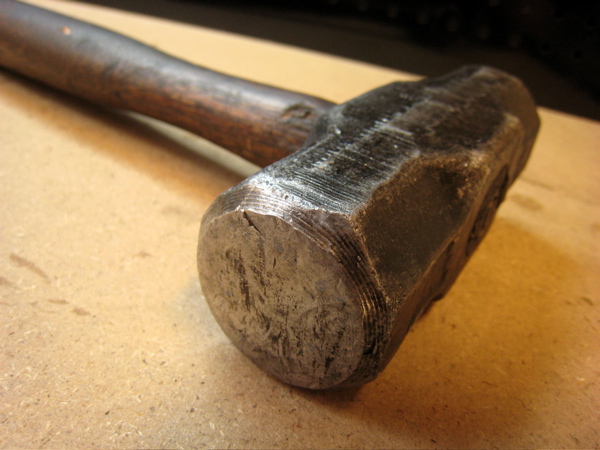
NOW... in theory, this should have worked like a charm... BUT it didn't. So I had to resort to the original method of the B.F.H. (please hold all laughter until end of post)
3 pound, short handle sledge.
I didn't want to bang on the axles with them still in the carrier, so I yanked them out and tapped them out in the vice. The studs came out pretty easily with 2 decent blows from the sledge.
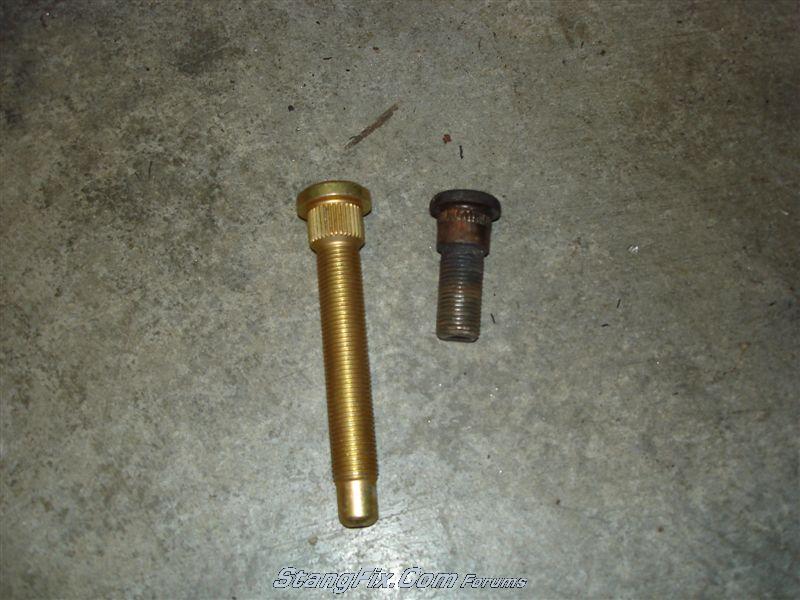
Here is the difference between an OEM wheel stud and a new 3" ARP wheel stud:
Next up was pulling the new studs in. I didn't stop to take any pictures, but it's pretty straight forward. In a nut shell:
I installed a new stud through the existing axle hole, i used a standard cast bell reducer
like such:
as a spacer, so I would not have to zip the nut down as far. Seat the reducer over the protruding stud, I then installed a conical washer on top of the reducer and then follow with a sacrificial acorn nut to draw the new stud in with. Hand tighten assembly. Next use an air impact to draw the acorn nut down, thus "pulling" the new stud in. Tighten until the bottom of the knurl head is flush with the back of the axle face. Done.
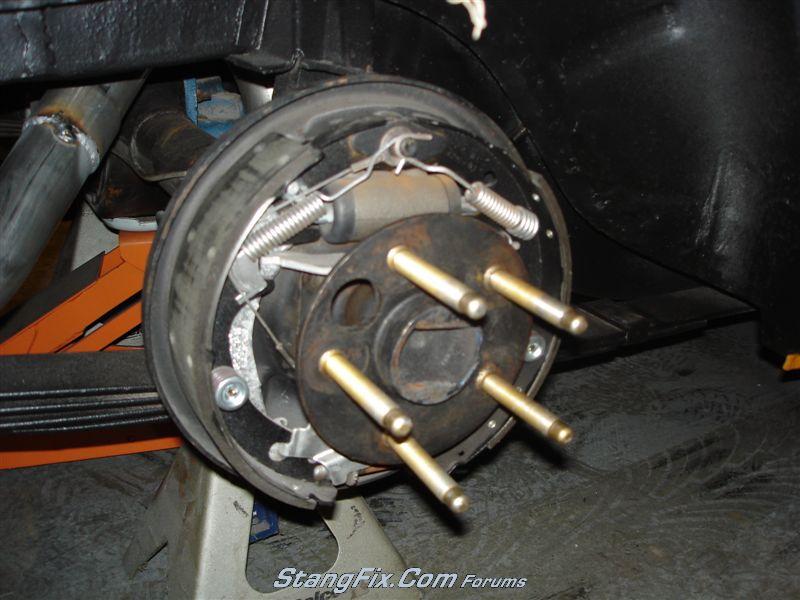
All new studs installed and axles reinstalled. I would have had to remove the axles either way with these 3" studs as it would have been impossible to insert one from the back with the axle backing plate being in the way.
Plenty of threads left now, with all new open acorn lug nuts:
Fronts were about the same process.
Last edited by a moderator:
 op, they weren't on were they? :doh :toot