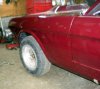
Yesterday I massaged the body brackets to allow for some adjustment and go the driver fender to fit. Spent time test fitting the gravel shield and attaching the bolt clips to the body and front sheet metal. Pics next week of assembled front end.
Navigation
Install the app
How to install the app on iOS
Follow along with the video below to see how to install our site as a web app on your home screen.

Note: This feature currently requires accessing the site using the built-in Safari browser.
More options
-
Hello there guest and Welcome to The #1 Classic Mustang forum!
To gain full access you must Register. Registration is free and it takes only a few moments to complete.
Already a member? Login here then!
You are using an out of date browser. It may not display this or other websites correctly.
You should upgrade or use an alternative browser.
You should upgrade or use an alternative browser.
Mach1Mark's '65 coupe restomod
- Thread starter Mach1Mark
- Start date
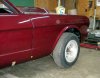
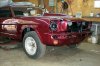
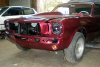
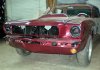
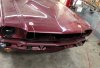
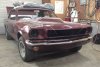
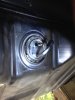
Building on last weeks work I shimmed and adjusted the driver side fender (had to take it on and off the body a couple of times), adjusted the driver side hood hinge (again). The hood being fiberglass, is imperfect even when new so the fit will not be as close tolerance as a metal hood. I am considering hood pins instead of the factory center latch assy. We will keep trying though. Installed the gravel shield, the front valance and both headlight buckets. The horribly large and uneven gaps between the doors and "Ford tooling" fenders are what they are. The cheaper repro fenders don't fit at all.
Attachments
A
Anonymous
Guest
I like the piece of mind that the hood pins give with a FG hood. I wouldn't trust the center latch holding, especially at high speeds!
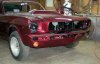
After a two month plus hiatus, I work on the Colt today a little. Installed the fender extensions (around the headlights) and the grill support. Had to un-stick the hood centering pin, couldn't open the hood. Had to unbolt the whole assemble. Going with hood pins.
Attachments
Grabber70Mach
Well-Known Member
Looking good.
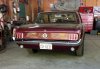
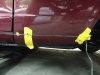
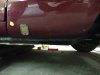
Had a productive day albeit shorter than I would have liked. Installed new, repro rear bumper, installed original license plate light assy, test fit new fuel tank level, installed YOM 1965 SC license plate, began install of new Scott Drake stainless steel hood pins.
Attachments
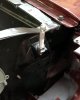
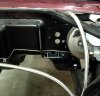
Today, I test fit the new rear gas shocks: they fit but the shock plates are not a proper fit. Need to refit/replace. Installed the new gas pedal assembly, installed new hood pins, test fit new hidden radio antennae and it will work !!
Attachments
monkeystash
Active Member
Nice progress Mark!
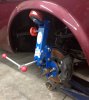
Borrowed the fender rolling tool from Craig, rolled the front fenders this morning. Will do the rear wheel openings next weekend. Wasn't as difficult as I was thinking it would be. Yes, I will be touching up the scraped paint inside the fenders. Also, test fit the new rear seat package tray (needs Palomino paint).
Attachments

Last Sunday I drilled some holes in the new fenders for the rocker trim brackets. Attempted to roll the rear wheel opening lip and had to stop because even though I had been heating the paint with a heat gun I could hear the body filler cracking under the paint (probably separating from the sheet metal). Also, began to remove the OEM upholstery from the rear seat back.
Attachments
Saturday, cleaned, polished and installed the front bumper (its the original and hasn't been on the car in 22 years), installed the fuel sending unit, trial fit the front brake proportioning valve, trial fit the door weather strip (need to install wind wing frames first).
Attachments
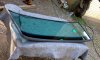
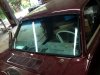
Today, installed new rubber gasket on the new windshield and now both are installed in the proper opening on the body. Tightened the new front bumper bolts down. Nice.
Attachments
I make oil
Active Member
Looking good. :thum
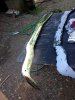
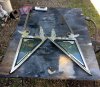
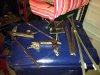
I totally disassembled the wind wing frame assemblies. The rubber seals are shot and one of the latches has always been broken. The bare frames are on their way to the chrome shop and I will be ordering some new pieces this week.
Attachments
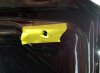
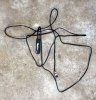
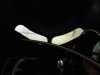
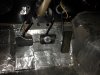
Didn't get a lot done today, attached the new coat hanger clips to the roof and attached the gas pedal/spring assy to the throttle arm. Note to self: don't forget to order new parts. Special thanks to Atlanta Steve for talking me through locating the holes in the roof and the iPhone pic.
Attachments

Ponyman66
Yak, yak, yak
Looking good Mark. The home stretch appears to be in sight! I meant to ask, who did you send your vent frames to for rechrome? I have to send my quarter window frames off (they're actually in a box awaiting my decision on who to go with!). Keep up the good work!! :thum
Thx, John.
Im still trying to locate a beauty plating shop that doesnt charge more than the cost of new repro frames. Had one guy here in Houston quote me $175 (EACH) !! A local street rod buddy referred me to a couple of places in TN so I better check into them.
Im still trying to locate a beauty plating shop that doesnt charge more than the cost of new repro frames. Had one guy here in Houston quote me $175 (EACH) !! A local street rod buddy referred me to a couple of places in TN so I better check into them.
Ponyman66
Yak, yak, yak
From checking with others a year or so back, it seems $150-175 is about the going rate. The wife bought me a set of repop vent frames for Christmas. They look good, though I haven't fitted them yet. If one of the Tn shops you're considering is Advanced Plating, they do pretty good work. They can be a bit pricey though. I've been considering Qual Krom at the recommendation of Charles Turner.
SELLERSRODSHOP
Well-Known Member
be prepared to wait a long time for advanced too. good, expensive & a long wait too.
mark, i'll get on that other project we discussed this week. ended up getting behind schedule on a couple other things going & out of town all last week....
mark, i'll get on that other project we discussed this week. ended up getting behind schedule on a couple other things going & out of town all last week....
Another option for chroming...
http://www.mustangcorral.com/cgi-bin/cp-app.cgi?usr=51F1514253&rnd=3502748&rrc=N&affl=&cip=&act=&aff=&pg=prod&ref=clvent&cat=excl&catstr=HOME:cl:excl
I got my vent window frames from Mustang Corral back in 2007 and very pleased with the chroming quality. They basically take your frames as a core and ship you out a set they already have on hand. The chrome looks great but if you are concerned with every detail being perfect then you may want to call them first. The only issue with the ones I received is that the little V detail at the lower front corner was somewhat sanded out... probably to remove some light pitting. In my opinion a very minor deviation for a non concourse type car. No one has ever commented on them and I've seen several other high end cars with the same issue so hardly a concern for me. For $225, plus shipping and cores, I think it's a very good alternative...