Evil: you are one sick puppy. I sure hope the car comes together and actually gets on the road.
Navigation
Install the app
How to install the app on iOS
Follow along with the video below to see how to install our site as a web app on your home screen.
Note: This feature may not be available in some browsers.
More options
-
Hello there guest and Welcome to The #1 Classic Mustang forum!
To gain full access you must Register. Registration is free and it takes only a few moments to complete.
Already a member? Login here then!
You are using an out of date browser. It may not display this or other websites correctly.
You should upgrade or use an alternative browser.
You should upgrade or use an alternative browser.
AzPete
Well-Known Member
Wicked work on that. Should be a sweet ride when done. Can you imagine finding this car in a barn in 30 years.....what was Ford trying.....¿¿¿¿¿
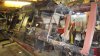
Everything going on here and I am still hung up on the steering arrangement. Holy hell, man. I might have missed it somewhere but is that an electric assist unit within that amalgamation of parts?
I thought the TT car was quite the accomplishment. Now this.
I thought the TT car was quite the accomplishment. Now this.
70_Fastback
Hell Bent for Speed
I just now found your build - Very impressive! Seems to be very well thought out.
And I am in the same ackerman boat as you on my ratrod since I had to flip my spindles from side to side and push my tie rod out in front. I heated and bent my steering arms out as far as I could, but the backiig plates limited that rather quickly.
And I am in the same ackerman boat as you on my ratrod since I had to flip my spindles from side to side and push my tie rod out in front. I heated and bent my steering arms out as far as I could, but the backiig plates limited that rather quickly.
A
Anonymous
Guest
"Horseplay" said:Everything going on here and I am still hung up on the steering arrangement. Holy hell, man. I might have missed it somewhere but is that an electric assist unit within that amalgamation of parts?
I thought the TT car was quite the accomplishment. Now this.
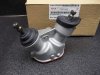
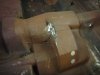
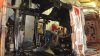
Actually it's an upper steering box off an Isuzu. I used it to reverse the steering shaft direction so that it would go around the diff and then back to the rack. The rack I'm using is off a Thunderbird, I forget what year but it was the widest one I could find. The tie rod ends, which are off a Datsun 240 Z. I plan to use the stock Lincoln power steering pump.
Attachments
A
Anonymous
Guest
"70_Fastback" said:I just now found your build - Very impressive! Seems to be very well thought out.
And I am in the same ackerman boat as you on my ratrod since I had to flip my spindles from side to side and push my tie rod out in front. I heated and bent my steering arms out as far as I could, but the backiig plates limited that rather quickly.
Ackerman is my biggest concern with this suspension and actually the whole build. With the adapters I made I'm fairly close, but not directly on it. I had intentions of using a Ford "REVO" knuckle but they are not available in the US. I even had my son go by a Ford dealer in Germany but they said they didn't have a part number for them yet. They are used on the Ford Focus RS that is sold in Europe but not here. I understand they have a much larger bearing than the standard Focus sold here and are five lug which I think would have worked good for this build. Bummer.

Fst Blk
Well-Known Member
I feel like I'm doing something with my stockish (compared to your builds) 67 and you post this. Crazy.
Bill
Bill
A
Anonymous
Guest
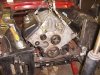
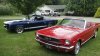
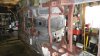
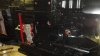
Pushing along I've spent the last couple days scraping and cleaning. Once I blasted off all the seam sealer (love the Landa) I found a couple more areas that need some TLC and some new metal. Not sure why the PO used so much seam sealer but he had the crap everywhere. Actually his restoration work was not that bad and I don't have any idea why he used so much of the stuff. Roll bar is complete and the rear seat will still be usable. I had to do a little modification on the seat base so the drivers seat would go all the way back and that took a little longer than I expected, but the good news is the drivers seat will now go all the way back and all the way up. I guess when I done my initial measurements I didn't allow for the transfer case clearance and should have moved it back another 3/4 of an inch. Oh well, no problem, just a little notching and welding. Anyway, I took a little time to take a couple of the other girls out for a spin. The wifie and the dog and me went driving and ended up having a picnic at the park. Nothing like a convertible ride on a nice day.
Attachments

A
Anonymous
Guest
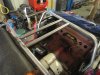
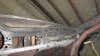
Still moving along. I'm down to the scrape and paint stage and been sandblasting for a few days. One thing about the sand (slag) it gets in every crack and cranny there is. Both on the car and me. Good thing is I'm done and starting to bring it back up. I hope to have the belly done in a day or two and start mounting the suspension and rear diff and such. Actually I'm thinking about getting the car running and doing a little testing before doing the final paint. I'm sure there will be some bugs to work out and probably would be safer not having to worry about scratching up a new paint job. I done a little work on the wheel openings so that a larger tire can be used in the rear and also match up to the fronts wider track. A good ole hammer and dolly works wonders. The tire track width will be a couple inches wider on each side.
Attachments


A
Anonymous
Guest
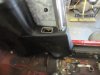
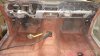
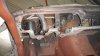
Bottom of the car is now in primer and I used urethane on the wheel wells and along the rockers. I did make somewhat of a patch in metal where the kick panels go. The PO had cut them out for a speaker but there was nothing to seal the back sides. Anyway I picked up a couple of doggie dishes made out of stainless and fastened them to the openings. I left the clips for the speakers and now have plenty of room to mount them flush. Problem solved. I finished up with a coat of undercoating to cancel out the "ding" from the dishes and plan to add some fiberglass insulation if it's an issue when complete. Rock on!
Attachments


A
Anonymous
Guest
Oh, I sprayed about half of the wheel liner (upper part) with 3M undercoating to see if it would soften the texture. It worked pretty good and when I finalize all the painting I'll go back and add a topcoat.
70_Fastback
Hell Bent for Speed
:mark probably could have cut you a deal on some bowls from his blowout closing bonanza...
A
Anonymous
Guest
Well if there was free shipping.
A
Anonymous
Guest
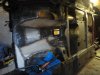
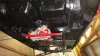
Been working on the belly a bit and it's now painted and ready for the suspension. Also the transfer case is installed and ready for the drive shaft. There's one of those "I wish I would have done thats" in the way I made the TC mounts. "If" I would hinge the upper mount the TC would be much easier to install and hinge down if the front drive line needs attention. Oh well. I am planning on a major dash change. The plan is to split the dash and add about an inch plus metal strip extending it down. This will allow me to mount two sets of 4"X6" speakers in front of each seat. Also I plan to use a couple of 5" Auto Meter MCX gauges mounted in the center just above a planned Google Nexus Tablet PC. On the heat and air controls I'm still pondering. I may do a mock up out of cardboard to see how everything fits. I about forgot about the sub woofer. I guess it will go in the trunk. I'm not too sure how well it will work so if any of you Vert owners have done this please chime in.
Attachments
Fast68back
Guest
Darreld has a pretty cool stereo setup in his vert, think there are some pics around here somewhere.


70_Fastback
Hell Bent for Speed
Man I'm jealous... I miss getting to build shit in the garage.
Just as soon as I finish the basement...
Just as soon as I finish the basement...
68EFIvert
Well-Known Member
It is coming along nicely. I love it!
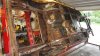
Here is a picture of my trunk. It has 2 10" subs and a 5 channel amp. I have Focal component speakers in the kick panels and 4' x 6' speakers under rerpoductions door speaker/light grills.
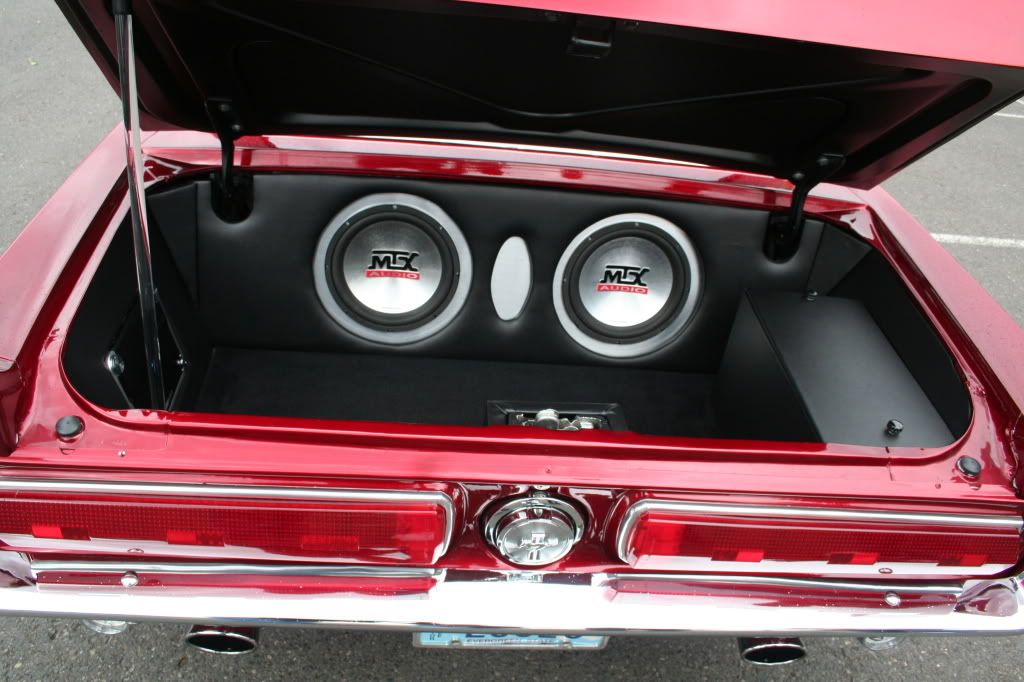
Here is a picture of my trunk. It has 2 10" subs and a 5 channel amp. I have Focal component speakers in the kick panels and 4' x 6' speakers under rerpoductions door speaker/light grills.
