• Hello there guest and Welcome to The #1 Classic Mustang forum!
    To gain full access you must Register. Registration is free and it takes only a few moments to complete.
    Already a member? Login here then!

2021 Use it or lose it.

janschutz

Corn Hauler
Last year was good for getting rid of stuff, I went through 11 boxes and repurposed or fixed a lot of stuff.

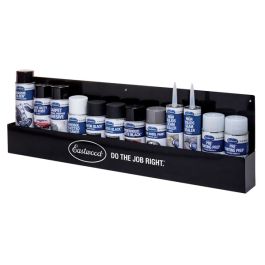
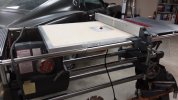
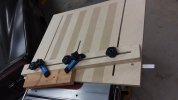
I used some foam board to cut out with my work's laser to cut out a prototype paint can holder. I am currently cutting out the pieces for the real shelf out of some scrap 1/2" plywood. This will be going on my cleat wall in the maintenance barn.


PaintShelfProtoype.jpg
 
Built the first rack, There needs to be some tweaks on the program and we need to determine why we chewed up a couple new bits. Need to sand and fill the anchor hoes before I clear coat it.

PaintCanRack2.jpg
 
Built the first rack, There needs to be some tweaks on the program and we need to determine why we chewed up a couple new bits. Need to sand and fill the anchor hoes before I clear coat it.

That came out nice. You say you need some tweaks on the program- are you using some sort of x-y coordinate machine to do the cutting?
 
We first tried our Laser cutter but the plywood is 1/2" 9 ply Russian Birch and was too dense for the laser. Now we are using a CNC machine, it is small and slow (used primary for prototyping. Too much red tape to use one of the production machines.

CNC.jpg
 
Plywood is expensive and likely over-kill for this design. Use MDF. Cheaper, easier to work and will have a better end finish too. Paint it to seal the material and it will have good longevity as well.

It's funny you post this now as I jumped on an Eastwood sale this weekend to buy a couple of these. Got 20% off.

 
I’ve wanted to power spray under my car, but my driveway is too sloped to safely put the car up on jack stands. So I decided to build some platforms to correct the tilt, which entails cutting quite a few 2x4 sections at a taper. Table saws don’t readily rip lumber at an angle. Sooo I needed to make a taper jig. But to do that I wanted to make a router table to mount my router.

The first is the router table. Since my Shopsmith has a ton of ways to arrange the tables for support and it has a rip fence, I decided to use those to my advantage. The wood table is the router portion of the ShopSmith, which also involved some fab work on the ¼” thick aluminum angles around the edges. You may already know that the Shopsmith is one of those do everything machines that is a drill press, table saw, horizontal boring machine, 12” disc sander, jig saw, jointer, lathe, and vertical filer…at least those are the attachments I have, and most come standard. It’s not nearly as handy as having all those individual machines already set-up, but it doesn’t take up as much room either.

The second is the taper jig. I had to machine an aluminum block down to fit the miter gauge slot, because the Shopsmith doesn’t have a standardized slot width like other table saws, and I wanted a long one. Just clamp the lumber on the jig at your desired angle, slip the jig in the miter gauge slot, and rip away
 

Attachments

  • router table.jpg
    router table.jpg
    164.7 KB · Views: 17
  • taper jig.jpg
    taper jig.jpg
    141.4 KB · Views: 17
Look at you being all safe and such. We used to just stack up some bricks and blocks of wood and have at it.
 
Look at you being all safe and such. We used to just stack up some bricks and blocks of wood and have at it.
It seems the older I get, the more I have to loose... and I may not have the time to recover. Besides, engineers like to build stuff.
 
Back
Top