• Hello there guest and Welcome to The #1 Classic Mustang forum!
    To gain full access you must Register. Registration is free and it takes only a few moments to complete.
    Already a member? Login here then!

After a really long time.. the bay is painted!!!

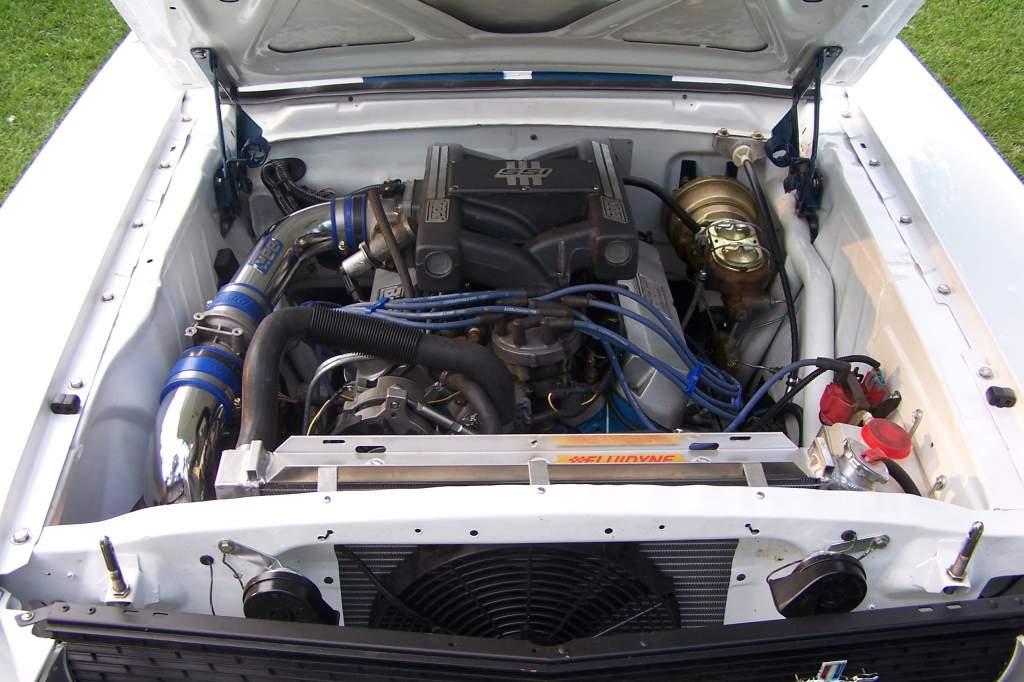
OK, a little history:

I started off adding some shock tower reinforcements. The engine bay was already painted blue like exterior of the car, and I wanted to keep the engine bay the same color. However, the paint in the engine bay wasn't the same shade as the exterior, nor did it have any metal flake in the paint. So with that being said, I decided to get same shade of Caspian Blue and shoot the engine bay.

Well first off, this is my first time at ever using a spray gun... I broke down and bought a Debliss paint gun kit from Eastwood and reading everything I could find on the Internet about car painting. I decided to use Acrylic enamel since that's what on the rest of the car with an epoxy primer base. I did use some kind of hardener for enamels on the advice of a paint guy that I know.

My first attempt at shooting epoxy primer turned out really bad with A LOT of wrinkling. As a result, I had to strip all the paint off the engine bay. It felt like I would overcome one hurdle only for something else to prop up... and this went on for what seemed an eternity. Well today, I finally shot the blue. I had to be a little inventive with the cold weather; it was about 45-50 degrees in NC today, so between coats I would close the garage doors, turn the heat up full blast until it warmed the body up a bit, then open the doors again to shoot another coat.

All-in-all, I don't think it turned out that bad considering it's my first time. It definitely looks better than what was on it.

Here are the results:

normal_2011-01-03_-_Engine_Bay_Painting_002.jpg

normal_2011-01-03_-_Engine_Bay_Painting_006.jpg


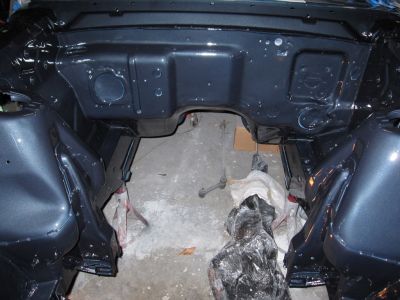
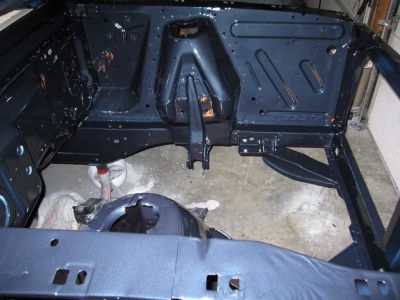
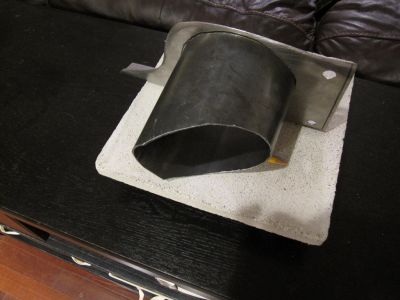
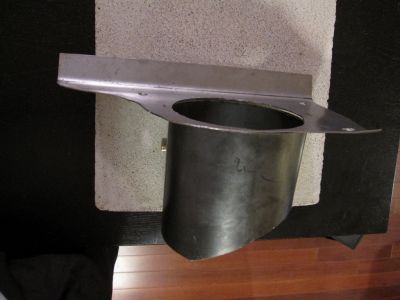
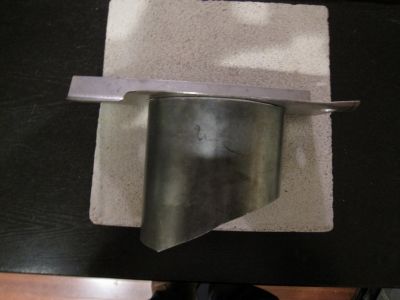
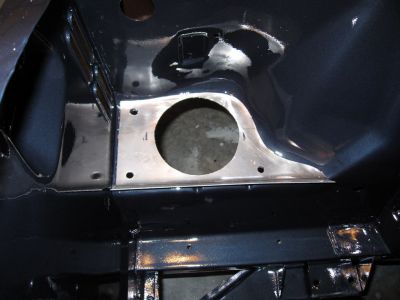
In this next pic notice the big 5" hold where the battery used to be; that's the start of my cold air intake for the EFI. More on that at a later date.

normal_2011-01-03_-_Engine_Bay_Painting_007.jpg


-Shannon
 
Looking great Shannon. Its amazing how time consuming all this stuff can be... Hang in there and keep plugging away!
 
Looks nice, I like the color. Try to maintain at least 60 degrees when painting because even with hardner in your paint it it will go dormant and not want to harden. Rich.
 
Nice job! That engine bay is pretty looking! :thu Makes me want to hurry and pretty up my engine bay!

I'm really digging that Caspian Blue color... I bet that would look hot on Gertrude. :confu
 
"Shaun" said:
Looking great Shannon. Its amazing how time consuming all this stuff can be... Hang in there and keep plugging away!

Thanks Shaun, this part of the build alone has set me back 4 months from the start... but I think the reinforcements and new paint will be worth it.

Once the paint cures, I'll be running brake lines and starting the suspension install. I'll be taking lots-o-pics!!

"mustangstofear" said:
Looks nice, I like the color. Try to maintain at least 60 degrees when painting because even with hardner in your paint it it will go dormant and not want to harden. Rich.

Rich,

Thanks for the tip.. I need all the help I can get.
 
"guruatbol" said:
Looks great! Wanna do mine? :yah

Mel

Hell no!! This little project has been the bane of my existance since it started. My wife has nearly kicked me out of the house because of the fumes.. and the time I've had to devote just to get over this hurdle. :char

I'll never do anything like this again unless I have the proper place to do it in.. and plenty of time.

And all the people at work think I'm crazy for even attempting this. I did learn alot and have a good time at it...

-Shannon
 
Keep it up, your wife will come around some once it is driveable. Mine complains every time I even paint with a can. She can smell the paint a mile away.
 
"LastDeadLast" said:
Hell no!! This little project has been the bane of my existance since it started. My wife has nearly kicked me out of the house because of the fumes.. and the time I've had to devote just to get over this hurdle. :char

I'll never do anything like this again unless I have the proper place to do it in.. and plenty of time.

And all the people at work think I'm crazy for even attempting this. I did learn alot and have a good time at it...

-Shannon

It'll be quicker next time around... :nut
 
Shannon,

What are your plans for the cold air induction.... IRT protecting the eventually exposed air filter from sucking rain water out of the wheelwell? I'm using a CCA kit, but have yet to pull the plug and route the filter into the wheelwell.


Painting in an attached garage? Your wife definitely loves you!
 
"daveSanborn" said:
Shannon,

What are your plans for the cold air induction.... IRT protecting the eventually exposed air filter from sucking rain water out of the wheelwell? I'm using a CCA kit, but have yet to pull the plug and route the filter into the wheelwell.


Dave,

About the cold air intake... I've got a 5" metal tube that is but to about 8 inches long with the bottom end of the tube cut diagonally with the long side close to the wheel so water and debris won't get flung up into the tube. The tube will be welded to a 18ga plate that sits in the engine bay where the battery used to be. This isn't a ram air intake, but just a way for the air cleaner to get outside air.

Here are the pics of what I've mocked up so far:

I haven't welded the tube to the mounting plate together just yet, but this is how it will look when complete:
normal_2011-01-04_-_Cold_Air_Intake_002.jpg


Another shot of the mock up: The 1" tab will support aluminum walls to box in the intake from the engine:
normal_2011-01-04_-_Cold_Air_Intake_001.jpg


Another side on shot:
normal_2011-01-04_-_Cold_Air_Intake_003.jpg


This is how the plate will fit into the engine bay:
normal_2011-01-04_-_Cold_Air_Intake_005.jpg


Any additional ideas would be appreciated.

"daveSanborn" said:
Painting in an attached garage? Your wife definitely loves you!


My wife is an angel.. she's put up with my smelly hobby for years... Here's props to my beloved and my goofy kids:
normal_Wife-Kids.jpg


Thanks,
-Shannon
 
with the bottom end of the tube cut diagonally with the long side close to the wheel so water and debris won't get flung up into the tube.


With the end of the tube cut diagonally, what is your plan for attaching the air filter? Or will the air filter be installed on the underhood portion of the tube?
 
"daveSanborn" said:
With the end of the tube cut diagonally, what is your plan for attaching the air filter? Or will the air filter be installed on the underhood portion of the tube?

The air filter will not be attached to this at all.. its only a means for the air filter to have a source of cool air.

My hope is that with the tube being directly behind the front valance, that I'll have a venturi effect happening that will pull air into the tube. The air filter will be enclosed and insulated from the engine bay was well. The air filter (a conical element) will be sitting pretty much where the battery used to sit.

Edit: Since I'm going to be essentially building a box around the air filter (with weatherstripping seals and everything), I hope that when the car gets up to speed, the "intake box" will be somewhat pressurized.


Hope this makes sense.

-Shannon
 
Hope this makes sense.


Perfectly. Please post pictures of the completed air intake... particularly the box/housing for the air filter.

I "dead-ended" my oval K&N filter, pointing downward, directly over where the battery shelf used to be (see below picture).

3_07_09_08_5_57_31_4.JPG


With a mechanical cooling fan I initially had concerns that I might experience "fan wash", which could cause erratic MAF readings, but the car runs perfectly and I haven't had any problems. One of these days though I'd like to follow your plan and house the filter inside a box/housing and take full advantage of cold air through the wheelwell to the box. This "intake box".... are your plans to build from scratch or is there an OE ABS box that could be suitable/adapted for use?
 
Last edited by a moderator:
"daveSanborn" said:
This "intake box".... are your plans to build from scratch or is there an OE ABS box that could be suitable/adapted for use?

Dave,

That's a nice setup.

My plans were to make something out of aluminum. It shouldn't be that complicated to do.

I think something made out of metal would look a little better than a big black plastic box.

-Shannon
 
Thanks all!

Hey Mustang67408, I was watching a short video of your stang.. that thing is a beast!!!

I've finally got most of the suspension, steering and brakes done. All the brake plumbing was completed this morn. I need to get the steering column installed and bolt up then I start on the engine.

It's always nice when your progress can be seen.

-Shannon
 
Back
Top