• Hello there guest and Welcome to The #1 Classic Mustang forum!
    To gain full access you must Register. Registration is free and it takes only a few moments to complete.
    Already a member? Login here then!

Boom's Boosted Bullitt

The underside looks pretty clean. I debated between removing all the various speed nuts that held various brackets. I decided to snug the bolts on instead to prevent rattles and in case I need them in the future.
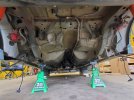
20250613_154517.jpg

I looked at mounting the two rear IRS brackets but I need to clean out the threaded holes. Sadly that tap is broken on my thread restorer set. Debated using a real tap, decided to put the tip of the bolts in and spray say wd40 to sit overnight. Hope this works and cleans them up enought to thread a bolt in.
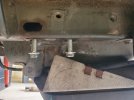
20250613_161134.jpg

Tomorrow should be a fun day trying to maneuver the IRS in place.
 
Getting those bottom holes cleaned up was a pain. I eventually resorted to using a tap, going very carefully by hand at first until it was started in the existing threads.

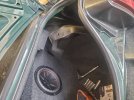
I also had to remove the shocks. I didn't realize what a pain that'd be with the subs in the trunk. I had to get a ratchet sitting on the nut inside while twisting the shock body off with my hands. Forearms felt like Popeye afterwards lol.

20250614_111941.jpg

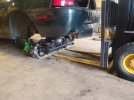
Set the irs on a sheet of plywood and used that to slide the assembly under the car. Just barely fit.

20250614_135900.jpg

Now to figure a way to get some jacks under it and start that dance of lining up all four holes at once. Almost looks like I could get the front bolts in and swing the back up into place....maybe
 
Got the IRS subframe installed! What a pain. The front seemed to be like a 1/8" too narrow. Fought with it for awhile before getting it to go in with a prybar helping. Seems to be a common issue with the stiffer poly bushings.

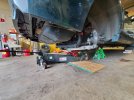
Luckily i had this transmission jack, it definitely helped to be able to hold the whole assembly and tilt isn't as needed.

20250614_151109.jpg

It was a sigh of relief once I finally got all four of the bushings into their pockets. Took a rest and then torqued the bolts.

I also cleaned up the new driveshaft and got it mounted. Fit like a glove, idk if the stock one would've still fit.

20250614_185449.jpg


Might take tomorrow off to rest and then tackle the coilovers and exhaust on Monday. Still waiting on the new calipers to come in.
 
You say it was a pain to install, but it looks like it went in fairly quickly. I figured there would be a lot more work to make it fit. Great install!
 
There wasn't too much trouble outside of wiggling and leveing things to get the 4 point lined up in their pockets.

One area that did require changes so far was:

The upper control arm mounting bolts. The forward most bolts need to come in from the front "pointing" to the rear, if you have the bolt going the other way the threads are too long and will hit the stock solid axle upper control arm mounts on the car.

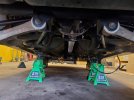
I have the coilovers loosely mounted on the car. I need to get them tightened up.

This morning I plan to get the new exhaust started.

20250615_155140.jpg


Still waiting on the new calipers.
 
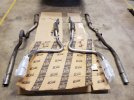
Was pretty busy today so not much progress. I did manage to get the tailpipes and mufflers hung on the mounts and resting on jackstands for now.

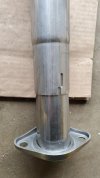
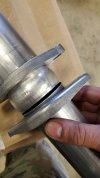
Ran into a issue with the Borla kit. I remember seeing this when it came in forever ago but didn't think it'd be a showstopper. They use a 2.25" socket to connect their system to the vehicle. It immediately necks up to a 2.5" tube the rest of the way.

signal-2025-06-16-15-23-41-268.jpg

My mid pipes tubed are 2.5" also, both the old and new ones. Issue is that a 2.25" female socket doesn't fit with a 2.5" ball end.

signal-2025-06-16-15-23-11-111.jpg

Called Borla, they weren't much help. Said this is how it's desigbed since it's supposed to fit a stock exhaust which was 2.25.

No local shops have anything to remedy this either. I did called and speak to the folks at spintech mufflers and they were willing to make me adapter that would fit, but the recommended to either cut or expand the 2.25" section and run 2.5" all the way through.

So I picked up a nifty new kit from Harborland that says it works on stainless tubing. Well see tomorrow. I also ordered new stainless starter tubes from Summit. They also have an O2 port, so I should be able to put the wideband there.

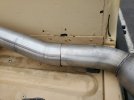
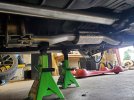
Here's a shot with the exhaust mounted on the hangers.

20250616_154218.jpg
 
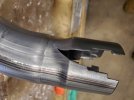
Got a bit of progress done today. The expander works really well. I initially had an issue die to the way they cut the pipe. Choice words were thought for sure.

20250617_112703.jpg

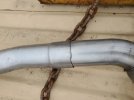
After that fun, I decided to cut the ends that had that split/cut off. Went pretty smooth after that. The way the expander works makes you have to loosen and rotate the doe in the pipe to keep it round as you expand. Got both sides expanded and was able to slip a 2.5" pipe in without issue.

20250617_115823.jpg

20250617_140652.jpg

Only concern is that with cutting the ~2" off the ends is if I'll have enough with the new tires coming on to connect everything. If not I should just have to add a short straight pipe. No issues making a new expanded end now.

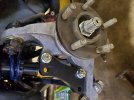
I also mocked up the old caliper with the rotors to ensure I had the orientation right for these brackets. Once I got it sorted I hit the bolts with some blue locktite and torqued them down too. Coilovers also got torqued on the bottoms after verifying the washers and everything was correct.

20250617_155744.jpg

I finally got my new rear calipers in! I plan to clean them up to get them prepped and painted tomorrow.

Also need to get the top of the coilovers secured and then I can see about adjusting the height a bit. Almost got the rear end all together again.
 
I didn't know those expanders existed, much less available at HF. A few years ago I was putting a Borla exhaust on my dad's F150 and it came with mis-matched pipes. I chased around town to find a muffler shop that could do that for us.

I like the way your project is coming together.
 
A lot of part stores will rent you an expander tool. I know for sure my local Autozone has them, for example. As Brett learned, it's a good idea to maybe practice it's use on a scrap tube first to get a feel on how to get the best results. Takes a bit of effort and time but you can match the results of a professional pneumatic tool.
 
The tool set is super nice. Came in a case, too. I don't know if my local auto stores have one, they barely had a spring compressor.

I figured it wouldn't expand properly due to having that slit cut, just didn't expect it to tear quite as much.

Painted my new calipers and brackets. Not super happy with the paint finish/quality. But wasn't expecting a smooth mirror shine since these are just cast calipers. Waiting on these to dry and then ill get the brakes mounted. Going to work on getting the parking brake cables routed.
 
Thanks!

Got the proper size exhaust tubes in today. I'm gonna try and get the exhaust mounted up tomorrow.

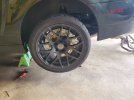
I played around a bit with setting the coilover height. Gonna be tough to get it finalized until the cars on the ground. I mounted the wheels so I could see the clearance they have currently.

20250618_145700.jpg

Brakes should get mounted up tomorrow also.
 
Took a day off to be lazy.

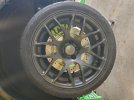
Got the calipers mounted this morning. These larger rotors take up any slack the e-brake cables had before. I need ti see if there's a different mounting point at the front if the fenderwell, the cable is very close to the tire.

20250620_110917.jpg

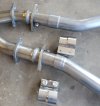
The new exhuast starter tubes look great, SS from JBA and theybhave ports for O2 sensors. I plan to put my wideband sensor in one.

20250620_095616.jpg

I was able to get the passenger side to fot without too much issue. The drivers side is going to need lengthened a bit.

20250620_113211.jpg

I plan to also wipe the exhaust down before starting it. I've heard that any smudges will get burned into stainless when it's started. Plus it'll look nicer for a bit.
 
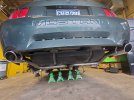
Got the exhuast all hooked up and snugged down. Also wiped everything down to hopefully remove any grease or fingerprints.

Managed to get both calipers mounted and the brake lines connected. Always makes me feel like a trauma surgeon when I'm doing brake lines. Trying to hurry and stop the fluid from going everywhere.

Still need to bleed the brakes. That'll have to wait, I'm terrible with those vacuum pump tools. I just do the old pump pump hold with a helper to bleed the brakes.

Need to tighten up a bracket that came with my new lines. It secures the line to the upper arm to help keep it away from the tire.

20250620_174931.jpg

That should just about wrap up the rear end work. Only things left are checking the ride height and setting the stopped on the coilover adjustment ring, and hooking up the irs abs sensors to the car. Those plugs go inside and under the rear seat to acces the harness.

Then it's on to the front!
 
Not much progress lately.

I went back and tightened the brakes lines some more. The banjo bolts say to torque to 14 ft lbs. Had to use a dial torque wrench to do that. Felt really unnerving, it'd get torque and then loose some. I attribute it to the copper washers sealing (hopefully)

Wiped the lines amd fittings down and didn't notice anymore wetness or drips. Fingers crossed they're good. Should have a helper tomorrow and can bleed the rears.

Been waiting on some O2 sensor plugs that were supposed to be delivered on Saturday...must got an email today that they shipped :rolleyes:

Been looking ahead at the front with dropping the k member. Figured I'd see what it all costs and order it since I have to drop it anyway. Can't seem to find the control arms in stock anywhere. Even called the company. They said the arms are super backordered and will be at least a week. I don't want to wait that long. Don't have a whole heck of a lot of time left.
 
Not a whole week! You are lucky, I have had parts backordered for 6 months. Waiting sucks when you are making such good progress.
 
Back
Top