
70_Fastback
Hell Bent for Speed
First, I'm in the process of converting my stock '70 gauge cluster over to all Autometer gauges, but doing this I can only fit 4 standard aftermarket gauges in it and I need/want the standard 6 total gauges. I tried the A-Piller gauge pod and didn't like the look of it at all.
Since my car came missing it's radio; and the prospect of purchasing audio equipment, etc just didn't thrill me that much, I opted to make my own radio delete plate / gauge bezel and install my remaining (+1) gauges in place of the radio.
And this is what I came up with...
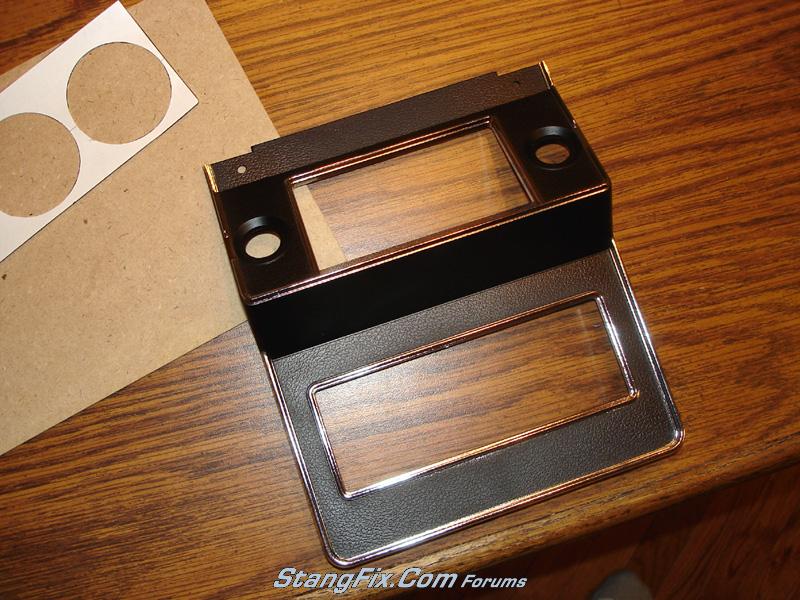
I bought a new repo radio/heater bezel (got a steal of a deal too).
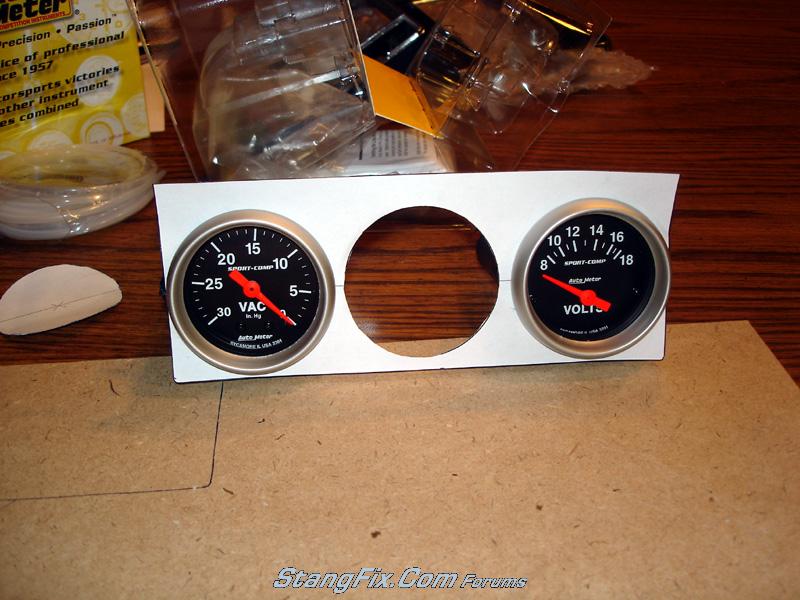
Measured the bezel and figured radii, etc and designed the actual bezel in cad. I cut out a paper version first for a trial run

After test fitting the gauges in the paper model, it was time to maching out the real piece.
One part I didn't document was the actual cutting of the bezel itself. You have to remove most of the camera case area of the radio, but leave some small radiused corners for attachment points.
Machined piece:
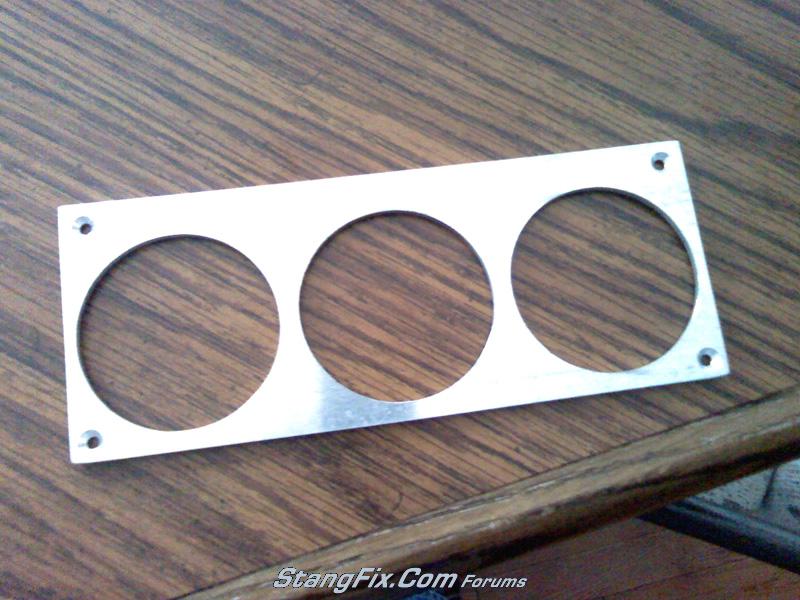
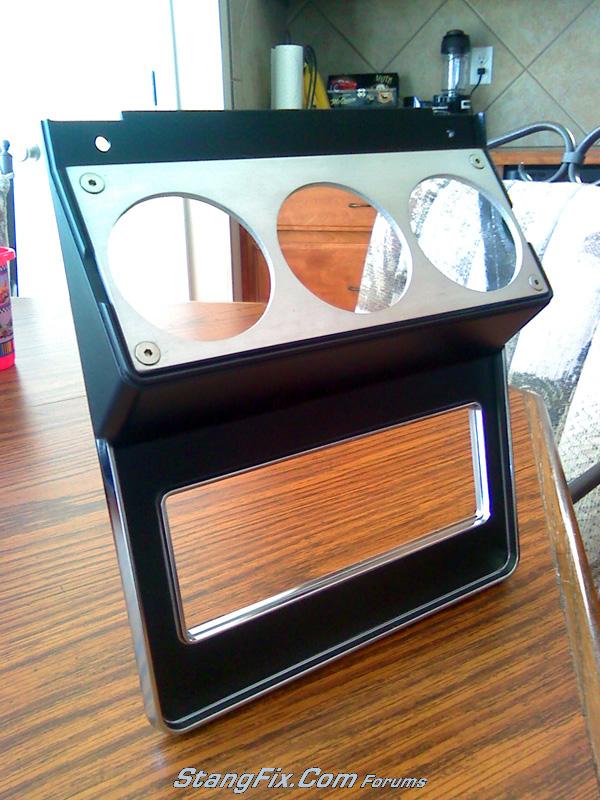
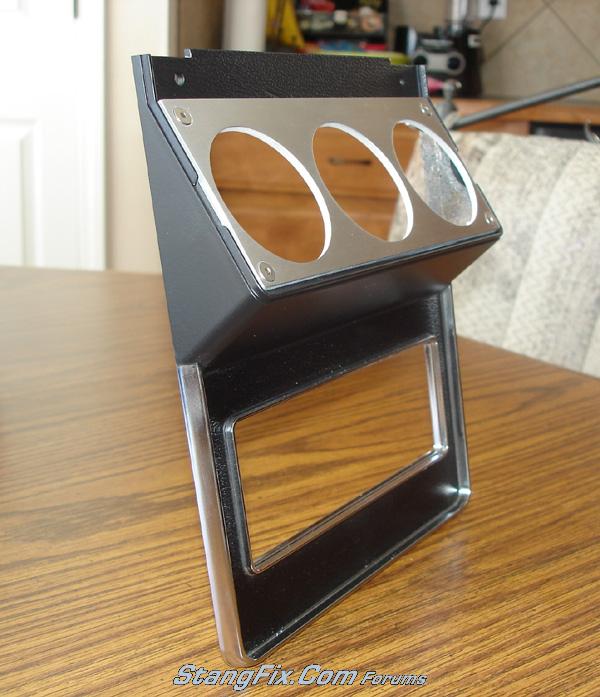
Here is the cut out bezel with the machined delete plate for a dry run. The material is 3/32" thick aluminum.
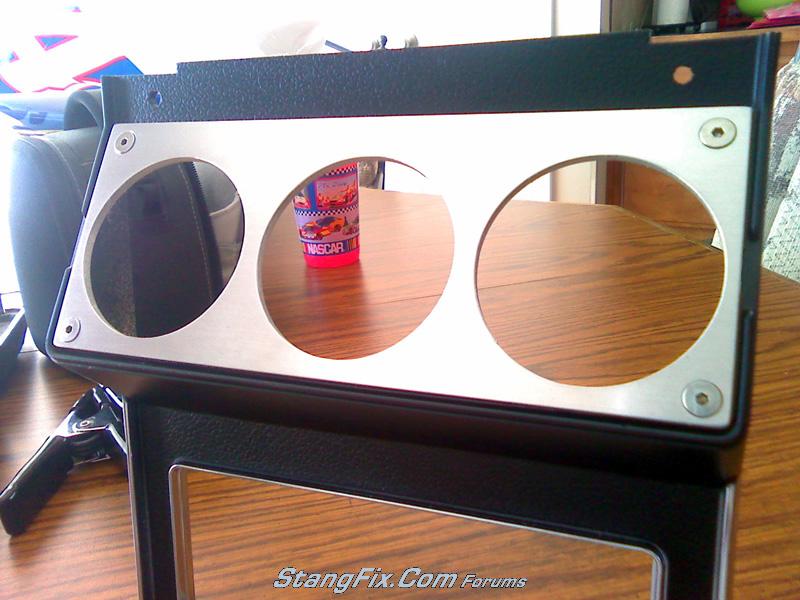
I countersunk and used recessed allen heads for a little more stylish look (IMO that is).
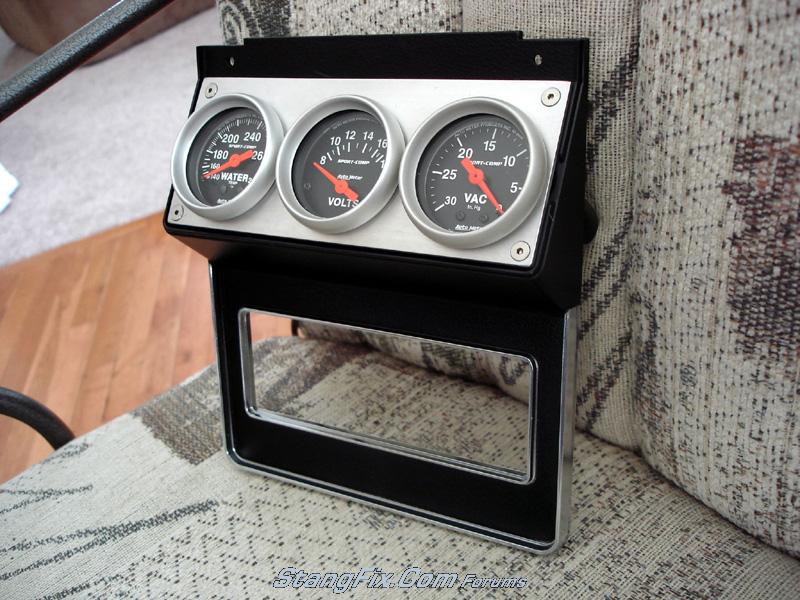
The gauges used were 2-1/16" AutoMeter Sportcomps. I only needed 2 additional gauges, but I didn't like the spacing of 2, so thus there are 3.

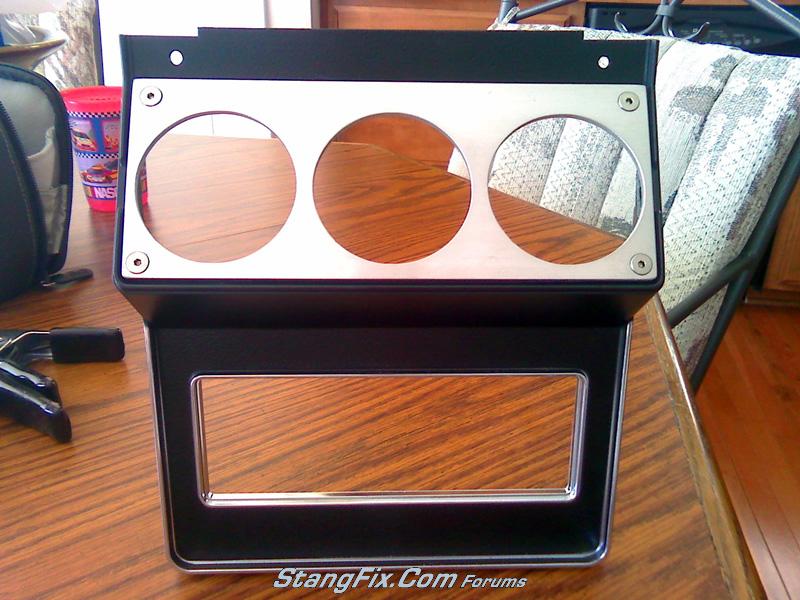
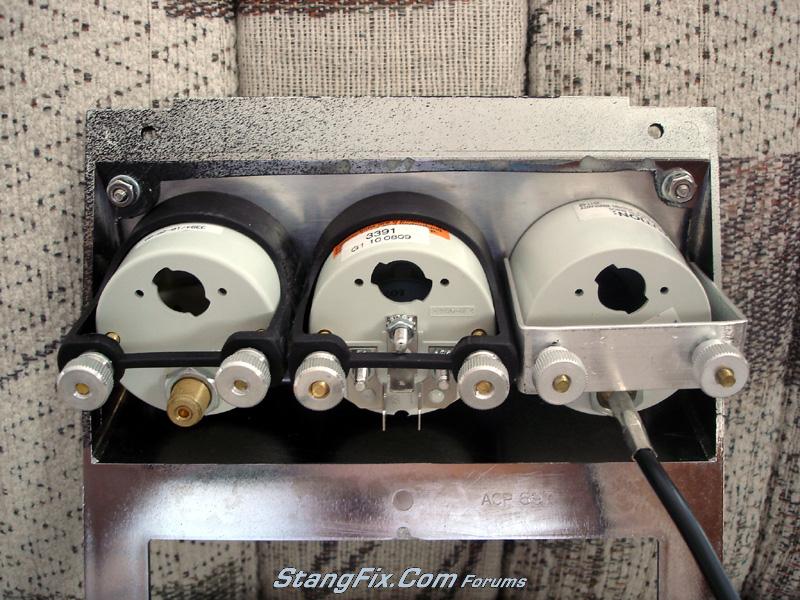
A little back view. And I'm not sure why the one gauge came with a different mounting bracket. Maybe just older stock...?
What do you think..? Yay, nay...? I dig it.
Thanks -
Since my car came missing it's radio; and the prospect of purchasing audio equipment, etc just didn't thrill me that much, I opted to make my own radio delete plate / gauge bezel and install my remaining (+1) gauges in place of the radio.
And this is what I came up with...
I bought a new repo radio/heater bezel (got a steal of a deal too).
Measured the bezel and figured radii, etc and designed the actual bezel in cad. I cut out a paper version first for a trial run
After test fitting the gauges in the paper model, it was time to maching out the real piece.
One part I didn't document was the actual cutting of the bezel itself. You have to remove most of the camera case area of the radio, but leave some small radiused corners for attachment points.
Machined piece:
Here is the cut out bezel with the machined delete plate for a dry run. The material is 3/32" thick aluminum.
I countersunk and used recessed allen heads for a little more stylish look (IMO that is).
The gauges used were 2-1/16" AutoMeter Sportcomps. I only needed 2 additional gauges, but I didn't like the spacing of 2, so thus there are 3.
A little back view. And I'm not sure why the one gauge came with a different mounting bracket. Maybe just older stock...?
What do you think..? Yay, nay...? I dig it.
Thanks -
Last edited by a moderator:
")