• Hello there guest and Welcome to The #1 Classic Mustang forum!
    To gain full access you must Register. Registration is free and it takes only a few moments to complete.
    Already a member? Login here then!

Running lean?

limeyboy

Active Member
Hi guys,
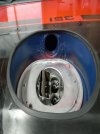
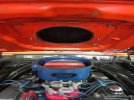
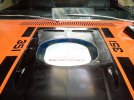
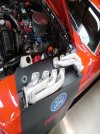
I thought I'd have a go at a homemade ram air bonnet and it kind of does something, after I've been for a run the lid of the filter is Ice cold and the surround is hot so it must be working up to a point.
My question is will all the extra cold air make her run lean when I'm flooring it?
I'm fitting some Sanderson block huggers soon and as I have to make up link pipes I will put an afr bung in and probably get n AEM kit so I can check properly.

Any thoughts?
Cheers
Jeff

sorry about the photos, I've lost the software I knew how to use and I'm still learning the only one I had left!!!
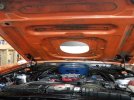
R1_0.jpgR2_0.jpgR3_0.jpgR4_0.jpgIMG_20220307_115811_0.jpg
 
Colder air is more dense than warmer air, but probably not enough to affect the tune for a street car.
 
I think you are right but I've had the first and only backfire through the carb at high speed so I'll be careful until I have a gauge for the afr set up.
I checked the plugs and they are very clean ( she's always run very well, on the lean side if anything) but unless I do a proper plug chop it is really only tick over I'm checking.
 
A backfire at high speed (was this high rpm or only speed?) could be due to a number of things: timing, bad valve seating, bad power valve in the carb, poor carb tune, misfire, etc. If it only happened once, I wouldn't be too concerned, but if it was continuous and/or consistent, then I would start investigating. Timing and carb issues would be at the top, I think.
 
It was high rpm 5,000 and it only happened the once and she starts and runs very well so I hope it was just a one off.
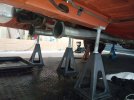
As the weather has gone right off now here in the UK I'm going to put her up on stands and take the Hookers off and fit the Sanderson's, not a job I'm looking forward to!
 
What did she do wrong , giving her the spurs ??
And for the exhaust, do it now while the wheather is still very mild !! Cali wheather in Europe !! Yiehow !!
 
Ah Bruno you are right, I need to do the work before Winter sets in as I wont be able to afford to heat the garage in January :(
 
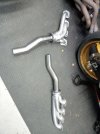
I'm on the job and have test fitted the Sanderson block huggers, I have to wait for a friend to come and help me fit them as there is no gasket just a bead of silicone and I think at least 4 hands will be needed to fit them without smearing the silicone everywhere o_O
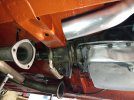
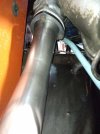
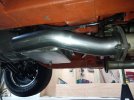
As you probably know Bruno we don't have "muffler shops" as the have in the states so the link pipes will be "bits and bobs" I'm pretty near with a pair of Hedman link pipes but will have to get other bits custom made ( 200 miles away) I now have an AEM air/fuel gauge kit so I'll weld a couple of bungs in as wellIMG_20221109_155243-1.jpegIMG_20221109_155300.jpegIMG_20221109_153116.jpegIMG_20221108_162330.jpeg
 
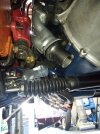
very tight on the drivers side!!!
got to get a 1D 90' pipe with a 6/700mm of straight on it made to try and get it out past the steering ram, chopping the Hedman link pipe up gave me the perfect shape to kick the pipe onto the line I need


IMG_20221110_100120.jpgIMG_20221110_100058.jpg
 
Regarding the silicone gasket. Maybe you can apply a strip on the headers and let it dry out before assembling ????


Verstuurd vanaf mijn SM-A605FN met Tapatalk
 
I'm not sure about letting the silicone dry, I'd always assumed it needed to "stick" to both services, I'll see if they will answer an email about it Bruno.

I guess you mean the speedo cable being close to the pipe, it's a misleading photo but I take your point, at the moment nothing is welded or fixed in place I'm just trying bits out for now, the old Hooker super competition headers used to sit on the top of the ram and I'm amazed they didn't melt the gaiter or some of the P/S lines.

I' looking forward to an extra inch or so ground clearance as the collector was huge and now it's just a 2.5" pipe
 
Bruno, just read this on the Sanderson website, I bought the headers secondhand ( but hardly run at all) so no instructions!

Apply an 1/8' wide smear of Permatex® #82180 Ultra Black® Silicone (or compatible) that isn't too thick around each exhaust port on the header . Allow the silicone to set overnight. or until completely dry.

you have saved me a lot of heartache by making me "read the instructions" :)
 
I think the instructions are a bit misleading as there is no mention of bolting the headers to the head after the silicone has dried so I'm going back to normal practice and assembling it "wet" :(
 
Whenever using silicone (RTV) as a sealant I like to let it begin to set-up a bit before torquing things down. Doing this lets the RTV gain some form which will give a bit of resistance to fill in the gaps as two surfaces are squeezed together. I find this especially helpful when laying a big bead to serve as a seal across the valley ends when laying on an intake, for example.

I put on the RTV and then let the top part rest on it applying its own weight for a while before I even hand tighten any bolts. If it is a vertical mating surface I use the mounting bolts to align the two parts but barely tighten the fasteners until I let the RTV have a bit of time to set. It's important to let the RTV fully contact both surfaces so it bonds to them when fresh. Just don't torque stuff down for a bit.

I do this with intakes, water pumps, oil pans...just about everything. NEVER had a leak when doing it this way.
 
I think the instructions are a bit misleading as there is no mention of bolting the headers to the head after the silicone has dried so I'm going back to normal practice and assembling it "wet" :(

When I installed our Sanderson headers, I actually questioned them about using silicone as a sealant with no header gasket. They said to install it "wet". We have not had a single issue/leak in the last 10 years since we installed them. I would do what Terry suggests above, let them set up slightly before bolting them tight.
 
I've emailed Sanderson and told them I'm using the Ultra Copper silicone and they said to put a thin layer ( 0.60") and let it dry overnight before bolting them on.
I've cleaned the head faces well ( there wasn't anything much on them anyway) and I understand the logic of a thin layer if the faces are good and square it's just to fill the small imperfections.
As I'm sure you know they have to be put in from under the car and it is very tight so any "wet silicone" might end just about anywhere but where it should be, so I'd rather let it dry.
 
Back
Top