• Hello there guest and Welcome to The #1 Classic Mustang forum!
    To gain full access you must Register. Registration is free and it takes only a few moments to complete.
    Already a member? Login here then!

Update on Shag - Lots of body salon pics

cmayna

DILLIGARA?
Donator
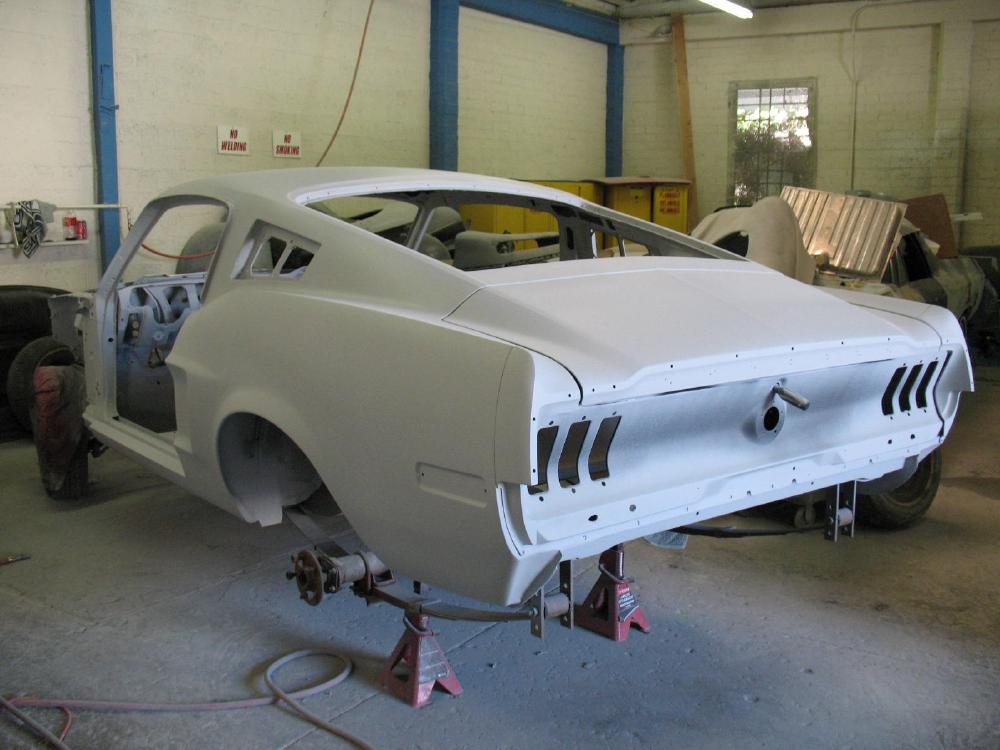
Been busy overseeing Shags body work and finally decided to take some pics. In a nut shell lots of sheetmetal replaced mainly in the back due to previous accidents. Poorly previous bodywork also added fuel to the fire. Items replaces were:

both trunk drop offs
taillight panel
rear crossmember
Upper rear trunk open corners
both lower quarter patches

Front passenger floor was replaced due to too much swiss cheese.

Yesterday after Shag got his first primer, George and I went crazy with our sharpie pens marking areas that still need to be addressed. Tomorrow, 1st blocking begins as well as preparing all remaining loose pieces (vents, headlight buckets, hinges, etc). Hope to apply first base coat by end of this week.

IMG_0922.JPG


Click here for 25 more pics.
 
Last edited by a moderator:
You're still missing the 90* tabs for the front of the false floor. Didn't I send you one of them? I'd get those welded in before paint. Otherwise, everything looks pretty damn good!
 
Craig,

Outstanding progress! The fun times of re-assembly look to be right around the corner.

Couple things I thought of while looking at the pictures....

Unless you're 110% certain that they're installed at the perfect spot to align the closed door, remove the door posts for the door latches. These posts have a "floating" feature that allows the post to be moved for minor adjustments when lining up the doors rear edge body line. If the car is painted with the post installed and then the post has to be moved slightly when you're lining up your door gaps, they'll be an unpainted area around the post that won't look very pretty.

Double check all of the screw holes for both the rocker panel trim and the roof side rail channels. Sometimes these screw holes become "enlarged" from wear and tear/PO owners attempts to use a larger screw. Before paint is the best time to check all of these holes to make sure no holes are oversized.

Great progress pics! Thanks for taking the time to post/share them!
 
Midlife,
I tried to install them but after measuring so many different fastbacks, I found the location to not be precise, thus I have made the decision to wait and not install them until I install the interior. Yes, I'm taking a risk of flying fireballs but I plan to totally encapsulate the entire cabin with welding blankets leaving just the two areas of concerned open.

Otherwise I can go back and estimate where they go but what if they end up in the wrong place? Do I have that much play that I can take such a chance and just do it?

Yes, I have your brackets waiting to go in.


Dave,
Funny thing, I happen to be going back down to see Shag today to infact remove the door posts.
 
Install the brackets on the bottom side of the false floor, and then fit the false floor onto the rear brackets. You'll need the back-side fiberglass panels to find where the false floor fits. When done, simply mark where the brackets need to be welded, remove them, and weld away!

I've done a similar trick for finding where to locate screw holes on fiberglass panels: put the screw in backwards on the mounting point, and press the repaired panel against the screw point. That locates the place the drill the through-hole. Also works for the kick panels!
 
WTF is the false floor? Thats a good tip mid, but can you screw the kick panel screws in backwards?

Craig, progress looks great, I remember those days fondly, its a very exciting time..... has the passenger floor pan been patched?
 
"Fast68back" said:
WTF is the false floor? Thats a good tip mid, but can you screw the kick panel screws in backwards?

Craig, progress looks great, I remember those days fondly, its a very exciting time..... has the passenger floor pan been patched?
The false floor is the rear-most piece of flooring on the fastbacks.

And yes, with the kick panel removed, the screw hole is accessible from the backside. If not, simply cut the head off a screw with the same threads, leaving the point pointing towards the passenger compartment.
 
Back
Top