• Hello there guest and Welcome to The #1 Classic Mustang forum!
    To gain full access you must Register. Registration is free and it takes only a few moments to complete.
    Already a member? Login here then!
Boom's 68 fastback

Had a chance to coat the exposed area where the mount was and the leaf pockets.

Been swamped at work. Hope to be able to mock up and possibly get one or both brackets for the 3 link.

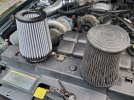
Had to get a new air filter for the new daily beater. Think I'll notice a difference? I had previously knocked a pile of junk out if the old filter. Disgraceful the previous owner let it get like that.

PSX_20230721_193219.jpg
 
Had a doozy of a morning that really set me back, didn't have chance to think about working on the car till mid afternoon. Plan was to take the upper 3 link bar and mock it up and/or install it.

Needed to move a bunch of things from the interior of the car so I had room for when I had to drill and mount the center reinforcement plate. Tried wrestling the bracket into place and realized that its hitting the seat belt mount things. It appears that they're spot welded in place. I need to have them turned 90* to clear the bracket it looks like. I tried prying a bit and it seems like the sawzall might work well in this application.

Of course, my batteries weren't charged enough to get the mounts off. I have the batteries charged up and will try again in the morning.
 
Great to see you are back at it! Looking forward to all the great progress. I lost my old account info and had to make a new account :confused:
 
One step forward and two steps back lol. Seems to be the norm for these projects.

I managed to cut the seat belt anchors off. Sawzall worked really well for this. It sucks because I have to fill those holes, but its a good thing since now I can really clean and cover that area properly.

I go to finally lift the lift the 3 link bracket up into place while the angels sing only for it not to fit as snug as depicted in Shaun's instructions.

I was worried that the subframe connectors would interfere, but they seem to be far enough down to not affect this.

As you can see in the picture, the ends clamp over the fram rail just forward of the shock crossmember. Its a very snug fit for sure. In the trans tunnel, there is am arched piece that should fit up against the floor. You drill 3 holes through that and sandwich the floor with another curved plate on top. But on my install the curved but doesn't seem to fit against the floor snugly. Leaves about 1/2". Can't see this being snugged down to conform since the frame rail bolts would prevent that from happening.

PSX_20230729_101316.jpg


Tunnel fitment

PSX_20230729_101331.jpg


I've sent some pics and question to Shaun to see what he thinks. It's most likely that I've not gotten it positioned properly. But wanted to get his opinion before drilling anything.
 
I could be wrong here as I'm going off my rapidly deteriorating old memory but didn't Shawn have this installed in his 65/66?
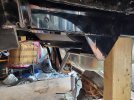
 
I could be wrong here as I'm going off my rapidly deteriorating old memory but didn't Shawn have this installed in his 65/66?

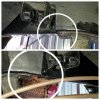
It was in his 70. Only difference was the 69-70 cars needing to cut a hole for additional clearance and the shocks are an inch shorter. I got the new proper length shocks.

He said it looks pretty good and to put a nut and bolt through the arched bracket through the floor to snug it up and then ensure the ends are snug to the frame rail before drilling them for the bolts.

He does also have this same setup on his 65/6 racecar.
 
Decided to see how the rear bracket lines up. I hoped it fall right on, of course it didn't with my luck

It didn't seem to want to go on perfectly straight. Upon getting it to seat, I noticed my nut/bolt holds downs for the gas tank needed trimmed.

PSX_20230801_184504.jpg

Got them trimmed piece of cake with my handy cordless grinder. Love that tool.

Once those were shortened I went and tried to push the bracket into place. Used a floor kick and block of wood to help get the bracket to seat up fully on the frame rail. Might not even have to modify my fuel lines!

I sent another inquiry to Shaun showing where both sides sit once the bracket is pressed onto the rails. Seems like the passenger side should be further forward up against the bump stop to match the drivers side. I didn't want to start whacking things until I hear his thoughts. I the links are adjustable, but thay seems like alot. Also I thought trying to force the crossmember might put unnecessary stress on the frame rails or the bracket itself.

PSX_20230801_184451.jpg
 
The difference L to R is quite alot IMO .
Maybe the car got a hit in the back sideways in the past ?
I should take measurements of how square the car is in the back ?
My 2 eurocents.

Verstuurd vanaf mijn SM-A605FN met Tapatalk
 
Square is the key word here. Don't just assume the left and right stop brackets are positioned correctly. An 1/8" or so forward or back wouldn't make a bit of difference for a bump stop. Canting a rear suspension assembly even half that would be a serious issue. Remember how these cars were originally put together on the assembly line. Some guy like {.} could of slapped it together early one Monday morning for all you know. Find a couple additional mirror image reference points (I like factory stamped holes in rails/floor) to verify placement and as Bruno noted, be sure to make sure the car itself is straight!
 
My dad worked at a Ford plant in Genk , Belgium. He was foreman at an assembly line where the body parts came together to be welded to be a body. That was from 1965 till 1977. The stories he told about how bodies were put together , the good and/or the right way.
If doing the job correctly , the body was within specs ( 1/8 ). But if the men didn't close the clamps on the rig where the parts were attached to , things went "crouked" . ??
My red fastback's rear left quarter has such an issue.
Glad my dad told this so I know what can happen to a car body , from factory !!!

Verstuurd vanaf mijn SM-A605FN met Tapatalk
 
You guys are right. Shaun said the same thing, to find a known point to measure and ensure the bracket is square. He echoed that the bump stops may not be in the same spot and that I may need to massage the bracket fore or aft on both sides to get it squared before drilling and mounting.
 
Had a chance to swing by and tear the old axle down (pull the brakes off). Once those parts were off I was able to drain the axle and put it in the truck to clear the space out where the car is. This will hopefully make it easier to get the brackets lined up and mounted and then I can slide the new axle into place and prep it for install once I'm ready.

Been having issues with the daily driver Mustang. Pretty sure the fuel pumps going out. Got a new one on the way and will drop the tank Monday for that.
 
Here again ... make sure the axle sits , in the middle , square to the body , in the middle of the arch of the wheelwell when the car sits on his tires, prior to make measurements where to weld the brackets to the axle.
My 2 eurocents.

Verstuurd vanaf mijn SM-A605FN met Tapatalk
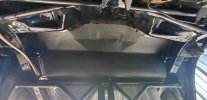
 
Remember, depending on suspension travel distance the axle will move forward and back as it sweeps through its arc. Center when at normal ride height. When centering side to side, make marks equal distance on either side from the inside of the housing ends on the axle tubes. Make your distance measurements from these marks to points on the chassis to find center. I use the inner side of the frame rail from one point but also verify it by measuring from a couple other points of reference as well on both sides. Again, these cars are far from straight and perfect. Nobody wants their car dog tracking down the road.
 
Here again ... make sure the axle sits , in the middle , square to the body , in the middle of the arch of the wheelwell when the car sits on his tires, prior to make measurements where to weld the brackets to the axle.
My 2 eurocents.

Verstuurd vanaf mijn SM-A605FN met Tapatalk
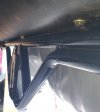
I luckily have the whole axle from Shaun's car with the brackets already on it.

I wanted to get the old axle put of the way so I can clearly center the brackets and measure everything like you guys mentioned.
 
One step forward and two steps back lol

So I went cleaned up the area under the car now that the old axle is put of the way.

I didn't have a tape measure but I did some Tim the tool man measuring using a scraper I had handy. I measured from the front of the 3 link bracket to the shock mount crossmember on the car. The brackets actually spot on where it's at ironically. The bump stop brackets, upon a closer look, do I fact appear to be in different places.

So is the shock mount crossmember a good reference point?

PSX_20230813_131429.jpg

Additionally, even though I trimmed the studs down. I feel that these bolts and nuts I have holding the fuel tank on will need removed altogether. Maybe I can find a carriage bolt that can fit going up into the car. The brackets isn't fully seated upward and you can see it'll sit right where the nuts are.

PSX_20230813_131505.jpg

I shamefully have to admit that i had to stop there for the day because i didn't have the keys to open the trunk and get to those bolts. Hopefully I can find the key, hate to have to replace the locks (again)
 
Back
Top