• Hello there guest and Welcome to The #1 Classic Mustang forum!
    To gain full access you must Register. Registration is free and it takes only a few moments to complete.
    Already a member? Login here then!

Horseplay: 1965 Fastback Restomod

WOW. Guess I haven't been here in a while. Have a lot of catching up to do but that will have to wait. I might actually get an entire day in the garage to day so going to take advantage. Need to fab up a tubing straightening tool so I can get at it on the fuel and brake lines. Also been chomping at the bit to try my hand at a fuel neck modification along the lines of Craig's but with a commercial piece I picked up to address the issue of gas spillage. And finally time to get going on installing this...

exhaust.jpg
 
Ask Rusty Gillis how he attached what looks like an almost identical gas cap to the '66 coupe project. Bottom of page three of that thread.
 
So been busy and getting a lot done. Some obvious most not so much but still necessary to get it on the road. I mentioned before/elsewhere about an issue I had with fitment of the gas cap. I converted to a larger tank and the fuel neck (then one I modified to include a flapper plate) by design had the underside of the cap almost 3/8" off the rear panel surface. I didn't car for how that gap looked as you could see the neck mounting plate and fasteners, etc. So as I am prone to do this prompted another unplanned modification.
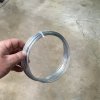
I have access to a lathe so i made up a filler piece to fasten to the back of the aftermarket cap I am using to fill the void. I have to finish sanding the ring and polishing it up but here are some pics to show the problem and the fix. When i finish polishing the piece it will add what will appear to be a chrome ring around the base of the cap. More importantly, that ugly gap will be gone!
gap.JPG cap ring.JPG underside cap.JPG mock install.JPG new gap.JPG
 
Also got the exhaust done. I went with a 2.5" Magnaflow system. The fit was decent overall. I love how tightly it tucks up to the car but the drivers side tail pipe was a real PIA. If I wasn't doing through the valance exhaust it would have been much easier. As it was, I had to make a couple cuts to add some angles to get the pipe lined up just right to come out perfectly centered through the trim piece. It's pretty tight on that side with the spring mount and gas tank but in the end it turned out great.

I bought some SS wire for the MIG but didn't get the tri-mix gas recommended for welding SS. It didn't seem to be a problem as far as the welds went. I practiced on a couple of pieces cut off the tubes given to fab up the connection to the headers. Welds looked good. Not porous or anything. Good penetration. More splatter was the only issue which I expected. I will paint the welded areas to try and stave off any rust with header paint as soon as the wife is not around (want to bake them to cure the paint properly :)). I'm not welding the full system up at this time. Going to use the clamps provided and see how it goes. I will likely tack each union but that's it.

The kit comes with a set of polished turn downs that I didn't use. I bought a set of 2.5" to 3" rolled tip pieces instead. Very much like on my '14. They look very good. At least I think so.
exhaust install.JPG exhuast install 2.JPG exhaust tips.JPG tip extension.JPG tip installed.JPG
 
Interesting...looking at this page on my phone (Tapatalk), it shows the pics doubled up. Looking at this page on my desktop (Chrome), it only shows the pics twice.
 
Interesting...looking at this page on my phone (Tapatalk), it shows the pics doubled up. Looking at this page on my desktop (Chrome), it only shows the pics twice.

Other than his typo, I see the same thing as Mark. Twice on Tapatalk and once on my laptop.

as for the exhaust, it looks great! It also confirms that there is no way I could fit all of that under our fastback due to the TCI torque tube, X bracing and 3 link suspension.
 
So good news and bad news. Bad news first. Over the next 28 days i will be home a grand total of 6 days. That puts a real cramp in my build schedule. As I had it mapped out I had a shot at finishing by no later than mid-June. That took a big hit with this new work schedule. But i will soldier on.
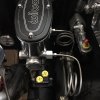
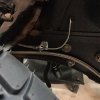
Good news is we had fairly crappy weather this weekend so I got out of yard work pretty much and stole some extra garage time! Fuel line and almost all the brake lines are made and installed. I came up thisshort on brake line so I had to order more to finish up the rear end. That's alright as it is by far the easiest of all the lines I had to make.
To keep with what seems to be the secondary theme of this build thread, along with the requisite pics I will share some advice and tips on performing this task of making your own lines. In my case, I went stainless throughout which in some ways makes it harder but i think in at least one other it lends itself to a better appearing finished job.
There are lots of ways to do things. This is just how I went about it.

I fabbed up mocks of every line using bailing wire. The stuff i used was about 3/32" in diameter. You just need something that bends fairly easy and will hold it's form. Depending on the length of line needed, make marks on the wire every foot or inch on the unformed wire. For longer lengths I just made marks at the inch for about a foot at each roughly estimated end and foot marks in between. Then when the finished mock is formed I could easily determine it's overall length. When making the mock line make sure to have the wire end inside the termination point or account for this length later. Once I had a mock line completed, I could determine it's length and cut the appropriate length of the real tubing I would end up using. This cuts way down on waste. It is important to know how much line is lost to the making of the flare ends. This has to be taken into account when sizing up the actual tubing length needed as well as the length of the mock piece. I used an old piece of brake line I had laying around that i measured to an exact length and then flared. This way I knew exactly how much to add to each piece to account for the loss of length to flares. You only have to be this anal if you are like me and want everything to line-up perfectly, etc. ;)

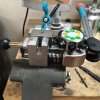
The other thing i will tell you is like most jobs, the right tool(s) makes everything easier. I have a pair of line bending pliers and also a couple different tube benders too but the absolute must have in my opinion is the flaring tool from Eastwood. If you time it right you can get it for about $200 and it is worth every penny. Don't even try to do this kind of job (especially in SS) without it. The bar type set-ups you find at auto parts stores are crap and will NOT get the job done. Period. They may work on the coated soft stuff you can buy at Autozone but not on SS. I had only one bad flare in the whole project and it was because of how I cut the tubing. I ended up actually tool hardening a piece due to an unsquare cut I used a file to straighten out. Use a cut-off wheel and not a normal tubing cutter for SS, by the way, as the latter will also harden the metal and likely cause it to crack when flaring.

I won't know for sure how all my flare joints worked out until I put some fluid and pressure in the lines but judging by the flare quality appearance and care I took in making the lines so they were exacting in length and alignment, I am pretty confident all will be good. Any way I will shut up and share the pics!
bailing wire.jpg wire form.jpg Eastwood tool.jpg stress relief coils.jpg drivers side.jpg
 
Back
Top