I'm sure that I am not the first one to do this, my 1968 Mustang Coupe needed better tunes. So on another forum I posted a want ad for a 'minimally damaged' radio bezel and another member sent me one for the price of shipping.
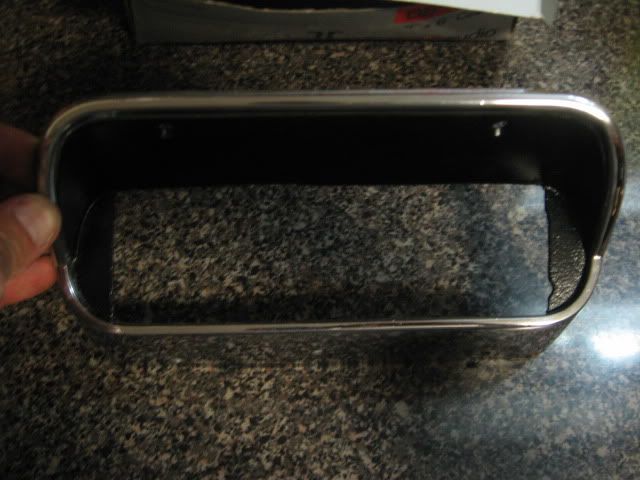
The one he sent me had been hacked for a standard 2-pole radio and painted with some sort of gawd aweful shiny black paint.


I started with a template measured and cut using the guidelines that came with the new radio, I created it in milimeters because that's what the instructions had.

I centered it on the face of the bezel, it barely fit, it is actually wedged a little bit, I should have trimmed the radio faceplate a little on the lower right and left corners. But I didn't, and nobody notices..

I skipped documentation on a few steps.. but first I marked the outline with an awl/scribe. Then I used a 1/8" drill bit to drill about a billion tiny holes just on the inside of the marked line. I followed that by using a coping saw to 'connect the dots'

I took the blade off the saw, then put it through the hole and then reattached the blade..

The process worked fairly well for getting the hole to be close to the final size, it wasn't perfect by any means

Another skipped step not documented.. I used a combination of files, both rat tailed and flat to smooth out the remainder of the surface to get this.

After a series of fitting attempts and filing, eventually the radio installation bracket fit nicely and I bent the tabs to hold it in place


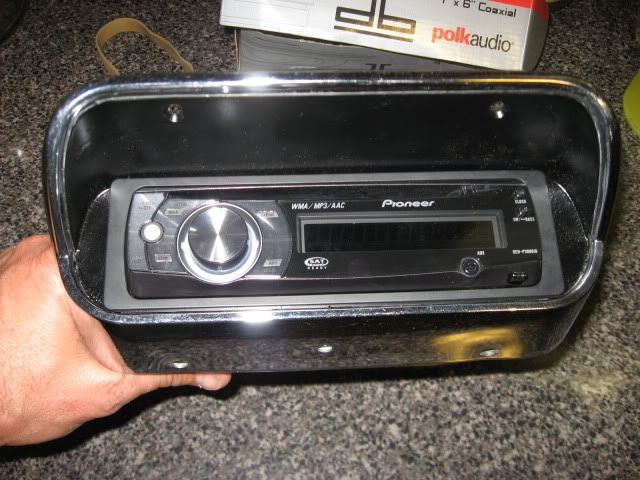
Slid the radio into place and here's what the final project looked like.

Now I have CD player, can play MP3's from CD or DVD, bluetooth and a wireless remote. But I still can't hear a damned thing because I don't have a quiet enough cabin, and I blew out the speakers in the rear deck trying to turn it up loud enough...
The one he sent me had been hacked for a standard 2-pole radio and painted with some sort of gawd aweful shiny black paint.
I started with a template measured and cut using the guidelines that came with the new radio, I created it in milimeters because that's what the instructions had.
I centered it on the face of the bezel, it barely fit, it is actually wedged a little bit, I should have trimmed the radio faceplate a little on the lower right and left corners. But I didn't, and nobody notices..
I skipped documentation on a few steps.. but first I marked the outline with an awl/scribe. Then I used a 1/8" drill bit to drill about a billion tiny holes just on the inside of the marked line. I followed that by using a coping saw to 'connect the dots'
I took the blade off the saw, then put it through the hole and then reattached the blade..
The process worked fairly well for getting the hole to be close to the final size, it wasn't perfect by any means
Another skipped step not documented.. I used a combination of files, both rat tailed and flat to smooth out the remainder of the surface to get this.
After a series of fitting attempts and filing, eventually the radio installation bracket fit nicely and I bent the tabs to hold it in place
Slid the radio into place and here's what the final project looked like.
Now I have CD player, can play MP3's from CD or DVD, bluetooth and a wireless remote. But I still can't hear a damned thing because I don't have a quiet enough cabin, and I blew out the speakers in the rear deck trying to turn it up loud enough...