• Hello there guest and Welcome to The #1 Classic Mustang forum!
    To gain full access you must Register. Registration is free and it takes only a few moments to complete.
    Already a member? Login here then!

1952 F1: The Garage Roommate

Select from the following six options, derived from two basic designs w/ colors and options.

  • A

    Votes: 1 7.7%
  • B

    Votes: 7 53.8%
  • C

    Votes: 2 15.4%
  • D

    Votes: 0 0.0%
  • E

    Votes: 3 23.1%
  • F

    Votes: 0 0.0%

  • Total voters
    13
  • Poll closed .
Im not seeing the poll on my desktop, just that there is one vote so far.

Edit: I figured it out. Voted.
 
Im not seeing the poll on my desktop, just that there is one vote so far.
That's weird. It should show at the top of the last thread page. I see it. To the left are the six choices and the the right buttons to "cast vote" or "view results" I just entered a vote and it worked and changed the result tally. Sad part is the pictures of choices is now back on thread page 11. Couldn't incorporate it in the poll post.
 
Great poll Terry. So far the results are all for B. Similar to our recent recall efforts....I think this should be considered a mandate from the StangFix constituents!
 
Great poll Terry. So far the results are all for B. Similar to our recent recall efforts....I think this should be considered a mandate from the StangFix constituents!
It is great since I was planning A or B. Verifies my view, I think, that it captures what I'm after. Just have to make my mind up on the inner ring. Really wish I could see one of their wheels in person. Speedway sells a cheaper version in other colors that doesn't have the ring or special coating. No ring either. I suppose I could buy (borrow) one of theirs to at least touch one and evaluate its quality. I could return it for the cost of shipping. Might go that route...
 
There, voted in your crappy poll. Actually had to start up the computer just for you. Hope you're happy.
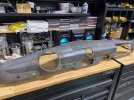
 
So as usual I am bouncing all over on this project. Or it may seem that way but honestly there is a reason to my madness. I'm really trying to get all the interior major changes understood so I can get the major stuff completed as it impacts much of what is to come. The biggest one is the complete customization of the dash. If you are following along you should recall I recently got a '49 Ford sedan dash that I intend to modify and then graft into the stock piece.
49dashclean.jpg
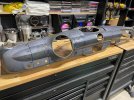
First step was to get it cut down to the necessary width. You can see in this picture I had quite a bit to remove. Aside from narrowing the width to fit I also needed to make sure key elements, like the primary gauge pod, aligned properly in the truck.
49dashmarkedforcut.jpg
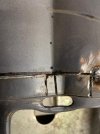
While not the most difficult of metal working projects it turned out to be quite a bit more challenging than you might expect. That raised center section varies in size (top to bottom) along it's width and the upper and lower sides of it are not equal nor consistent either. When sectioning out areas and then pulling the two sides back together that raised area doesn't line up. Sometimes it was off a huge amount. Fixing this to get it to be correct was a challenge at every juncture with each being different in the way I ended up making them work. Just to give me another wrinkle, the bottom edge also drop lower as it approaches center from either side. This meant I had another area of misalignment to deal with at each re-sectioning.
dashgloveboxmisalignment1.jpg
dashgloveboxmisalignment2.jpg
dashcenterfilltogauge.jpg
 
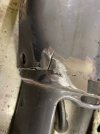
The most challenging piece was on the left (driver's side) as I had to remove a sizeable section to the left of the gauge pod and the size difference on the raised portions was dramatically large. Took some doing and a few relief cuts and a filler piece but in the end it came out very nice.
dashleftbulletmisalignment1.jpg

dashleftbulletmisalignment2.jpg
dashleftbulletcutout.jpg

dashbulletsliver.jpg
dashshortened.jpg
Honestly, I am very happy with how it came together. I've still a bit of work to do on it but it's 90% there. Next up is to trim off some of the top and ends and make a quick piece to fill in that area in the top where the old speaker grill mounted. Then I can lay it over the stock dash and cut and graft it in. That'll be a big day.
 
Little late but I like F on the steering wheel. Nice and clean.


Sent from my iPhone using Tapatalk
 
I like what and how you did the dash panel modifications. I did quite a bit of this back in the day, and always enjoyed the challenge and seeing it come out as I wanted it. Kudos to you and I hope you truly enjoyed the task.
 
I like what and how you did the dash panel modifications. I did quite a bit of this back in the day, and always enjoyed the challenge and seeing it come out as I wanted it. Kudos to you and I hope you truly enjoyed the task.
Thanks, Randy. As you would know, this type of project can get pretty challenging. I ran into many more issues with alignment and such than anticipated but honestly, that's where the fun part of it all lies, if you ask me. I was reviewing the pics I posted and my diatribes with each and realized I may not have been clear on where I started and how it ended up. Figured I could add it bit more for anyone more curious about the details.

The stock '49 dash measured roughly 55.25" curved edge to curved edge reference points. For alignment as I wanted into the existing truck dash I needed that width to come down to 42". That meant I had to find 13.25" of section(s) to remove. At the same time, I needed to be sure the main gauge pod was in a position centered on the steering wheel. The other consideration was the location of that smaller gauge pod. In the original dash this held a clock. I'll be having a custom made boost gauge fitted into it. Initially my instinct was to shift it favoring the drivers side for an asymmetrical look. After much deliberation I decided to leave it in the centered spot. This leaves it just outside of the edge of the steering wheel for a good viewing angle from the drivers seat and allows it some prominence in the dash.

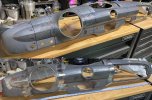
So once I had all that charted out in my head I had to find where on the dash I could slice out enough material to meet all the necessary goals. The pic below shows where it was sliced and diced next to how it all came back together after the surgery. Maybe it was all my scheming or just luck (likely a combination of the two) but you can see how I not only achieved the mission but was able to cut out the ugly ashtray in the process. Also place my cut lines to remove unneeded holes etc. It pays to plan!

One other thing came to light in the end. Even though I maintained the full perimeter of the glove box frame in this process when reassembling it all I found the box door is a smidge off and the gap around it is uneven. Freakin' Ford! Later down the road I will need to slice and dice it a bit to get a perfect fit.

Anyway, if you bothered to read all that rambling, here is a side by side pic that might help better illustrate the changes.
shorteneddashcompare.jpg
 
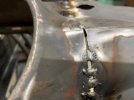
MIG. The whole process was so involved in cutting and manipulating pieces, etc. it was pretty easy to just do quick tacks with the MIG as it was being cobbled back together. Often I found it easier to leave a bit of a gap between pieces to facilitate ease of moving (i.e. bending a bit this way or that) once an initial tack positioned an edge or point where it belonged. The MIG makes welding across a gap much easier than TIG. Then I just stitch welded things up to fill in all the gaps/seams.

As the metal is pretty thin and I needed to grind everything flush as the final phase, I also laid spot/stich welds across all the welds on the backside as well since I was doing this on a welding table and access was as easy as flipping it over! Likely not necessary but it certainly didn't hurt and like the added strength (thickness) that extra metal gave to the joints.

When I get to cutting this into the existing dash the plan is to get it where it will lay flat on the top and I'll use a thin cut-off wheel at a 45 degree angle to "cut it in". This way the two pieces will lay together at a bevel with no gap or straight parting line. Then I'll use the TIG and likely a lay wire technique to weld it all together. Seems the smart and easiest way to do it and get the best result. We will see.
 
Back
Top