• Hello there guest and Welcome to The #1 Classic Mustang forum!
    To gain full access you must Register. Registration is free and it takes only a few moments to complete.
    Already a member? Login here then!

70_Fastback: RAT ROD - 193x Ford / 1942 GMC Truck

And one more, just for fun & looks, post.

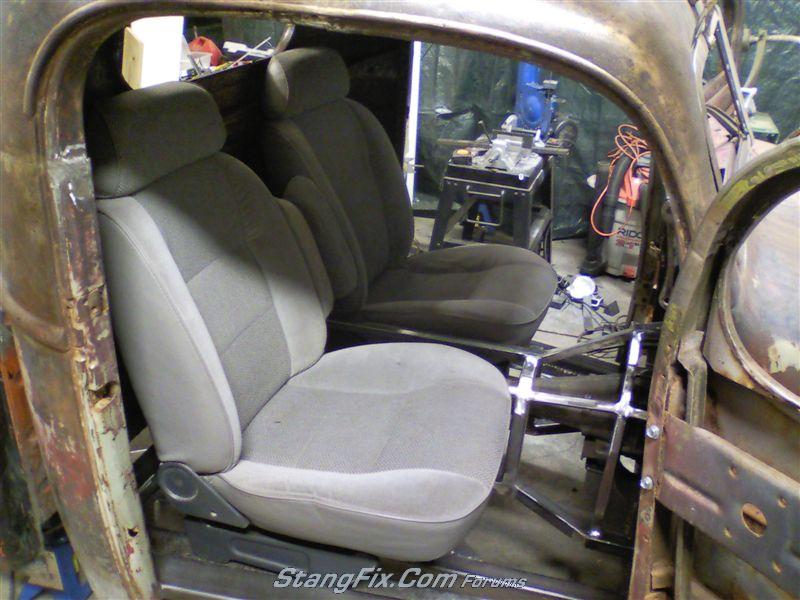
My free Craigslist seats that I scored! I actually scored SEVEN seats - all out some late 90's mini-van. The people actually took them out to upgrade to leather seats - I even saw them in their van.

So I ended up with these:
26-100111111147-71261813.jpeg


:yah

The seats are nice and clean, one seat does hava a couple of spots on it, but they may clean out - but the 5 small ones look brand new! They were folded down and stacked in storage when I got there.

The plan for the other 5 (which I am borrowing from janschutz's seat creation that he did) is to make a stadium style type "couch / gaming seat" for the basement. I will make a large multi-angled base and mount the seats to it. I'll wrap the base in sheet metal to give it a finished look. And yes.... that is :gs in the back wall. :hide


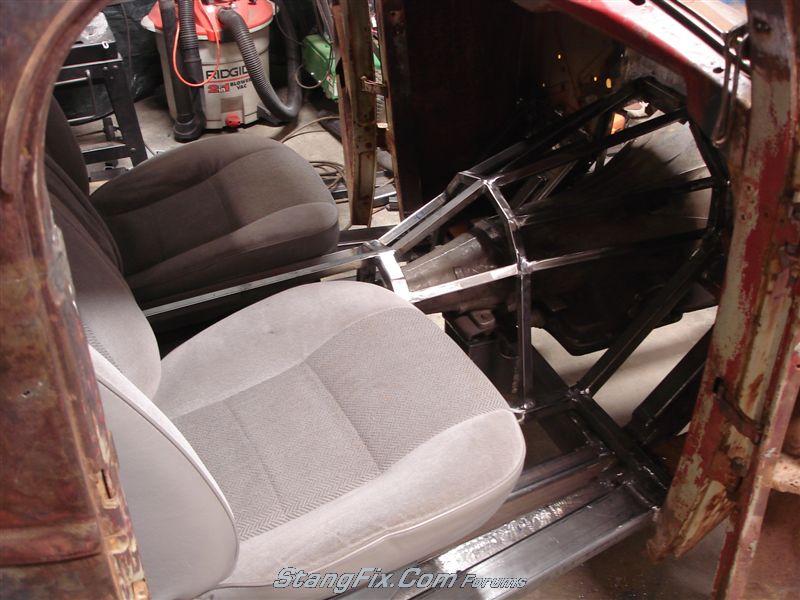
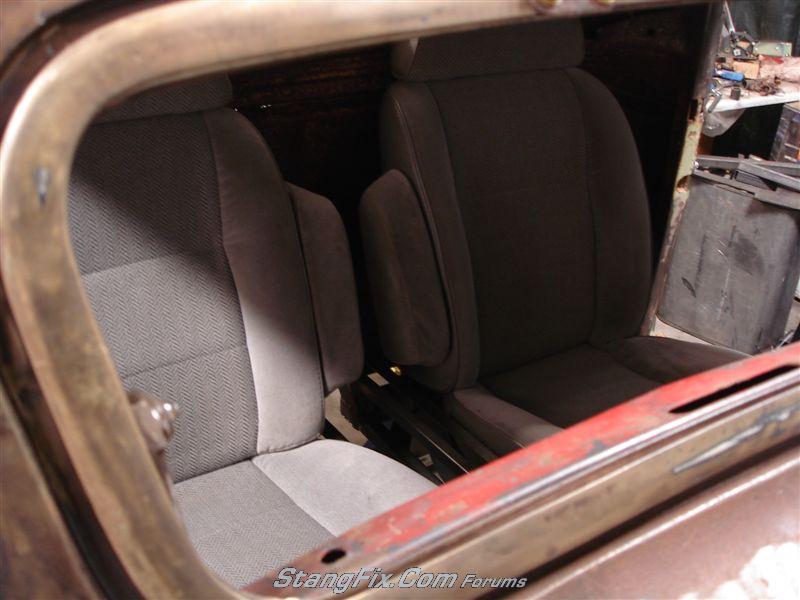
I just wanted to test fit them. And they fit perfect!
26-100111111802-71271290.jpeg


26-100111101048-7119316.jpeg


26-100111103134-71251665.jpeg


Though I may have to do something about the finish - it's doesnt really flow with the theme. But for free - I'm going to make them work. :thu
 
Would you please go somewhere else to post this stuff......you make the rest of us look like hacks.


BTW, I've mentioned this before.
 
Thats one beefy floor structure! I like it!. Seats fit nice. I thought you planned on something like a metal tub or something for the seat?
 
You are correct. But it would be too low, and a tub on a base may look odd. And these are way more comfortable too. LoL.
 
I think the tub and butt combination was the reason for the change.....

Looking mighty strong for sure.
 
Weekend Update:

Task: Under dash, 90 degree mount, master cylinder & pedal linkage.

The idea of running an exposed master, traditional fire wall mounted master cylinder on a fenderless build didn't appeal to me on a few levels. First was the aesthetic component and second was the vulnerability of the exposed MC. What if I hit a chunk of tire, or something, going down the road and it flew up and took out a break line, etc. Just was not comfortable with it. So I decided to "hide" it.

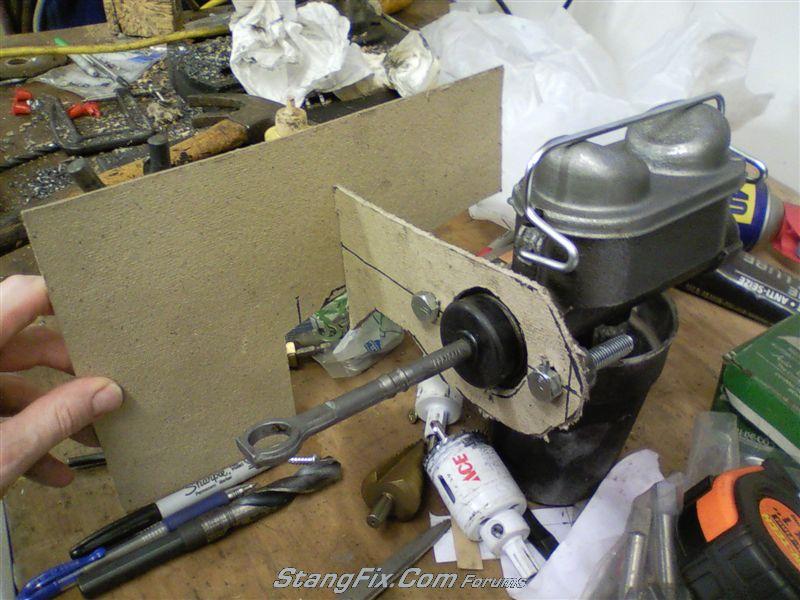
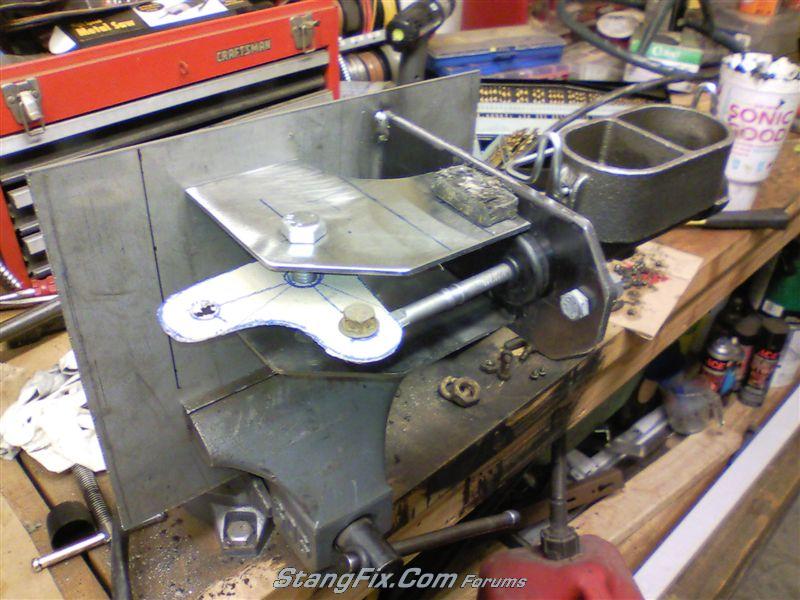
Started off with a basic, $15, Full-size Ford, dual drum master cylinder from the local O'Reilly. Add bracket ideas.
26-240111090236-7178562.jpeg


Backing/firewall plate is 1/8" steel - all mounting tabs are 1/4" steel.
26-240111090239-71791231.jpeg


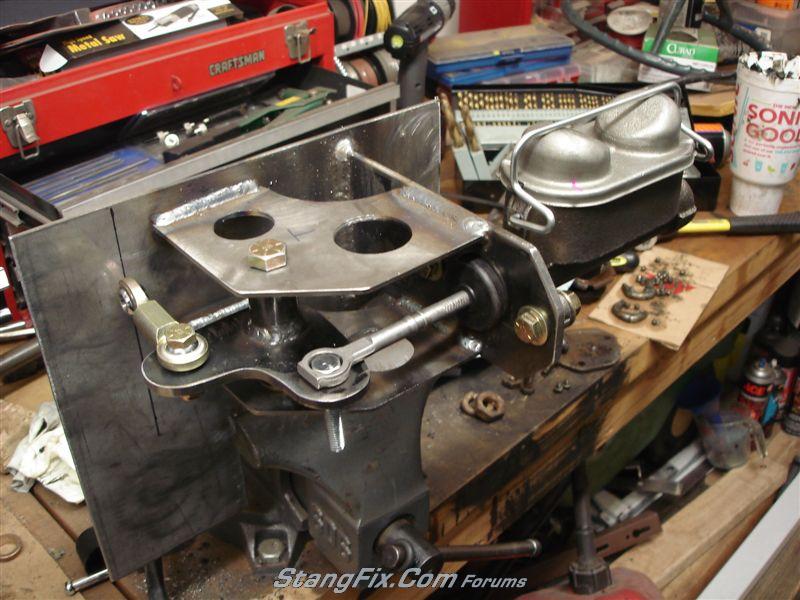
Add in side gussets for support & a center pivot point for the bell crank.
26-240111090241-7180748.jpeg


Add some holes for fun . The bell crank & pivot is shown in the center.
26-240111090246-71811756.jpeg


This is where I made a slight after thought change. I didn't care for the hoop on the end of the master cylinder rod, so I cut it off and threaded the rod and screwed on a spherical rod end. The rod end is a bit thicker than the original hoop end (which I measured around) and it raised my rod angle just a tad. I don't think it will matter though as it has plenty of clearance in the piston bore on the MC. But if anyone knows for SURE, please let me know.

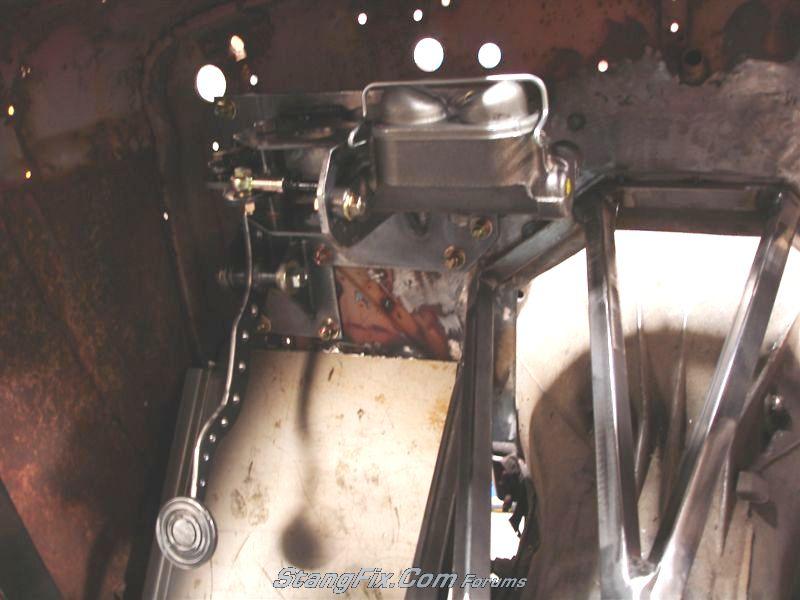
Botled on the inside firewall, under the dash. And yes, there is ample room to access the top of the master cylinder.
26-240111090249-71821177.jpeg


I made the brake pedal, linkage & brake pad also. The sheet metal floor shown is just temporary. It's actually an old cookie sheet - LoL.
The brake pedal has additional bends in it to clear the future horizontal steering shaft that will exit the side of the cowl for cowl steering.
26-240111090252-71831684.jpeg


Another view:
26-240111090258-71842284.jpeg


And the home made "antique" brake pedal... It's a 3" diameter cut from a hole saw. I then used smaller, alternating, hole saws to cut in the inset grooves.
26-240111090300-71852053.jpeg
 
Last edited by a moderator:
Video of linkage moving.

Linkage.wmv

I need to re-adjust (thread out & in) the heims joints to reclock the bell crank around a little bit to reduce the arcing movement of the rod ends, but other than that it works great.

Now I just need to plumb it all up.
 
"janschutz" said:
Nice work on everything, You do great work. The pedal looks like a tin can lid to me.

Ha! I didn't see it at first - but now I do. Thanks.... :char

LoL. But it's a 1/4" thick tin can lid though :thu
 
That's much better than those dinky phone pics! Nice work J :thu
 
Your skills could provide a very nice "card" for the wife......just need to land them in the right business. You have the design and build capabilities that are rare.

Outstanding.....
 
Keep it up and you are going to need that big diesel engine I just gave away to power the thing.

So you don't have to build your own starter button, I found one on-line for you.

image.php
 
Back
Top