• Hello there guest and Welcome to The #1 Classic Mustang forum!
    To gain full access you must Register. Registration is free and it takes only a few moments to complete.
    Already a member? Login here then!

70_Fastback: RAT ROD - 193x Ford / 1942 GMC Truck

Just a small update; but a useful one for me.

Finally, FINALLY got around to getting new bushings in the spindles and installing the new king pins, bearings, shims etc. The front end is tigheter than a .... well, it's tight to say the least!

And I also made my permanent tie rod in lieu of my damn temporary flimsy conduit tie rod :roul I can now EASILY push it back up the driveway by myself :yah

Since I am doing reversed, or tiller steering (as some call it) I wanted the tie rod to be beefy, but not big and bulky and detract from the front appearance of the setup.

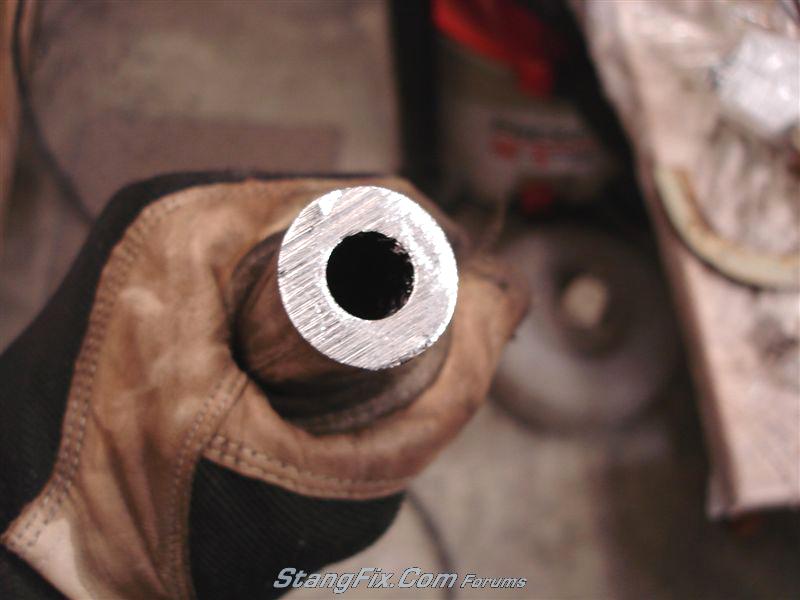
I first decided on 5/8"ID x 5/8"-18 heims/rod ends for the connecting points, which then somewhat determined my tube material. I went with a 1" O.D. - 1/2" I.D. (1/4" wall) DOM tubing.

Raw tubing:
26-151110220247.jpeg


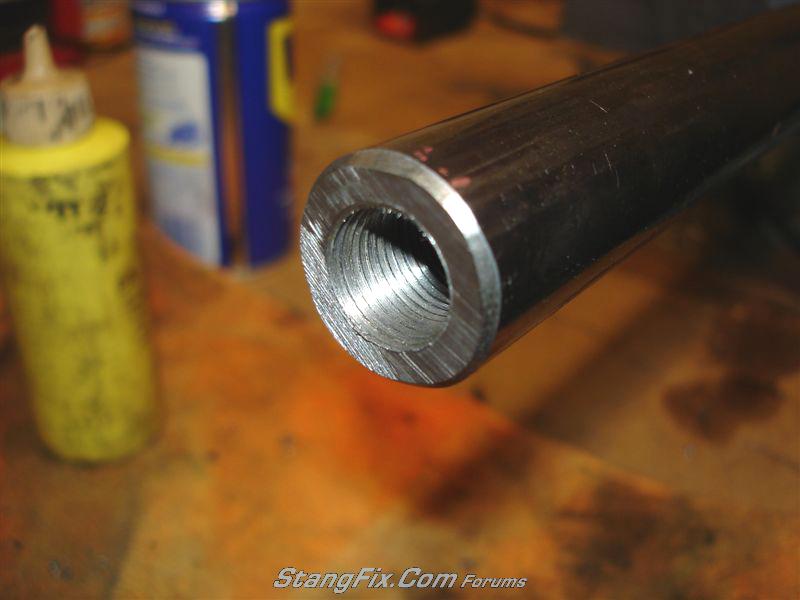
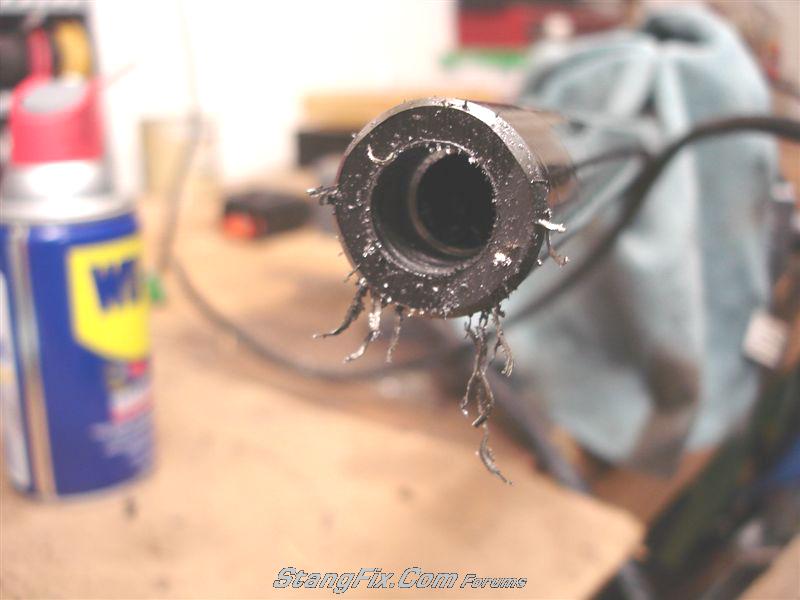
The I.D. had to be drilled from .500" to .578125" (37/64") to facilitate a 5/8"-18 tap. You can see the amount of inner wall thickness being removed. It was finished drilled 2" deep:
26-151110220311.jpeg


And then tapped to 5/8"-18:
26-151110220335.jpeg


Taper the end a bit and install heims joint. Which I found BLACK ones - which is extra cool :yah:
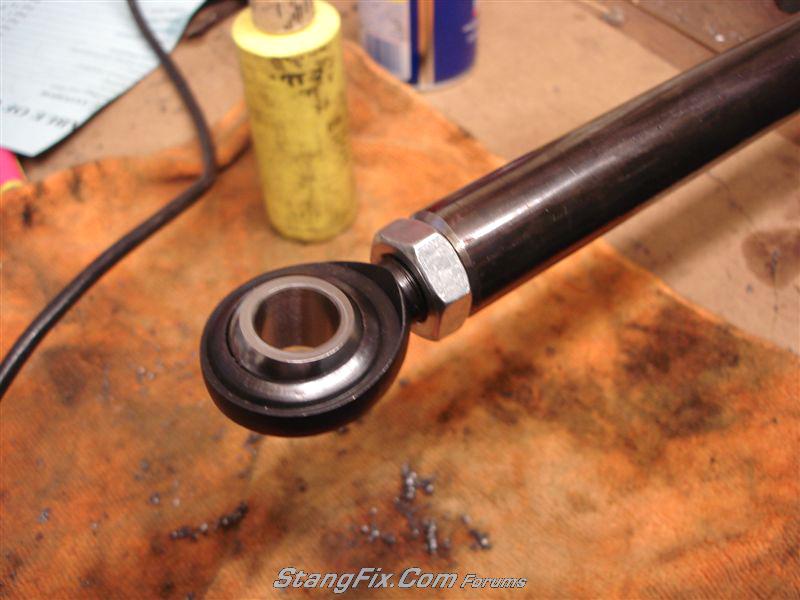
26-151110220401.jpeg


Installed and "home" aligned. Set to 1/16" tow out:
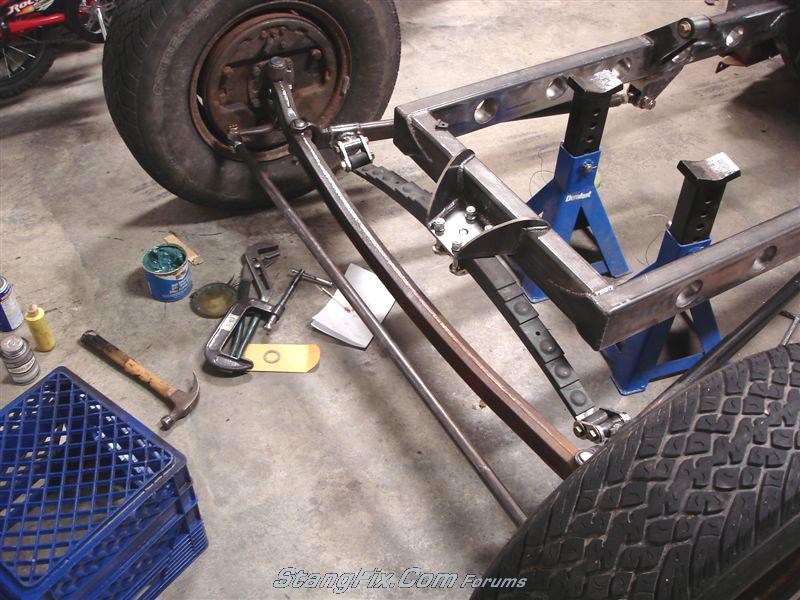
26-151110220430.jpeg


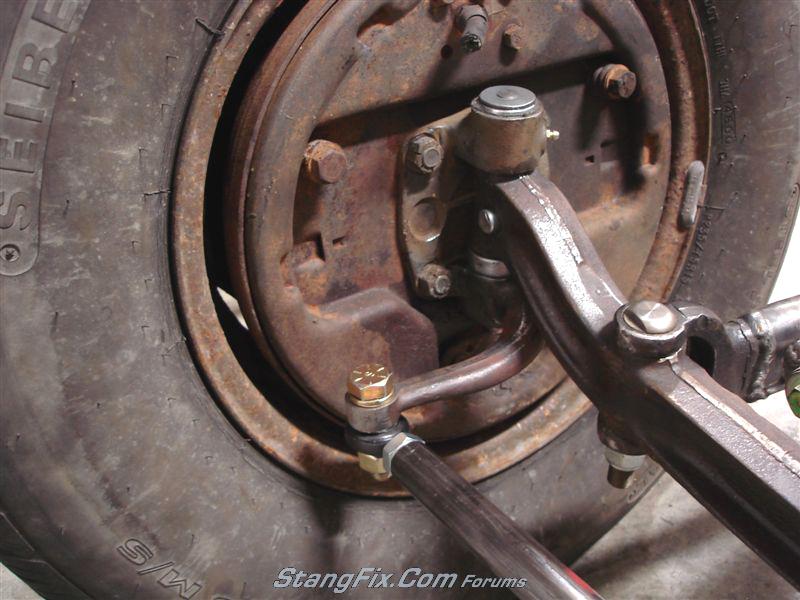
Now, since I am running tiller steering, that means the spindes had to be swapped from side to side -meaning the steering arm would typically extend to BEHIND the axle, not in front like mine is. The main reason is because I did a spring behind setup and the tie-rod would interfere with the spring, shackles, etc. SO, this also messed up which side the leading steering arm went to. The spindles were originally set up for cross steer -meaning the leading arm had two eyelets, which would be on the passenger side. But mine is on the driver side.

It's hard to see here, but you can see the double eyelet on the end of the driver side steering arm here (it's out in front of the temp tie-rod connection point):

26_14_06_10_7_19_45_0.JPG


And here is the current driver side arm with that extra eyelet cut off and smoothed. I also had to drill out the tie-rod holes in the steering arm (they where tapered for a standard 1/2" tie-rod end with a tapered shaft. I drilled them out to accept 5/8" grade 8 hardware as well:
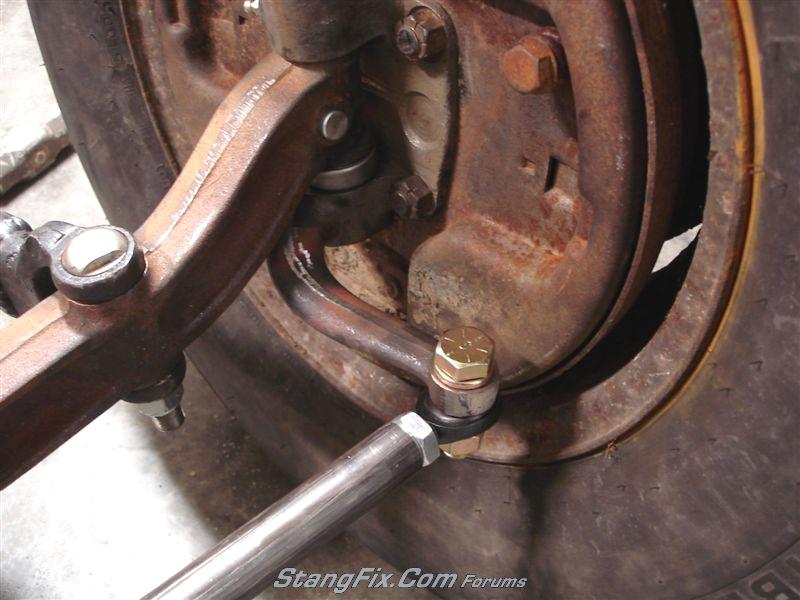
26-151110220508.jpeg


Passenger side matches:
26-151110220542.jpeg
 
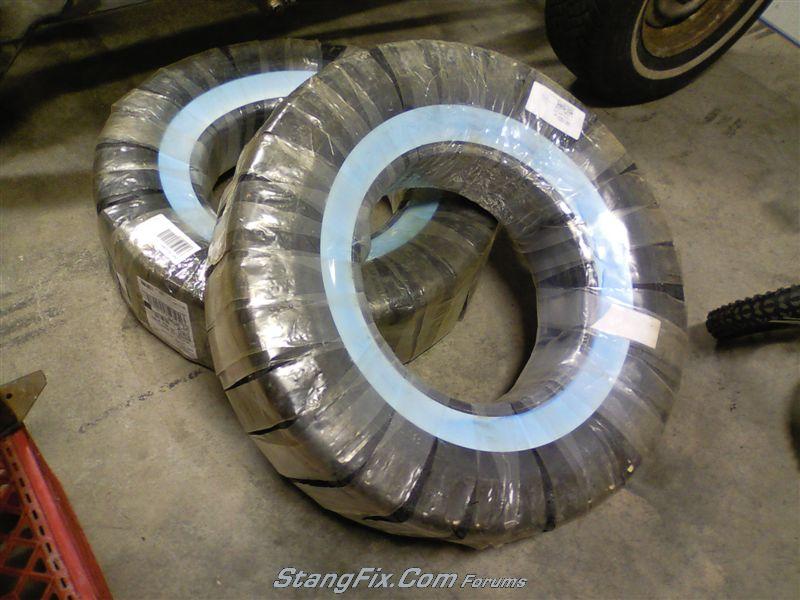
...and for my birthday Bonnie bought me my Vintage Firestone (Coker Tire) cheater slicks! 8.20x15. She didn't mean to give them to me this early though. She ordered them last Thursday evening from Speedway and then showed up on the front porch Friday - so I found them when I got home friday! Speedway is just north of me in Lincoln, NE - about a 4 hour drive. She didn't know that. LoL.

26-221110070023.jpeg


:yah
 
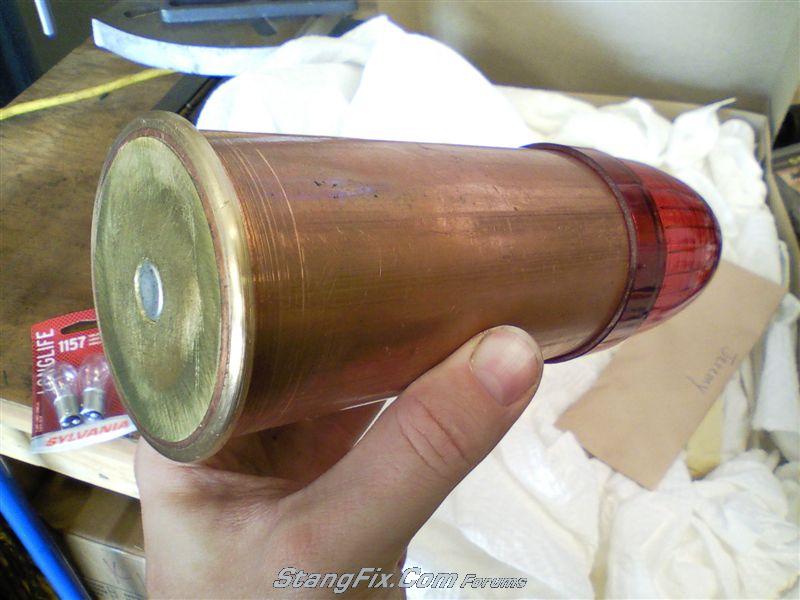
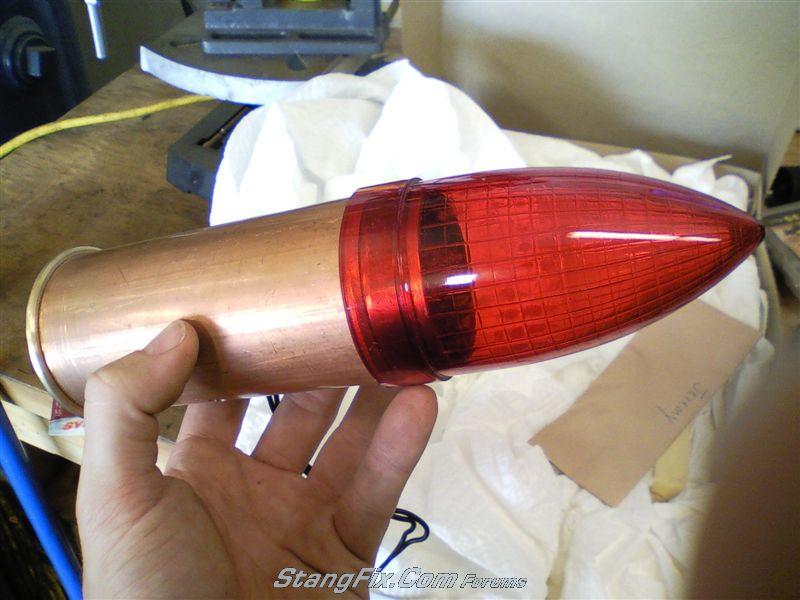
And another birthday present! I had mentioned this to my Dad in the past about making some taillights from some old artillery shells, but I was not having any luck finding any large enough, that was not stupid money expensive.

So for my B-day (we had to celebrate it early) he made me go through a series of steps / presents to figure out what I was getting. The first was an envelope with 4 brass screws and washer/nut hardware. Not a clue what it was for.

Second box contained some unknown brackets for mounting something -- these were home made brackets as well (I forgot pics of those). I was stumped at this point.

And lastly was the big box containing these babies:
26-221110070123.jpeg


26-221110070104.jpeg


I was totally shocked! He made these from scratch out of miscellaneous copper and brass pieces. The primer button is a small freeze plug inverted though. And the tail light lens is from an old caddy'. They are friggin cool I think! They look kick a$$ mounted on the bed - goes perfect with the artillery/military type finish theme! I had to mock them up when I got home.
 
"janschutz" said:
That is so cool. They will look great on you rat rod. They just need patina so they do no look new.

Green Patina Formula:
2 parts white vinegar, 1 1/2 parts non-detergent ammonia, 1/2 part non-iodized salt

Clean the part, don't touch it with your bare hands, brush this stuff on.

Peeing on it will also do it.
 
"Mach1ne" said:
Green Patina Formula:
2 parts white vinegar, 1 1/2 parts non-detergent ammonia, 1/2 part non-iodized salt

Clean the part, don't touch it with your bare hands, brush this stuff on.

Peeing on it will also do it.

Interesting info. Thanks Skip.
 
"Mach1ne" said:
Green Patina Formula:
2 parts white vinegar, 1 1/2 parts non-detergent ammonia, 1/2 part non-iodized salt

Clean the part, don't touch it with your bare hands, brush this stuff on.

Peeing on it will also do it.
Jeremy, this is the one time pictures are not necessary with your preparing the patina!
 
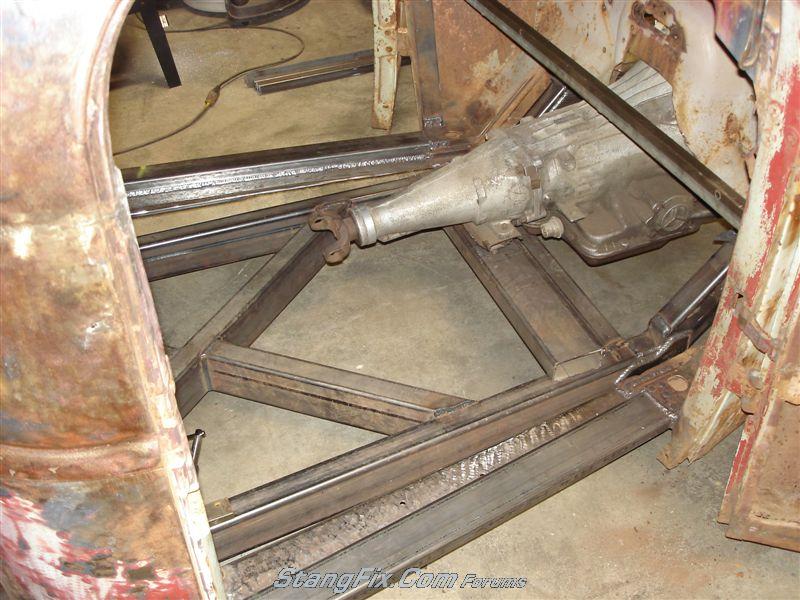
Update time. Been working/starting on the floor structure for the cab. This is proving to be a most tedious job.

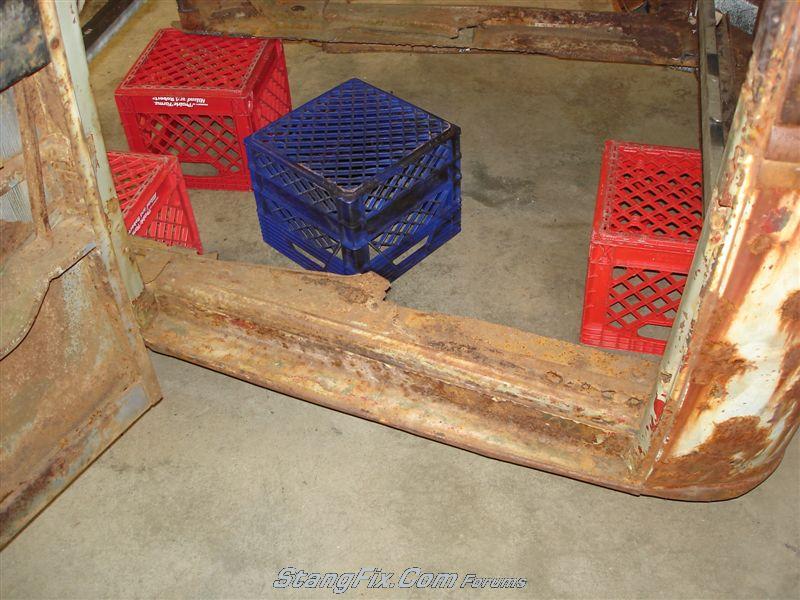
What was left of the existing floor structure:
26-131210135853.jpeg


I removed the old rockers and the floor pan section - (kept the rockers for reinstall & pitched the rest):
26-131210135909.jpeg


I decided to keep that existing steel section that is shown remaining spanning from the front door post to the rear post. It was tying the door posts together and was still really solid. I decided to just take it back down to bare steel and remove the excess junk brackets, etc:
26-131210135937.jpeg


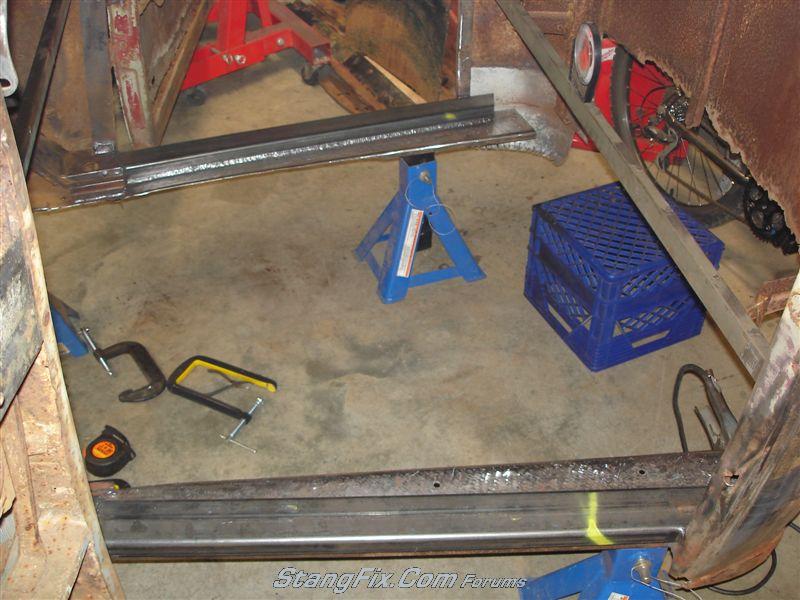
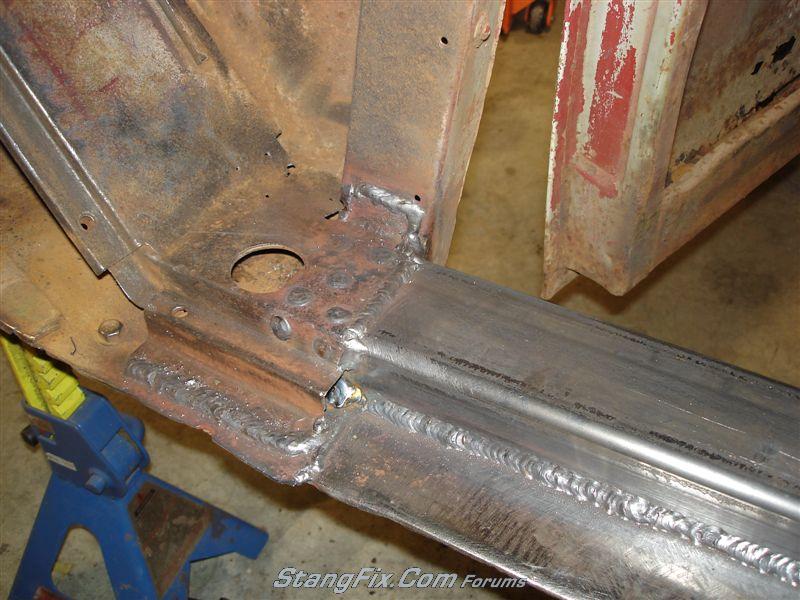
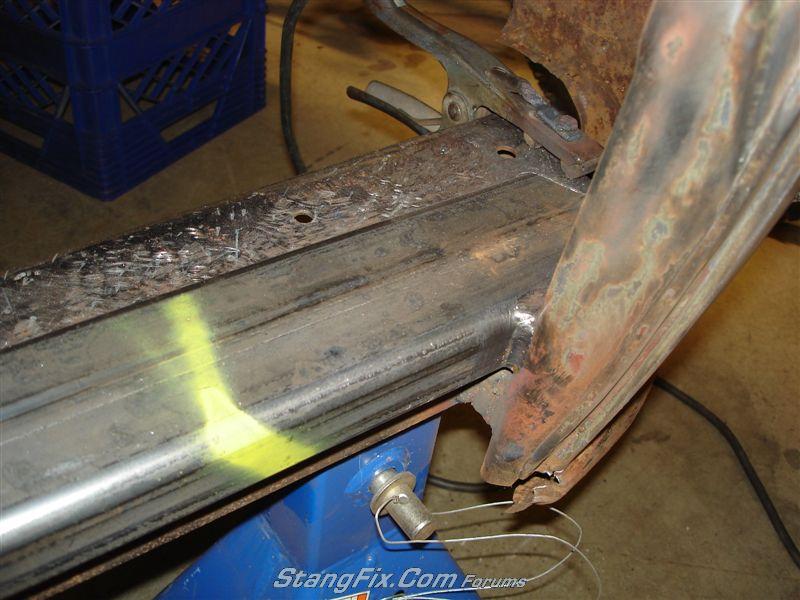
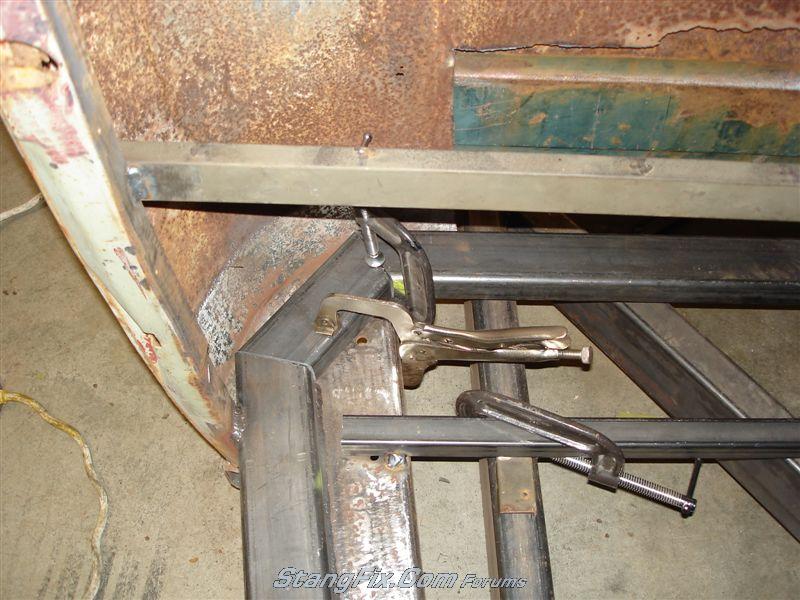
Next was to create a new rocker structure. I used 3"x1-1/2"x3/16" rectangular tubing. It was the exact size to slide up into the existing toe board structure to tie the pillars together more solidly:
26-131210135954.jpeg


26-131210140012.jpeg


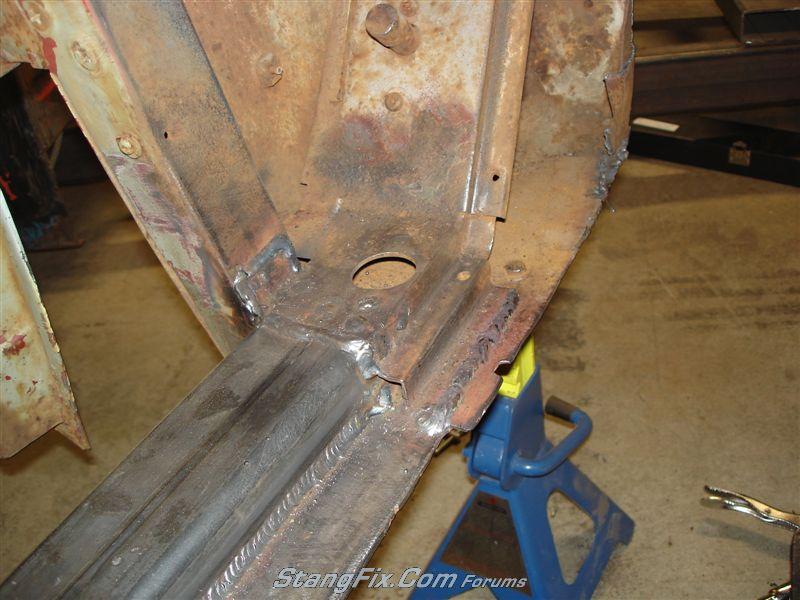
I drilled the existing toe boards and cherry welded the new steel in and fully seam welded it also:
26-131210140326.jpeg


I also fully welded the new steel to the existing steel:
26-131210140027.jpeg


And finally I tied it all back together again at the rear door post. If you look directly below my top weld, you can see where the existing steel support bolted to the door pillar with large spacers. There was about 1-1/2" wide in square spacers with a bolted connection. I didn't like that so I welded it up solid as well. It was hard to get to it, so it's not a beautiful weld by any means. But it is solid:
26-131210140310.jpeg


--------------------


Next was to drop the cab back down on the frame and establish final ride height so I can start the chassis cab mounts.

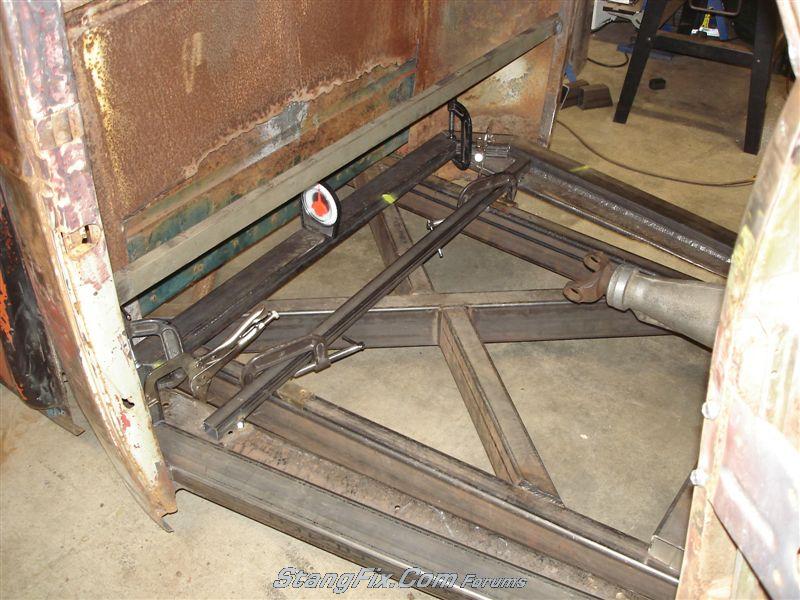
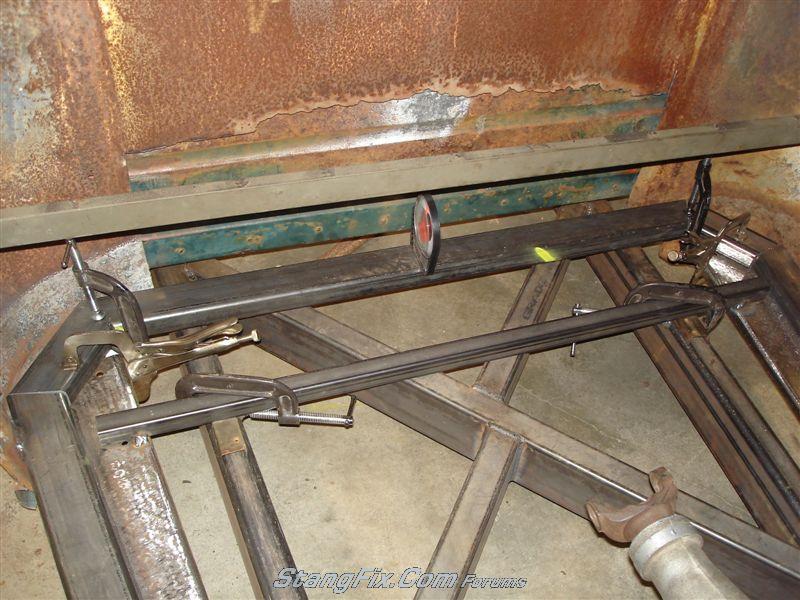
Dropped it back on, tacked a temp bar across the supports to hold it up and started the rear cross member. I got a good start on the drive shaft loop but it is not on there yet. I will weld it on before I cut the center section from that rear cross member so nothing moves on me.

The started floor structure:
26-131210140407.jpeg


Filleting the edges to follow the cab corners:
26-131210140421.jpeg


You can see the 1/2" spacers under the smaller cross tube. That means I have plenty of room and no channeling will be required. Sweet. The new cross tubing will be that same, smaller square tubing. It will rest on top of that old steel as shown, but tie into the structural rockers.
26-131210140450.jpeg


Forward looking shot. The large circular openings at the front door post is where the front cab mounts will be. I still need to make the trans mount also:
26-131210140436.jpeg


Lots of planning and not much doing. the inner structure should hopefully go quicker.
 
Looks pretty beefy! Coming along nicely. Do you have some old rusty floor to throw back on top of the new framing?
 
"monkeystash" said:
With those incredible skills, I'm still wondering why you hang out here with us losers. :shrug

Oh whatever! I put the "ERRRRR" in loser! I'm here till the end :beer
 
Your work is amazing. I wish I had the tools to do this kind of work. My brother and I are dying to build a ratrod. I've actually got a 49 Chevy P/U sitting waiting on me when I go pick it up... Long story short, I was working on the guys phone and asked about the old truck sitting at the edge of his yard. He told me to haul it away and pull the motor, tranny, and rear-end because he wanted them and it was mine.
Bill
 
At this point, I'm waiting on my brother to finish his garage. I kinda like having a home to come home to :roll Wife has already threaten to cash in my life insurance policy if I bring another money pit home :guns lol
Bill
 
Back
Top