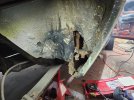
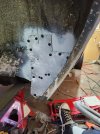
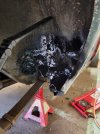
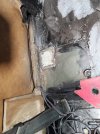
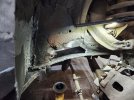
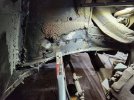
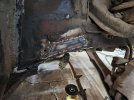
Hey Jeff, it might just be the concerned old father part of me writing this but you really should rethink how you fastened those seats to the floor. The way you did it creates a much greater potential for the mounting bolts to shear off. In those rear little box mounts you made that bolt will likely develop fatigue as it can flex between the lower weld point and the top where it gets snugged against the factory seat rail. That clearance hole in the top of the box channel is an issue. I think in the video you mentioned maybe you should have welded up at the top as well. At minimum if using this design you should. At the front, that little round spacer is not good at all. The actual surface area to which the seat is clamped down is limited to the very small surface area of the top and bottom of that spacer. To make it worse, that tiny surface area is surrounding a hole in the rail (and floor panel) that the bolt passes through. These areas will likely fatigue crack quickly as well. In a stock situation, look how much surface contact the base of the rails makes with the floor. The mounting bolts clamp the two together spreading the load across a broader, stronger area. Just getting in and out of the seat will quickly challenge your set-up over time as lateral force is applied. Same with every turn, start and stop while driving. Safety first, as they say.
Navigation
Install the app
How to install the app on iOS
Follow along with the video below to see how to install our site as a web app on your home screen.
Note: This feature may not be available in some browsers.
More options
-
Hello there guest and Welcome to The #1 Classic Mustang forum!
To gain full access you must Register. Registration is free and it takes only a few moments to complete.
Already a member? Login here then!
You are using an out of date browser. It may not display this or other websites correctly.
You should upgrade or use an alternative browser.
You should upgrade or use an alternative browser.
Another Project - 71 Torino
- Thread starter JRANGER
- Start date
JRANGER
Active Member
So let me start by saying thank you for your concern. I didn't show it in the video but i did indeed go back and put welds at the top section of the bolt as well to reinforce them.Hey Jeff, it might just be the concerned old father part of me writing this but you really should rethink how you fastened those seats to the floor. The way you did it creates a much greater potential for the mounting bolts to shear off. In those rear little box mounts you made that bolt will likely develop fatigue as it can flex between the lower weld point and the top where it gets snugged against the factory seat rail. That clearance hole in the top of the box channel is an issue. I think in the video you mentioned maybe you should have welded up at the top as well. At minimum if using this design you should. At the front, that little round spacer is not good at all. The actual surface area to which the seat is clamped down is limited to the very small surface area of the top and bottom of that spacer. To make it worse, that tiny surface area is surrounding a hole in the rail (and floor panel) that the bolt passes through. These areas will likely fatigue crack quickly as well. In a stock situation, look how much surface contact the base of the rails makes with the floor. The mounting bolts clamp the two together spreading the load across a broader, stronger area. Just getting in and out of the seat will quickly challenge your set-up over time as lateral force is applied. Same with every turn, start and stop while driving. Safety first, as they say.
As far as the hole, and fatigue areas they are reinforced for the stock bench and at the end of the video i mention using the middle bracket across the tunned. Which also have a reinforcement in it for the whole. So that shouldn't be a big issue,
So i guess a bigger space does need to be made for the front that's about 1/4" to really spread the weigh distribution there, so i may fab something up there. Appreciate in the input and concern
JRANGER
Active Member
janschutz
Corn Hauler
Wow, you sure making progress!
JRANGER
Active Member
JRANGER
Active Member
JRANGER
Active Member
JRANGER
Active Member
tarafied1
Well-Known Member
what did you do about your broken windshield?
JRANGER
Active Member
Nothing yet...going to have to buy another unfortunatelywhat did you do about your broken windshield?
tarafied1
Well-Known Member
bummer. I have never done a windshield like that. only 60's with the rope trick. Is it glued in? I think the 69 Mustang is like the Torino rather than my 67
JRANGER
Active Member
yes sir, its a glue in style. I dont know if ill do it or have it done.....Just sucks breaking new glass and wasting moneybummer. I have never done a windshield like that. only 60's with the rope trick. Is it glued in? I think the 69 Mustang is like the Torino rather than my 67
Glue-in install is so much easier than the old school gasket and rope trick method. As long as the metalwork around the perimeter is right not much to screw up as the glass literally just lays down into the opening.
tarafied1
Well-Known Member
if I ever get to the 69, it will need a windshield. But that is one of the least of it's problems. After seeing Jeff's work on the Torino I am sure I can save my 69 but wow that's a lot of work!
JRANGER
Active Member
you can do it!if I ever get to the 69, it will need a windshield. But that is one of the least of it's problems. After seeing Jeff's work on the Torino I am sure I can save my 69 but wow that's a lot of work!
tarafied1
Well-Known Member
my 69 looks rough (and it is) but I think it is savable. Nothing is hidden anyway. all original paint so no filler or previous patchesyou can do it!
JRANGER
Active Member
the best thing is they make all the parts for your car somy 69 looks rough (and it is) but I think it is savable. Nothing is hidden anyway. all original paint so no filler or previous patches
and just 8 million dollars later...the best thing is they make all the parts for your car so
![Censored [.] [.]](/styles/default/xenforo/smilies/censored.gif)

