• Hello there guest and Welcome to The #1 Classic Mustang forum!
    To gain full access you must Register. Registration is free and it takes only a few moments to complete.
    Already a member? Login here then!

Chasers 66 408 Restomod / ProTouring Coupe

I like to have multiple streams of work. That way, if I start getting bored or irritated with a particular long running project (cough...body work) I can work on something else to switch it up.

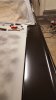
So i've been thinking about the dash. I'm going to be adding a Vintage Air AC system to the beast but I take issue with their vent ergonomics. Mostly in that, I think the whole thing looks forced. I actually saw a setup a couple weeks ago at a car show and it enforced my opinion. It's like when folks decide they want to add more gauges so they throw one of those pods under their dash...it just doesnt jive to me. So here are my thoughts...

I'm going to be building a console to accept a 2 dinn head unit so the radio slot, which I previously had welded and smoothed, is available for vents. I know the VA system puts a couple of rectangular vents in there...but I'm not a fan of mixing the round vents for the sides (which are plopped under the dash rather haphazardly) and rectangular. Call me OCD but it bugs me...

What I think I'm going to do is mold the round vents into a space on the lower portion of the dash panel on the drivers and passenger side leveraging some exhaust piping to make up the contour. I really dont think that will take much to get them to mold in and then build up some smoothed edges with a light skim of filler. I think I'm going to put another set of round vents in the radio slot. I'm moderately concerned about the style line in the dash but I think I can get it dollied down on the edges so that the vents can sit relatively flat.

Why did I just tell you all that?
1) Because I'd be curious to know if any of you guys have done something similar or have other ideas on it.
2) Because, for reasons I dont really understand, I value ya'll's opinion :p
 
Doing this while the car is apart is the time to do this. I want to do more custom dash work but I will need to wait until I want to strip the dash to just metal. In my 68, I used the radio delete plate to install an electronic control panel for the AC.
ABInside23.jpg
 
I finished some body work over the weekend (so I thought) and sprayed 2 coats of slick sand over the whole thing so I could get it blocked proper. One of the things I was working on was getting the drivers fender to align. It was the el cheapo repo from NPD since, at the time of purchase, they were out of the Ford tooling ones. It didnt fit very well but I attempted to make it work investing probably 20 hours or more fixing gaps, adjusting contours, etc...only to discover that I hadnt fully vetted the contour from the top rear portion to the door...and it was off...a lot. I tried adjusting the top side out but then the gap to the cowl and windshield was wrong. There was seemingly nothing I could do to get it to work in save from maybe ripping the top side of the fender and trying to spread it which was probably the 'right' thing to do if I wanted to keep trying to use this one...so against my better judgement (please dont hate me), I tried to filler work the back side into the contour. For the most part, I got it pretty good on the side contour but the top body line was too far inward (about 1/2"...yeah...it was bad) and I tried to hammer it back, work it in, etc. I thought everything looked great so I sprayed the poly. Upon walking around and double checking everything it was pretty clear, that fender was not going to work. The top line is all sorts of wrong.

So as of yesterday I bit the bullet and ordered the Ford tooling fender as it's now in stock...went ahead and ordered a door for safe measure. I'm not sure what door the body shop used in 2011/12 (it was hit in the door by a kid driver) but it required some work to get it to shape up right to the rest of the car and I was never really that happy with it. I figure, since I have to pay for freight anyhow, I'll try a new door and see how it fits. According to NPD it was "tested for excellent fit"...yeah...we'll see. The other reason was because I had worked the door edges to play nice with the POS fender. Oh well...live and learn right?

On the bright side, the passenger side looks pretty f-ing good. I'm sure there are low spots that will need some touching up but the contours I had worked in look amazeballs imo. There are some minor anomalies in the gaps but they arent enough to really piss me off. We'll see if that changes the more I stare at them.

Anywho, pretty sure the door and fender wont be here by this weekend. Therefore, I'm going to work on blocking the whole passenger side, rear, deck lid, and drivers quarter panel (to a point).

I also had a nice conversation with @tallguy about the dash vents he worked in. He used the back up light housing and fit it to the contours of the dash. His plan and work seemed the most reasonable for what I want it to look like so that's what I'm going to do as well. I'll work on that in between sanding sessions.

All in all, I think there's well over a months worth of work left in the dash changes and body work. Which is good because the TKO 600 swap is expensive...gives me time to save up some pennies.
 
All those words and no pictures, half these guys will be lost.

Just kidding. Glad to hear the passenger side is coming along. Makes me look forward to fitting the repro door and fender I have here.
 
I'm debating taking pictures or not of the drivers side. I'm a little embarrassed about it. It's pretty funny...like a little 'S' curve on the top contour. I'm a little more hopeful about the fitment of the new fender and door since the passenger side went pretty well. Sure; took a little trimming, beating, and adding some to the edges but all in all, didnt fit bad and that was with a new door and fender. I have a sneaking suspicion that a lot of my problems on the drivers side had to do with a possibly crummy door. We shall see though.

Man...I'm really looking forward to fitting the transmission and starting wiring. I'm jealous of you Boom.
 
I'd like to get your take on those doors from NPD. Have a guy locally here trying to source good quality replacement doors.
 
@msell66 Sure thing. Once the drivers side comes I'll firm up my opinion but so far its been ok. The passenger side was the more expensive and supposedly reinforced door. It is noticeably more firm than the current drivers door. Makes me hope I dont regret going with the cheaper door since there's no mention of reinforcement. The edging needed some work on the passenger side. It wasn't a consistent line and had a couple spots where it sort of 'bowed in'. The rocker to bottom gap line was also a little extreme but wasnt hard to fix with some 1/8" filler. I think I have about 2 hours in getting everything tightened up. The top of the gap from the door to the fender was also excessive but was an easy fix. I'm not sure if that was the result of the door or the fender since that fender is a repop as well

20170521_165904.jpg


The contours were ok and it isnt super wavy. I had some issues with lining it up to the quarter panel but I dont know if that was a result of the door or because of the PO skinning job which was not done very well. I had to unmount the front side of the quarter and pop the contour out into shape.

In summation, I think it's serviceable but it'll need some massaging to get it to work in right. All in all, I think I have about 3-4 hours in getting it to look right and align properly. I'll document more on the drivers side since I'll be starting that whole process over again.
 
The wiring stuff adds up pretty quick. Pretty much need to get their crimpers, I get one pair...$80 :( then you should consider a covering for the wires. I started with some of the classic braid from Painless, but it's super pricey for what you get. I found links to a seller on Ebay that sells techflex (same as painless, just a commercial brand) for dirt cheap, got some of that coming in Friday. Then you need clamps and what nots to hold everything in place. My interior is gutted with no dash, so I can really only run the wires to the general area for now. Ugg....

Just ordered the brackets from MTF to mount an Ididit column. Now to get the column...
 
It's only money right :-D Luckily i think i have a set of crimpers for their style of connectors. When I built my bike several years ago I picked up a set of those crimpers...different brand but same style. Of course I'll need to make sure they work with the AAW connectors. I'll have to look into the techflex although, I'm a ways off sadly. I at least want to have the front half of the car blocked and done before I drop the engine in and start fitting the TKO. I'm REALLY hoping that the new door and fender play nice together and not have to spend weeks tweaking and welding.

To add in, I started working through the dash modifications for the vents last night. It looks pretty straight forward but it's going to take awhile to get the backup lamp housings contoured to the dash. I'll post more as that little side project moves along.
 
One word of advice on the wire wrap is that you need to use the right type of product for the environment it will be used. The Techflex style is great for inside the body of the car and some underhood applications. If wires are run close to higher heats (exhaust manifolds/headers or across the top of the engine) I use a style made for high temperature protection. Also be sure its designed for contact with oil, gas, etc. Some of them are not. Oil, for example on generic plastic will cause the plastic to breakdown. And lastly, if you are going to route wires in areas exposed to the road (framerails, inside the fender, etc.) use something that affords greater protection against blunt force strikes. Driving down a gravel road can lay waste to a typical hard plastic woven wrap. I run such wiring through a section of heater hose in such cases. Stuff bounces off rather than damaging the material. It's also MUCH easier to keep clean.
 
Boring update first...Sunday I sanded...for like 6 hours. But I managed to get the passenger side, apron, and rock guard blocked. There are a couple small spots on the rocker and fender I want to touch up but the rest is glass smooth. There's still a little more SS on there than I'd prefer so I'm debating going another round of blocking with 220 to take a little more off.

Now for the good news / bad news portion of our story...I picked up the new drivers fender and door today. The good news is the Ford tooling fender is leaps and bounds better than the reproduction in terms of build. It's heavier steel for sure. The contours are nice and sharp and it looks to be pretty straight already. I cant check the fit just yet as you'll see in a moment.
The bad...the new door doesnt fit like I want it to fit. I mean, it's probably "good" but it's not good enough in my opinion. I dorked around with it for about 2 hours this evening trying to get the rear gap where I wanted it. I have a little over a 1/4" gap on the top-rear (I'd prefer an 1/8) portion of the door. I'm out of aft adjustment on the upper hinge to move it back. Moving the lower hing forward opens the gap on the bottom. The rocker to door gap was acceptable. I dont know if it's just the lighting in my shop or what but it just seems so...large. The contours line up great to the quarter. I could potentially 'shim' the hinge --> door mount point to make up some of the gapping...not sure what the right option here is.

(sorry for the picture angle)
20170807_195704.jpg


20170807_195716.jpg


Then I threw the other door back on. Took about 10 minutes to get it adjusted in place and I like it's rear gap a lot better. However, I added rod to the front gap to mesh with the shit repop fender. The fit on the Ford fender is not playing well with the fixed up edges so I couldnt test fit it.

Leaves me with some decisions...
Option 1: Try to fiddle with the new door some more and work it to try and close that gap a little. Being out of aft adjustment on the upper hinge doesnt give me much confidence
Option 2: Set the door as good as I can get it, set the fender in place, then weld rod on the assorted gaps to tighten them up
Option 3: Cut off the rod from the previous door and see how it works. There's no guarantee that the door will behave even after removing the rod.

Gratuitous picture of my bike...for no other reason than I cleaned it up to possibly take it to a show over labor day. My dad will be taking his car so we figured it might be fun to have 2 things that I've built there...
20170806_173056.jpg
 
Don't try to get your gaps too tight. 3/16" is pretty standard goal for a very well aligned body. Wooden paint stir sticks are a great tool to use for setting gap space.
 
Yeah but 1/4" is excessive. When I was trying to set it I had stacked 2 sticks tapped together and the thing wasn't even close.

I think I'm going to try and work the new door a little more tonight. Going to start by adjusting the top hinge as far back and up as I can get it and start there. I would be happy if I could get the bastard to move back even 1/16 on the top. The bottom has lots of play left in it. Regardless, I'll get the gaps uniform, match the contours, and figure out what to do from there. Adding rod to the gap ends is not difficult and now that I've gotten some practice at it, should only take 2 or 3 hours (minus skimming and sanding). I think that's going to lend a better result than trying to trim off the stuff I added to the first door, fix ends, hope I dont grind too far and have to touch it up etc.
 
Alternatively, I think I might just take the burr wheel to the hinge mount holes on the A-pillar. Open the back sides of them up a tad.
 
My approach is to get the body lines perfected and then make any needed changes to get the gaps correct. Top of the door and the door "scallop" lines if not good ruin the appearance regardless of gap perfection. Next is door to quarter gap. Lower gap to rocker is last concern as is least noticeable overall. Fender is then made to match/gap correctly. Don't forget the build-up from primer/sealer, color and clear do influence final gap clearance...likely more than you might expect. Sounds like you have it all under control.
 
I take the same approach although I'd like to avoid adding filler rod if possible so I want to attempt to get some more adjustment in that top hinge. The contour lines on the door match really well which makes me happy. I also have a good feeling about the fender to door gap given how the test fit of the fender (minus the door) looked in relation to how the door sat. It's not a perfect test but it gives me an idea how it'll behave.
 
Clearanced the upper A-pillar bolt holes and ground some off the back of the inside mounting plate and got just enough of the adjustment I wanted. The door gaps are acceptable now. They are just inside 3/16" which I'm happy with. The contours are pretty darn close and I can work them in no problem. I also had to add a little clearance to the lower side of the striker plate. Overall, pretty good.

I then test fit the fender. We had some words at first but it fits way better than the repop. Like night and day...I'm not going to have to do any finesse work on the gap edges. They are nice.

I need to pull the fender back off and go back to adjusting the door. The front lower is canted in which is throwing the contour mesh with the fender off...among other things.

The fender and door also feel nice and flat. I'm going to block the e-coat since I need to scuff it for primer anyhow. We'll see how straight these things are from the factory.

Oh hey...gave a call to MDL...drivetrain comes in 2-3 weeks...then we'll see if I can catch Boom ;-)

Here are some pictures...remember, it's not finish adjusted so dont beat me up too hard.

Photos are attached. I need to sort out why forums dont accept angle adjustments when I use the images from my S3 repo...
 

Attachments

  • 20170808_195309.jpg
    20170808_195309.jpg
    112.6 KB · Views: 16
  • 20170808_195241.jpg
    20170808_195241.jpg
    143.3 KB · Views: 16
I'm a couple of posts late on this but I also replaced both my doors with the NPD Ford tool ones. Both fit well but the upper hinge that attached to the door had to have the bolt holes elongated out some to bring the doors out properly. It's not so much that once the bolts are in you will not see it. Also test fit your door handles, some have reported some interference that needed to be taken care of.
 
Good call. I didnt think about the door handles. I'm just excited there's light at the end of the bodywork tunnel.
 
Back
Top