• Hello there guest and Welcome to The #1 Classic Mustang forum!
    To gain full access you must Register. Registration is free and it takes only a few moments to complete.
    Already a member? Login here then!

Restofied - My '66 Coupe Project

Okay I FINALLY have some progress stuff to post! :yah

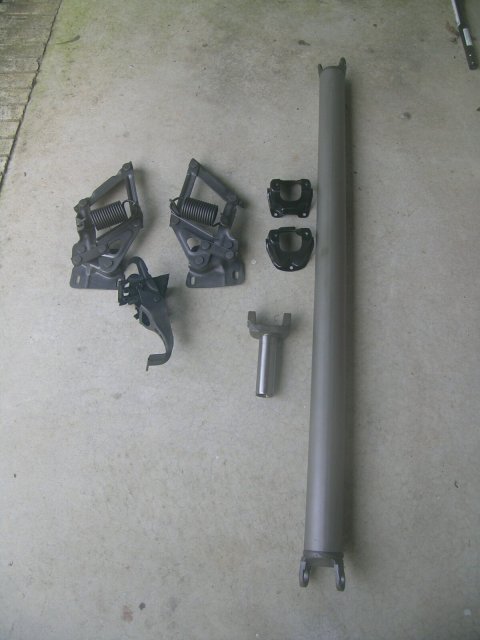
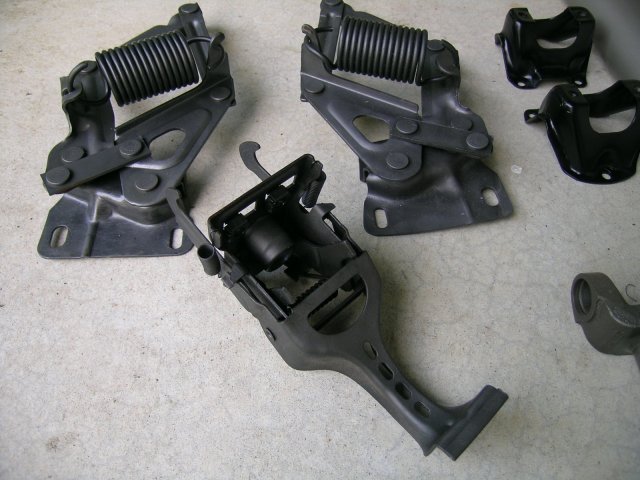
Over the past several months I suffered from severe project burn out. I'd mess with a few small things here and there, but that was all. One items was starting on my roller bearing spring perches. I finished one, but the other languished. Well progress has now been made on that. I'm getting a little ahead, but last night after working on the car all day I went to the garage again and started on the last perch. The time consuming thing was getting the tube fitted for the bearings, so that's all I focused on. I made quick work of it (seemed to go much quicker than the first one!), and called it a night. Today I got the spring perch cut and fitted for the tube. All that's left now is to weld the tube into the perch and peen the ends over. Here's a shot of the completed one (on the right), and the one I just worked on:

2319396910070710241S600x600Q85.jpg


The big progress was more body mods/sheet metal work. I finally got the relocated battery box all welded up and the outside welds dressed (moved to the left fender apron):

2796538550070710241S600x600Q85.jpg


2426112520070710241S600x600Q85.jpg


I also got the V8 style power brake booster swapped for the thinner 4 cyl version:

2195241410070710241S600x600Q85.jpg


I like the clearance better that it gives to the shock tower. I used the Mustang Steve pedal pin relocation and firewall brace also (another project had finished during my burned out period). I welded up all of the unneeded holes in the firewall too.

Then it was underneath the car for the grungy work. I started by dressing all of the welds in the floorpan from my ealrier pan replacement. I had dressed the welds inside the car but not underneath. I then moved to the back with a stripping disk on the grinder and started stripping/cleaning.

2389609750070710241S600x600Q85.jpg


I still need to get into the areas the disk wouldn't go. I plan to media blast those areas. By using the stripping disk first it'll minimize the amount I need to blast. Same thing with the engine compartment.

Prior to closing up last night (after messing with the spring perch), I decided to use the darkness to my advantage. I went back out to the car with a trouble light and put it underneath. I then climbed into the car with a marker in order to locate and pin holes left in my ton of welds. Wherever light shined through...pinhole! Today I went back and welded all of them up. For the amount of welding I've done on the car, there weren't too many areas that had pinholes!

I had a few smaller repairs I made on various little brackets and such also. It's been two FULL days of work getting done. With everything accomplished I just hope to keep the momentum rolling!
 
Looking good...

Shouldn't there be a indent on the tube sides to work the shock mounting nuts?
 
"AzPete" said:
Looking good...

Shouldn't there be a indent on the tube sides to work the shock mounting nuts?

Yes indeed there is Pete. I just haven't put them in yet. I was waiting to finish both and to get my new set of shocks in so I could make sure the indents were deep enough to clear. I have the shocks in, so I'm doing the indents when the second perch is finished. Good eye!!
 
Wow, almost a YEAR without an update!! Hopefully they will come again with a little more frequency. The latest "big" project was finally getting a good primer coat on all of my previous work. Here's some before and after pics:

Engine compartment I started with-
mia_image.png


mia_image.png


And after much work/modification/stripping-
mia_image.png


mia_image.png


Trunk area before-
mia_image.png


mia_image.png


mia_image.png


After repairs-
mia_image.png


mia_image.png


mia_image.png


Interior before-
mia_image.png


mia_image.png
]

Interior after-
mia_image.png


mia_image.png


It's taken a ton of work, but so far I'm happy with the end results. Next will be sealing all the seams and getting my Lizard Skin sprayed on the interior. Stay tuned!
 
Last edited by a moderator:
Wow, all that happened today? I'm impressed :steer
That primer looks too nice to paint over!
Jon
 
Ummm...what's the big hole on the apron for near the battery?
 
"Jonk67" said:
Wow, all that happened today? I'm impressed :steer
That primer looks too nice to paint over!
Jon

Well I said in another thread my son helped out a TON. See, everyone thought I exaggerated!! LOL
J/K The engine bay got blasted in a day and a half (shoulda taken less than a day!), and the right trunk floor got repaired. Then everything was prepped and shot. All of the other repairs and mods have been ongoing for the past several years. I had previously primered repairs with a rattle can to keep something over the bare metal. That was mostly taken off though prior to the epoxy primer. It was still a huge amount of work in a day and a half. I am so thankful my son helped out. He really put out the effort!

"Midlife" said:
Ummm...what's the big hole on the apron for near the battery?

It's the intake hole for the air filter box. It's grafted in from the donor '92 Mustang. That saved me from trying to get everything lined up properly...Ford already did it for me. I'm using a factory airbox and silencer as opposed to an open element filter set up. The left apron was modified and the battery relocated there as in the '92 car. Basically, when the hood is lifted you'll see a pretty to close to stock '92 5.0 engine bay. Just my little twisted take on the term "resto-mod".

Thanks for the kudos guys. I am starting to see the light at the end of the tunnel. I've kept a little busy with little projects over the past year that haven't even been worth taking the camera out for. Clean this, paint that. It's all stacked up and waiting for install. It kept me busy with SOME forward progress, and it's stuff that needed to be done eventually anyhow. I'll see the pay off when it comes time for final assembly. I can just starting bolting in parts/pieces instead of having to wait and clean/refinish stuff when I'm ready for it. Hopefully it works out well! I have to take a day off on Thursday for a doctor's appointment. I'm hoping I feel well enough afterwards to get the seams all sealed. I'm keeping my fingers crossed I can get the outside of the engine bay area and the floor pan in primer this weekend. I can start getting parts/pieces in final mock up if I can get that accomplished. Be prepared for MANY more photos when that happens!
 
I'm expecting to see the car in its completed state at this year's MBB.
 
I got my interior seams sealed up yesterday in preparation for today....Lizardskin! I didn't get pics of the interior after sealing, but here's the seams sealed up in the trunk:
Dscn1488.jpg

Dscn1488.jpg Dscn1486.jpg


Today I got everything cleaned, scuffed and masked. I laid down two coats of Lizardskin (the sound deadener). I had to let the first coat dry for about 45 minutes before the final coat. It took about 1 1/2 gallons to do both coats and I wasn't skimping either. I only did the firewall, underside of the cowl, interior floorpans, interior sides of the rear wheel wells and inside the rear quarters. I have work to do on the roof yet, as well as a few more things in the trunk. I'll have more than enough to do the roof and the wheel wells and quarters inside the trunk. Here's the interior after the second coat:

Dscn1482.jpg

Dscn1484.jpg

It went down pretty quick and because it's water soluble when wet, clean up was easy too.
 
Last edited:
That's some very good looking sheet metal repairs, John. Do a little each day and you'll be done before you know it.
 
Thanks Mark. All of you guys that have painted cars really makes me jealous!! The sad thing is I've done the repairs for so long now it's hard to get motivated to even fire up the welder! LOL

I am in the home stretch for the actual sheet metal work. Just a few more repairs to make and I get to start on the actual body work. The upside is that the body itself is super straight. I also have new door skins, valances, fenders and hood (No, I don't have dollars falling out of my pockets. I got them at a deal, and they're the premium stuff, not the flimsy cheap repops. A guy bought the Ford tooling stuff and then changed his mind and went back to original parts. I have about $300 in it all!).

The next two weekends are kinda shot (work on one and a wedding to attend on the next). My next full weekend I hope to be underneath finishing up the bottom of the car. That will allow me to start mocking in the engine, drive train and suspension one last time before it goes back in for good!
 
Yesterday I had "other" projects around the house to get done. Afterwards I had some time so I worked on getting my drive shaft cleaned up and restored. I also took care of the yoke. I got the yoke cheap because it had been sitting in someone's garage and developed a little surface rust. It's actually an AOD conversion yoke. Normally they run about $60 and up. I picked it up for $25, primarily due to everyone being scared off by the rust. It cleaned up like brand new! I painted the drive shaft in Detail Grey and Cast Coat. It looks reasonably original, but it'll stay nice longer than the original bare finish.

Today I had planned on working on the body but the weather decided not to cooperate, read-liquid sunshine! Not to fear though, I have a rainy day to-do list also! Awhile back I had gotten my hood hinges disassembled (springs removed), and then degreased and cleaned along with my hood latch assembly. Everything went into the blast booth along with the shock tower caps while I was at it. The hinges and latch were getting phosphated so while I waited for the solution to heat up I got the caps painted. The phosphating came out really nice and I was totally pleased. The latch assembly went in for 10 minutes along with the hinge springs. The hinges went in for about 8 minutes each. After everything was pulled and dried they got coated with WD40. The hinge springs were then reinstalled. They went back on a LOT easier than getting them off!

While it may seem like just small stuff, it was still necessary. It was also pretty labor intensive and time consuming. More stuff to scratch off the list as done! Here's the pics:

The drive shaft, yoke, shock tower caps, hood hinges and hood latch assembly:

267-260713164846.jpeg


Closeup of the hinges and hood latch:

267-260713164909.jpeg


BTW, I've located all of my "lost" pictures for previous posts. I'll try to get them restored shortly.
 
After a LOOOOONG hiatus I've finally gotten movement again on the project. Heck, I had to scroll back almost 5 pages in the Members Build forum just to find my posts! Since I don't have any new pics right now I've gone back and started fixing the broken links for the past pictures that were missing. Due to NUMEROUS "upgrades" to the site over the past several years most were lost. I still have a bunch to do, but I'm working on them.

I've built a jig to roll the car to access the bottom of the car more easily. Due to the tight confines of where the car is, pics are kinda difficult right now. If the weather holds out this week I'll have it rolled and have pics of the set up. The problem I ran into in the past was it'd take me a day to clean the underside for paint and then run out of time. It would go on hold (work, weather, etc), and I'd have to repeat the cleaning all over. After doing this three times I got a little frustrated. With the car on it's side I should be able to get it all done in one day (fingers crossed). Updates coming!
 
Still working on getting the old pic links updated. Yesterday with the help of the whole family I got the coupe rolled over on its side. Not to fear, it's on a rotisserie of sorts. It allows the car to roll onto one side. It's been built and attached for over a month now but weather and lack of help kept me from rolling it.

Big kudos to my son who did all of the heavy lifting. I could only lend a hand...literally! I've hand one hand/arm bandaged up like a q-tip from wrist surgery a week ago. My son snapped a few pics of the car on it's side that I'll get and post. It sure helped rolling it. Found some additional spots that need work!
 
Back
Top