• Hello there guest and Welcome to The #1 Classic Mustang forum!
    To gain full access you must Register. Registration is free and it takes only a few moments to complete.
    Already a member? Login here then!

Sig's 68 Fastback

I thought I posted this already, or maybe I added the pics to another thread.

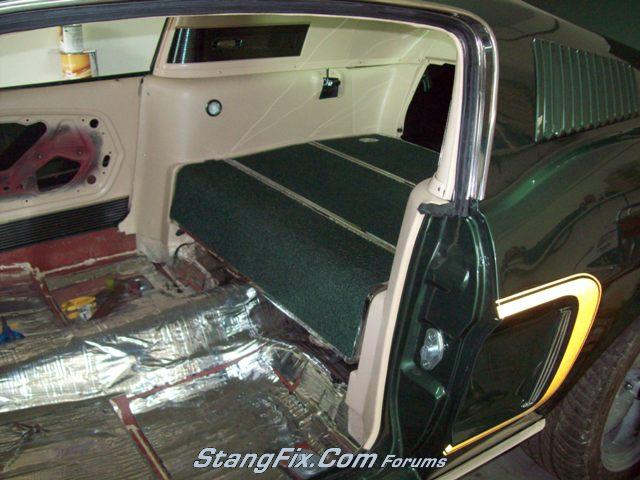
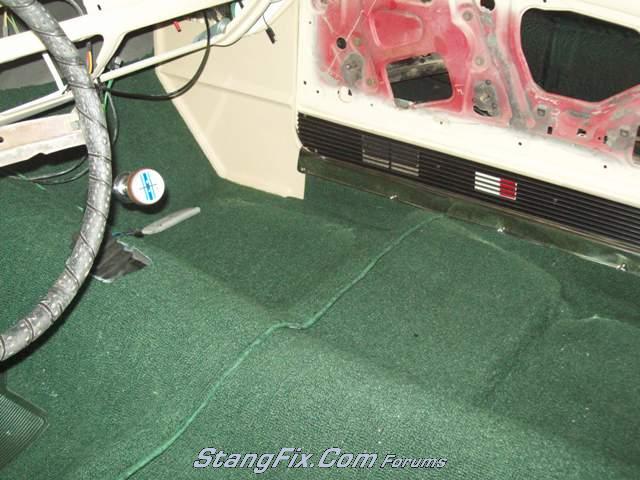
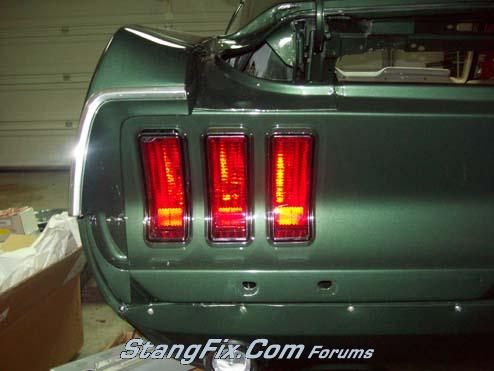
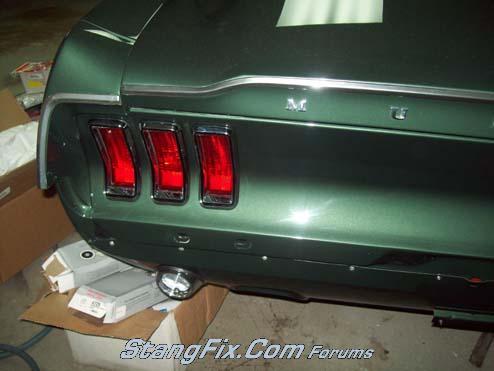
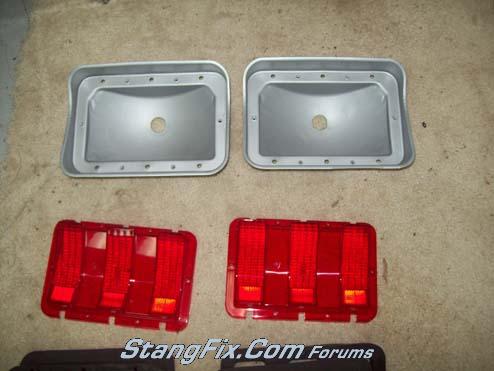
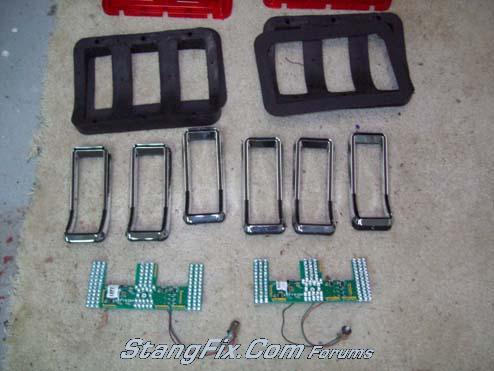
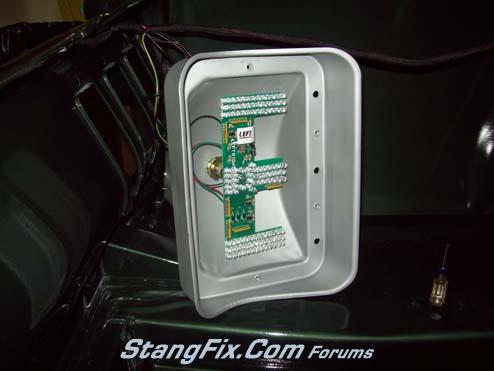
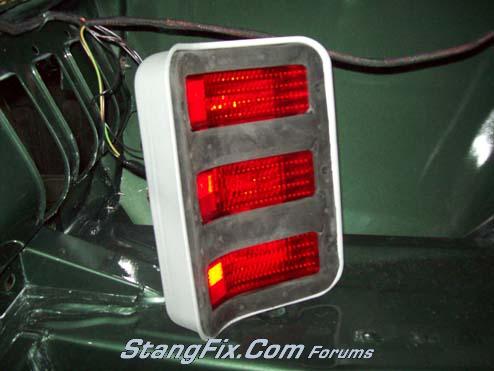
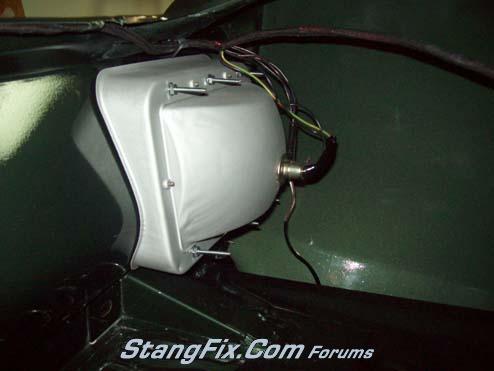
LED taillights installed. Slowly making progress. I want to have all the lights/wiring done before I do any interior assembly to make sure they all work and no shorts or grounds to chase down. Its all new wiring so it goes together pretty easy.

427_29_03_10_2_27_47_0.jpg

427_29_03_10_2_27_47_1.jpg

427_29_03_10_2_27_47_2.jpg

427_29_03_10_2_27_47_3.jpg

427_29_03_10_2_27_47_4.jpg

427_29_03_10_2_28_28_0.jpg

427_29_03_10_2_28_28_1.jpg

427_29_03_10_2_28_28_2.jpg
 
Started on the interior. Used Ramaat BXT, Heat Shield, and some closed cell foam (don't recall the name) and then the headliner. The headliner kicked my butt. This is the third headliner I've done and is the worst so far. Not sure why. I am pretty sure once I get the trim pieces in the back up on the roof it will help pull it tighter.

427_03_04_10_8_03_52_0.jpg

427_03_04_10_8_03_53_1.jpg

427_03_04_10_8_03_55_2.jpg

427_03_04_10_8_03_55_3.jpg

427_03_04_10_8_03_55_4.jpg

427_03_04_10_8_05_30_0.jpg


The glass is in, but I'm not sealing it yet with the 3M goop until I know the headliner will pull tight with the trim pieces in. Otherwise I'll pull the glass and try it again.

I use some 550 cord in the channel to pull the rubber through. Works pretty good.
427_03_04_10_8_05_31_3.jpg

427_03_04_10_8_05_31_4.jpg

427_03_04_10_8_06_38_0.jpg


Cleaned up some misc stuff underneath with the trans install since it was just rebuilt.
427_03_04_10_8_05_30_1.jpg

427_03_04_10_8_05_31_2.jpg


Also broke out the stainless Magnaflow exhaust. Just need to pick up some fittings to bolt to the collectors on the headers and pick out the tips to use.
427_03_04_10_8_08_22_0.jpg


A few observations...

The dust from the body shop is a pain. It wipes right off, but its in every nook and cranny. It will take some time getting rid of it all.

The seals on this weatherstrip (scott drake) for the windshield and back glass is much tighter than I've used before. It fits right up against the channel all the way around. I should have installed the molding clips for the windshielf before putting the glass in because I have no room to work with with this weatherstrip. Others I've done in the past did not have as much rubber.

For the record, when filling up a T-5 with fluid, it will run out the back before it runs out the top drain hole if you don't put the driveshaft in first. :ep
 
Man, that is coming along nicely. I have mine stripped and am prepping to paint the interior and trunk. I bought Dynomat but I am thinking it may look too good to cover up when I am done. Did you do your interior metal in body color or did you leave primed? Got any pics of the interior metal all finished out?

Also, did you go with Mustang Projects sequential kit?
 
I'm cooking with this thing but keeping hitting various snags. I start on one thing, walk to the shed to get a part, see another part and think "hey, I can put that on too," grab the second part and forget the first part, get back to the car, put the second part down, look around, think to myself "where did I put that first part now" then look around for 15 minutes, finally remember its still in the shed, go back to the shed to get it, see another part there that needs painted, think to myself "well, if I just paint this now, it can dry while I go put this other part on then I'll come back for it," so I paint part 3, grab part 1, go back to the car, go to put part 1 on and figure out that I forgot to order xxx from NPD so put part 1 to the side, go to my tablet and add xxx to the next NPD order list, then look around, wipe the sweat off my face, and think to myself, "why am I so hot and sweaty and tired and I haven't put one damn part on the car yet?"
 
Scott Drake new vent grills installed. I like the look but don't like the fit. From this vantage point they look great, but if you look at the leading edge the grill where it bends is about 1/8" too short, and results in a gap there on the leading edge.

427_08_04_10_7_10_22_0.jpg


Raammat installed on the floors, two layers, will cover with foam before I lay in the carpet. I'm not doing foam up inside the quarters and wheelhouses, just too much cutting and fitting. Laziness perhaps.
427_08_04_10_7_10_23_1.jpg


Started the fiberglass install. I have to say the AMK master interior kit is worth every penny.
427_08_04_10_7_10_23_2.jpg


Gas tank opening with caulk cord ready to go. Turns out I didn't need the outer row on the front and back lip, so that came up. I'm using this caulking cord on any bolt or screw that penetrates the hull of the car.
427_08_04_10_7_10_24_3.jpg


Gas tank installed. Bottom left corner as pictured, 3rd opening from the left there is about a 3/8" hole that is in the tank and the floor of the trunk. There is a matching one on the other side. I have no idea what that hole is for. Will take a better picture and ask the question in one of the other forums.
427_08_04_10_7_10_24_4.jpg
 
No idea. I'd love to say a few months, but that would be a pure guess. Limitation is time to actually work on it and I'm going to be working a lot the next month out of town.
 
To me, this is the best part of the build. After paint. All the fun stuff get's done now. Keep up the good work. The car is looking dynamite!
 
but if you look at the leading edge the grill where it bends is about 1/8" too short, and results in a gap there on the leading edge.


Funny story.....

When this part was in it's final stages of production, prior to initial release to the public..... I called Scott Drake expressing interest in this part. They couldn't sell a set to me, but they did tell me who the first deliveries were going to be shipped to. Stang-aholics. I called Stangaholics and informed their CS department that the new item would be shipping to them shortly from Scott Drake and that I'd like to pre-order a set. A week or so later the new interior grilles showed up and while they looked nice, their ABS construction left me a little skeptical. When I got them attached to the upper panels it was immediately aparent that they were ~1/8th inch short on the leading edge. No amount of adjustment would close the gap.

I called Scott Drake to inform them of the deficiency and was told... wait for it.....

"Really? This is the first complaint we've ever had for this item, it must be something you're doing wrong."

I then informed the dumba$$ that I was probably the first person to ever use the damn things and explained that the item was just made available to the public within the last few days. From your installation comment I see that my complaint from over 3 years ago was a complete waste of my time.
 
Dave, that annoys me too. I've complained to Dynacorn a couple times now about parts and get that line too, "you're the first person to complain."
Whatever. You know, its not like we're stupid here, if they said "hey, we know its a problem, but the price would triple to redo the tooling to fix it," I'd understand. But to act like they have a perfect part that nobody complains about is just insulting.

Had a great day working in the garage, lots of progress.

Annoying repro parts today:
carpet fit sucks, not sure why they call it "molded" because it doesn't line up on any floor contour at all.
fold down seat latch covers: hold for latch knob not punched in right spot, I'm going to have to drill them out because the hole holds the knob too far back preventing the latch peg from engaging the seat.
kick panels don't have screw holes drilled. WTF? Seriously, how good do I have to measure to drill the hole in the exact right spot?

On to the pics...

(I really like how well this dark green carpet matches the paint)
427_17_04_10_7_12_26_0.jpg


All of these panels and trim pieces are original, still couldn't quite get it all to line up right. Not sure what I missed but don't recall having those gaps last time. Although it could be that with the black interior last time I just didn't notice them.
427_17_04_10_7_12_26_1.jpg

427_17_04_10_7_12_26_2.jpg


I'm not thrilled about the headliner, still a few wrinkles, but I can live with it.
427_17_04_10_7_12_26_3.jpg

427_17_04_10_7_12_26_4.jpg


427_17_04_10_7_13_28_0.jpg

427_17_04_10_7_13_28_1.jpg


I went with the stainless door sills. Fit is better than the cheapo repros. Very thick/stiff.
427_17_04_10_7_13_28_2.jpg


Door data tag from Marti. Looks good, went with the original data even though none of it matches anymore except the VIN.
427_17_04_10_7_13_28_3.jpg
 
Keep it up. I love parchment and green together. Have you thought of what the dash inlays are going to be, camera case, wood grain or brushed aluminum?
 
Started on the upholstery last night. SWMBO helped. Seats out of a 90 GT, I think. It was 1230 when I got to where I'm at with this, still need to put the knee bolster together and add that. Upholstery is custom ordered TMI 68 parchment with comfortweave and stitched to look like the 68 seats but obviously cut for the fox body seats.

This was actually easier than the early model seats. More pieces and parts, but the assembly went smoother. Hardly any hog rings, the upholstery is held tight with plastic sleeves that slip over the frame on the bottom.

427_20_04_10_4_23_15_0.jpg
 
Looks great. You are really making progress. How do those rivets work that hold the data tag on? Do you just punch the center?
 
Back
Top