tarafied1
Well-Known Member
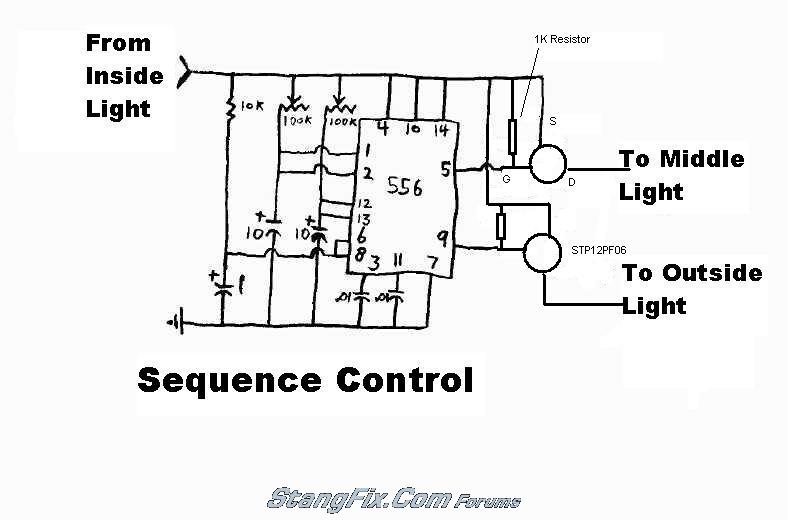
I wish I knew what I was looking at... I just went ahead and bought some $120+ Dynamite sticks
Follow along with the video below to see how to install our site as a web app on your home screen.
Note: This feature may not be available in some browsers.
Hello there guest and Welcome to The #1 Classic Mustang forum!
To gain full access you must Register. Registration is free and it takes only a few moments to complete.
Already a member? Login here then!

"shaggycowboy09" said:ok thanks good to know..is there a certain type that i need or will just any heatsink do the job? Also I'm not even sure how exactly you use them.