Navigation
Install the app
How to install the app on iOS
Follow along with the video below to see how to install our site as a web app on your home screen.
Note: This feature may not be available in some browsers.
More options
-
Hello there guest and Welcome to The #1 Classic Mustang forum!
To gain full access you must Register. Registration is free and it takes only a few moments to complete.
Already a member? Login here then!
You are using an out of date browser. It may not display this or other websites correctly.
You should upgrade or use an alternative browser.
You should upgrade or use an alternative browser.
70_Fastback: RAT ROD - 193x Ford / 1942 GMC Truck
- Thread starter 70_Fastback
- Start date
70_Fastback
Hell Bent for Speed
HA, I like it except for the camera!
70_Fastback
Hell Bent for Speed
Been doing a lot of work lately - but not so much on the pictures.
Here are a couple of preview pics of what I have been working on. Nothing is finish installed yet as everyting kind of goes together and I need to access one thing through another, etc, etc.
Couple of pics of things to come:
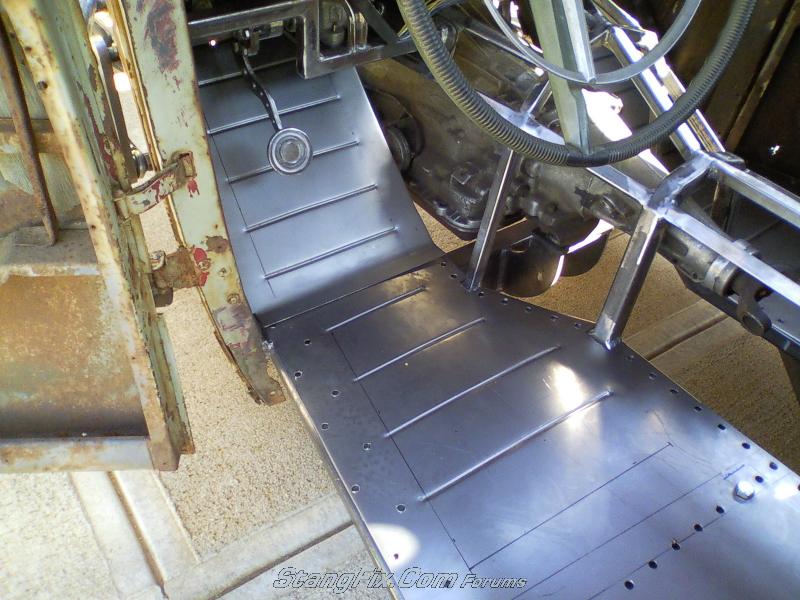
-------
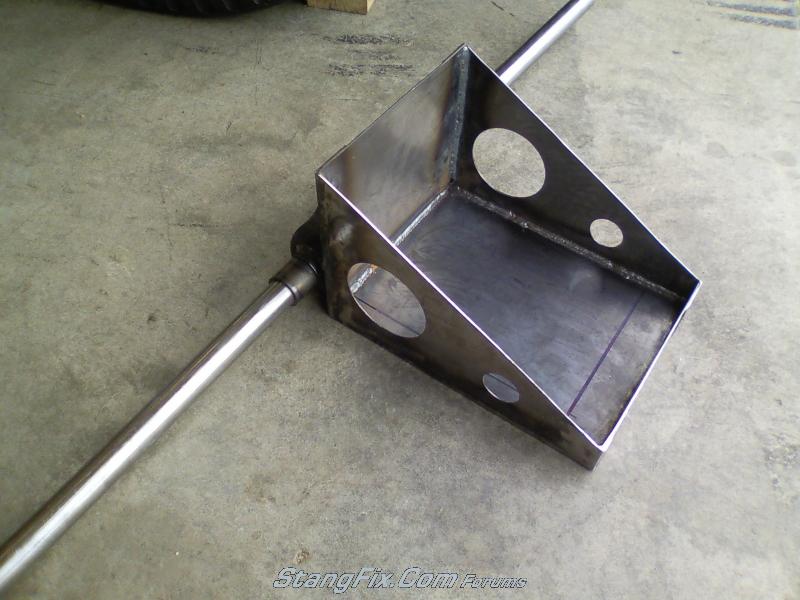

Here are a couple of preview pics of what I have been working on. Nothing is finish installed yet as everyting kind of goes together and I need to access one thing through another, etc, etc.
Couple of pics of things to come:

-------


O
opentrackerSteve
Guest
"70_Fastback" said:...A set of new 7" sealed beams for my headlight buckets [nb]I ALMOST walked away with about 60 boxes of new sealed beam headlights for $25 bucks...
You should be popping tri-Y headlights in there that run on the halogen H4 bulbs vice the sealed beams...
I like the attention to detail you're cooking into this vehicle.
tarafied1
Well-Known Member
me too but it sure is a lot of work just for the prototype... :roll"opentrackerSteve" said:I like the attention to detail you're cooking into this vehicle.
"tarafied1" said:me too but it sure is a lot of work just for the prototype... :roll
Dont you know the prototype gets all the work? That way he can bang out the next one for the poor schmuck in line! :shee
70_Fastback
Hell Bent for Speed
"tarafied1" said:me too but it sure is a lot of work just for the prototype... :roll
:bowdown
tarafied1
Well-Known Member
my prototype work is usually were I make something and then figure out I could have done way better a different way!"lethal289" said:Dont you know the prototype gets all the work? That way he can bang out the next one for the poor schmuck in line! :shee
Fast68back
Guest
We finally get a picture of one of his FUBARs......

Those holes are nowhere near the reference line he drew.... (he'll probably blame Bonnie or the boys)

Those holes are nowhere near the reference line he drew.... (he'll probably blame Bonnie or the boys)
70_Fastback
Hell Bent for Speed
That "reference" line was not for the holes Rick. The holes were all drilled from the backside so the burs would be up and the metal would lay flat when I cherry weld it. The reference lines for the holes are atually on the back.
That top line was for when I was orientating the seats & brackets.
Thanks.
That top line was for when I was orientating the seats & brackets.
Thanks.
Yeah, yeah, whatever. Where's the update? You're slacking."70_Fastback" said:That "reference" line was not for the holes Rick. The holes were all drilled from the backside so the burs would be up and the metal would lay flat when I cherry weld it. The reference lines for the holes are atually on the back.
That top line was for when I was orientating the seats & brackets.
Thanks.
70_Fastback
Hell Bent for Speed
I left the damn camera at the office Friday when I left, so I didn't have it all weekend. Just have some crappy cell phone pics.
I will upload a couple of those pics in a minute.
I will upload a couple of those pics in a minute.
Fst Blk
Well-Known Member
70_Fastback
Hell Bent for Speed
"67 Fastback" said:What is this?
Bill
This:
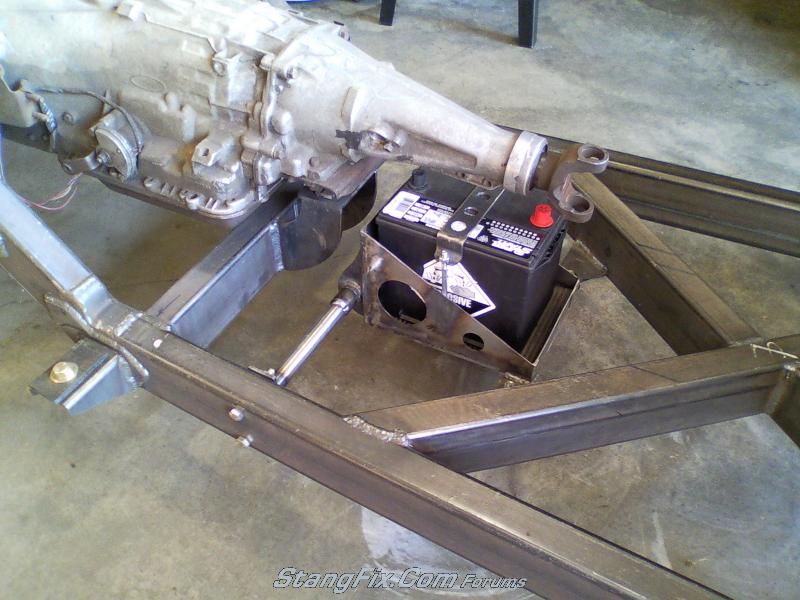
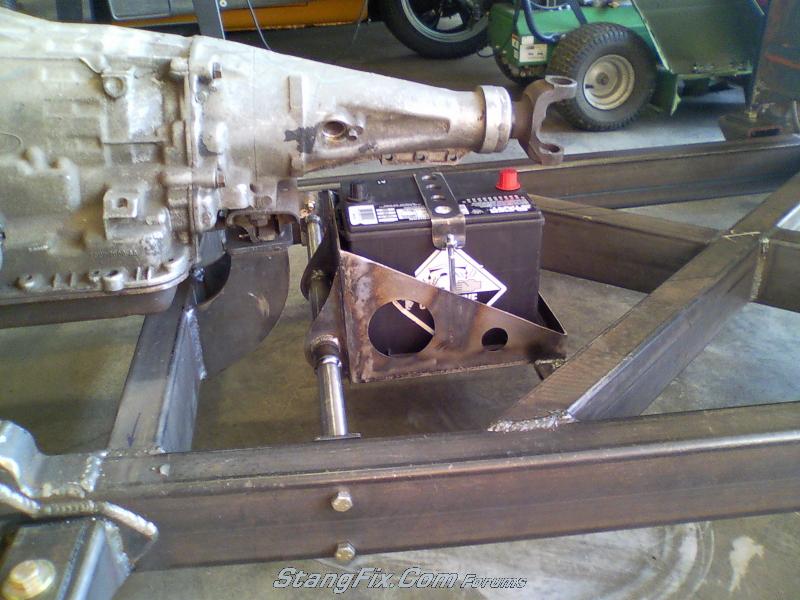
Also known as the pain in the arse. But I wanted the battery hidden, so it's hidden.
The entire box actualy hinges down by removing the two rear bolts with captive nuts. The bracket swings down and then you remove the 4 cross member bolts. Lower the battery box to ground and slide it out.
Though this all had to be accomplished with the front of the vehicle jacked up about 10 inches.
The battery has top & side posts - so I am installing some remote mount posts on the front of the lower cab front for any recharging and/or jumping emergencies.
I am also integrating access panels into the trans tunnel for easy connection/disconnection of the posts as well.
Not the easiest setup in the world by any means - but I want people to look at the truck and say "where is the _____?".
Call me a glutton.... :hs
70_Fastback
Hell Bent for Speed
Popped the cab back off and started on body work now too. Tackled the large rotted area in the back of the cab. I cut it out larger to get to some "better" metal and formed the initial patch panel.
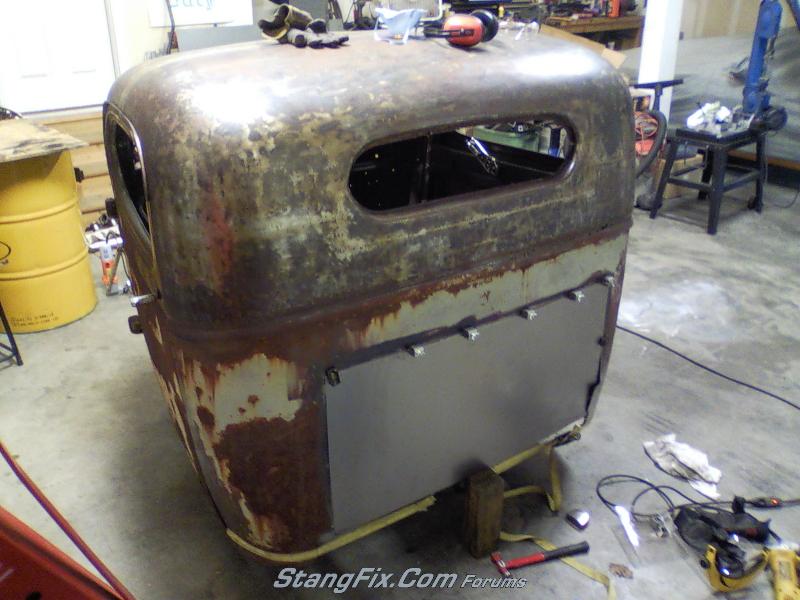
Rolled some beads into it for strength and welded in it and blended. I ran out of good flapper discs so that was roughly blended with a hard disc - yikes. I need to get some more flap discs and clean it up.
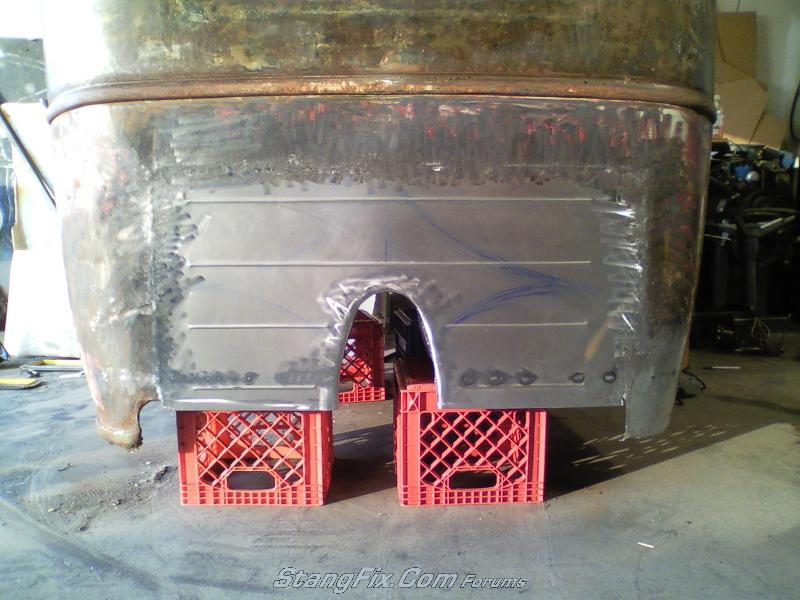
The bottom edge isn't finished yet either - the leading edge gets rolled up and tack welded to the cab frame structure to form a nice clean edge; basically how the drive shaft tunnel is formed. The sheet metal is rolled inside of the hoop and tack welded.
Appears I have a couple more dents to pop out.... LoL. Never noticed those until now!
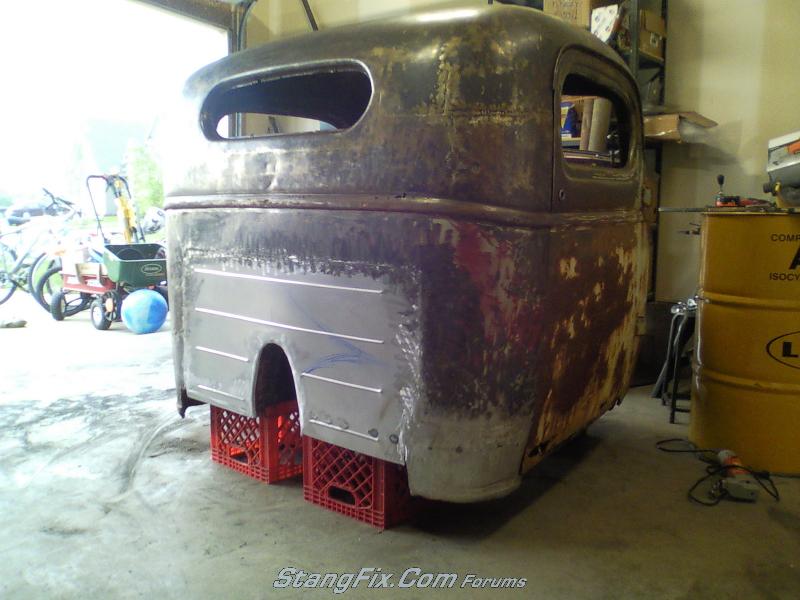
I also got the floors started & welded in place. They meet up with the cab corners and rear sheet metal and get welded together. I just need some smaller wire so I don't burn though.


Rolled some beads into it for strength and welded in it and blended. I ran out of good flapper discs so that was roughly blended with a hard disc - yikes. I need to get some more flap discs and clean it up.

The bottom edge isn't finished yet either - the leading edge gets rolled up and tack welded to the cab frame structure to form a nice clean edge; basically how the drive shaft tunnel is formed. The sheet metal is rolled inside of the hoop and tack welded.
Appears I have a couple more dents to pop out.... LoL. Never noticed those until now!

I also got the floors started & welded in place. They meet up with the cab corners and rear sheet metal and get welded together. I just need some smaller wire so I don't burn though.

Last edited by a moderator:
Glutton
Fast68back
Guest
"70_Fastback" said:That "reference" line was not for the holes Rick.
Whatever helps you sleep at night bub..... We dont want excuses, we want results....
70_Fastback
Hell Bent for Speed
That would be 2 xanax and a beer.
monkeystash
Active Member
I would have lost that bet; I thought it was the gas pedal for your club foot.


A
Anonymous
Guest
"monkeystash" said:I would have lost that bet; I thought it was the gas pedal for your club foot.
Bwaaaaa ha ha ha ha ha ha ha ha ha ha ha
