• Hello there guest and Welcome to The #1 Classic Mustang forum!
    To gain full access you must Register. Registration is free and it takes only a few moments to complete.
    Already a member? Login here then!

Johnny M - E-car build tread

"daveSanborn" said:
DSC01501.jpg


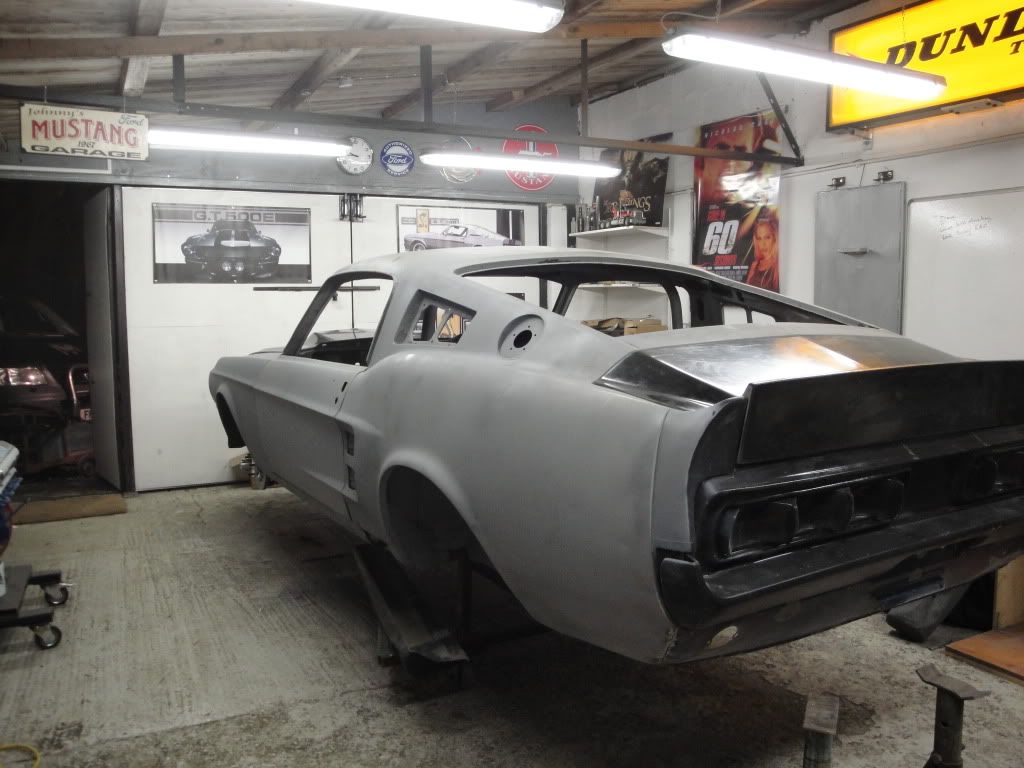
Is the deck lid not closed/down all of the way..... or is it "off" that much? Holy moly that's off a LOT!

Dave,
it is not closed but even when closed it is at least 1/2" off.....I am going to tape the weather stripping on tonight, closed it and give it a few days to settle before i start the FG work.
 
Last edited by a moderator:
It looks as if it would be close if the bottom of the trunk lined up with the bottom of the end caps, the top would be somewhat close. Can you adjust the catch/latch to draw the decklid all the way down?
 
"Fast68back" said:
It looks as if it would be close if the bottom of the trunk lined up with the bottom of the end caps, the top would be somewhat close. Can you adjust the catch/latch to draw the decklid all the way down?

I tried that but i loose the line at the sides of the trunk...
 
Car is looking great!


what did you do to the seat pans to lower them? I can't move mine back cuz the kids ride back there but I need to lower mine, my head is up in the headliner!
 
"tarafied1" said:
Car is looking great!


what did you do to the seat pans to lower them? I can't move mine back cuz the kids ride back there but I need to lower mine, my head is up in the headliner!

Yea, i did more or less what is in that article. Cut the lower lip off the base, remove the support from the underside, take 1.5-2" off the front/back of the base then weld the lip back on. Cut the support down and weld back in. Takes a little time but nothing too complicated. If you decide to move them back you will need to plug the floor pan holes and weld some bolts on the underside of the base to anchor your seat base.
 
Its been a slow few days waiting for an open slot with the media blasting guys.

I got some more parts ordered in the US as i have a crate coming over with work....which includes the bolt on spoiler from Mustangs to fear...I have decided to forget the FG trunk lid. I found an OE steel trunk lid in England for £35 (about $50) which is being collected this week.

Bought a new toy.....which should come in handy
DSC01549.jpg


The first batch of materials for the body work arrived in too.
DSC01548.jpg


She is heading off for media blasting tomorrow then FG work starts next week.
 
Last edited by a moderator:
I finally got her back from the Media Blasters. Cant wait to get stuck in. I have one coat of Etch primer on her. Will add a second coat and a coat of high build tomorrow.
DSC01580.jpg

DSC01581.jpg

DSC01582.jpg

DSC01583.jpg

DSC01586.jpg


And check this out....My car on a Rotisserie and a dolly at the same time......Has to be a first!!!!

DSC01579.jpg
 
Last edited by a moderator:
Not much to look at but got the last of the Etch Primer on and sprayed on a coat of 2k high build primer.......

DSC01594.jpg

DSC01596.jpg

DSC01590.jpg

DSC01591.jpg

DSC01593.jpg


I forgot to get the dark grey tinter so its a bit bright at the minute. i'll put a darker primer on after the bodywork is finished.

Not a bad effort for my first time with a spray gun.......... :vic
 
Last edited by a moderator:
Johnny, I just looked at this thread for the first time. Beautiful work on your car, and man, what a place you live at! Stunning!
 
Johnny,

Along the top edge of the rocker panel are 6-7 screw holes that are there to retain the aluminum door sill trim panel upon car re-assembly. Often these screw holes get "wallowed" out from normal use. NOW is the time to check these holes to make sure they are GTG.... NOT after the car's been painted and you're in the assembly phase.

Check all of the roof side rail trim mounting holes also.

Keep the progress pics coming!
 
Dave,
Thanks!!!! Its tips like this I REALLY need. I made the big mistake of buying a car that was already stripped down as my first mustang so i dont know things like this.....

More progress pics to follow very soon.
 
I've been super hetic with work. We've just bought a new drilling rig and it has zapped all my time.... :cry

Anyways,
I got most of the seam sealer onto the joints and cracks. I used a 3M 2k sprayable sealer but ended up having to brush it in to get a good seal.

DSC01692.jpg

DSC01690.jpg

DSC01693.jpg


AND......A crate arrived with some parts today.....what a way to start the weekend!!!!!!! :ecit :ecit :ecit :ecit :ecit :ecit :ecit :ecit
DSC01696.jpg

DSC01698.jpg


I hope to get seam sealer finished, spray the bedliner on the underside and get the interior and engine bay sprayed this weekend.

Thats all for now....
 
Last edited by a moderator:
I wont need my motor for another few months and I really really tried not to do this but my efforts to resist were useless.

DSC01699.jpg

DSC01704.jpg

DSC01702.jpg
 
Last edited by a moderator:
Back
Top