• Hello there guest and Welcome to The #1 Classic Mustang forum!
    To gain full access you must Register. Registration is free and it takes only a few moments to complete.
    Already a member? Login here then!

Kats Project

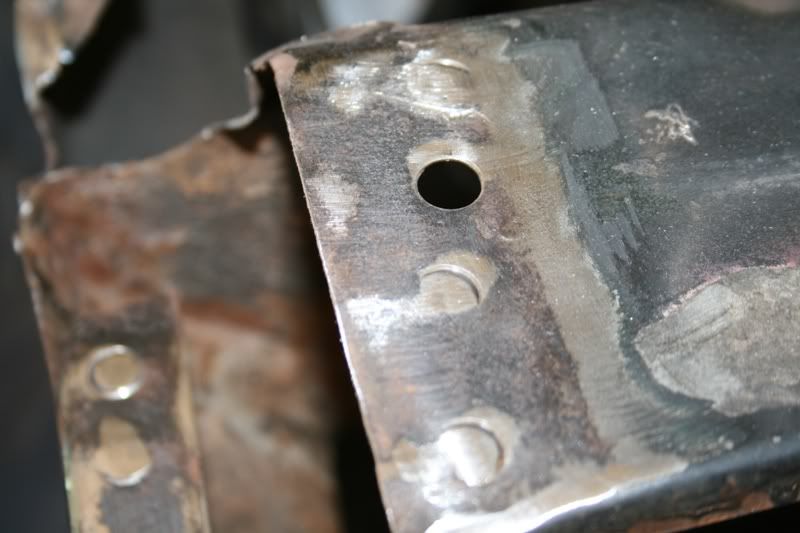
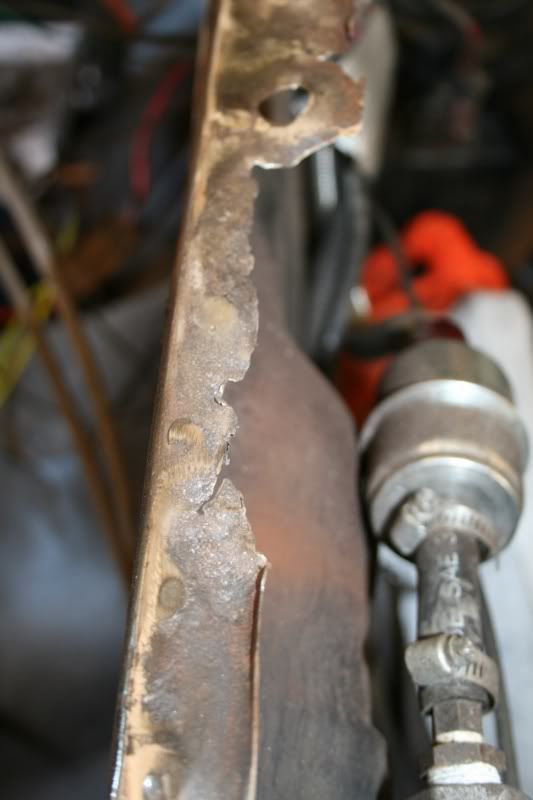
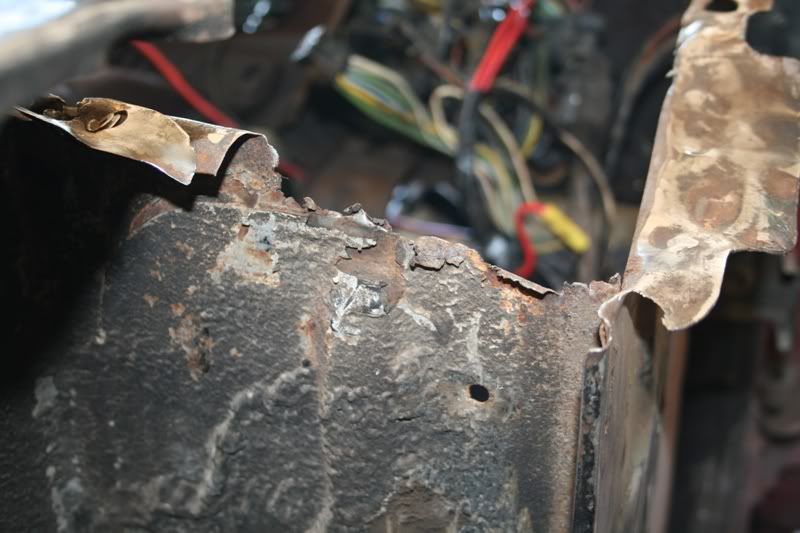
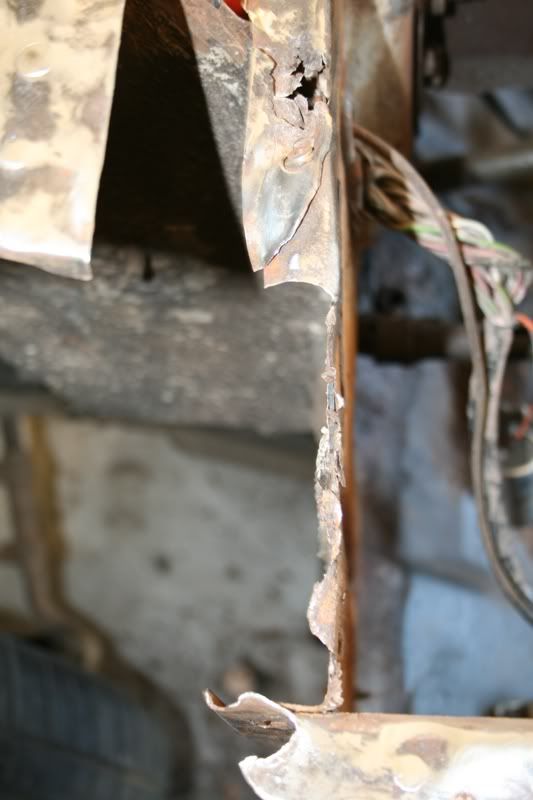
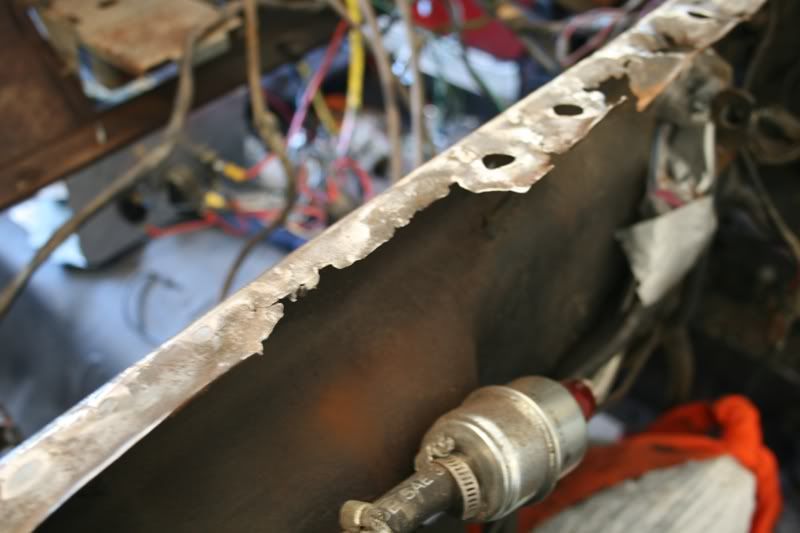
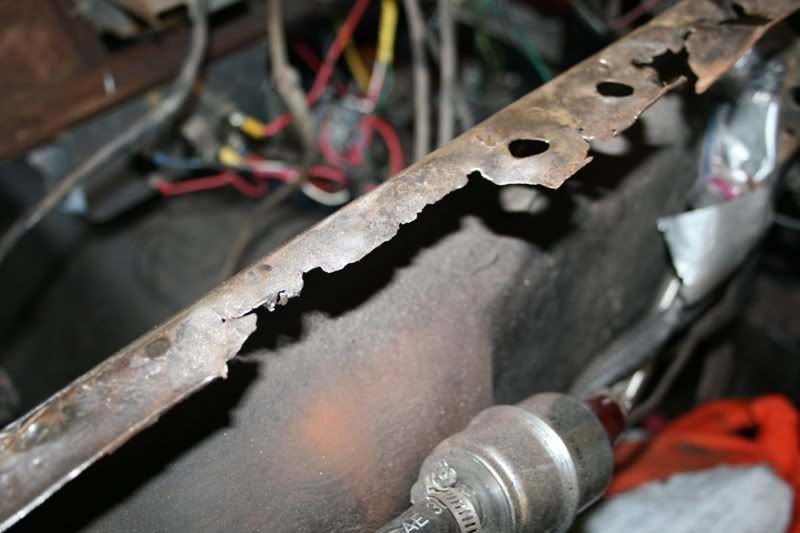
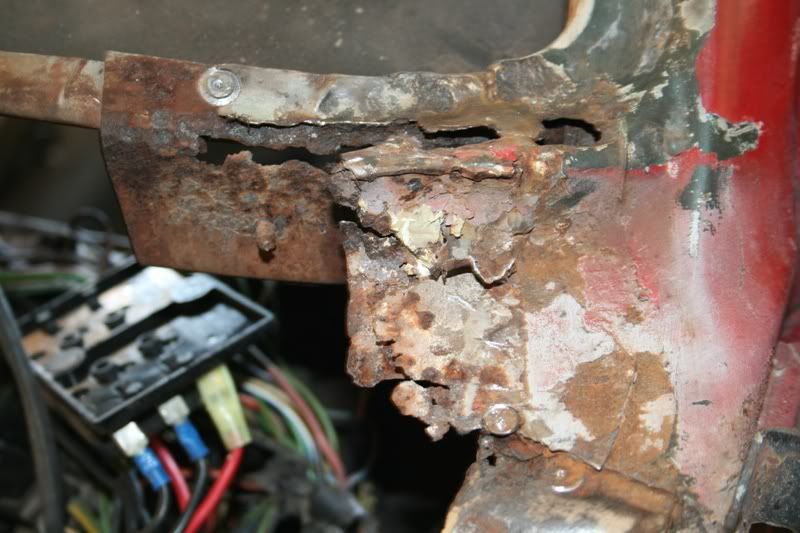
Kat there's also details (e.g. various lips and flat spots) on the front edge and that's why I'm doing a pattern to put them back in the patched area. I actually cut mine wider than necessary to put those in.

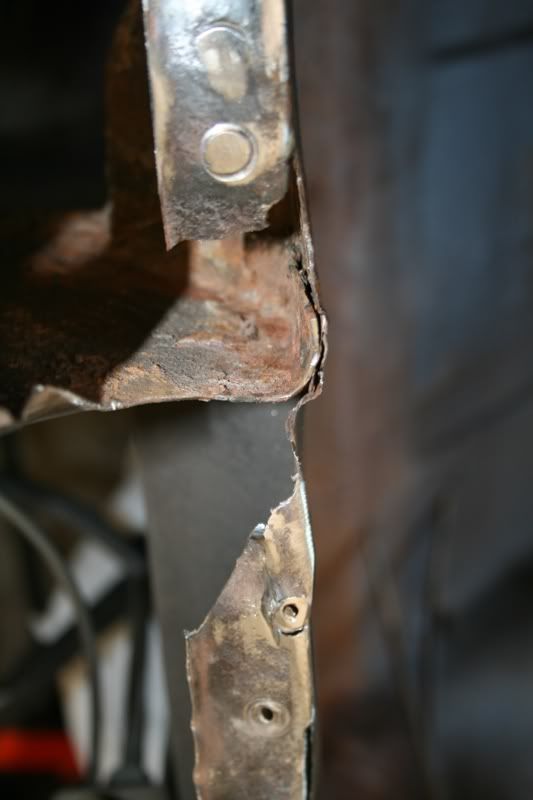
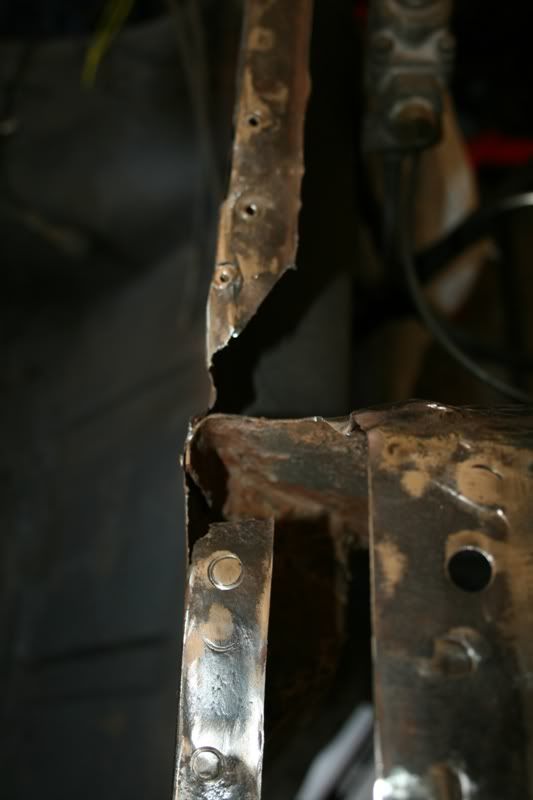
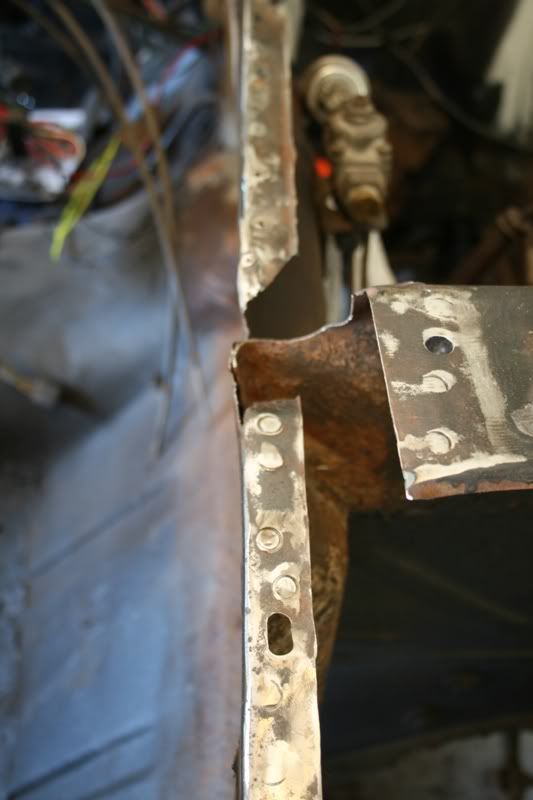
Regarding Pete's comments, if you look at the piece I made for my car you'll see all the vertical "black" lines. Those are actually the relief cuts in mine so it would bow properly. The color is simply heat marks in the steel from the cut off wheel. You can avoid the relief cuts if you have access to a shrinker/stretcher (something I wish I had and WILL eventually get!). By forming the bow with one of these, once it's formed it's there! I have to weld those cuts up to retain the shape.

BTW, thanks for the heads up on CJ's. I looked at your earlier threads to see any info about where you got yours. Keeping my fingers crossed!
 
This is going to require a lot of skills, tools and welding huh? None of which I have. LOL

Maybe I should just pay ya to make one for me. :confu :thu
 
Just can't tell by the photos how extensive the damage is, but I would begin the cleanup phase, sandblast, kill the rust, grind off the nubs left from drilling out the spot welds and reaccess. Looks like some of the lip may be salvageable, so just replacing the needed parts may be ok. Having extra sheetmetal around, leftover pieces would be nice. I looked at the price of a firewall, but at 189.oo bucks just for the part of it that you need, kind of Ouch! So back to improvising!. Take a few more photos pointing to what you believe is salvageable and what is not. I'm sure there are folks on this site that have extra sheetmetal just lying around. Or, buy an appropriate sheetmetal part that you can "massage", like a floor pan piece or use your imagination of what part you could manipulate into that place to "fix" it. Personally, I just see welding in short pieces of scrap metal to tie it all together(Won't be pretty, but structurally functional, and nothing that a lot of grinding wouldn't take care of) , then put on weld through primer and start the reassembly process. Sounds easy enough.

"Kats66Pny" said:
These are the areas along the lip of the firewall that concern me.

106zcqq.jpg


2upblo2.jpg


Any suggestions how to fix the lip without replacing the entire firewall? Maybe weld on a patch? Like this. :confu

DSC00304.jpg
 
Last edited by a moderator:
I would start with the flapper disc. No use taking off more metal than necessary. Use the courser items when needed.

Use the grinder on the leftover from the spot welds.
 
I think you'll be a little surprized just how tough those little left over nibs are when you go to grind them off! That's why that "other" spot weld cutter is so neat cause it takes that part out as the spot welds being drilled out. When I was replacing my floor pans, the side welds, I used my acetelyne torch and melted the nibs off easily vs grinding them off. Have to be careful of course with gas lines/vapor around(I did say of couse? lol) Got a watch when grinding on the little peckers~ it'll catch your grinding wheel and take a chunk out of it!

For the surface rust, phosphoric acid works pretty well(can be bought at ACE hardware in the "rust section" generally under various names,but the main content is PA), but nothing works as well as sandblasting. Just have to rig up like I did using the shop vac to catch the majority of the sand, otherwise it's an absolute mess! I would think a small attachment with the bristels, drill a hole for the tip of the blaster and that should cover a smaller area to blast vs. the larger attachment that I used.

Wear heavy duty gloves and do not breath what dust is conjoured up! BAD STUFF! Use the best respirator possible with plenty of fan force sucking or blowing out the nasty stuff!
 
Some better pictures of the damage. Got off most of the rust and grinded down the nubbins left. You can see some of them I cut a little too deep with the spot weld cutter. The firewall lip is warped as well, if you can't notice it in the pictures.

IMG_4599.jpg

IMG_4603.jpg

IMG_4597.jpg

IMG_4596.jpg

IMG_4595.jpg

IMG_4594.jpg

IMG_4593.jpg

IMG_4592.jpg

IMG_4587.jpg

IMG_4586.jpg

IMG_4585.jpg

IMG_4582.jpg


and I have to find a way to get this off the corners. Carefully take a cutting wheel and cut it out? :shrug

IMG_4601.jpg

IMG_4600.jpg
 
Last edited by a moderator:
I know everyone has a differant approch to repair work so this is just my 2cts worth.
I would cut along the top of the firewall near the lip and replace the entire lenght of it.
The fresh metal would make rewelding the cowl panel easier without the possiabltys of blow outs from the thin old metal and be stronger in the end.
Yes it is alittle more work now, But it may save some trouble later.
 
My 2 cents says to hold off with any further cleaning/cutting and such until the person who is actually going to be doing the repair work (welding) has a chance to see it and directs how they want it prepared. If that person is not an experienced Mustang guy it will help him to visualize what is needed to see the remnants intact. You start cutting off the lip and such and he may not have exact dimensions off which to fab and construct, for example. Could make the job harder (take longer/cost more) or worse, cause it to be fouled up.
 
Good work Kat! and great photos! Can tell a lot more of what's going on! :thu I'm going to rattle stuff off here~ no specific order, just stuff off the top of my head~

If you should start cutting the top lip off of the firewall to put a "new"piece , measure measure! You've got some thinking to do here! I'm mainly looking at the drivers windshield lower corner at this moment! We need the windshield to fit very well (of course), the rusty stuff of course needs to be surgically removed! I think I'd focus on this part for now~ the firewall doesn't concern me as much as the window areas!

* you may want to put the new cowl up to the hood to see how the curvature of the rear of the hood meets up with the new cowl. I'm new at this cowl stuff but a lot of common sense goes along way, plus thinking ahead. 1/4" off here winds up being an 1" off down the line!! So there will be many trials of putting the new cowl on(by vise grips or metal screws), putting the fenders on with a couple bolts, and then the hood~ it all has to capish! When the new cowl is welded to the "new" firewall, and the curve is off by a bit, it may look "off", but this may occur with different hoods as well! If you weld a piece of metal on top of the firewall, it would have to be the same level as the original or the cowl (of course) may be too high, so I think I'd try to salvage as much of the original firewall as possible, kind of like you showed us earlier by placing a piece of metal to "patch it".

Again, back to the windshield (drivers side), :hide of course a lot of that will be removed, and new metal "massaged" "beat" "manipulated" to match what was there, then welded into place. It looks like brazing went on there, probably from the beginning of your stangs existence, kind of a b---tch to weld over, or impossible unless brazing is done again. Brazing is kind of neat anyway in spots like that. I think just cutting it out will be the hardest part! Cuttoff wheel, pick a line, cut, make new piece, weld in.

Let's see what the others have to say~ :part

What's the plan for whomsoever's going to weld it into place?
 
What's the plan for whomsoever's going to weld it into place?

:shrug The plan was for me to take out the old, do the prep work and get it ready myself and have someone else do the welding. At this rate though and as much work as the stupid cowl needs, and rest of the car, I'm about to close the garage and forget about it for a while and just cruise in the Firebird. :roul
 
Kat, sometimes you have to close the garage doors~ your brain will continue to compute on your stang(and other stuff of course) even while you're away from it! The stang can take its toll on you~ It's hard ass labor! Take a break! This is a difficult part of your project!(Hell, they're all difficult! nothing is easy!).

There's a time when I just wanted to hang it up! especially when it came to the bodywork/prep/primining/blocksanding/painting!omg! but I gave it a little time and got back after it! You will too! :thu
 
Kat,

If you already had a guy in mind to do the work, get him over to look at it and see what he says. If it were me you called, I'd want to take it from this point anyway for the reasoning I gave in my earlier post.
 
I think it's about time to have one of those StangFix repair parties for Gertrude. :part

I think a nice venti iced caramel macchiato from Starbucks will help soothe my irritation with this cowl vent stuff. :thu
 
Kat the firewall lip actually doesn't look too bad to repair. Yeah, the top (flat) area looks rough, but as previously stated You can put a new top edge on. I could only see one small area in your pics that went into the vertical area. Unfortunately, mine is into the vertical area almost all the way across, hence the reason I had to go a little more extreme. As Dne stated the areas around the window corners are a concern (I got lucky there). Those brass corner brazes area a total B$tch to get out nicely aren't they?! I know it's a little late now, but I use a 40 grit roloc on my air grinder to thin them, then use cut off wheel and go straight into the seam (being careful not to go into the underlying metal). It stills takes some doing to get them up. Last, IMHO, your better choice for grinding on sheet metal is the flap disks. Unless it's 16ga or thicker metal, you'll quickly overheat and/or burn through anything thinner with the hard grinding wheel. Keep up the good work!
 
Would using a flux welder work for welding in patches? My neighbor across the street said he had a flux core welder and if we needed it (or any other tools), just ask.
 
Copied some of the problems......the third one would be a hassle to me......

Melted Contact Tip – happens when the electrode actually contacts the base metal, thereby fusing the two
Irregular wire feed – typically a mechanical problem
Porosity – the gases (specifically those from the flux-core) don’t escape the welded area before the metal hardens, leaving holes in the welded metal
More costly filler material/wire as compared to GMAW
 
"Kats66Pny" said:
Would using a flux welder work for welding in patches? My neighbor across the street said he had a flux core welder and if we needed it (or any other tools), just ask.
Kat,

Sounds like he probably has a cheap mig set-up. Depending on a lot of variables it could probably do some of the work you have in mind...once you've done a fair amount of practicing. Flux welding is not nearly as nice as gas, however. Lots of splatter and ugly welds in comparison to using shielding gas.
 
Back
Top