That is a super tight fit in your 66, Tom.
Navigation
Install the app
How to install the app on iOS
Follow along with the video below to see how to install our site as a web app on your home screen.
Note: This feature may not be available in some browsers.
More options
-
Hello there guest and Welcome to The #1 Classic Mustang forum!
To gain full access you must Register. Registration is free and it takes only a few moments to complete.
Already a member? Login here then!
You are using an out of date browser. It may not display this or other websites correctly.
You should upgrade or use an alternative browser.
You should upgrade or use an alternative browser.
Whatr are you doing to the Mustang today?
- Thread starter Boom
- Start date
BLAKE
Member
Explorer rear end has been chopped and welded. Working today on axles, bearings and seals.
For a relatively simple swap, this thing has taken more work, time and money than anyone ever lets on.
For a relatively simple swap, this thing has taken more work, time and money than anyone ever lets on.
Tubbster1966
New Member
Drilled and installed the O2 sensor. It's clamped on for now till I go to the exhaust shop to get a bung welded in.
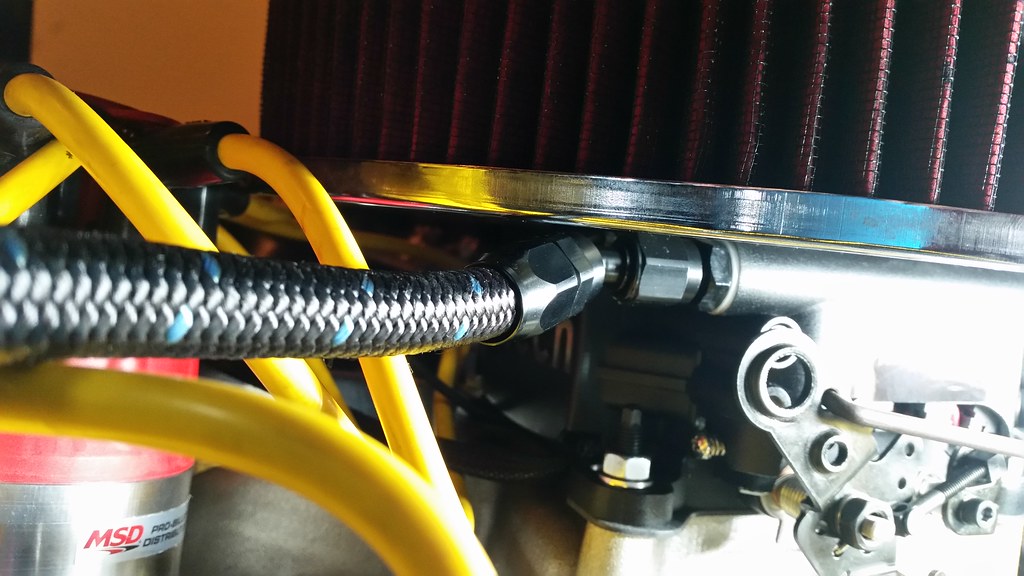
Ran the "vent" line for the FCC. Ran out of adel clamps. I need 3 more! So close to staring her up!
This is all for fuel injection for those that don't know already.
Sent from my iPhone using Tapatalk
Ran the "vent" line for the FCC. Ran out of adel clamps. I need 3 more! So close to staring her up!
This is all for fuel injection for those that don't know already.
Sent from my iPhone using Tapatalk
tarafied1
Well-Known Member
I've never done that swap but it does look like a is involved.Explorer rear end has been chopped and welded. Working today on axles, bearings and seals.
For a relatively simple swap, this thing has taken more work, time and money than anyone ever lets on.
BLAKE
Member
I've never done that swap but it does look like a is involved.
Man, it really has been. Everyone acts like it's clicking Lego together, but it's been a pretty long road and it still isn't done.
I'm considering working up a thread about the untold story of what it takes to get one of these things under an old mustang, totaling all of the things you have to cut off, weld on, press in, bolt on and the expense involved. It's so tempting when the whole rear can be had for +/- $120, but after all the work and parts, I'll probably have well over $500 in it before I'm done. Still a bargain for what you get but not nearly as cheap and easy as it sounds. Not to mention the question mark involved in getting the E-brake to work. That'll probably be kind of fun though. We'll see.
tarafied1
Well-Known Member
that would be good. I'd enjoy seeing it. I have always heard it wasn't too hard.
I think you hit the nail on the head with it being a bargain at around $500. It's like anything else, if you are willing to make up the cost of buying something ready to go with your own labor. In this case, you are saving a big chunk of cash for all the troubles.Man, it really has been. Everyone acts like it's clicking Lego together, but it's been a pretty long road and it still isn't done.
I'm considering working up a thread about the untold story of what it takes to get one of these things under an old mustang, totaling all of the things you have to cut off, weld on, press in, bolt on and the expense involved. It's so tempting when the whole rear can be had for +/- $120, but after all the work and parts, I'll probably have well over $500 in it before I'm done. Still a bargain for what you get but not nearly as cheap and easy as it sounds. Not to mention the question mark involved in getting the E-brake to work. That'll probably be kind of fun though. We'll see.
68Hidalgo
New Member
Not to mention the question mark involved in getting the E-brake to work. That'll probably be kind of fun though. We'll see.
The issues I am having with my E-Brake using the explorer rear is generating enough clamping force. The explorer setup requires more 'throw' than our mustangs did. So, you adjust the system to have the E-brake shoes just rubbing and then you still do not have enough movement with the E-brake handle out all the way. I plan to change the location where the rear cables hook up to the pivot.
Anyways, here is how I hooked the two systems together...
I used a combination of the explorer 8.8 cable assemblies along with the 68 cables. Wire rope clamps were used to tie the two together.
I took the ends(that fit into the body) off the original 68 sheathings and the explorer sheathings fit exactly in to them.
Peter
BLAKE
Member
Thanks Hidalgo. I'll keep that in mind. Some of the challenge is that me and a friend are doing this at the same time and helping each other out. His is a stock E-brake and mine has a fox body handle grafted onto the tunnel, so we're going to have to solve this problem twice.
Well said. The headache is part of the fun and what keeps it affordable. My whole build has been that way which has been quite rewarding.
I think you hit the nail on the head with it being a bargain at around $500. It's like anything else, if you are willing to make up the cost of buying something ready to go with your own labor. In this case, you are saving a big chunk of cash for all the troubles.
Well said. The headache is part of the fun and what keeps it affordable. My whole build has been that way which has been quite rewarding.
Tubbster1966
New Member

Gave her an actual wash, with water!
Oh, also fired her up the first time with the FITech!
Bone cold and started right away. I can tell she needs to be driven so the system can learn but it seems to run great!
Sent from my iPhone using Tapatalk
Looks nice. The Fitech is really nice to drive once its finished learning.
Tubbster1966
New Member
Looks nice. The Fitech is really nice to drive once its finished learning.
The only thing I gotta figure out now is the stiff throttle. It's either idle or half throttle. How do you have your throttle linkage setup for yours? Pretty sure I need to move my throttle arm to the top hole for the linkage on the throttle body
Sent from my iPhone using Tapatalk
The only thing I gotta figure out now is the stiff throttle. It's either idle or half throttle. How do you have your throttle linkage setup for yours? Pretty sure I need to move my throttle arm to the top hole for the linkage on the throttle body
Sent from my iPhone using Tapatalk
Don't laugh, I'm still using the stock linkage. The fastback will prolly get a nice Lokar cable set-up.
 20160324_205101 by Brett, on Flickr
Tonight I will be reassembling everything I put together over the weekend only to have to take apart because of a faulty new part. Hopefully, it will take a total of only three days to get a days worth of work completed now.  Word of advice which I typically follow but failed to this time. Test EVERY part before you install it. A bad turn signal switch cost me dearly. It's not like I'm in a time-crunch or anything!
Word of advice which I typically follow but failed to this time. Test EVERY part before you install it. A bad turn signal switch cost me dearly. It's not like I'm in a time-crunch or anything!Tonight I will be reassembling everything I put together over the weekend only to have to take apart because of a faulty new part. Hopefully, it will take a total of only three days to get a days worth of work completed now.
Frickn hilarious.
Loser
janschutz
Corn Hauler
Last week while torquing the lug nuts, I stripped out the threads on a nut. This is the third one I have done in recent memory. So I bought a full set of lug nuts Friday to replace the 50 year old ones I have. That is tonight's job along with pulling the engine bay wiring harness.
Installed another turn switch and started putting everything back together. Still have strange issues with the turn signals no doubt due to the change to LEDs. That'll be tomorrow nights frustration. Might need to put diodes in a couple lines. Not quite sure yet what is going on but every other electrical circuit is up and functioning properly so happy for tonight.
And I win! Electrical systems all done and functioning as intended. LED turn signal solution still has me scratching my head. I figured I was dealing with either a polarity issue or even unintended voltage leakage but never expected the solution I found. I had to wire the 3 pin flasher relay wrong to make the system work. Specifically, positive to the ground pin and ground to the positive. Obvious polarity deal but can't explain unless the LED "bulbs" are the type to require specific polarity. They only fit into the sockets one way and everything was wired as instructed (Mustang Project kit bought 7 or so years ago!). Nothing is EVER easy.
chaser012001
66 408w, TKO600 coupe...in progress
Some filler work, then epoxy over the filler, repairing some rust on the upper cowl, re-install the upper cowl since I'm done repairing the lower cowl, then panel fitting.
Oh...and blocking the current epoxy to address any low spots before the 2k blocking sessions in a few weeks.
Thats more like...what I'm I doing from today until next Wednesday...
Oh...and blocking the current epoxy to address any low spots before the 2k blocking sessions in a few weeks.
Thats more like...what I'm I doing from today until next Wednesday...
Last edited:
LED need to be inserted correctly. just try flipping them 180 for polarity. Just a suggestion.