Navigation
Install the app
How to install the app on iOS
Follow along with the video below to see how to install our site as a web app on your home screen.
Note: This feature may not be available in some browsers.
More options
-
Hello there guest and Welcome to The #1 Classic Mustang forum!
To gain full access you must Register. Registration is free and it takes only a few moments to complete.
Already a member? Login here then!
You are using an out of date browser. It may not display this or other websites correctly.
You should upgrade or use an alternative browser.
You should upgrade or use an alternative browser.
65 FB Scratch Build
- Thread starter 65-408
- Start date
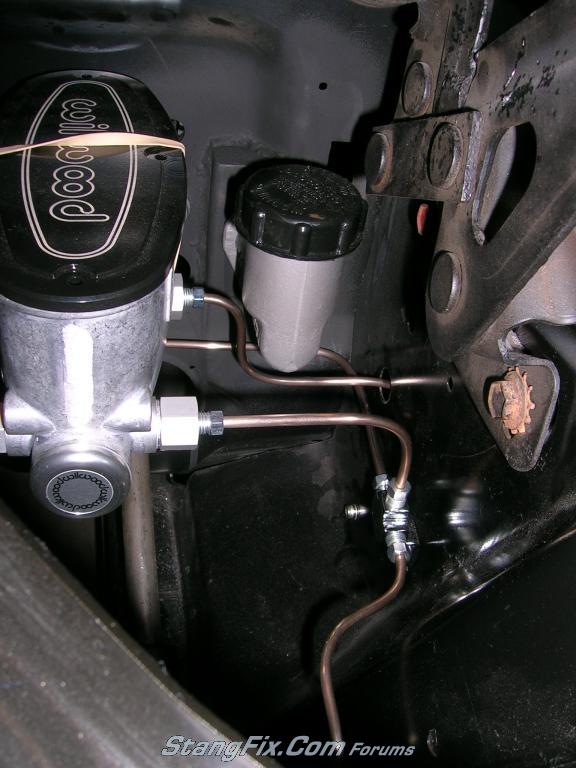
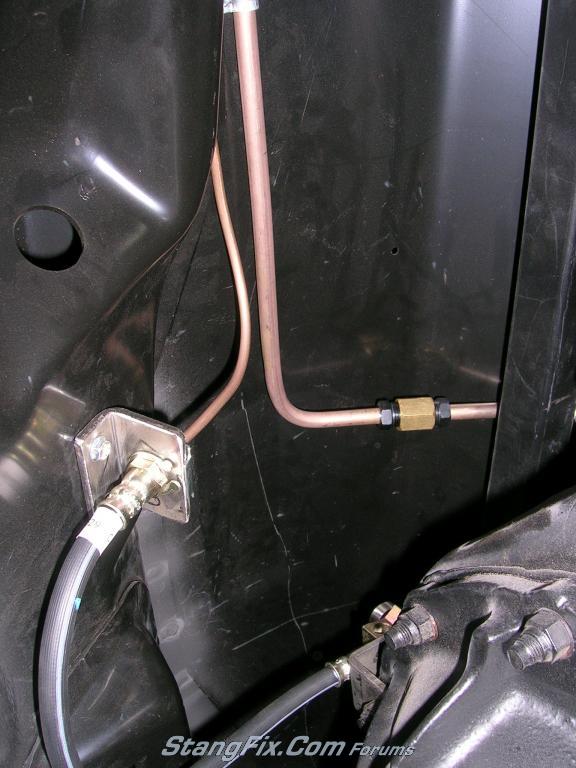
Brake lines next. I considered buying a prebent set, but I have changed enough (front and rear disc, Wilwood dual master, etc) and I want to change the routing, so I figured I would try bending my own. I bought this line from AutoZone called NiCopp and it is very easy to bend and flare, will never rust (nickel, copper) and can be polished bright with steel wool. it is $44 for a 25' coil and I had no problems straightening it out.
I had a hard time finding a simple Tee (to split the front lines) with a bracket, this one is a Harley part (PN 45517) and it worked out well. I went straight out the side with the rear line so I could run it through the torque box and up the rocker (to get it out of the tunnel)...
So far so good, still need to figure out where to put the proportioning valve in the rear line...
Last edited by a moderator:
Man thats gonna be a sweet ride! On your last pic, any concerns with stones coming off your tire? kip
One thing I will point out is that you did not put any "flex" capability in your lines from the master to the body mounting points. Those "curly Q's" you see on other cars where the lines attach to the master cylinders are there for a reason. They act as "springs" that allow the lines to flex without working against the fittings and such. You should really consider going back and modifying your lines in this regard.
70_Fastback
Hell Bent for Speed
But the Master is fixed to the same structural elements as the aprons, frame rails, etc. Why would the master move any more or less than the adjacent components. If that statement was true, wouldn't he need curly Q's at the 90 from the firewall to the passenger side apron as well?
There aren't any curly Q's in the fuel line and it fastens to the same points as the brake lines.
I'm not argueing your point, just wanting to expand on this issue some more... for my own personal use.
Secondary, on my rat, since the master cylinder is under the dash and I need to get the brake lines outside of the cab, I am thinking of doing braided flex lines from the master cylinder to the trans tunnel - extending fittings through the sheet metal and then coupling to rigid line at that point.
There are all kinds of motion/flex involved. Why do you think they put export braces on our cars? There is more than enough movement happening between the firewall and apron to stress crack a line. If very rigidly mounted, even a hard stomp on brake can cause enough deflection int he firewall to cause issue."70_Fastback" said:But the Master is fixed to the same structural elements as the aprons, frame rails, etc. Why would the master move any more or less than the adjacent components. If that statement was true, wouldn't he need curly Q's at the 90 from the firewall to the passenger side apron as well?
There aren't any curly Q's in the fuel line and it fastens to the same points as the brake lines.
I'm not argueing your point, just wanting to expand on this issue some more... for my own personal use.
Secondary, on my rat, since the master cylinder is under the dash and I need to get the brake lines outside of the cab, I am thinking of doing braided flex lines from the master cylinder to the trans tunnel - extending fittings through the sheet metal and then coupling to rigid line at that point.
I did all kinds of reading on the subject just recently in preparation for doing the lines on my car. I never knew why the "pig-tails" either. Another really simple reason is ease of installation. Gives you the flex to make it easier.
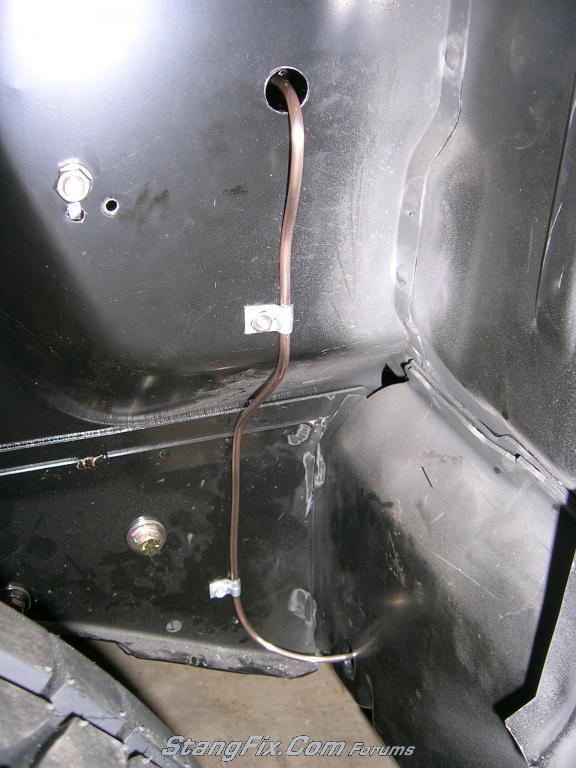
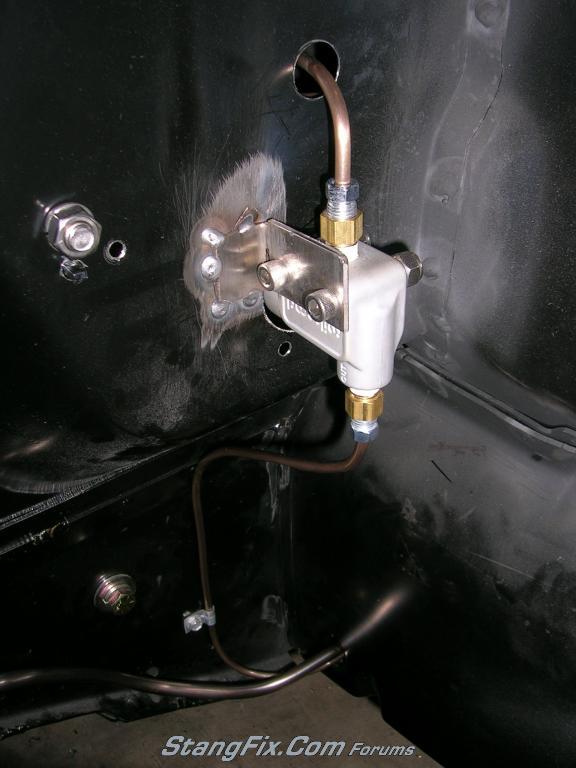
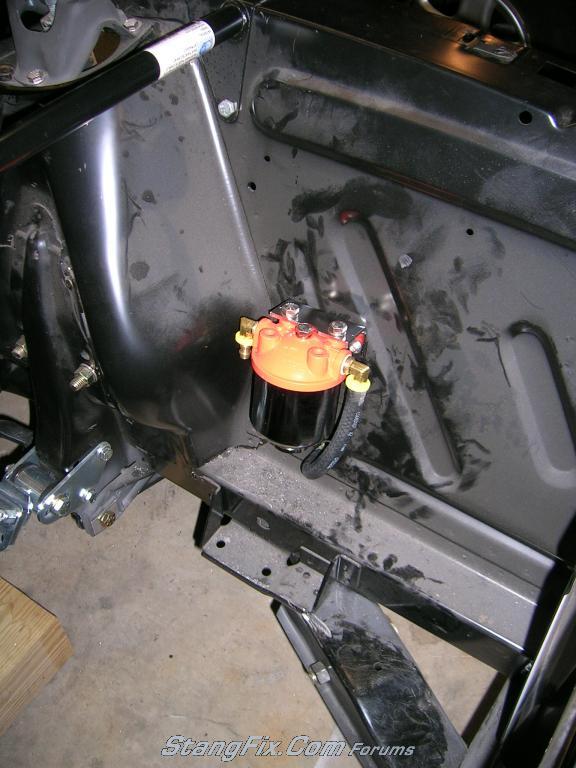
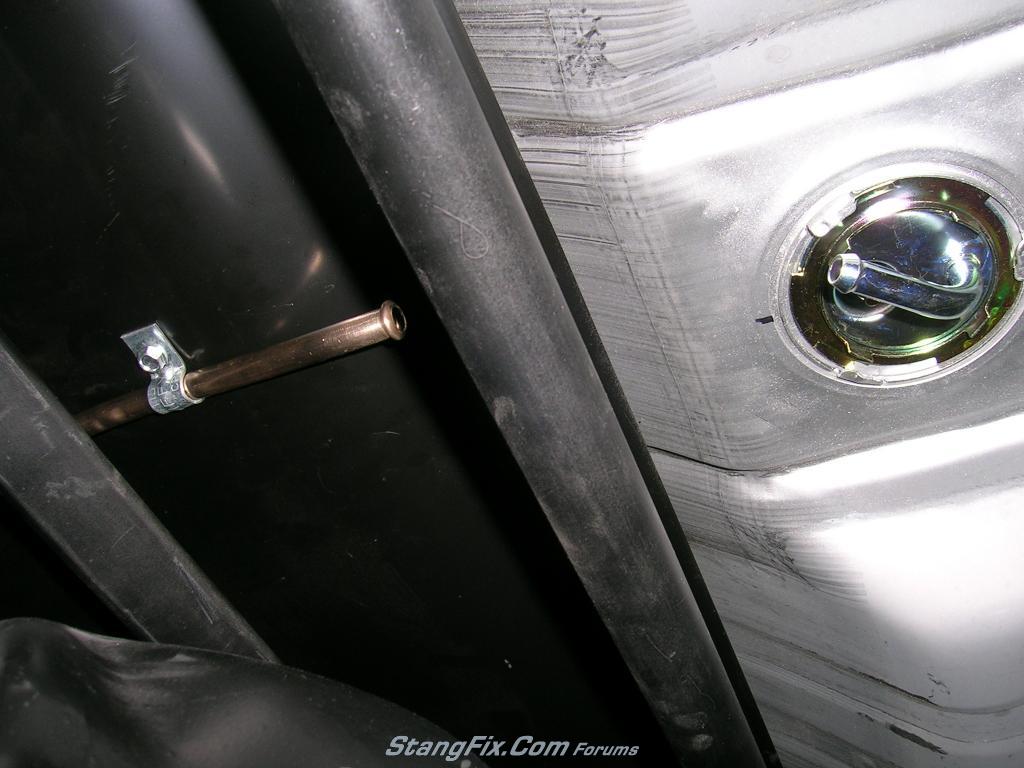
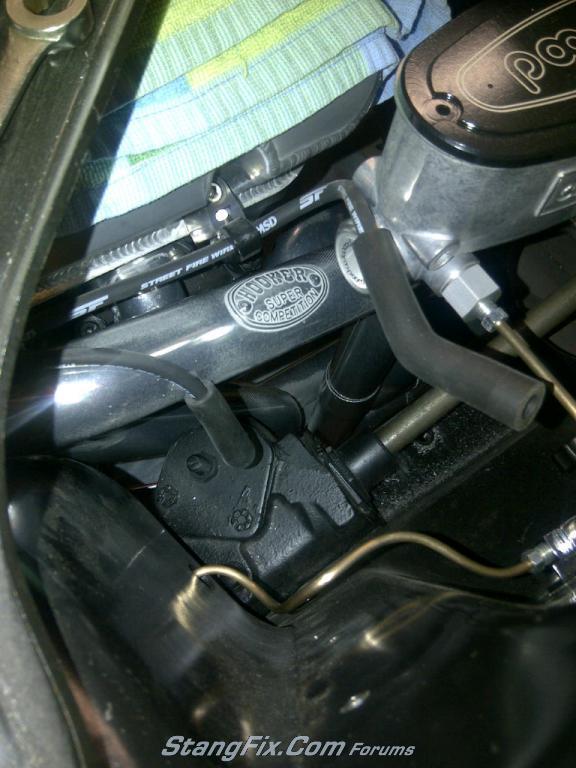
Cut in the rear proportioning valve and poked it thru under the hood hinge so the knob is accessible:

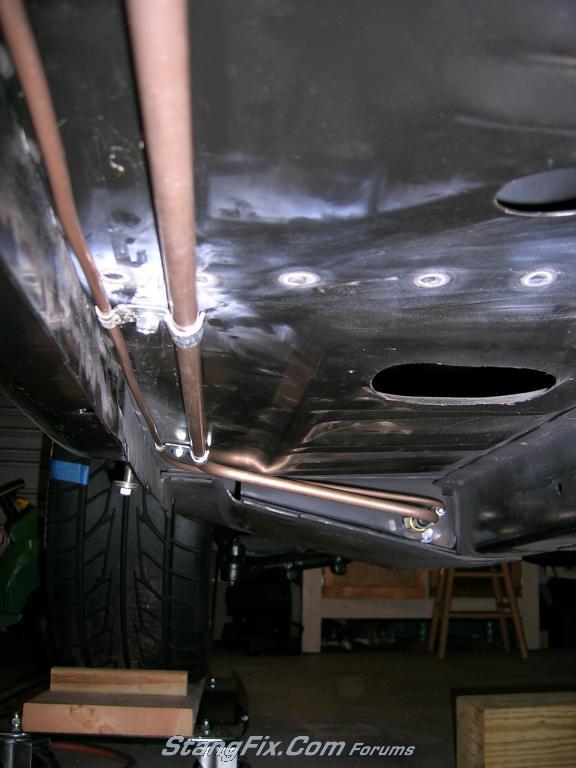
Also ran the front part of the fuel line, starting at this fram fuel filter. This line will also go thru the front torque box and down the rocker:


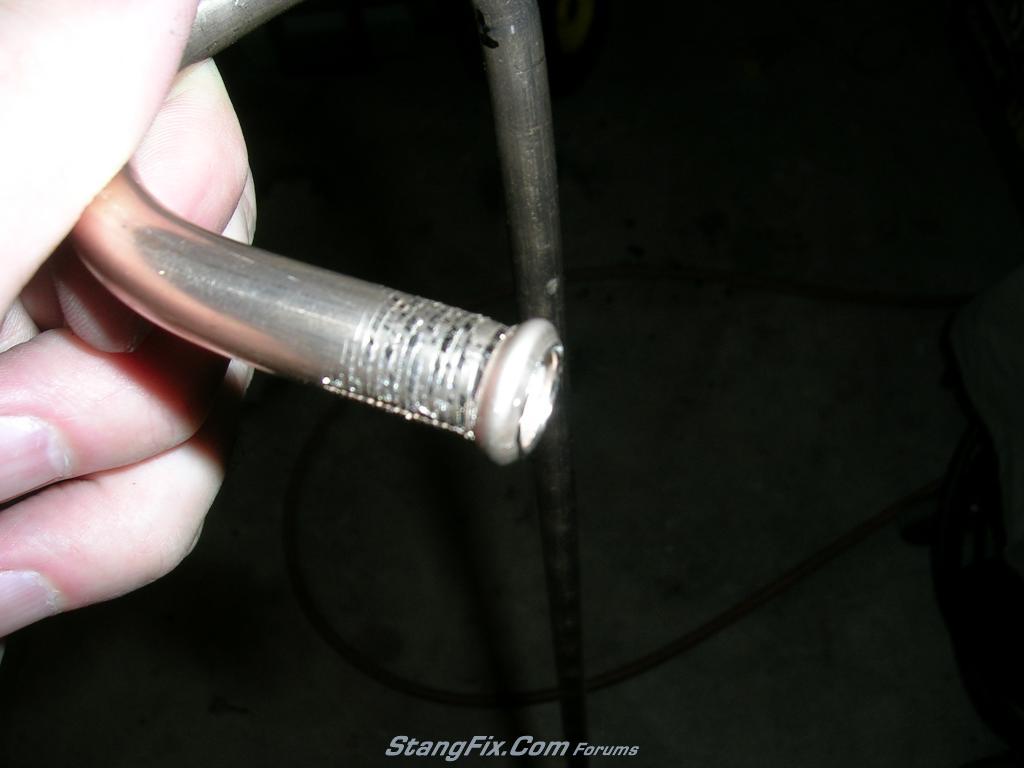
The fuel line is the same stuff (NiCopp) from autozone, but a bit harder to work with due to the diameter. In case anyone doesn't know, you can create a hose bubble on a hard line, by only perfroming the 1st step in a double flare operation...

Also ran the front part of the fuel line, starting at this fram fuel filter. This line will also go thru the front torque box and down the rocker:
The fuel line is the same stuff (NiCopp) from autozone, but a bit harder to work with due to the diameter. In case anyone doesn't know, you can create a hose bubble on a hard line, by only perfroming the 1st step in a double flare operation...
Last edited by a moderator:
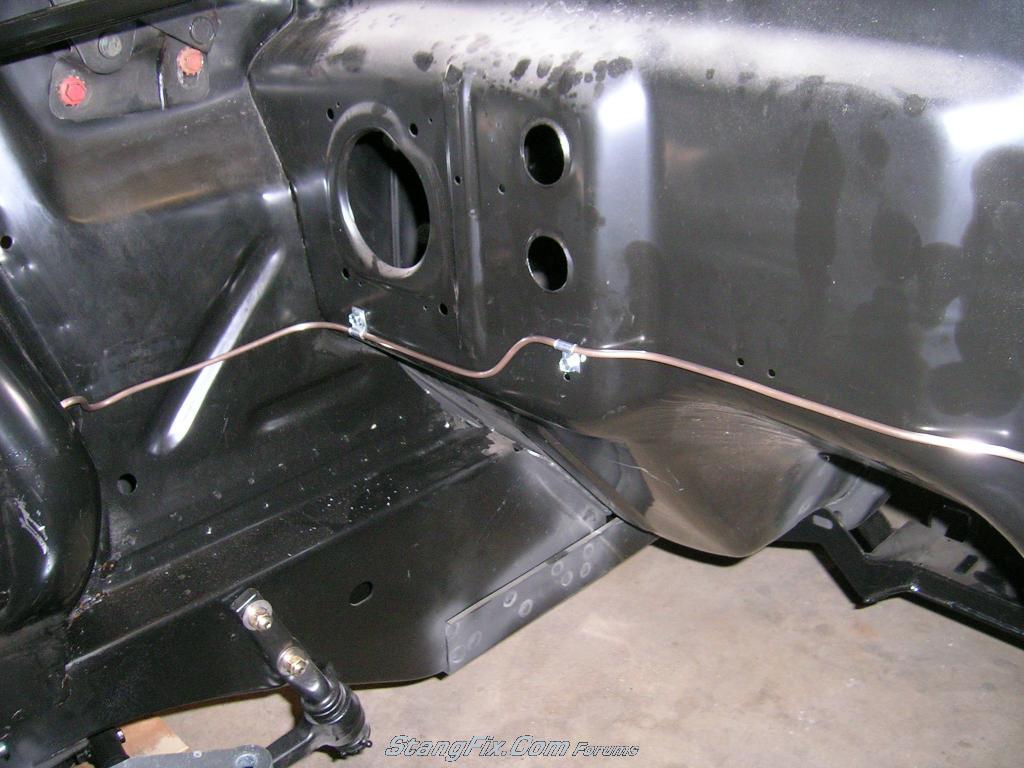
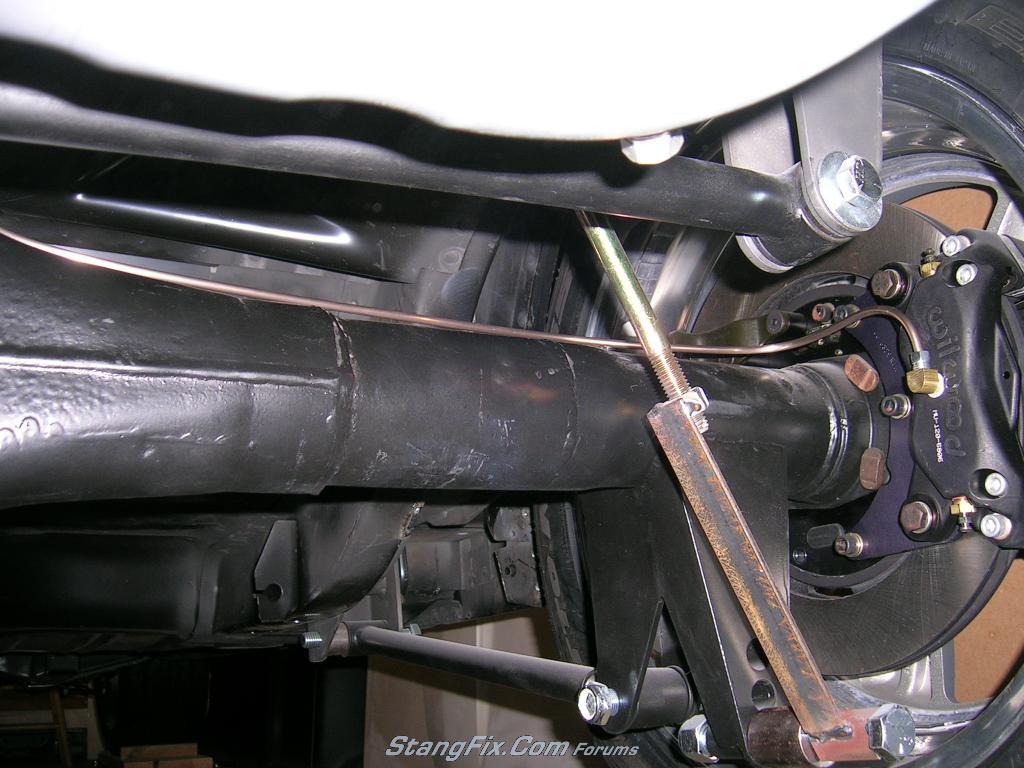
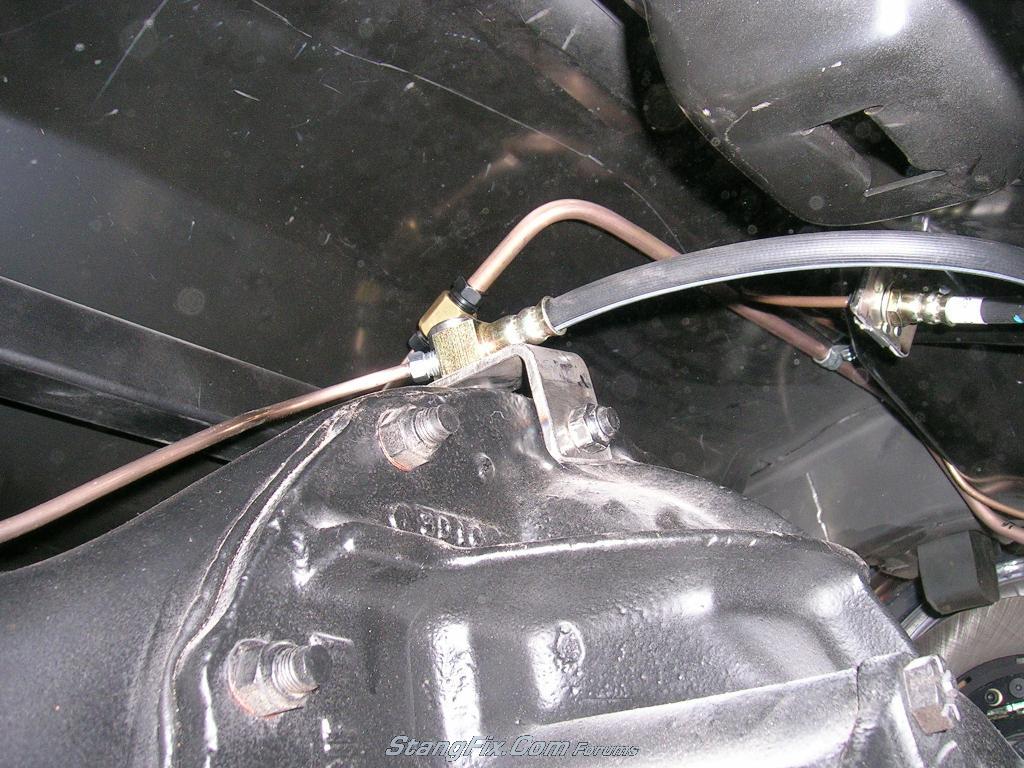
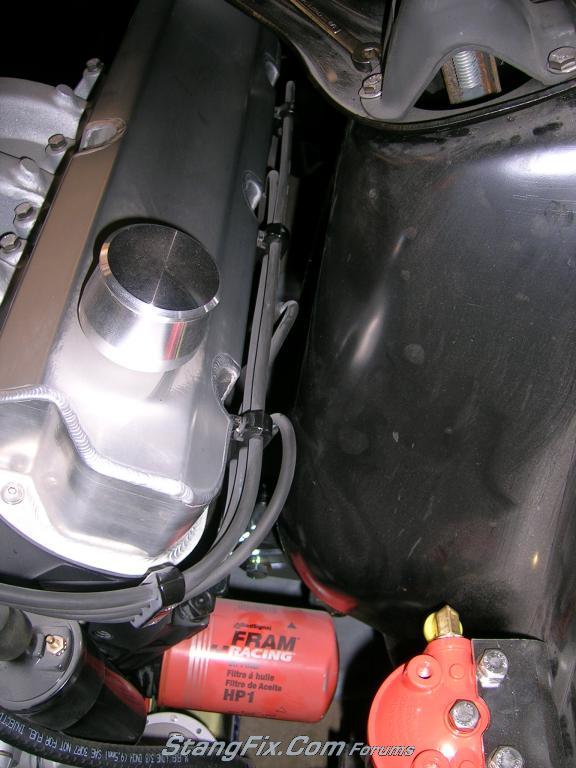
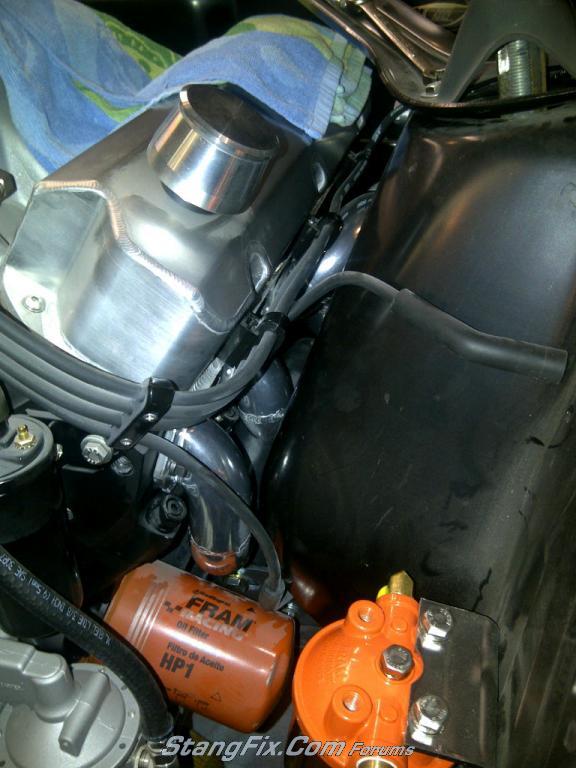
Brake and fuel lines are done, here are some pics of the way I ran them (down the rocker):

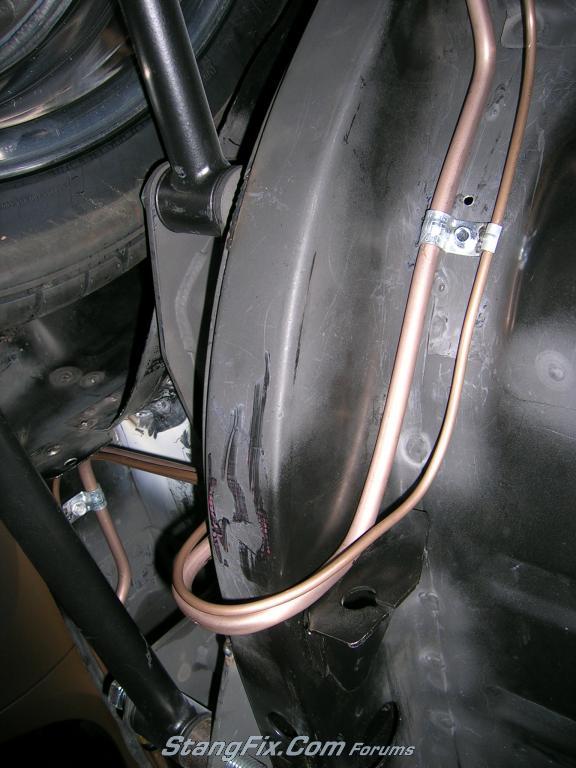
I dont love this (crossing over the rear rail), but this was teh best option with the 4-link:
Made a couple brackets for the rear flex line:
Fuel line drops down about 6" from the pick-up:
Hard Lines to the rear calipers:
I dont love this (crossing over the rear rail), but this was teh best option with the 4-link:
Made a couple brackets for the rear flex line:
Fuel line drops down about 6" from the pick-up:
Hard Lines to the rear calipers:
Last edited by a moderator:
Fast68back
Guest
Is it my eyes, the angle or the flash that makes the fuel line look almost flat? What is that flatbar stock that's sitting where the springs should go, looks like you have some in the rear as well?
"Horseplay" said:Instead of bending the lines down and around the frame rail, you could use whats called a "through-frame line fitting". This is how I will be doing mine where necessary.
Thanks, I like that... do you have a source?
I'm sure they are available lots of places but I know Speedway Motors has some.
70_Fastback
Hell Bent for Speed
Yep, 24 bucks at speedway. I just received mine, for the rat, yesterday.
AtlantaSteve
Active Member
Umm...I hadn't noticed this thread until this weekend and just caught up and...umm...
HOLY $#1+!! I've never seen a build so dramatic! When you got the roof cut off, that's when my jaw hit the floor. You saved that car, no doubt!
You sir, are da MAN!!
:kneel
HOLY $#1+!! I've never seen a build so dramatic! When you got the roof cut off, that's when my jaw hit the floor. You saved that car, no doubt!
You sir, are da MAN!!
:kneel
Thanks, but in alot of ways we did it the easy way, start with all new. It is much more difficult and time consuming to cut in one piece at a time, while trying to save and reuse. But I guess each method has its demons. For example, nothing on mine (due to the heavy use of repro parts) fit just right without alot of tweeking. And I haven't even got to the fussy stuff like window trim, etc. But I have learned one thing through this process: anything can be made to work...
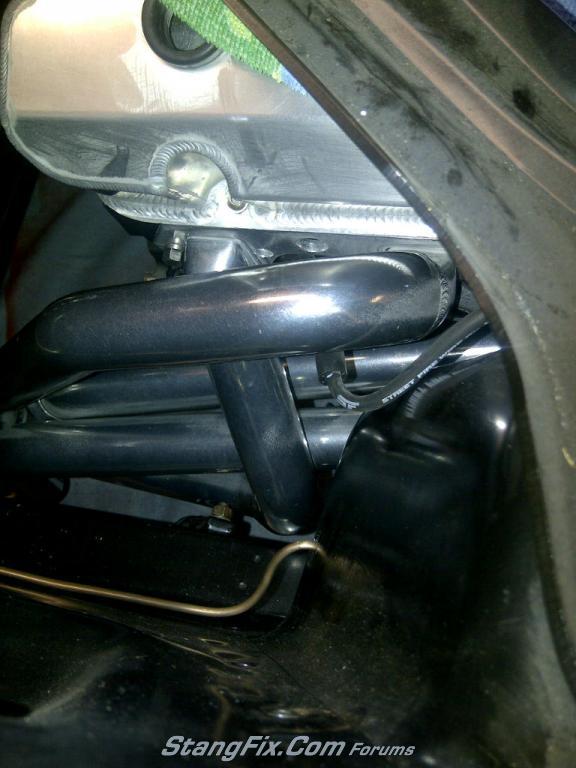
The engine fits, but I haven't tried the headers yet...

I am using the 1" drop Ron Morris adjustable motor mounts with 1/2" spacers.
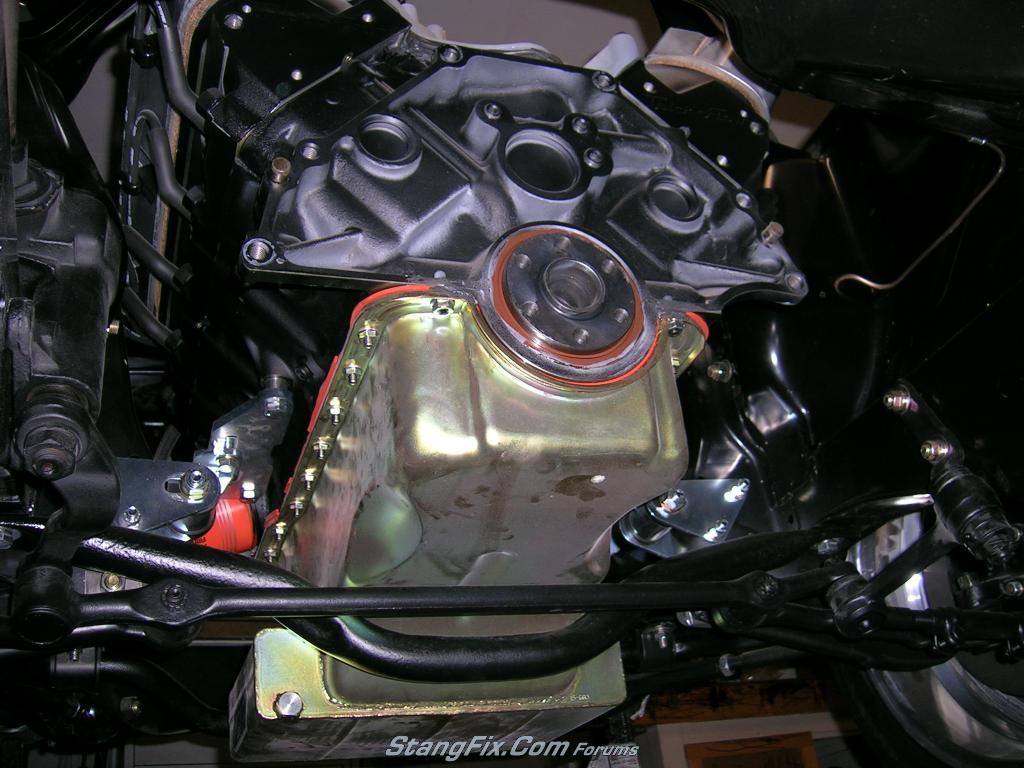
The engine fits, but I haven't tried the headers yet...
I am using the 1" drop Ron Morris adjustable motor mounts with 1/2" spacers.
Last edited by a moderator:
AtlantaSteve
Active Member
"65-408" said:Thanks, but in alot of ways we did it the easy way, start with all new. It is much more difficult and time consuming to cut in one piece at a time, while trying to save and reuse.
You cut the roof off a car, and put it back on.
If I'd done that, my car would always go down the road cocked at about a 15 degree angle. Again: I'm impressed.
That's what I'll be patiently waiting to hear your comments on. I haven't decided which way to go with headers yet myself and any info on fitment will be greatly appreciated."65-408" said:It fits, but I havent tried the headers yet...
")
OK, the headers are on, no inteferences, but they are very tight, with 1/8" of clearance in several places (need to ding a few things). I think the adustable mounts are necessary when using these, as it allows you to shift everything around. Had to lift the engine a few inches to get them in from below.
Drivers side:
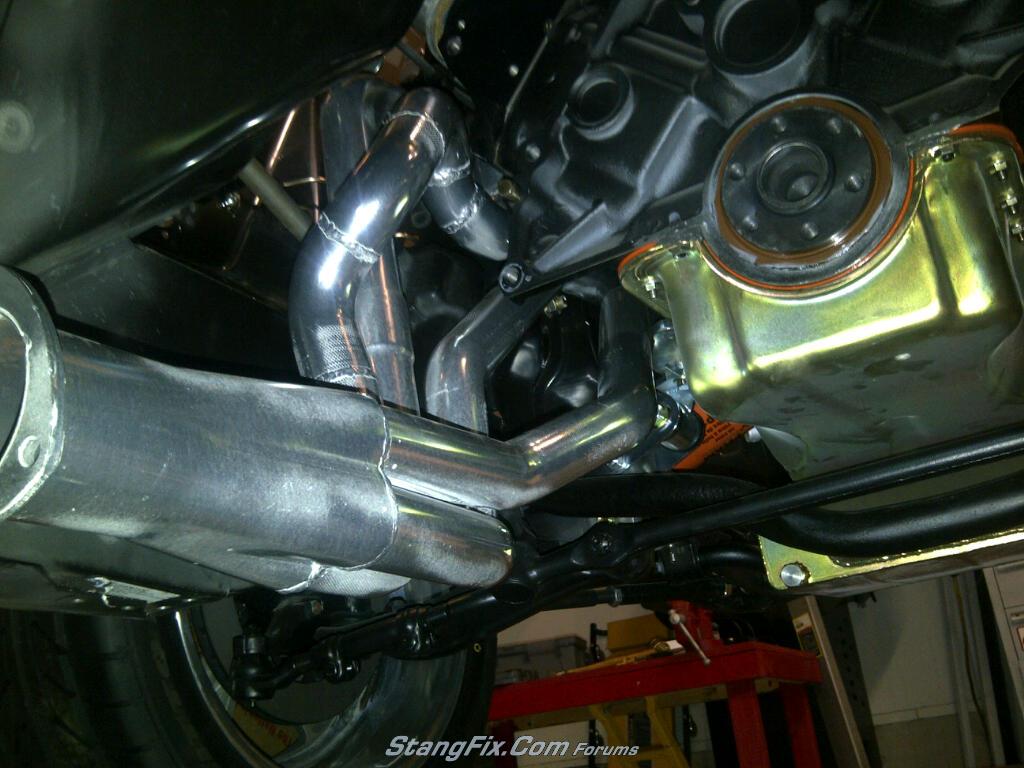
Pass side:

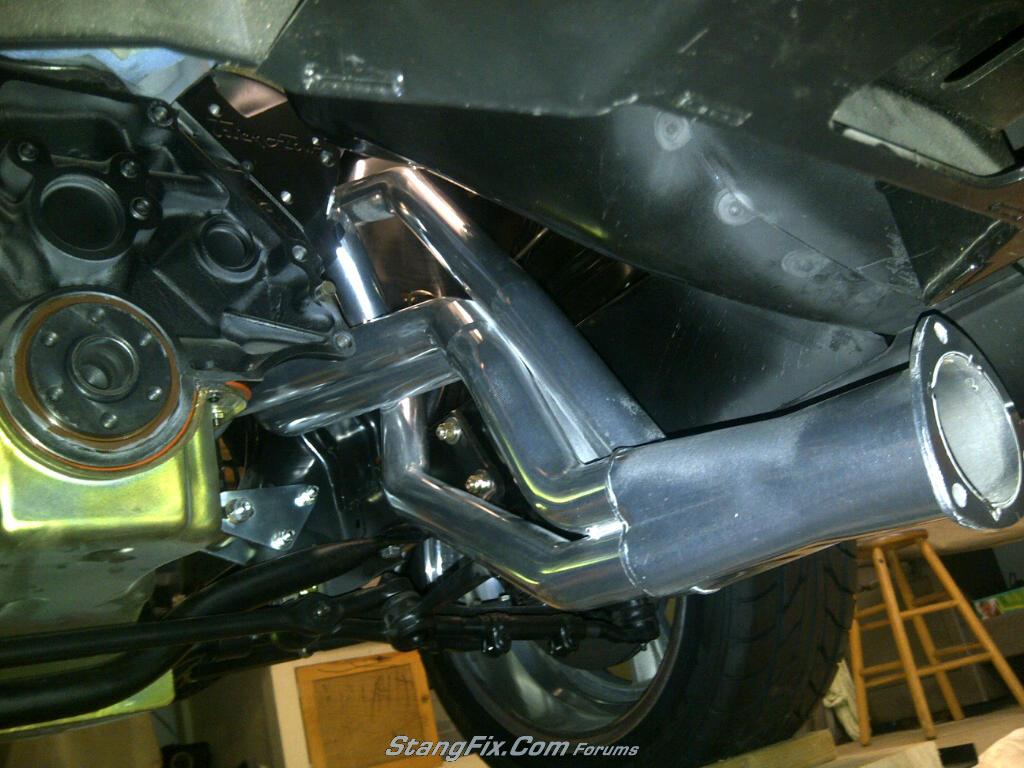
I don't have the trans in yet, so can't comment on final clearances and ground clearance (engine not at final angle)...
Drivers side:
Pass side:
I don't have the trans in yet, so can't comment on final clearances and ground clearance (engine not at final angle)...
Last edited by a moderator: