• Hello there guest and Welcome to The #1 Classic Mustang forum!
    To gain full access you must Register. Registration is free and it takes only a few moments to complete.
    Already a member? Login here then!

67 GT 390 Fastback

I have not worked on the car in a while but, I did get some time finally and got a few things done this weekend.

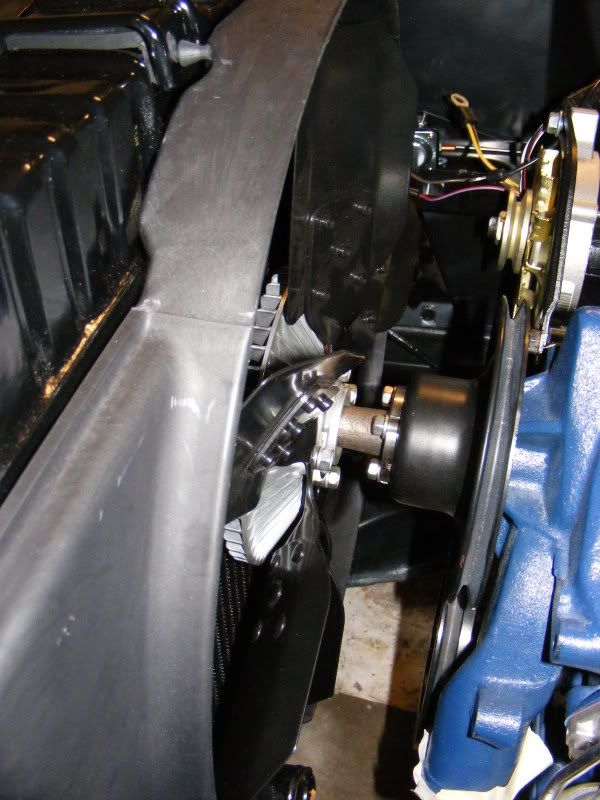
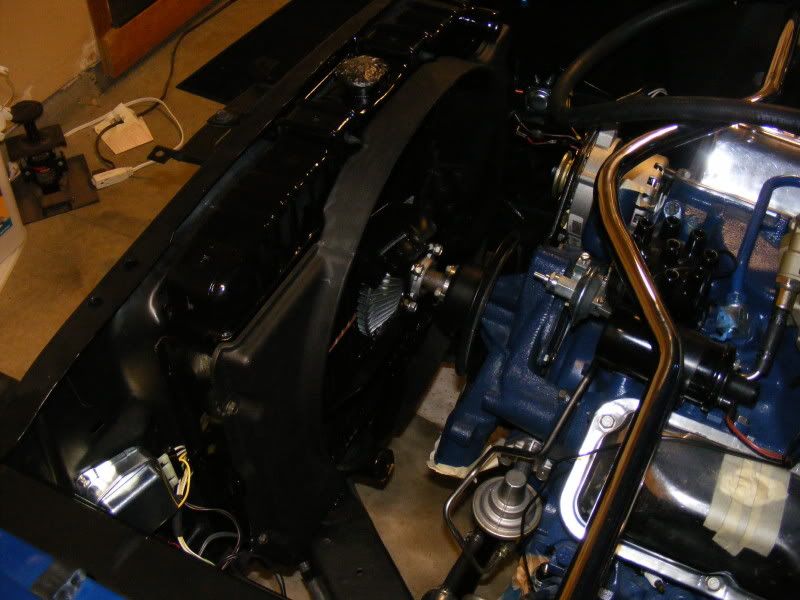
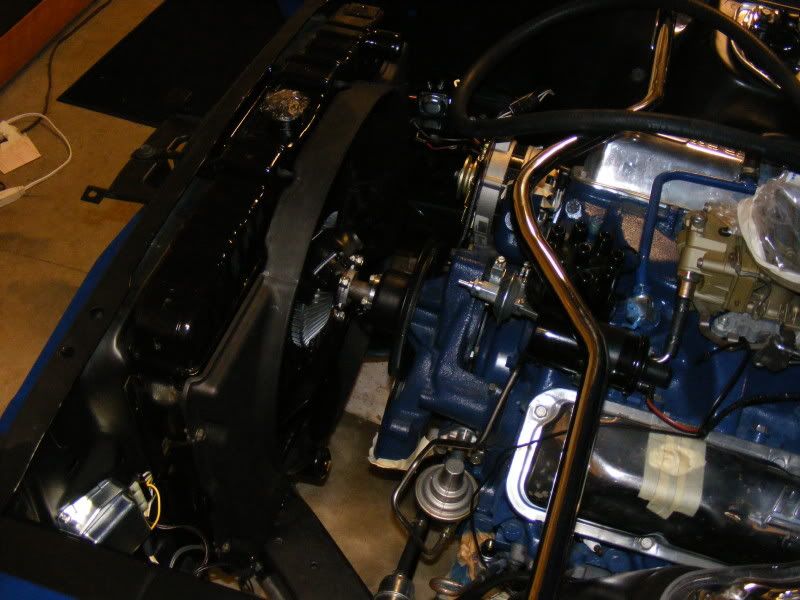
Radiator, shroud, clutch fan, and fan installed.. I spun the fan around and nothing hangs up rubs. It looks pretty good. I think the fan is sitting okay where it is in relation to the fan shroud.

3-6-2011014-1.jpg


3-6-2011011.jpg


3-6-2011013.jpg


3-6-2011010.jpg


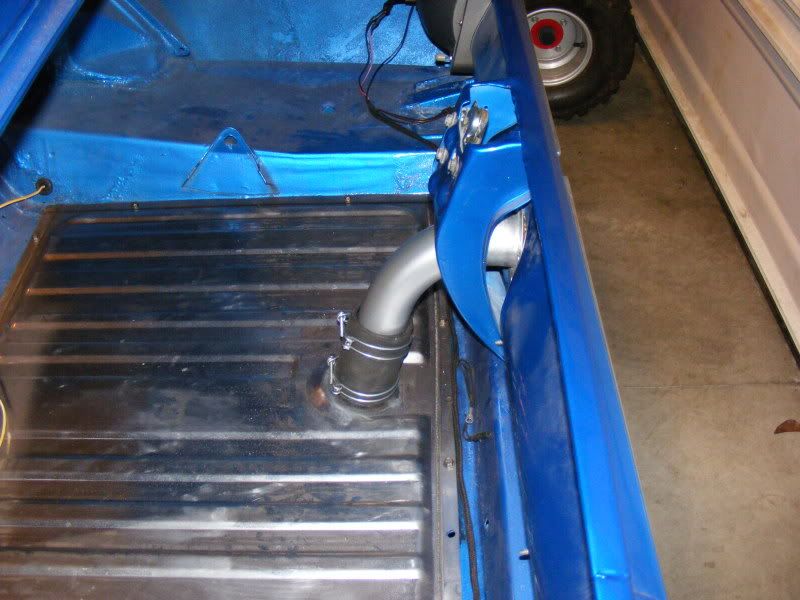
Installed the fuel neck since I got that back from Craig. Those original style hose clamps do not fit so well.

3-6-2011008.jpg


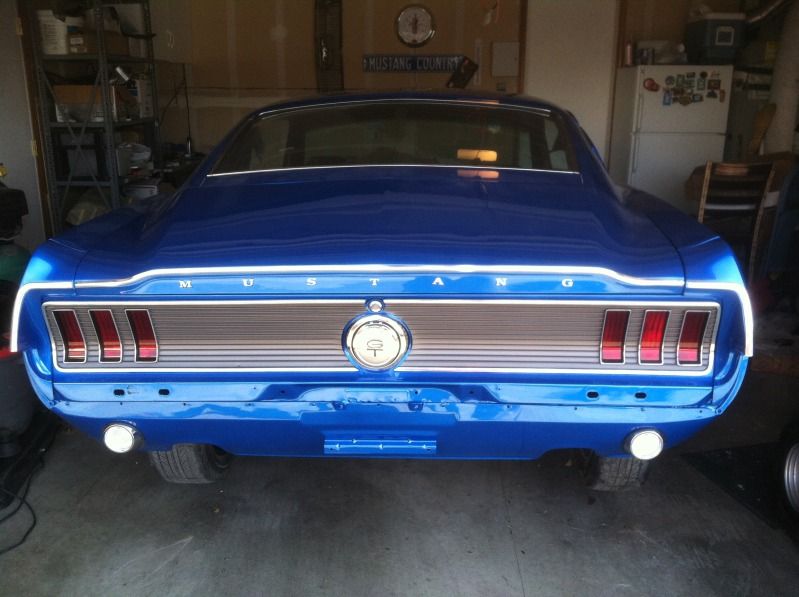
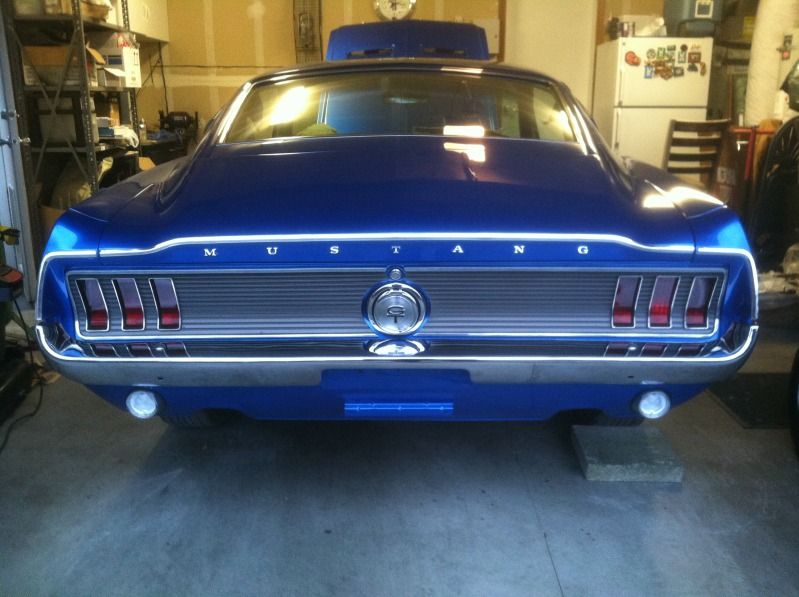
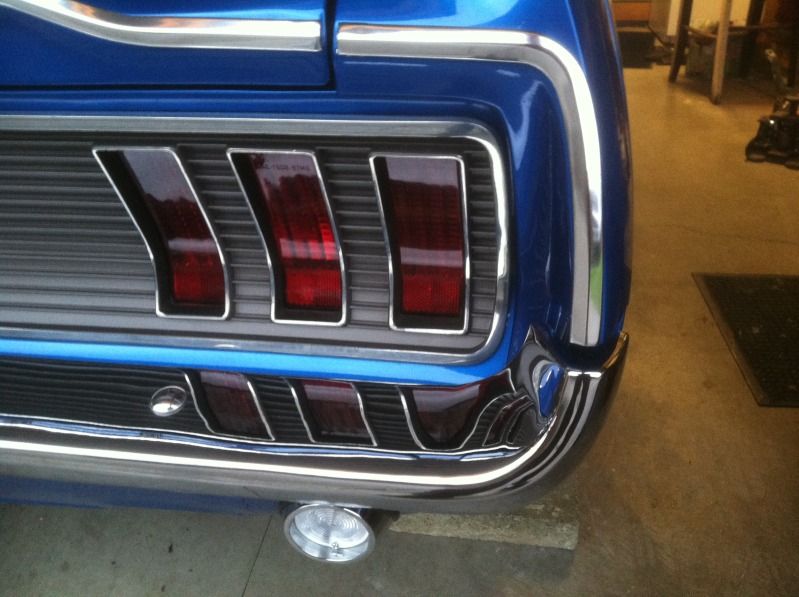
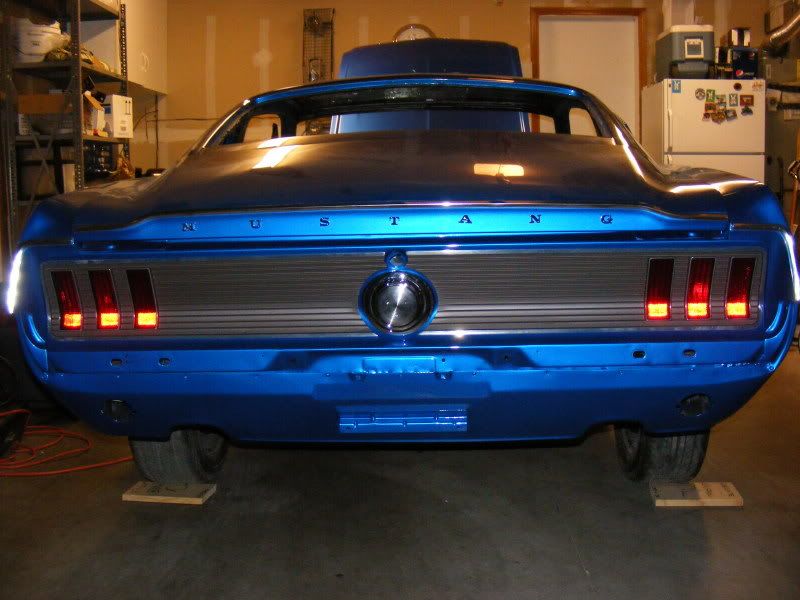
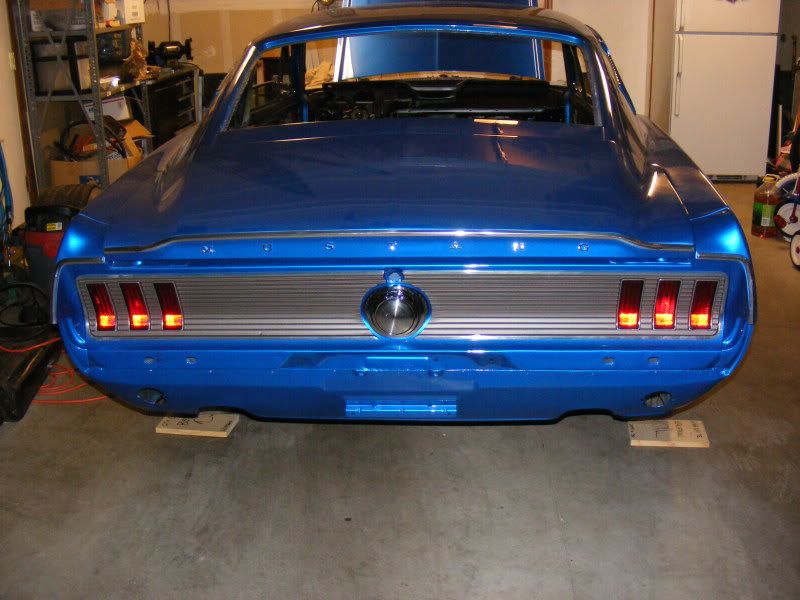
It was not raining tonight so I got a chance to open the garage and take a couple pics.

3-6-2011007.jpg


3-6-2011005.jpg
 
Last edited by a moderator:
"tarafied1" said:
that is sure looking good, I bet you can't wait to get it all together!

I'm sure you know how bad I wanna drive this. I am getting really close to starting this up. I only have a few misc things under the hood left. I am thinking I am going to get the headliner and the glass installed, then the exhaust and after that. :beer :yah

I was looking at the gap between the fan clutch and the radiator, well there really is not much room at all. I might have to pull that crap out again just to get the fan belt on. :wtf
 
position of the fan against the fanshroud is OK for me . Looks right.

You don't have to dissamble the fan or fanshroud to mount the belt.

You can sqeeuze it between each blade and the shroud, rotate the fan simultaniously .
 
I finally got some time to work on the car again. I got the headliner and overhead console installed today.

My car did not come with an overhead console so I picked up the reproduction brackets and had to make up some wiring.

I went to the junkyard and found some decent connectors.

5-18-2011003.jpg


The screw holes for the console to bracket in the rear repro do not come pre drilled. I am glad I noticed this before I installed the headliner. I left the screws in the brackets so it would be easy to locate once the headliner was installed.

06-18-2011007.jpg


06-18-2011006.jpg


RAAMat installed in the roof.

06-18-2011005.jpg


DSCF1001-2.jpg


DSCF1002-3.jpg


DSCF1003-2.jpg


DSCF1006-1.jpg


DSCF1009.jpg


DSCF1011-1.jpg


I think it looks pretty good for my first attempt at a headliner install.

I will probably work on polishing up the stainless window trim tomorrow.
 
So, I have been working the last couple of days polishing up all the window trim. Everything is going fine, all the pieces are looking good, it's all in really good shape. I was sanding away on the large lower front windshield piece and I noticed it was bowing in the middle. I tried to gently bend it back and then it gets a nice kink in it right in the middle. :censored

That sucks, the piece was in great shape. Now I have to find a replacement. At least it was the front and not one of the rear pieces.
 
If you can not find a trim piece close to you, I think I have a couple in a box that I was saving to refurbish.
 
"janschutz" said:
If you can not find a trim piece close to you, I think I have a couple in a box that I was saving to refurbish.

Thanks for the offer!

I called Del @ Del Pro today and he happened to have 3 on the shelf that he had already polished for $60.00/ea.

The piece that I bought from him make all the rest of my trim that I did look like crap now. We determined that the buffing wheel I have sucks.

Now I am going to try my luck on the sash trim...
 
I had the front and rear glass installed last night, here are a couple of pics.

9-12-112.jpg


Apparently after all the time I spent polishing the trim, I missed one piece. I will be getting that done soon.

9-12-111.jpg


Next is to get the exhaust installed. I have had the drive line laying around and have not touched that at all. I was thinking that I should get to that soon. Is it okay to sand blast that to clean it up?
 
I sandblasted the driveshaft, then applied epoxy primer and a top coat of rattle can paint.
 
Well, the house on the coast that I bought my wife is good for now so, it looks like I am able to start on the project again.

I ordered all the new panel parts for the dash, and an interior screw kit last week. Once I get that taken care of I am going to take the car to the exhaust / line up shop.

I thought that I had made a final decision to go with Magnum 500 wheels but, when I walked into the parts store the 69-70 Shelby 5 spoke wheels caught my eye. They are not cheap. It looks like I could buy 2 sets of Magnums for the price of these. I did not bother asking if the centers could get changed out with something other than the cobra. If anyone knows where I could get a good deal on these I sure would appreciate the tip!

yhst-13525187779972_2199_162538639.jpg


I think I am just going to go 15x7 all the way around.

I expect I will need to get off high center soon and figure out what I am going to here as I will need to get these on the car before it goes to the shop.
 
Back orders on parts are trickling in. The back up light assemblies came in, I snapped a pic after I installed them.

IMG_0459.jpg


I got the drive line installed this last weekend, the dash pieces that came in, I worked on the retaining clips for the wiring. I have the electrical assembly manual and it shows some the of the clips pretty clear, others not so much. Does anyone have a decent reference for a 67?

I am hoping on picking up rear and front bumpers and the wheels and tires at the swap meet this week. If that works out I will get the car in the shop the following week for exhaust and a line up.

More pics soon.
 
I bought a pair of re-chromed original bumpers at the Portland Swap Meet. The rear went on no problem, I think it looks pretty good.

IMG_0488.jpg


This is the pic I took after I put the bumper in for a test fit. I removed it and I did get all the required bolts installed before I reinstalled it.

IMG_0490.jpg


:sarc Love repro parts, the license plate light needed a little tweaking to get it installed. The bullet connector is too fat to feed through the hole in the valance.

IMG_0512.jpg


The front bumper arms were not cooperating.

IMG_0504.jpg


IMG_0501.jpg


IMG_0500.jpg


The inner arms were off quite a bit so, I picked up a couple of Dynacorn replacements. They went in a lot easier than the originals. The driver side lined up good but, I have an issue with the passenger side. I don't know if maybe I should try a different one. Maybe the 3rd time will be a winner.
 
I removed the chrome trim from the fold down seat and dropped it off at the re-chrome shop today.

IMG_0520.jpg


The air cleaner lid looks good in this pic but, it is showing some pitting so I went ahead and left it with them too.

IMG_0552.jpg


They told me 10 business days to get it done. I'll post more pics later of these parts after I pick them up.
 
Last edited by a moderator:
If you don't mind sharing I'd be very interested in knowing what it cost to re-chrome the fold down trim.
 
Back
Top