70_Fastback
Hell Bent for Speed
And I am almost finished with my "low buck baffles". I came across this on the internet purely by accident looking for header wraps; and I though, man this would be easy. One guy had before & after videos of the difference. It made some difference, but not a huge %. Maybe 20% quiter.
So I searched craigslist yesterday and found a new/used glasspack muffler.
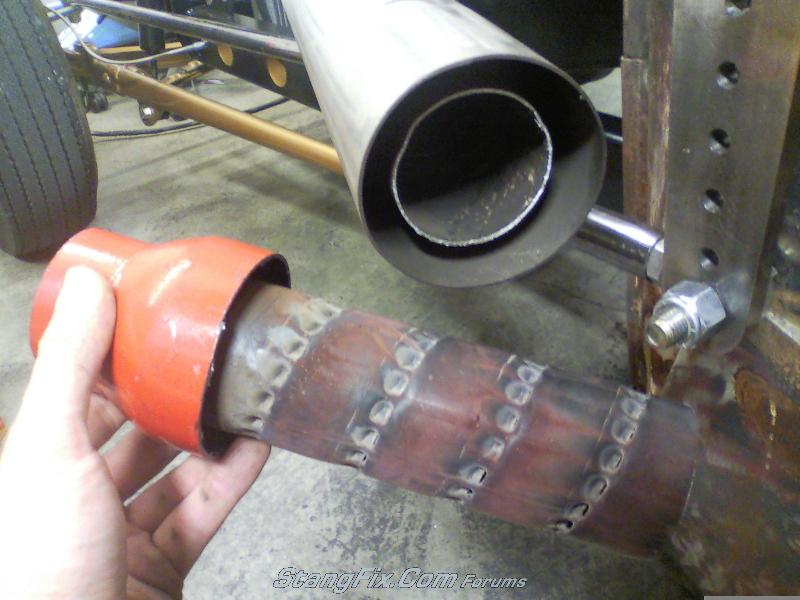
Basically you take 1 glasspack, cut in exactly in half, then remove the majority of the exterior casing, leaving a couple of inches on the attaching ends to secure it inside of the laker header megaphone tube. The end in the header that you are seeing is the other curved red end of the muffler. The red cap fits snuggly inside the header sealing off the chamber basically.
Cut example:

This was a 24" long muffler. I took about an inch off of the inlet tubes as well so they would tuck up inside the tube better as shown above.
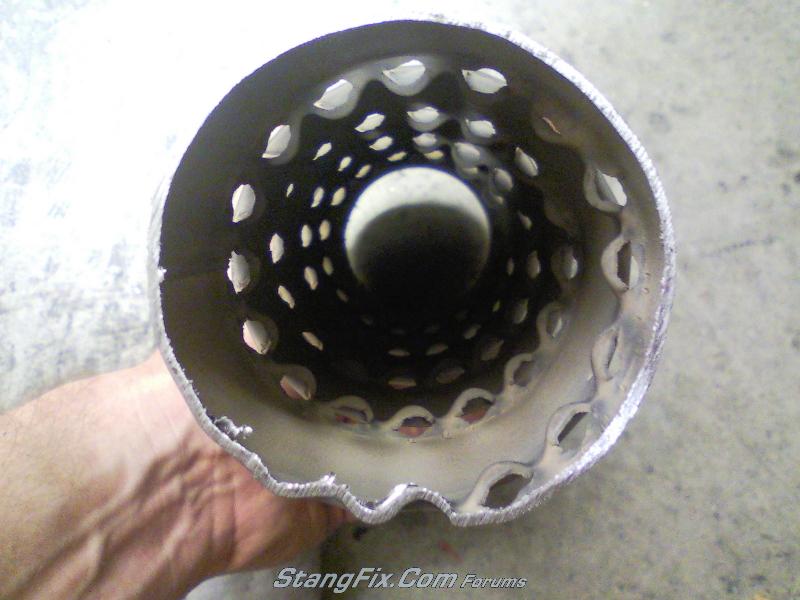
The next problem, which the other turorial didn't address was that when you flip the second half of the tube over, the interior baffle punches face the wrong direction. So I took the punched tube, cut if off flush with the mounting end, flipped it over and welded it back on so both sides match.
View of where exhaust gases will enter into the baffles:

I have yet to weld a disc on this end of the baffle, with a small center hole, to help redirect the sound around & thru the baffles.
Once the disc/cap is welded on. Just slide the assemble into the laker header tube and secure with 3 screws. I may drill it & use rivets though for a cleaner, less noticeable look.
I will see how it sounds this afternoon.
Not bad for $10 bucks and about 20 minutes worth of time!
So I searched craigslist yesterday and found a new/used glasspack muffler.
Basically you take 1 glasspack, cut in exactly in half, then remove the majority of the exterior casing, leaving a couple of inches on the attaching ends to secure it inside of the laker header megaphone tube. The end in the header that you are seeing is the other curved red end of the muffler. The red cap fits snuggly inside the header sealing off the chamber basically.
Cut example:

This was a 24" long muffler. I took about an inch off of the inlet tubes as well so they would tuck up inside the tube better as shown above.
The next problem, which the other turorial didn't address was that when you flip the second half of the tube over, the interior baffle punches face the wrong direction. So I took the punched tube, cut if off flush with the mounting end, flipped it over and welded it back on so both sides match.
View of where exhaust gases will enter into the baffles:

I have yet to weld a disc on this end of the baffle, with a small center hole, to help redirect the sound around & thru the baffles.
Once the disc/cap is welded on. Just slide the assemble into the laker header tube and secure with 3 screws. I may drill it & use rivets though for a cleaner, less noticeable look.
I will see how it sounds this afternoon.
Not bad for $10 bucks and about 20 minutes worth of time!
