• Hello there guest and Welcome to The #1 Classic Mustang forum!
    To gain full access you must Register. Registration is free and it takes only a few moments to complete.
    Already a member? Login here then!

Kats Project

"Midlife" said:
If you strip it down to bare metal, POR is not recommended as it needs rust to adhere to the panel. POR = Paint Over Rust.

Hmm so just wire brush to loosen rust and smooth things out then POR? Or should I go down to bare metal and then get some epoxy primer (or whatever suppose to be used) and chassis black?
 
Kat, check out GPR's build thread, he has got some really amazing stuff that I think you and I can learn from. He just posted the cowl replacement for the 65 hes working on. :part
 
"Kats66Pny" said:
Hmm so just wire brush to loosen rust and smooth things out then POR? Or should I go down to bare metal and then get some epoxy primer (or whatever suppose to be used) and chassis black?

I would, but I'm kinda anal. I don't like rust, even when it is supposedly converted by paint or chemicals. I'd rather start with nice clean metal and use epoxy primer, which seals it very very nicely. The best epoxy primer is DuPont DPxxLF (xx is a color) and it is very forgiving when spraying with a gun and will accept nearly every topcoat. It is quite expensive, however.
 
"Midlife" said:
I would, but I'm kinda anal.


Uh oh, I'd bet KO just got off the net after booking a flight to North Florida :shee
 
DuPont DPxxLF

I wonder if they sell that at Tasco? :confu

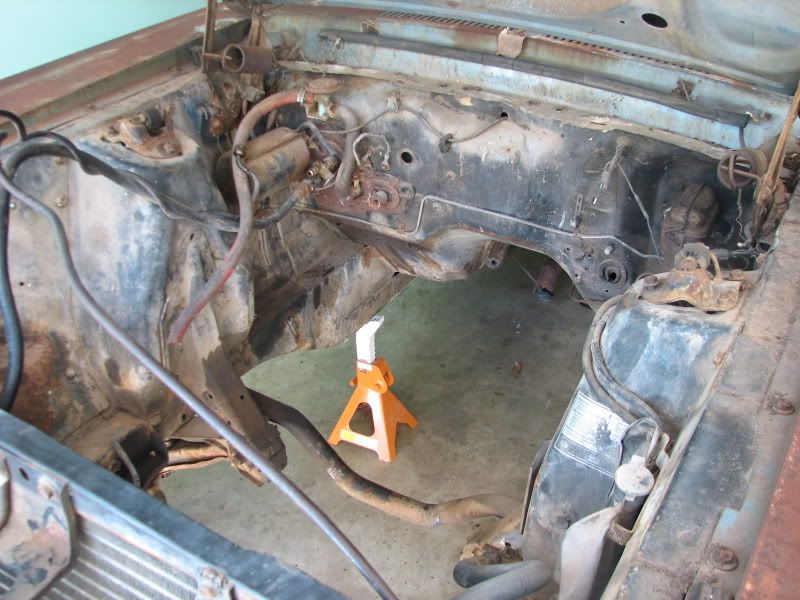
In the engine bay itself, there isn't really all that much rust. Mainly icky stuff / road grime. Either way the bay needs a good scrub down, and some fresh paint.
 
My engine compartment wasn't greasy, just ~ well, look at the photo. I washed it like you said with brushes n whatever, the let it dry, then used Aircraft paint remover(gloves, a good respirator!); it worked very well!! Also a good time to check your shock towers out for cracks n such. If you're replacing your brake lines, this is the time to do it! and gas line! I used seam sealer in all seams. After I was finished with prep, I used Eastwoods epoxy primer, easy to use, sands easily, etc(as with any chemicals, you need the best respirator, if not a fresh air breathing system). I also, like many, replaced the battery apron, then strut channels and radiator support! one thing always leads to another! Also a good time to maybe take close look at your steering~ easy to work on now vs on a creeper!

IMG_5632.jpg


IMG_6382.jpg
 
"Dne'" said:
My engine compartment wasn't greasy, just ~ well, look at the photo. I washed it like you said with brushes n whatever, the let it dry, then used Aircraft paint remover(gloves, a good respirator!); it worked very well!! Also a good time to check your shock towers out for cracks n such. If you're replacing your brake lines, this is the time to do it! and gas line! I used seam sealer in all seams. After I was finished with prep, I used Eastwoods epoxy primer, easy to use, sands easily, etc(as with any chemicals, you need the best respirator, if not a fresh air breathing system). I also, like many, replaced the battery apron, then strut channels and radiator support! one thing always leads to another! Also a good time to maybe take close look at your steering~ easy to work on now vs on a creeper!

IMG_5632.jpg


IMG_6382.jpg

That's just perdy.
 
Not to steal Kat's thread (and hopefully get some info that could help you out too Kat!), but I have a question for ya DNE'. Did you reduce the Eastwood primer any? I've got a quart to do my interior areas and engine bay also. Hopefully I'll be spraying mine within the next week or two. BTW, like Abe said...it looks purdy!!
 
Hey~ The eastwood uses two parts 1:1 ratio. I didn't use a reducer, but you can~ a urethane reducer. IIRC, I did use some reducer to some "older" eastwood epoxy~ never sprayed very well though. I read somewhere that primer should be used within a reasonable amount of time after opening to air~ ? eh, I bought it later by the quart and that worked great vs. by the gallon. This actually wouldn't be stealing the thread~ I would recommend Eastwoods primer anytime~ it sprays well, looks great, and the price is "reasonable"! ; )
dne'

"Ponyman66" said:
Not to steal Kat's thread (and hopefully get some info that could help you out too Kat!), but I have a question for ya DNE'. Did you reduce the Eastwood primer any? I've got a quart to do my interior areas and engine bay also. Hopefully I'll be spraying mine within the next week or two. BTW, like Abe said...it looks purdy!!
 
Did something productive. Cut the headers off tonight. :pbj

headersed.jpg

FYI the wrap was a PO thing.


Those look N-A-S-T-Y!! :wth
 
Wow! I do so need to get my wife a new set. I got painted try-Y headers and they sound great, perform great, but they are starting to look ugly. Time to get some headers by Doug that are ceramic coated like the ones on ED.

You will be so happy with whatever you go with compared to those nasty things.

Oh, FYI, I like the collector thing instead of welded so I can take them out when I want to. yea sometimes you need to replace the gaskets, but who cares. Convenience is everything!

Mel
 
[quote
author=silverblueBP link=topic=7310.msg144795#msg144795 date=1299463593]

Uh oh, I'd bet KO just got off the net after booking a flight to North Florida :shee
[/quote]

Very funny, you big eared freak. Leave poor kats build thread alone.
 
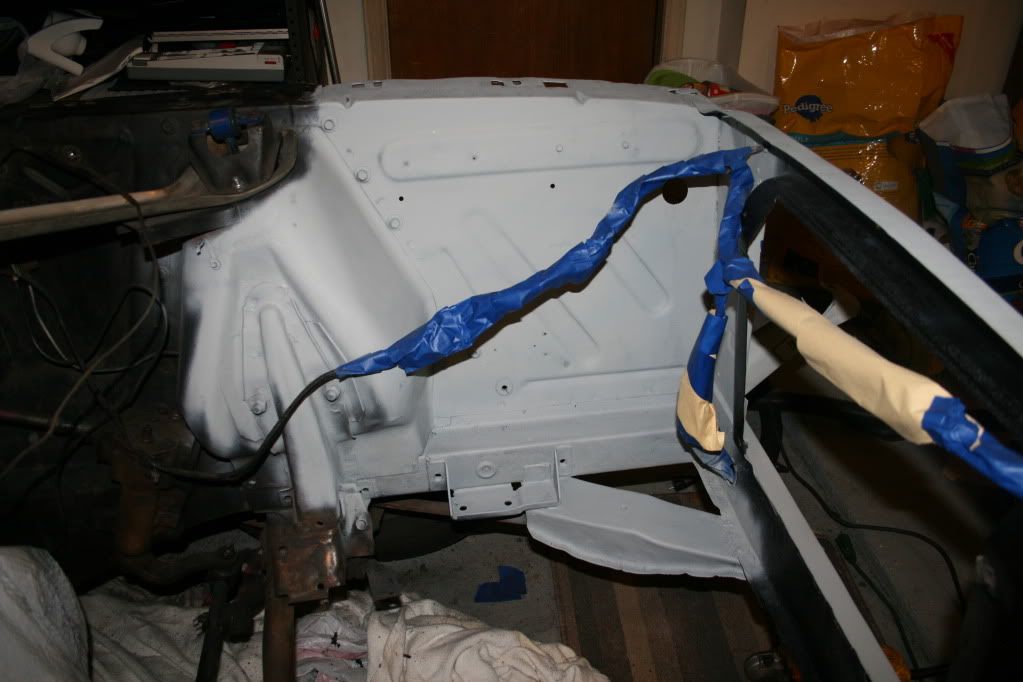
Last night and today's progress. Doing little sections at a time. It would probably might make more sense to clean the whole bay first then go in and primer. Whatever. lol It's a learning experience how to clean, sand, grind, rust removal, etc. :thu Not like it can't be re-sanded down! lol

IMG_4557.jpg


Hopefully later, when hubby gets home (I won't jack the car up if it's just me home) I'm going to see about removing the front suspension, export brace and anything else that needs to come off. It's just too cramped to stand in there and try sanding things down! Plus, my cowl vent should be here tomorrow!! :yah Of course I haven't even began to remove the old one yet. I think I'll do that, THEN go back and do the engine bay.

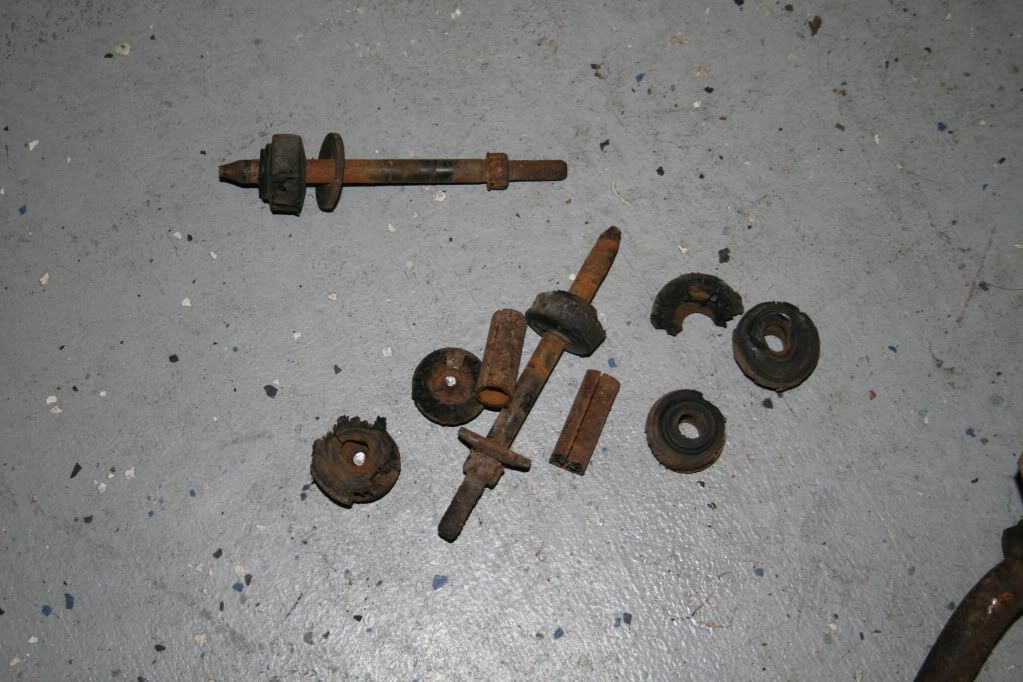
Oh and removed the old sway bar. Holy cow... rusted bolts are no fun. Thank goodness for propane torch! :thu These things literally fell apart.

IMG_4558.jpg
 
Last edited by a moderator:
I cut the stock braces off the shock tower under the export brace. Then I installed the export brace. I figure it looks better and if someone wants a bone stock car they should look elsewhere. All the drive train is not stock and the gauges are not stock, so....that is why they call 'em Restomods...

Mel
 
Looking good Kat. :thu
I am tackling the same thing in the engine bay right now. Feels like the sanding and scraping may never end.
 
I ended up removing the stock tower brace attachments too. It's only a couple of spot welds and they drill out easily. Not necessary, but it IMHO, does look cleaner. Kat I noticed what looks like tape wrapped all around your harness. I understand what ever it is was done to protect the harness. One easy and quick way to do that is use plain old aluminum foil. It wraps over, just pinch it shut and it'll stay in place. If you make sure you closed it up along the entire length, it'll protect as well as, if not better than, tape. An added bonus is you you can leave it on for as long as you'd like and don't have to worry about leaving tape residue behind to be cleaned off! Lookin' good though!!!
 
Back
Top